
図解ウォークスルー
Claude Code ステータスライン(statusline)の設定方法:/statusline コマンドで一発
Windows の実録画面になぞって、Claude Code のステータスラインを有効化する手順を解説。/statusline の実行、まっさらなデフォルトの選び方、生成される statusline-command.sh の承認、そして下部に表示される「ユーザー名・ディレクトリ・ブランチ・モデル・コンテキスト使用率」バーの読み方まで。
読了約 5 分 · 図解 13 ステップ
要点だけ
claude で起動し、/statusline と入力、設定の質問に答えるだけ。Windows ではシェル設定が見つからないため、選択肢3の「まっさらなデフォルト」が最短ルート:~/.claude/statusline-command.sh を生成し、~/.claude/settings.json を更新して、ターミナル下部にユーザー名・現在のディレクトリ・Git ブランチ・モデル・コンテキスト使用率を表示します。diff の承認ダイアログで許可すれば、以降は「ステータスラインを更新して」と頼むだけで変更できます。
ソース動画について
このページの全フレームは ProgrammingKnowledge2 のスクリーン録画から — Windows の D:\Dev での Claude Code v2.1.83 セッション(Opus 4.6 · 1M コンテキスト · Claude Max)、2026年3月収録。
フレームはクレジット付きで利用し、各ステップから動画の該当秒にリンクしています。ナレーションの引用はなく、本文は画面の内容から執筆し code.claude.com/docs と突き合わせて確認しました。
ターミナルで Claude Code を開く
エディタもダッシュボードも不要。PowerShell ウィンドウ1つで完結します。
- 1
CLI を起動する
Windows PowerShell を開き(ターミナルは何でも可、録画は PowerShell)、プロジェクトフォルダに cd して claude と入力。Enter でそのディレクトリ内で CLI が起動します。
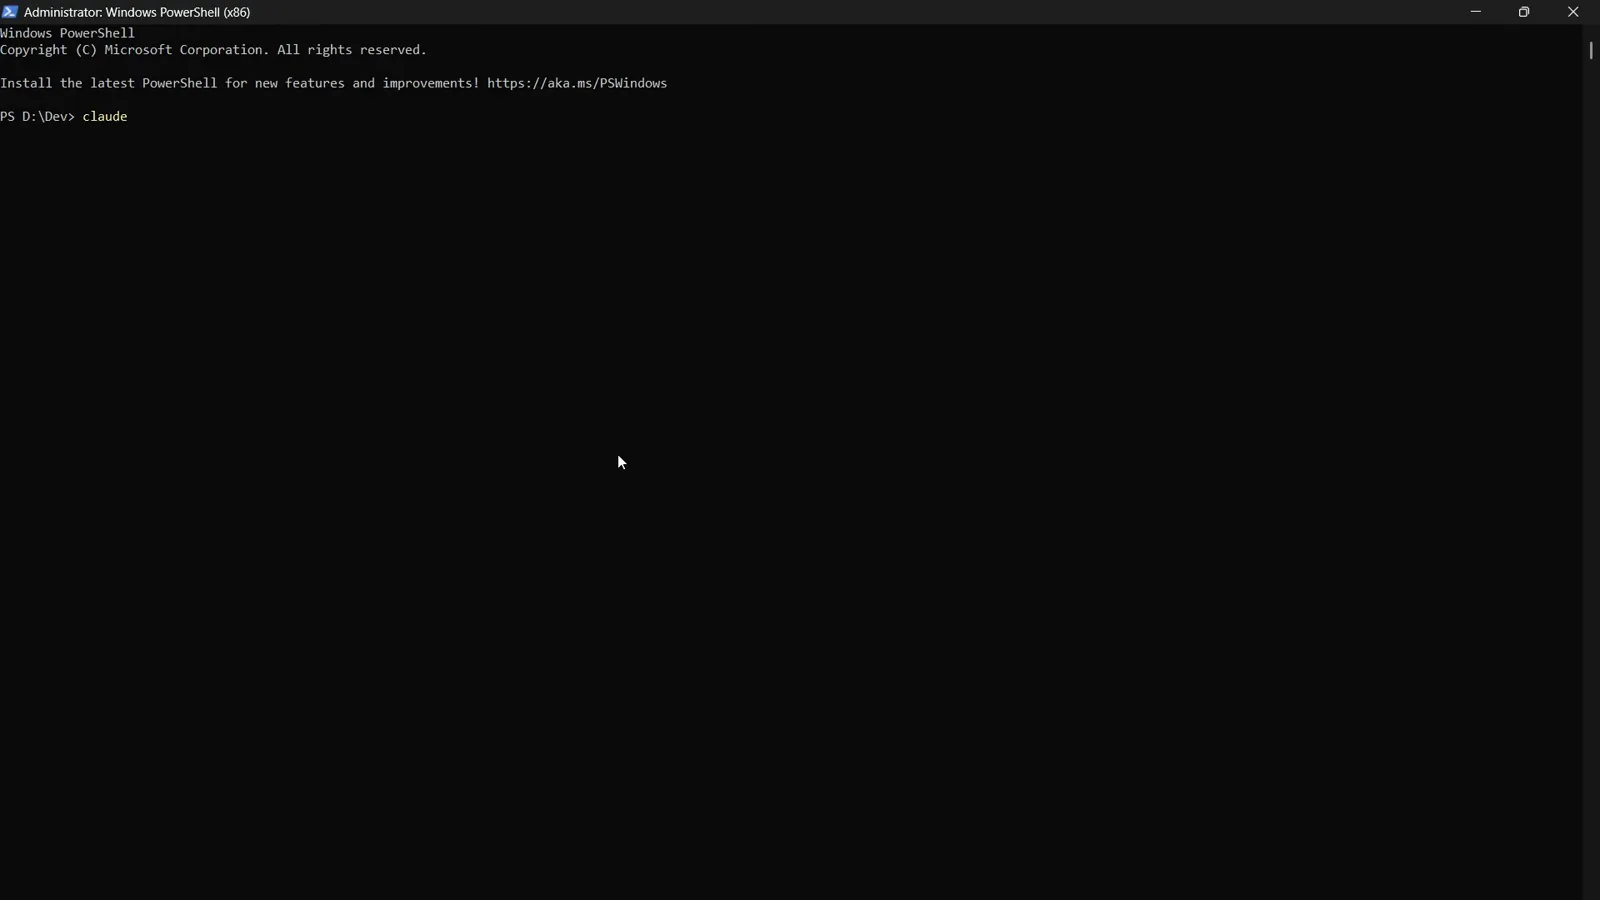
PowerShell のプロンプトで claude 起動コマンドを入力したところ(D:\Dev)。0:18 の場面を見る - 2
ウェルカムボックス
Claude Code はバージョン(録画では v2.1.83)、プラン、使用中のモデル — Claude Max アカウントの 1M コンテキストウィンドウ付き Opus 4.6 — を示すウェルカムボックスで迎えます。以降の操作はすべてこのターミナルセッション内で行われます。
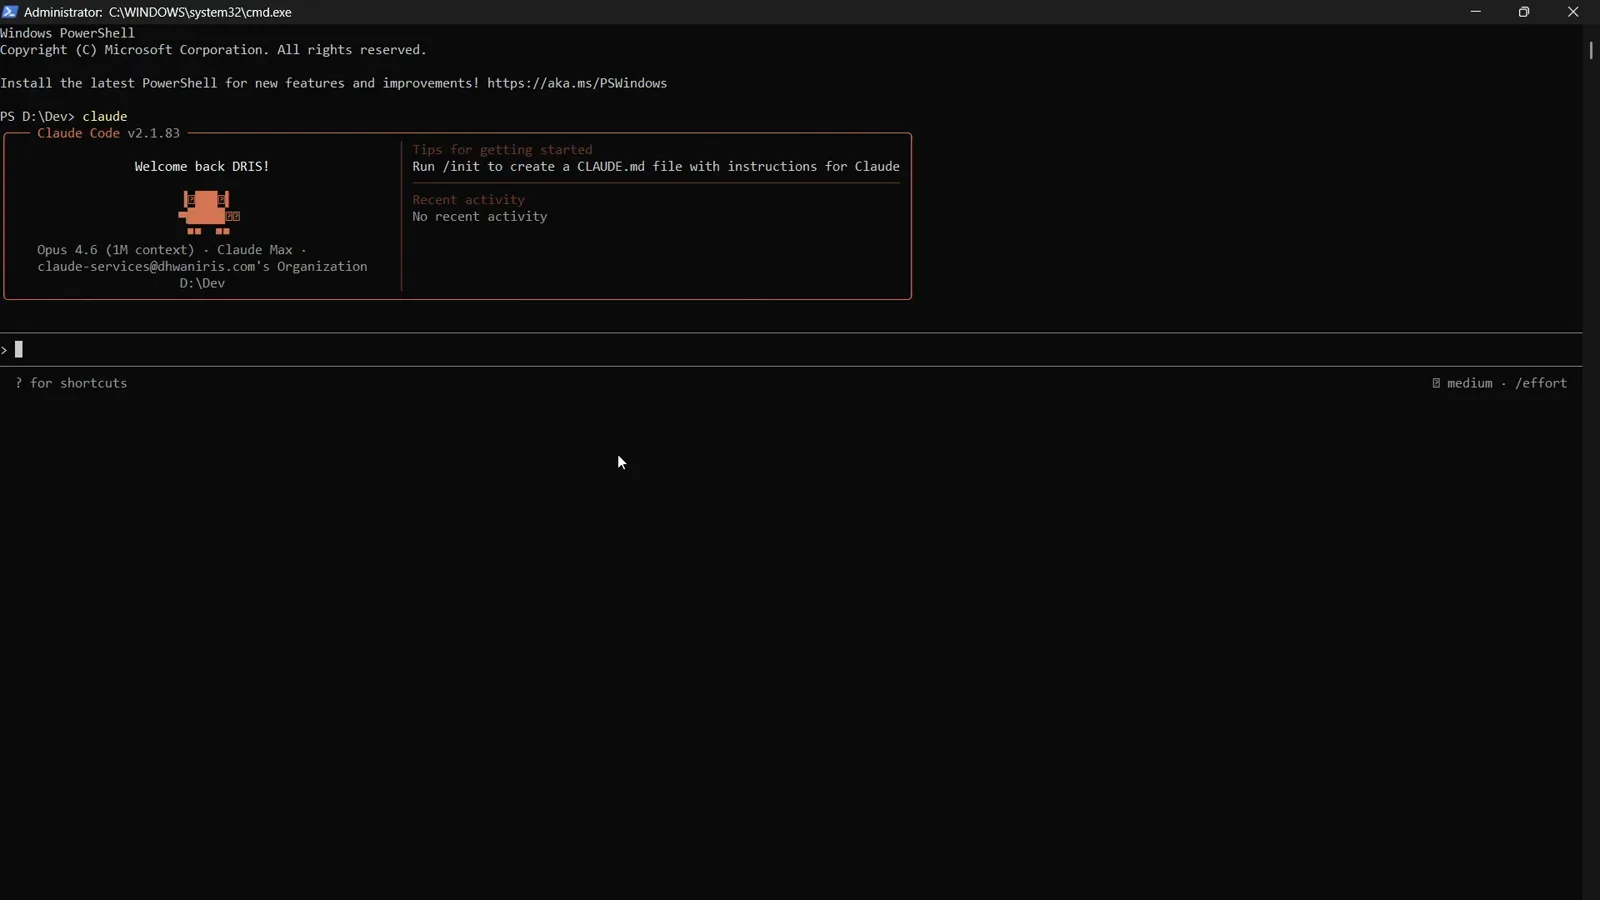
Claude Max プランの D:\Dev で起動した Claude Code v2.1.83 セッション。0:22 の場面を見る
/statusline コマンドを実行する
スラッシュコマンド1つで、専用のセットアップエージェントに処理が渡ります。
- 3
スラッシュコマンドを入力
入力ボックスに /statusline と打つと、補完メニューに関連コマンドが2つ表示されます:/statusline(「Set up Claude Code's status line UI」)と、バージョン・モデル・アカウント・API 接続・ツール状態をその場で表示する /status。/statusline を送信します。
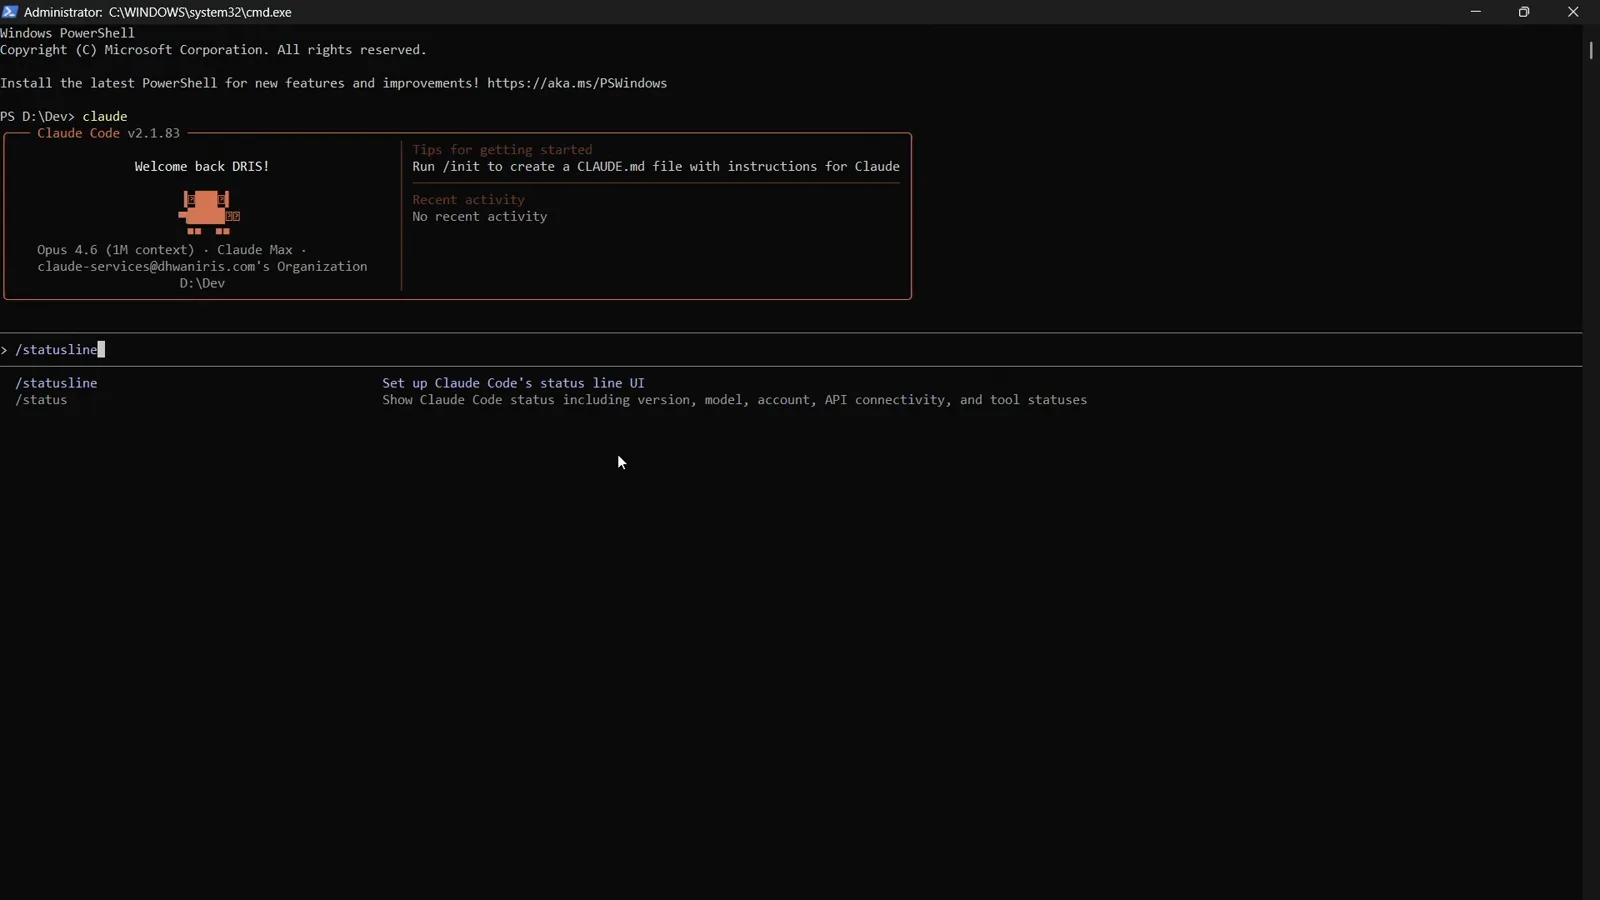
コマンドメニューの /status の真上に並ぶ /statusline の補完候補。0:32 の場面を見る - 4
エージェントが引き取る
/statusline の送信は設定のトグルではありません — statusline-setup(「Configure statusline from PS1」)という小さなセットアップエージェントが起動し、シェルとプラットフォームに合った設定を判断します。Initializing のスピナーとともに動き始めます。
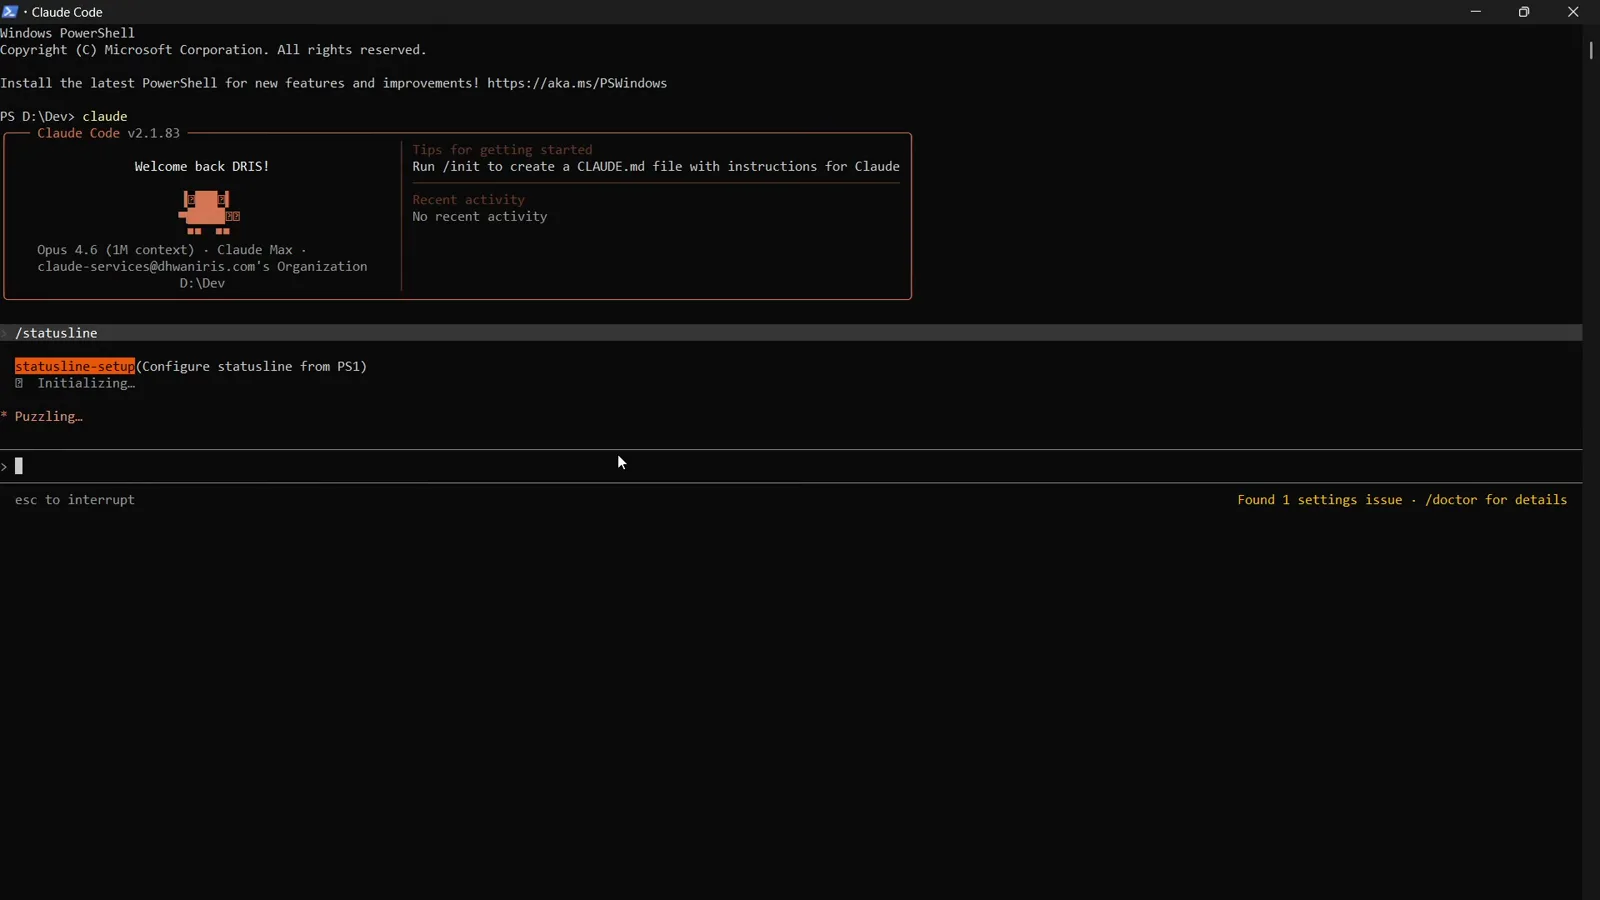
コマンド送信直後に動き出す statusline-setup エージェント。0:42 の場面を見る
セットアップの質問に答える
Windows には変換できるシェル設定がないため、まっさらなデフォルトが最速です。
- 5
既存の PS1 を探す
エージェントはまずシェルのプロンプト定義を探し、C:\Users\<ユーザー名>\.bashrc や .bash_profile を読んで変換できる PS1 がないか確認します。この Windows マシンにはありませんでした。
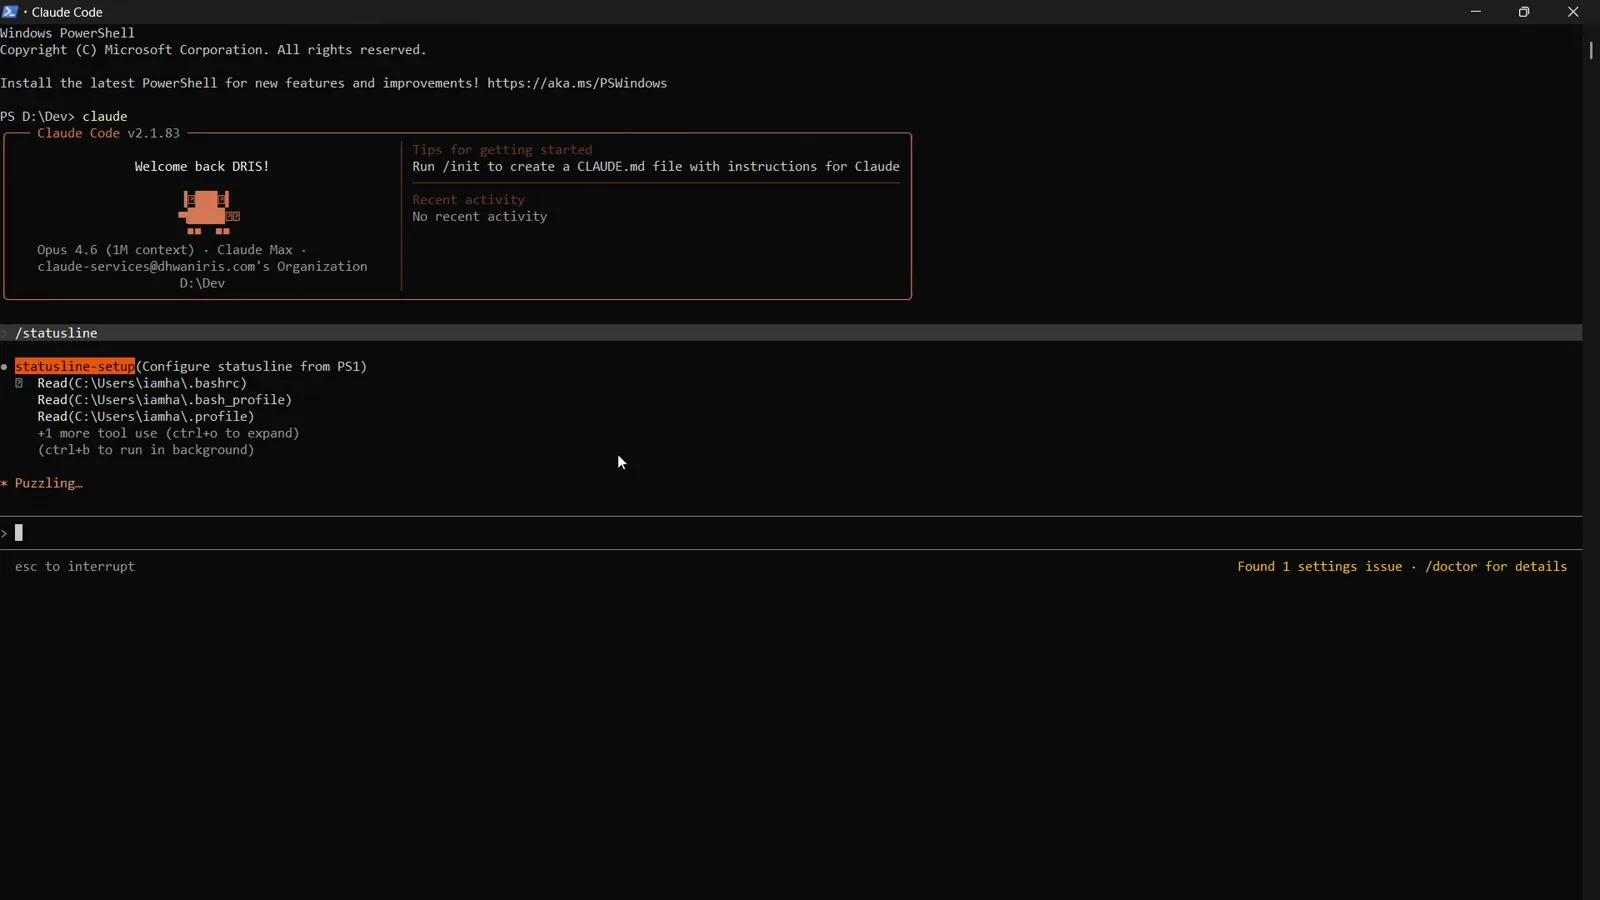
.bashrc と .bash_profile を読んで PS1 を探す Read 呼び出し。0:52 の場面を見る - 6
3つの選択肢
Windows ではエージェントが「couldn't find standard shell config files」と報告し、3つの選択肢を提示します:1. PS1 を貼って変換してもらう、2. WSL や Git Bash など別の場所にある設定ファイルを指定する、3. まっさらなステータスラインを設定する —「user, directory, model, and context usage を表示する堅実なデフォルト」。
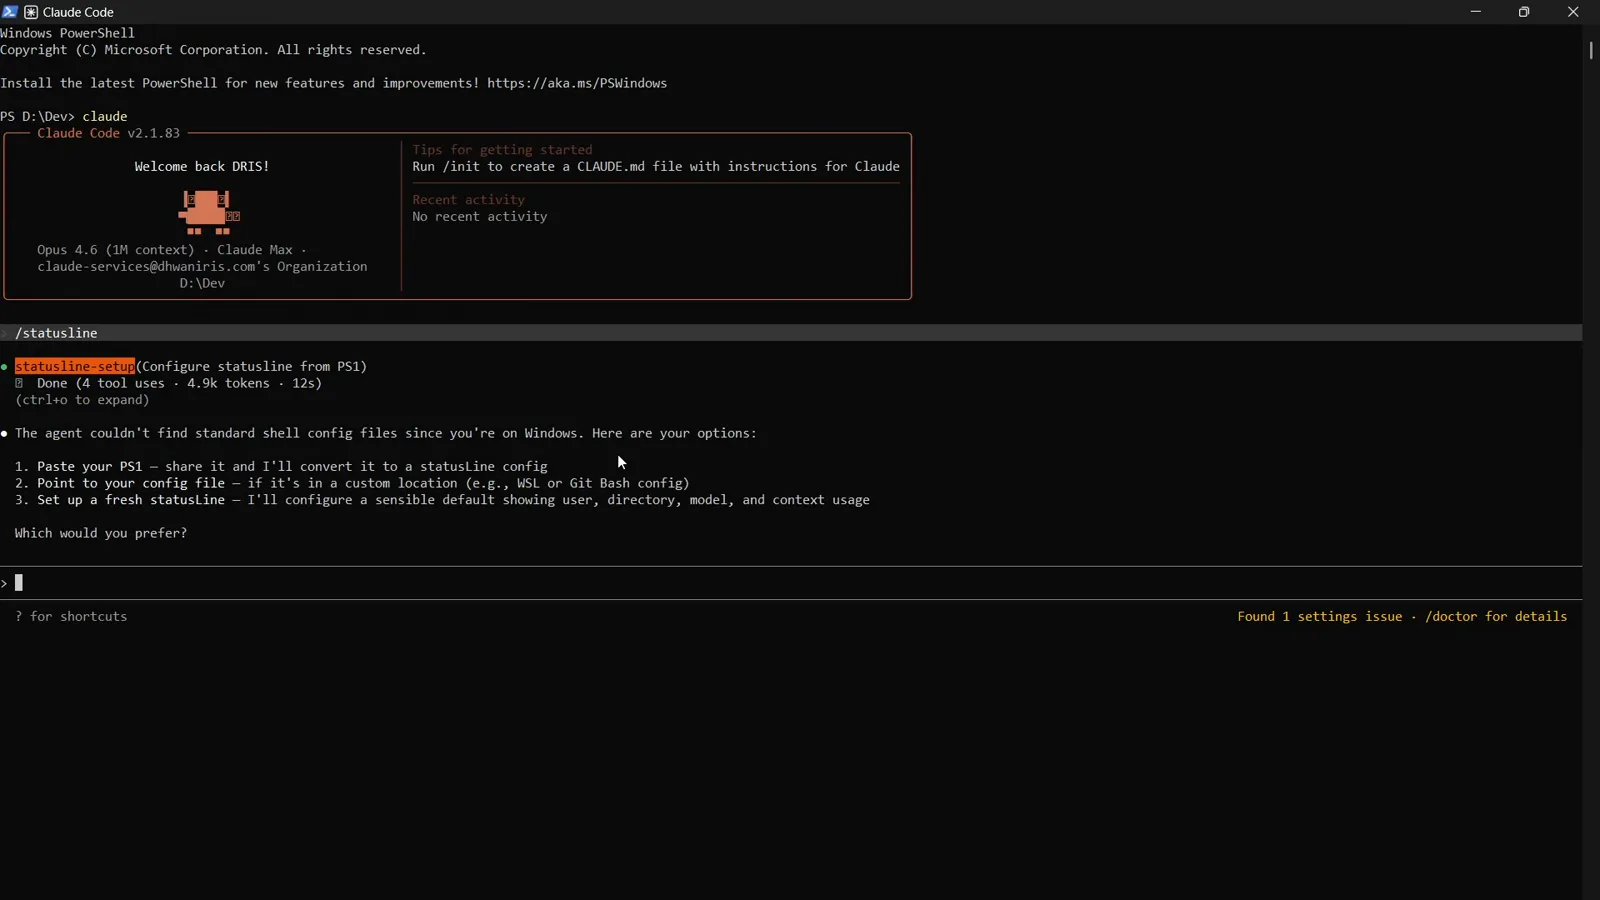
Windows でシェル設定が見つからなかった後の質問 — 番号付き3選択肢。1:02 の場面を見る - 7
まっさらな設定を選ぶ
動画の作者は 3 を入力します。フルリセットのデフォルトは既存のシェルプロンプトに依存しないため Windows で最短 — macOS や Linux でも PS1 を訳したくないなら同じ選択が使えます。
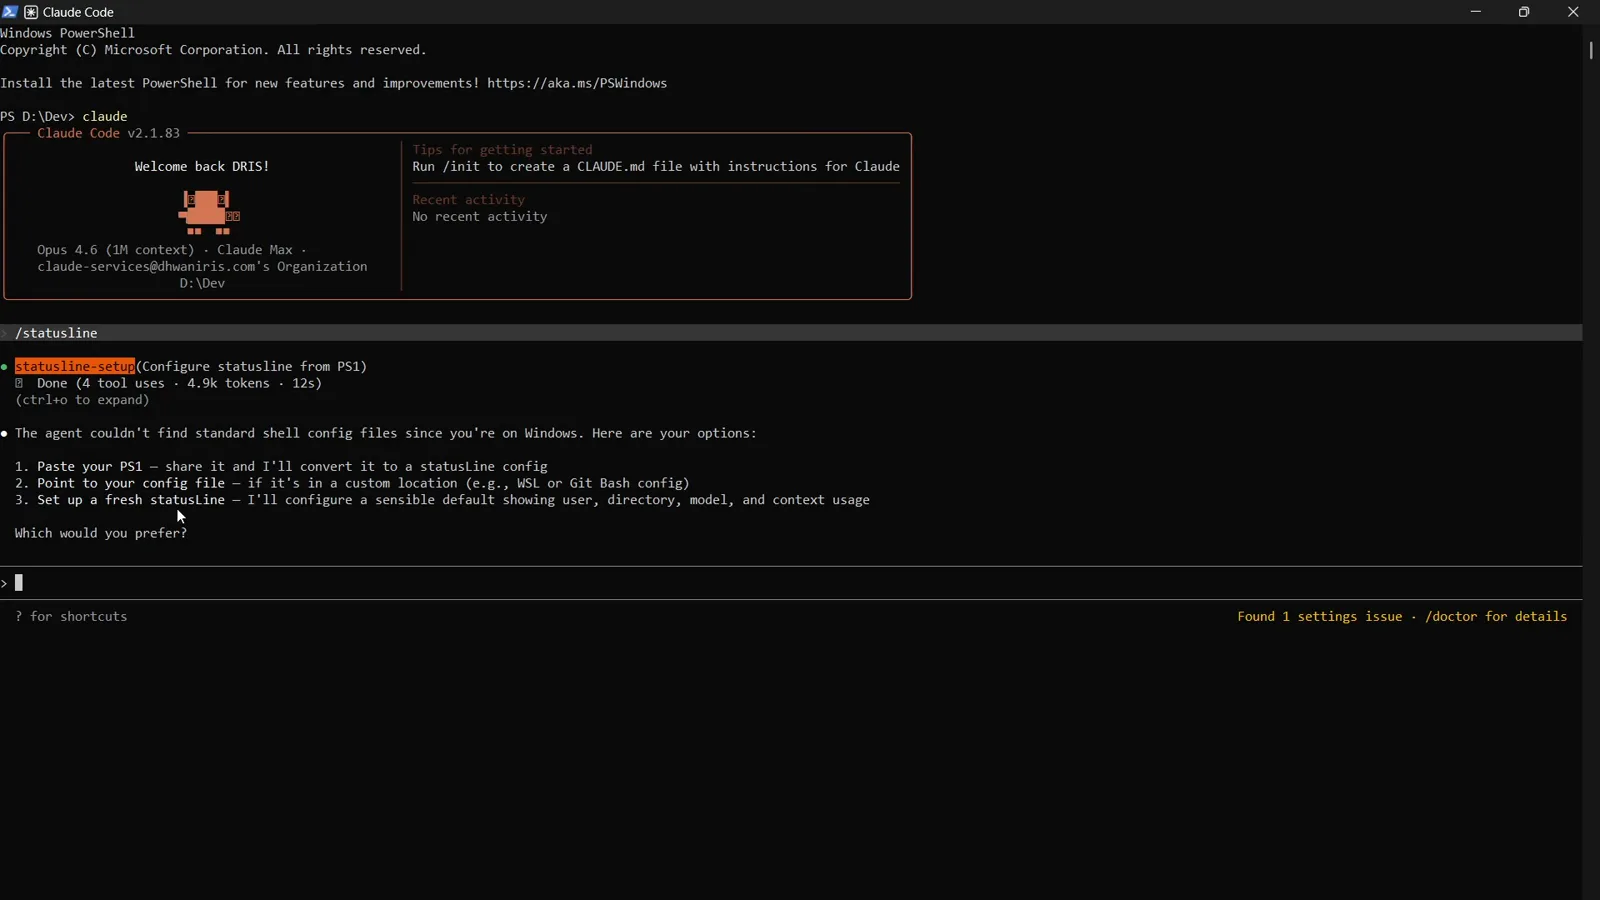
3 と答えてまっさらなデフォルトのステータスラインをリクエスト。1:24 の場面を見る - 8
デフォルトを生成
回答が届くと、statusline-setup エージェントはタスクを「Setup fresh default statusline」に切り替えて設定を開始 — 何かに手を加える前に現在の ~/.claude/settings.json を読みます。
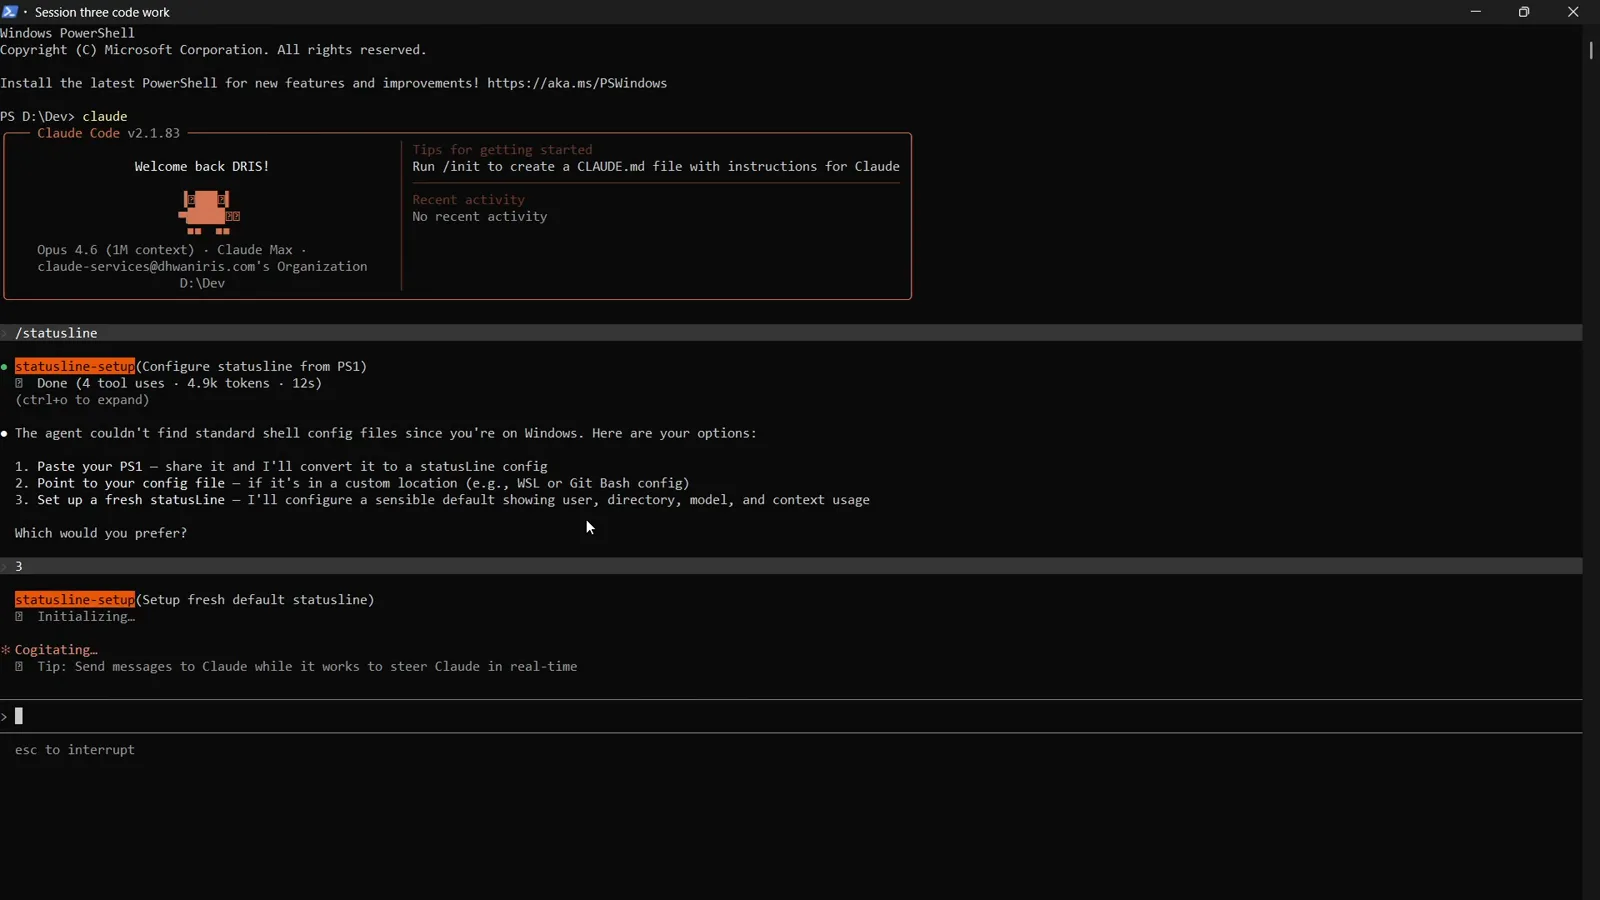
選択肢3の確定後に実行される Setup fresh default statusline。1:48 の場面を見る
生成されたスクリプトを確認・承認する
設定に手を加える前に、Claude が差分を全部見せてくれます。
- 9
diff を承認
Claude は書き込む内容をそのまま見せてくれます:ステータス JSON を jq で解析してコンテキスト率・git ブランチ・モデル名を取り出し、printf で1行に整形する小さな bash スクリプトです。ダイアログは「Do you want to make this edit to statusline-command.sh?」と尋ね — 作者は選択肢2の「Yes, and allow Claude to edit its own settings for this session」を選び、以降の変更の再承認を省きます。
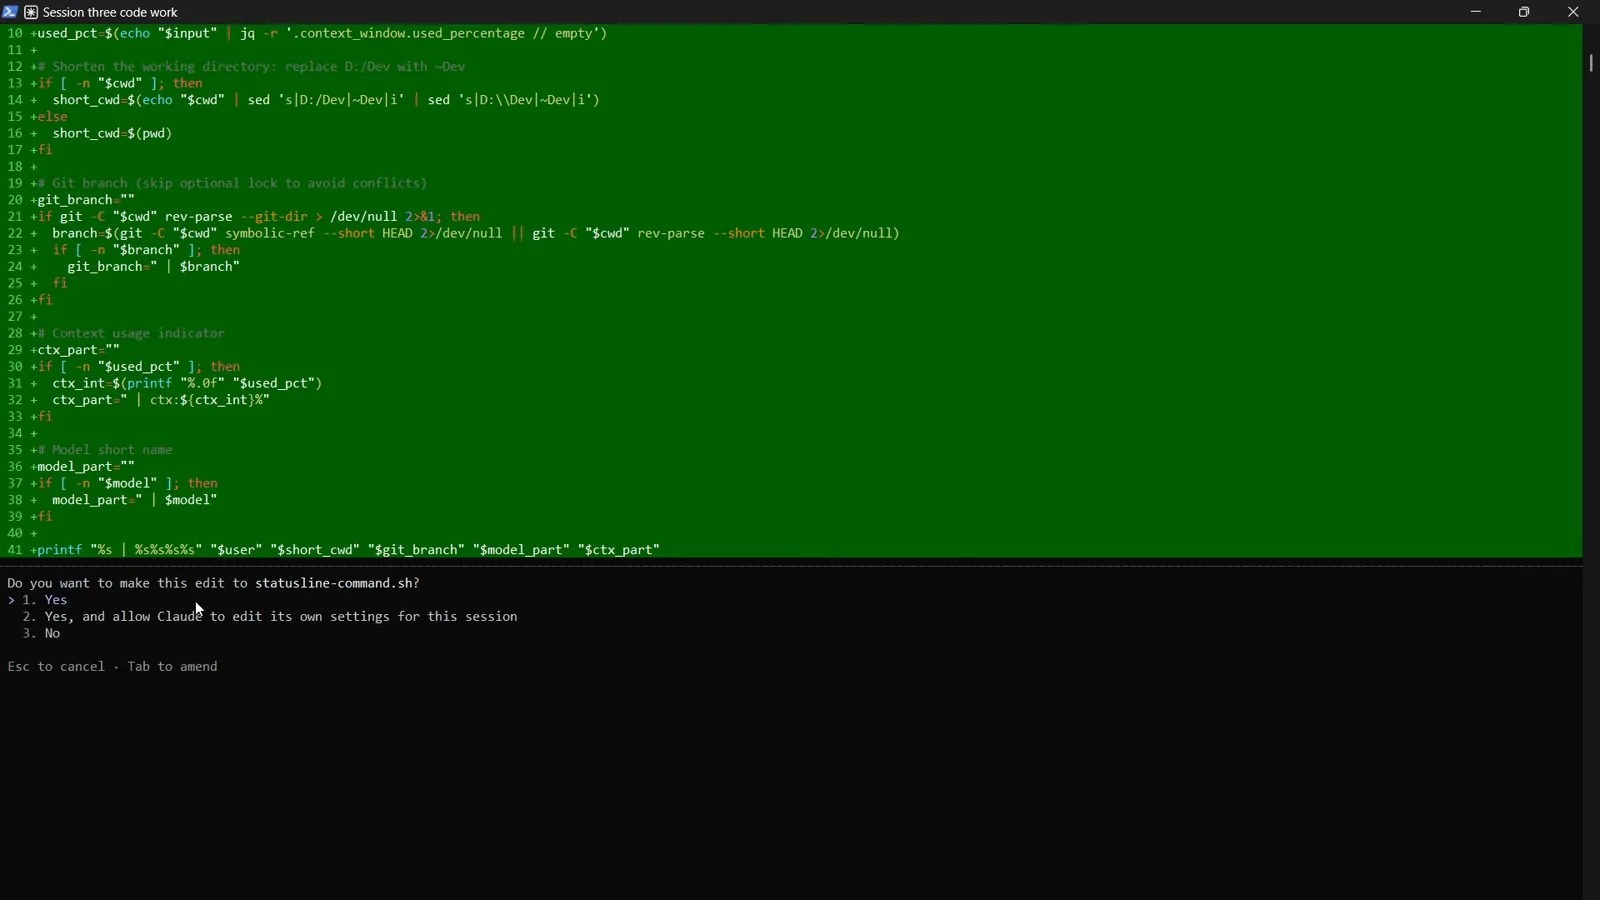
生成された statusline-command.sh の差分と承認ダイアログ。2:10 の場面を見る - 10
書き込まれるファイル
承認後、ツールのアクションリストには2つの変更点が並びます:~/.claude/statusline-command.sh の作成(バーを描画するスクリプト)と ~/.claude/settings.json の更新(Claude Code にそれを実行させる設定)。
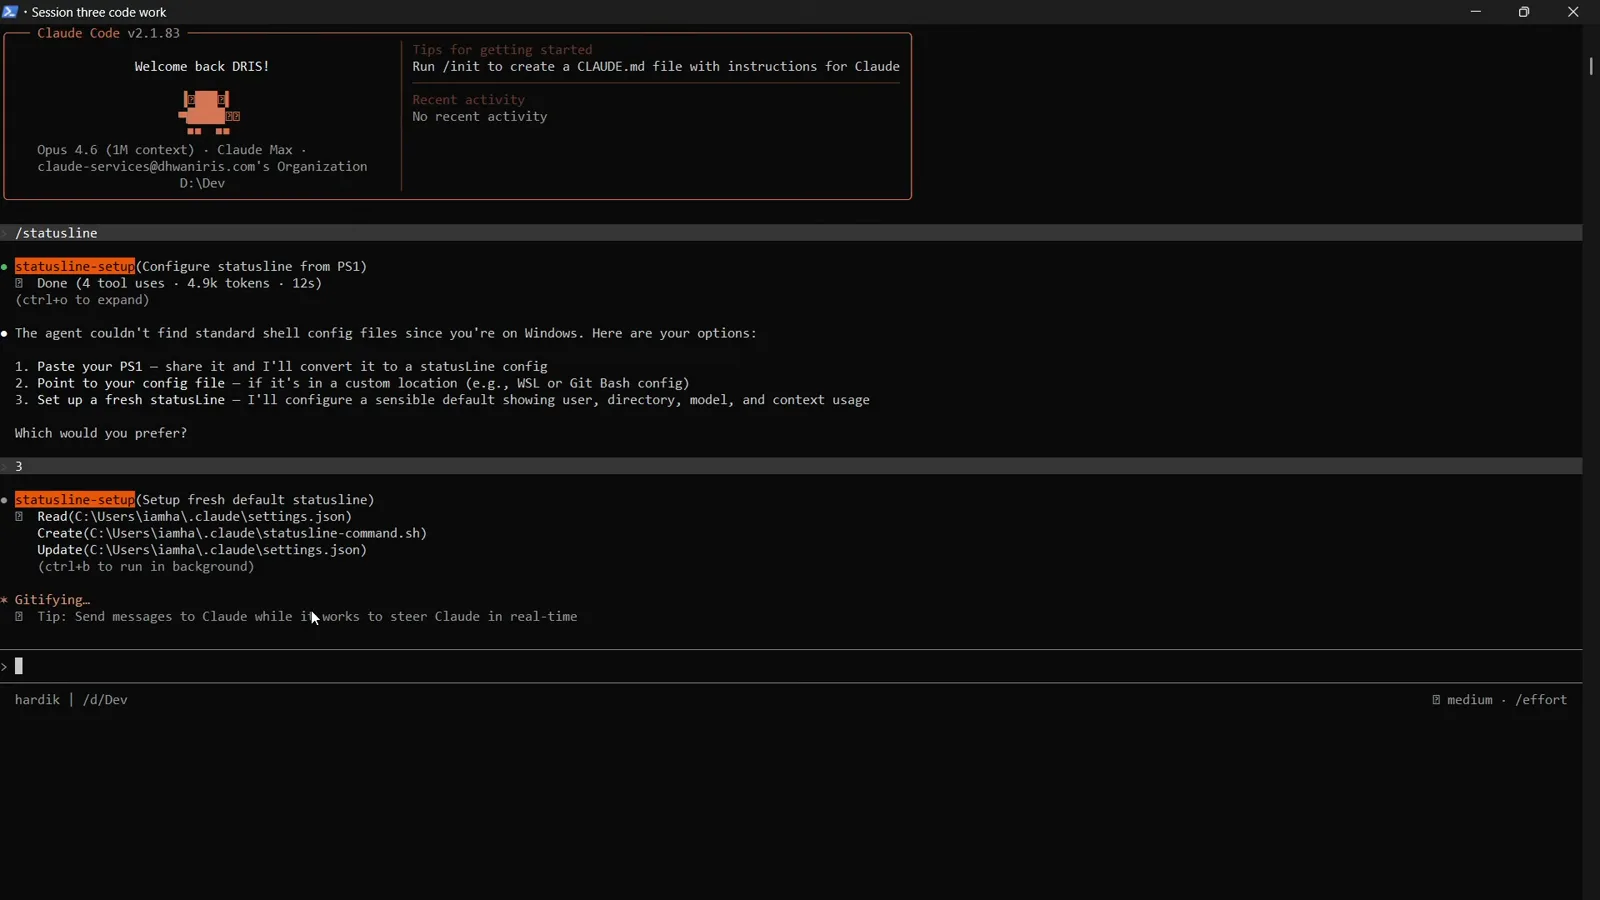
アクションリストに並ぶ Create statusline-command.sh と Update settings.json。2:22 の場面を見る
設定完了を確認する
同じターミナルの下部にバーが表示され、後でカスタマイズするためのパス2つも分かります。
- 11
49秒で完了
実行は「Done (5 tool uses · 6.4k tokens · 49s)」で終了。ターミナルの下端に注目 — エージェントが説明を終える前に、新しいバー harddik | d:/Dev がすでに表示されています。
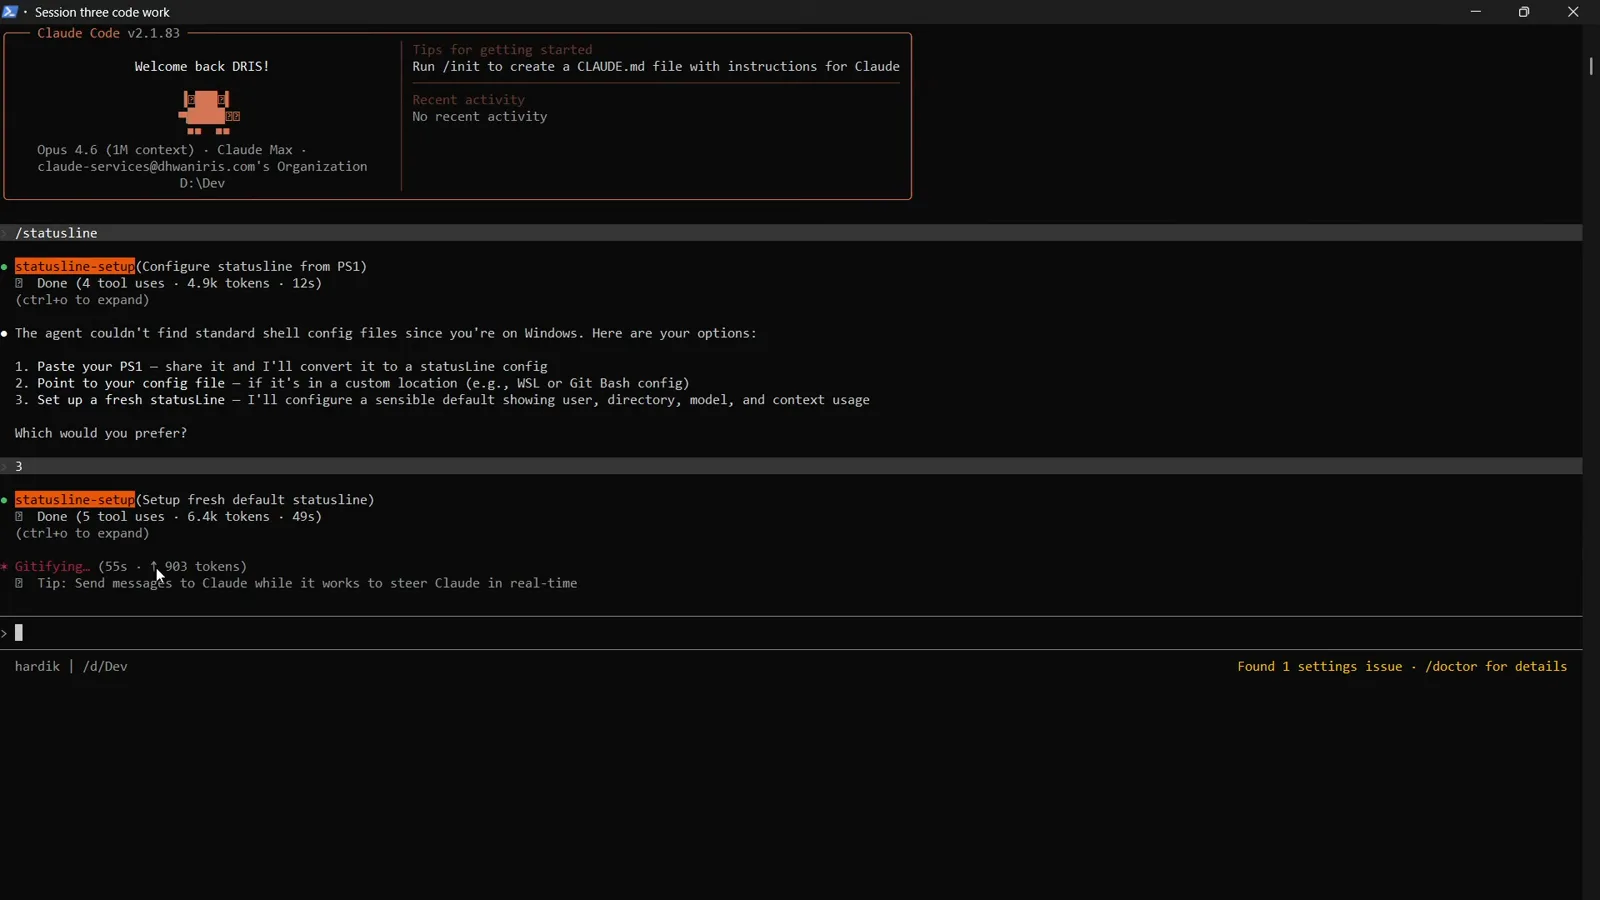
ツール呼び出しの完了と、下部にすでに描画された本物のステータス行。2:48 の場面を見る - 12
各セグメントの意味
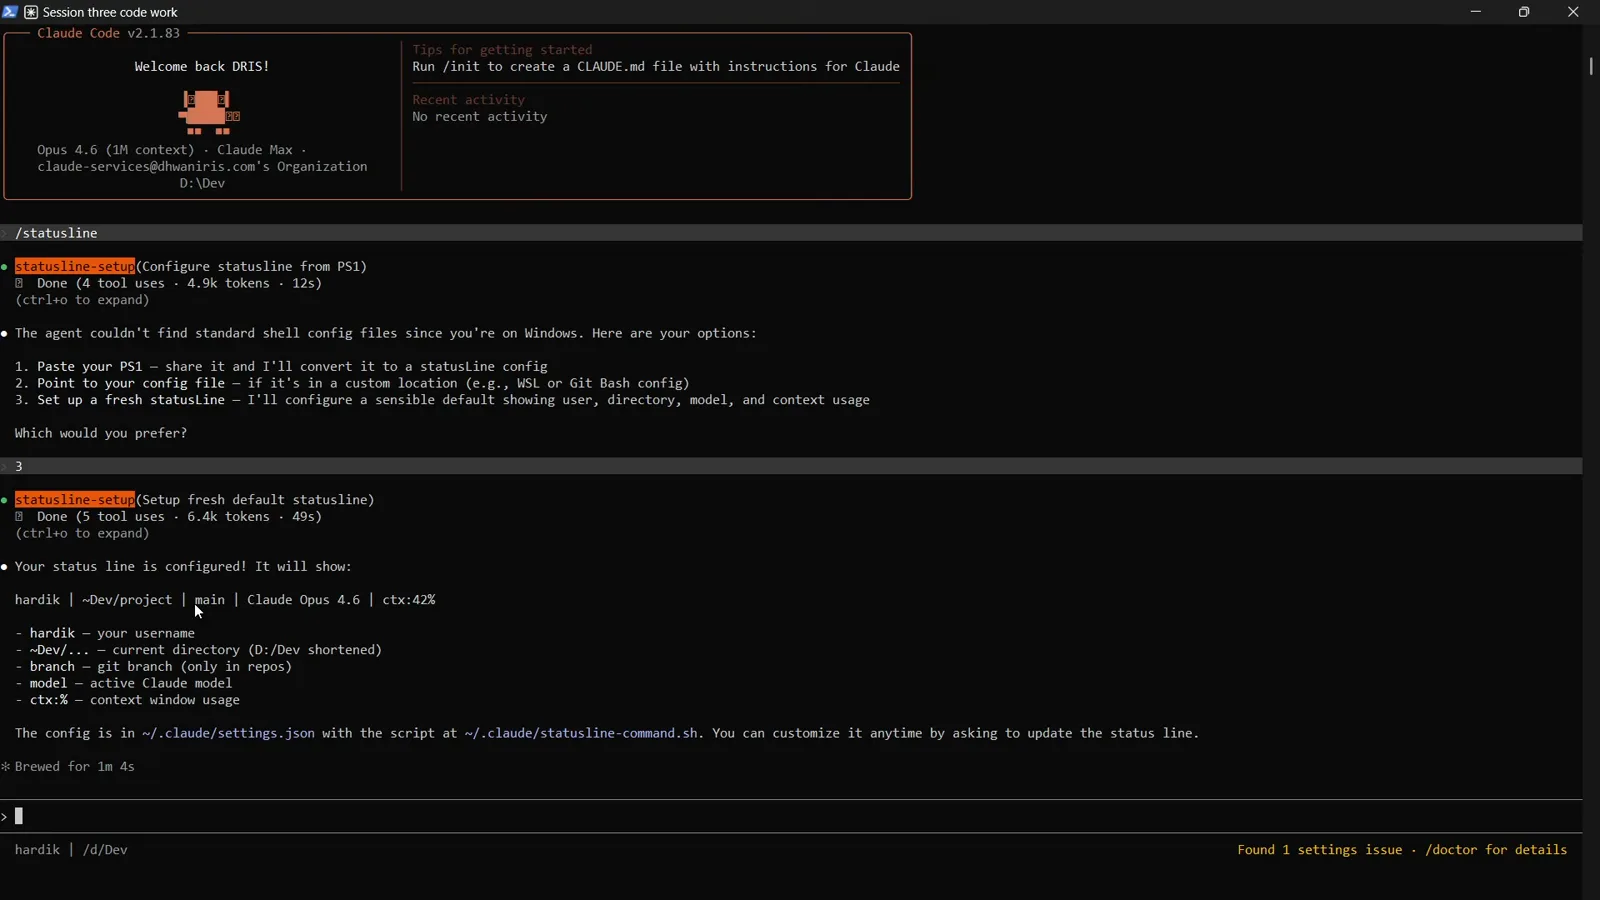
確認メッセージはサンプル — harddik | ~/Dvs/project | main | Claude Opus 4.6 | ctx:42% — と凡例を示します:ユーザー名、(短縮表示の)現在のディレクトリ、リポジトリ内なら Git ブランチ、アクティブなモデル、コンテキストウィンドウ使用率。
「Your status line is configured!」— サンプル行と5セグメントの凡例。3:06 の場面を見る - 13
設定の場所
覚えるべきパスは2つ:設定は ~/.claude/settings.json、スクリプトは ~/.claude/statusline-command.sh。表示内容を変えたくなったら、Claude に「update the status line」と頼むだけで手動編集は不要です。
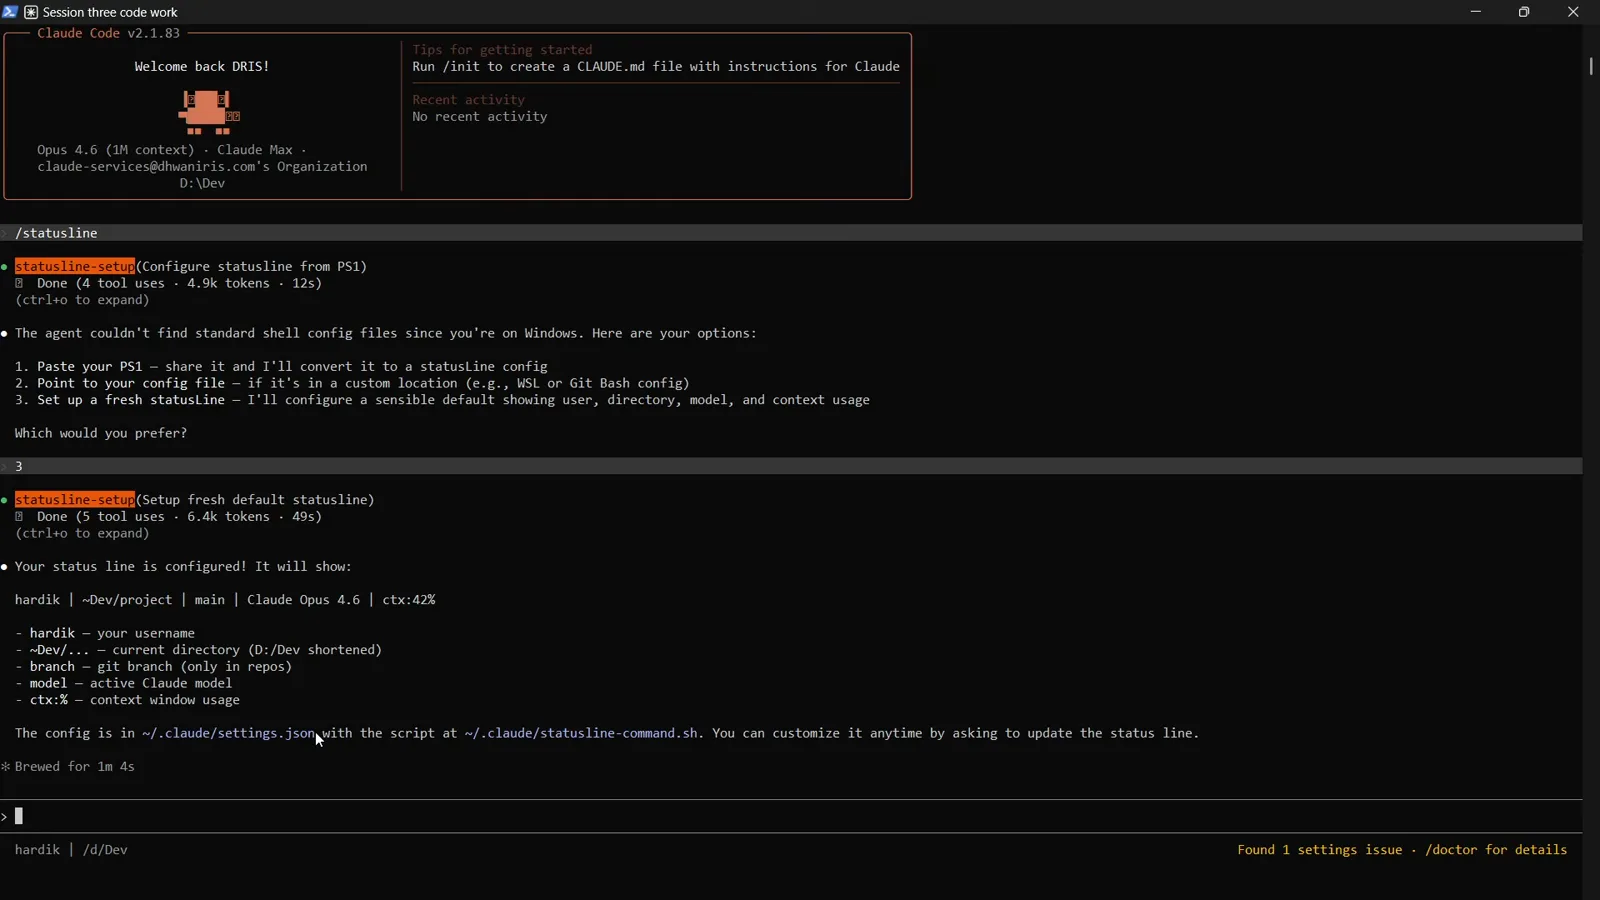
2つのファイルパスを示す最終サマリーと、下部の実表示バー。3:12 の場面を見る