
図解ステップ解説
VS Code で Claude Code:インストールからアプリ起動まで
VS Code 用公式 Claude Code 拡張の図解チュートリアル。CLI のインストール、初回セットアップ、マーケットプレイスの拡張機能追加、そして実際のセッションそのままに CRUD アプリを構築して実行します。
読了約 5 分 · 図解 14 ステップ
要点まとめ
まず curl コマンド 1 行で Claude Code CLI を入れ、claude を一度起動してテーマを選びプロジェクトフォルダを信頼します。次に VS Code マーケットプレイスから Anthropic 発行の Claude Code for VS Code 拡張をインストール。拡張を加えるとエディタの隣に Claude パネルが現れ、ワークスペースを読んで質問に答え、ファイル書き込みのたびに承認を求めます。本チュートリアルは実際のセッションを最初から最後まで追いかけます:インストール、ハードウェア質問での動作確認、拡張の追加、そして小さな Express CRUD アプリの完成まで。
参考動画
このページの全フレームは ProgrammingKnowledge のスクリーン録画から — Ubuntu 24.04 上の Claude Code 2.1.86 セッション、2026 年 4 月に収録。
フレームは出典付きで利用し、各ステップから動画の該当秒にリンクしています。ナレーションの引用ではなく、画面の内容から執筆し code.claude.com/docs と突き合わせています。
パート 1 · Claude Code CLI をインストール
拡張機能は同じ Claude Code バイナリを動かすので、まずターミナル版を入れます。手順は Ubuntu 24.04 で実行。同じドキュメントに macOS・Homebrew・Windows 向けコマンドも載っています。
- 1
公式 Quickstart を開く
"claude code install" で検索し、code.claude.com/docs/quickstart を開きます。Step 1 には OS ごとのインストールコマンド — macOS/Linux の curl 1 行、Homebrew、さらに Windows PowerShell と Windows CMD の各ブロックが並んでいます。
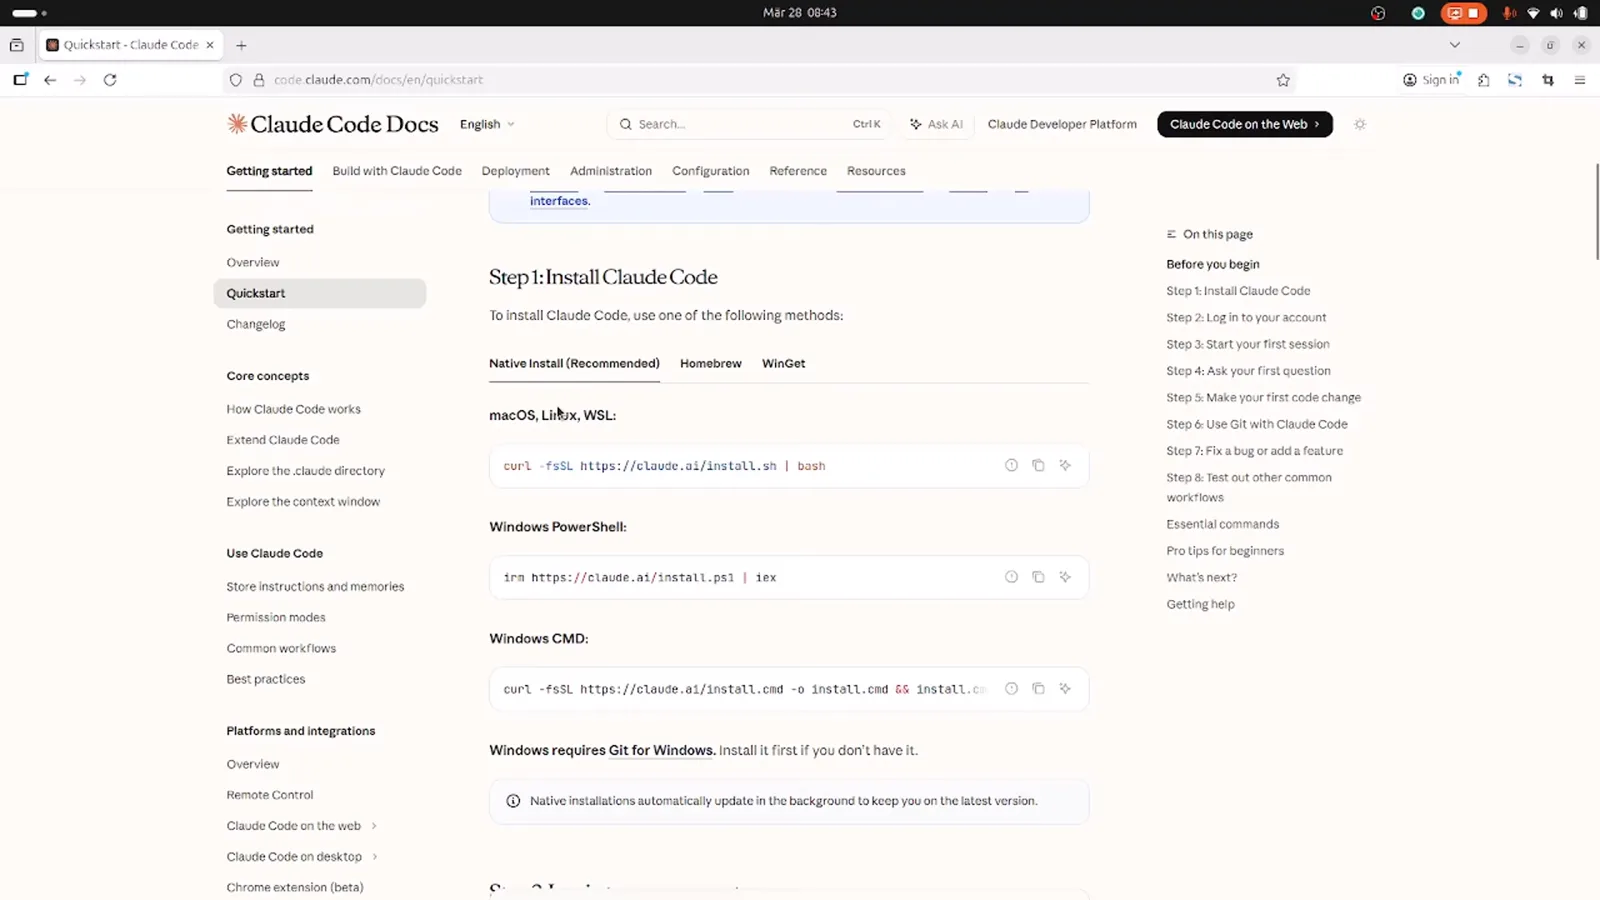
Quickstart ページは OS 別にインストールコマンドを整理しています。動画の 0:30 で確認 - 2
curl インストールスクリプトを実行
ターミナルに curl -fsSL https://claude.ai/install.sh | bash を貼り付けて実行。完了するとスクリーンショットのバナーが出ます:Claude Code successfully installed、バージョン 2.1.86、配置先 ~/.local/bin/claude、そして claude --help の実行ヒント。
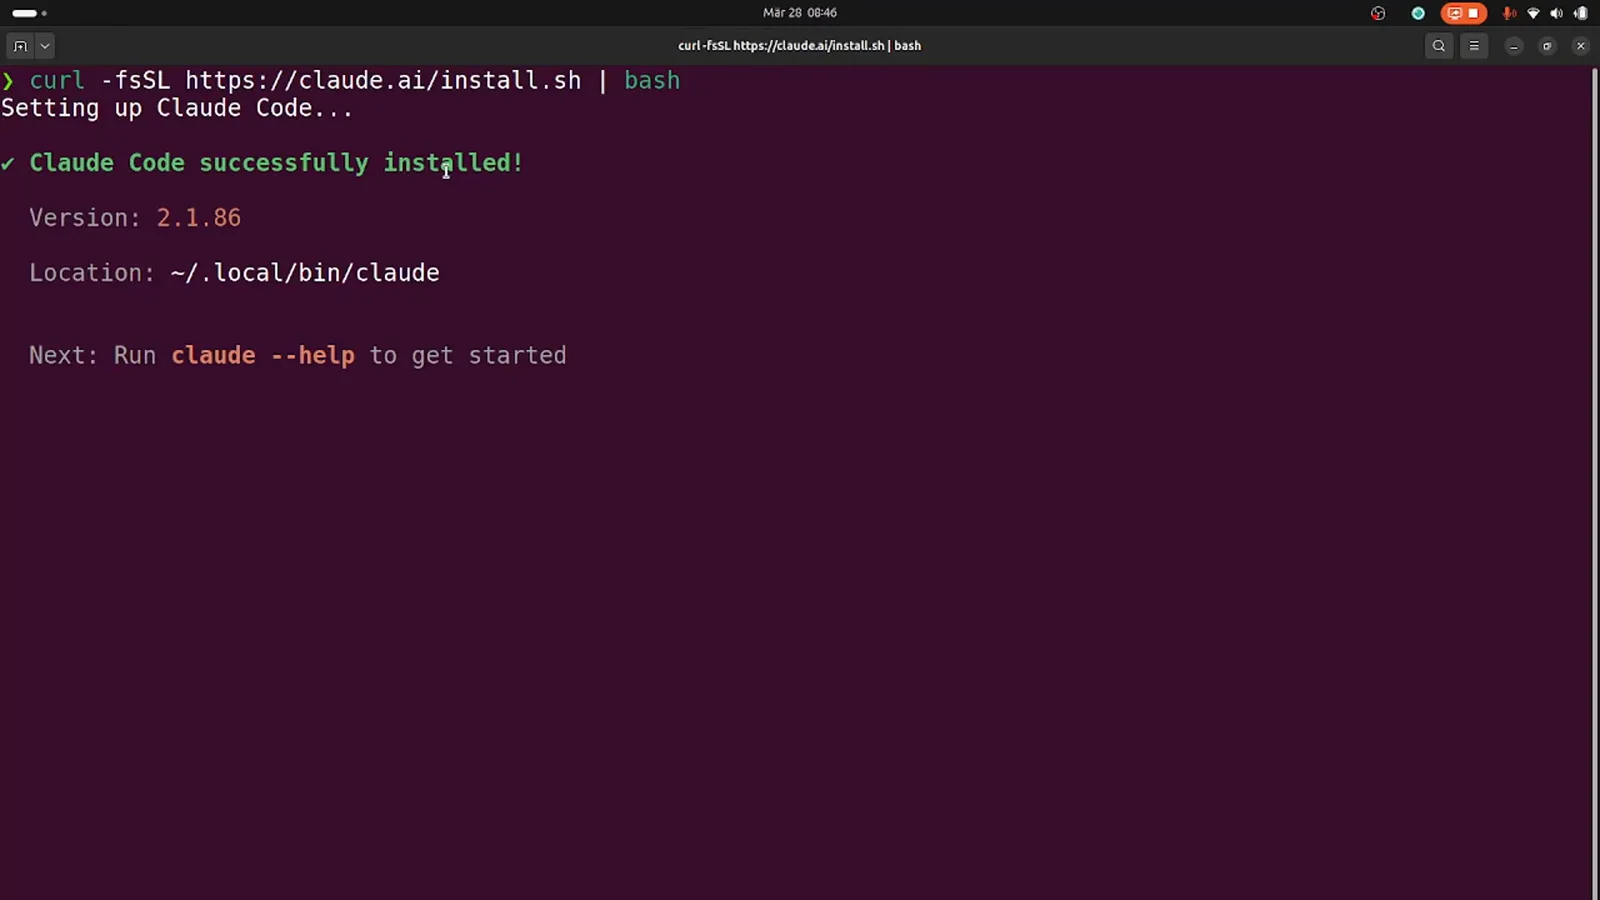
成功するとバージョンとバイナリの場所が表示されます。動画の 1:05 で確認 - 3
初回起動でテキストスタイルを選ぶ
claude を起動すると、最初の画面でターミナルに合うテキストスタイルを求められます — デフォルトは Dark mode で、録画でもそのまま使用。6 段階のバリエーションがライト・色覚対応・ ANSI 限定色端末をカバーします。
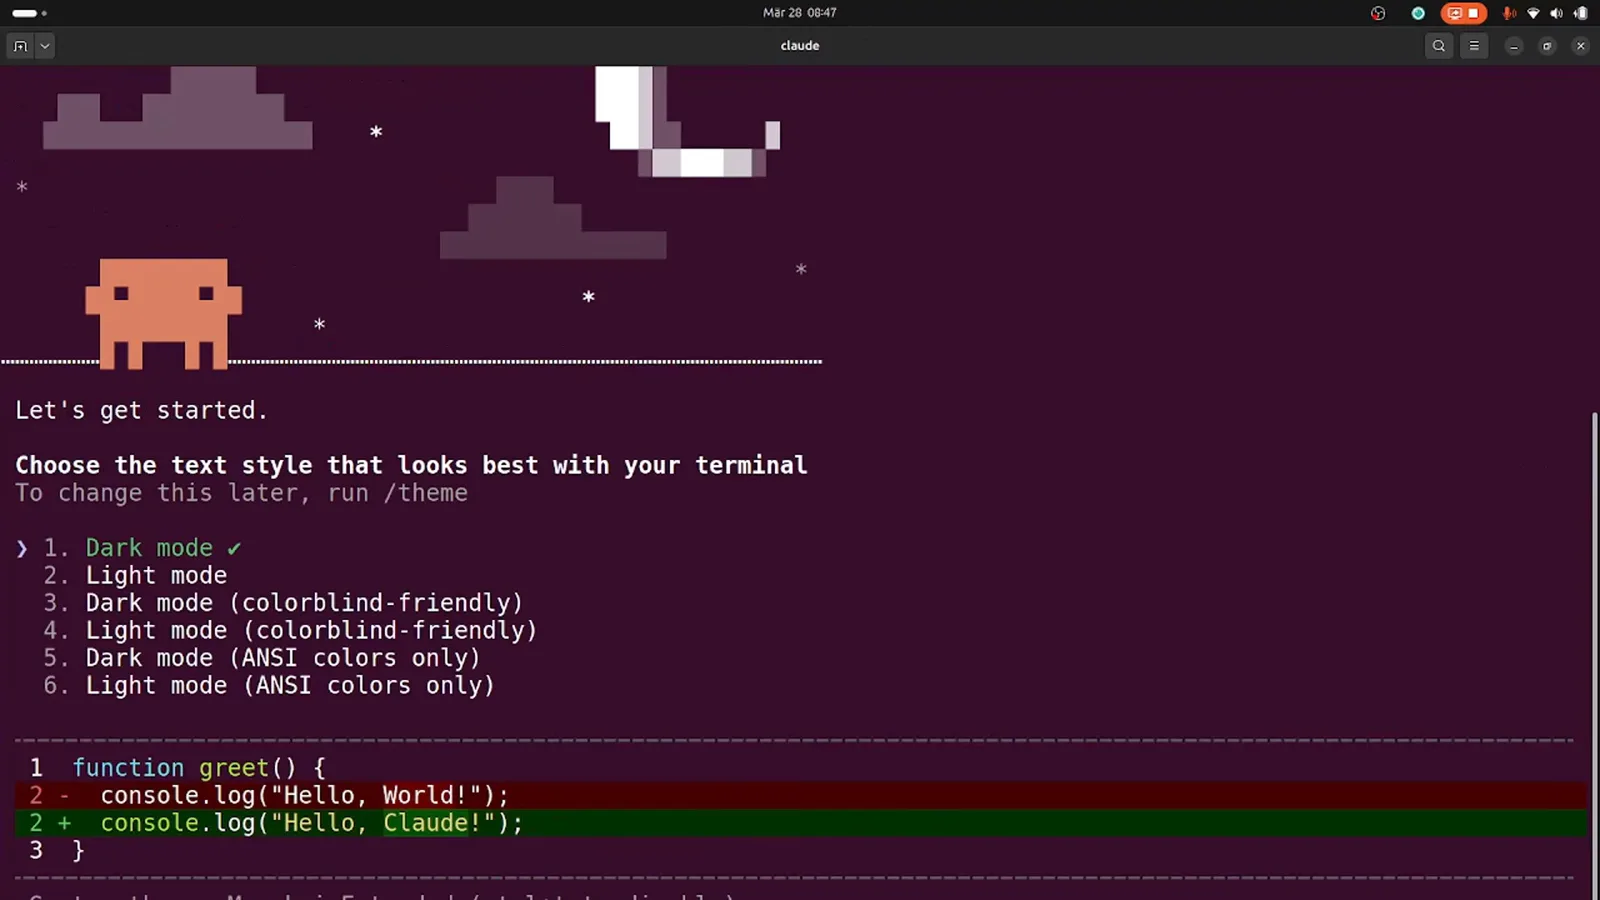
テーマ選択画面には Hello World の小さなプログラムによるライブプレビュー付き。動画の 1:28 で確認 - 4
作業するフォルダを信頼する
Claude は何かを読む前に Accessing workspace の安全確認を表示します:フォルダのパス、「Claude Code'll be able to read, edit, and execute files here」という注記、セキュリティガイドへのリンク。自分のプロジェクトなら 1. Yes, I trust this folder を選びます。
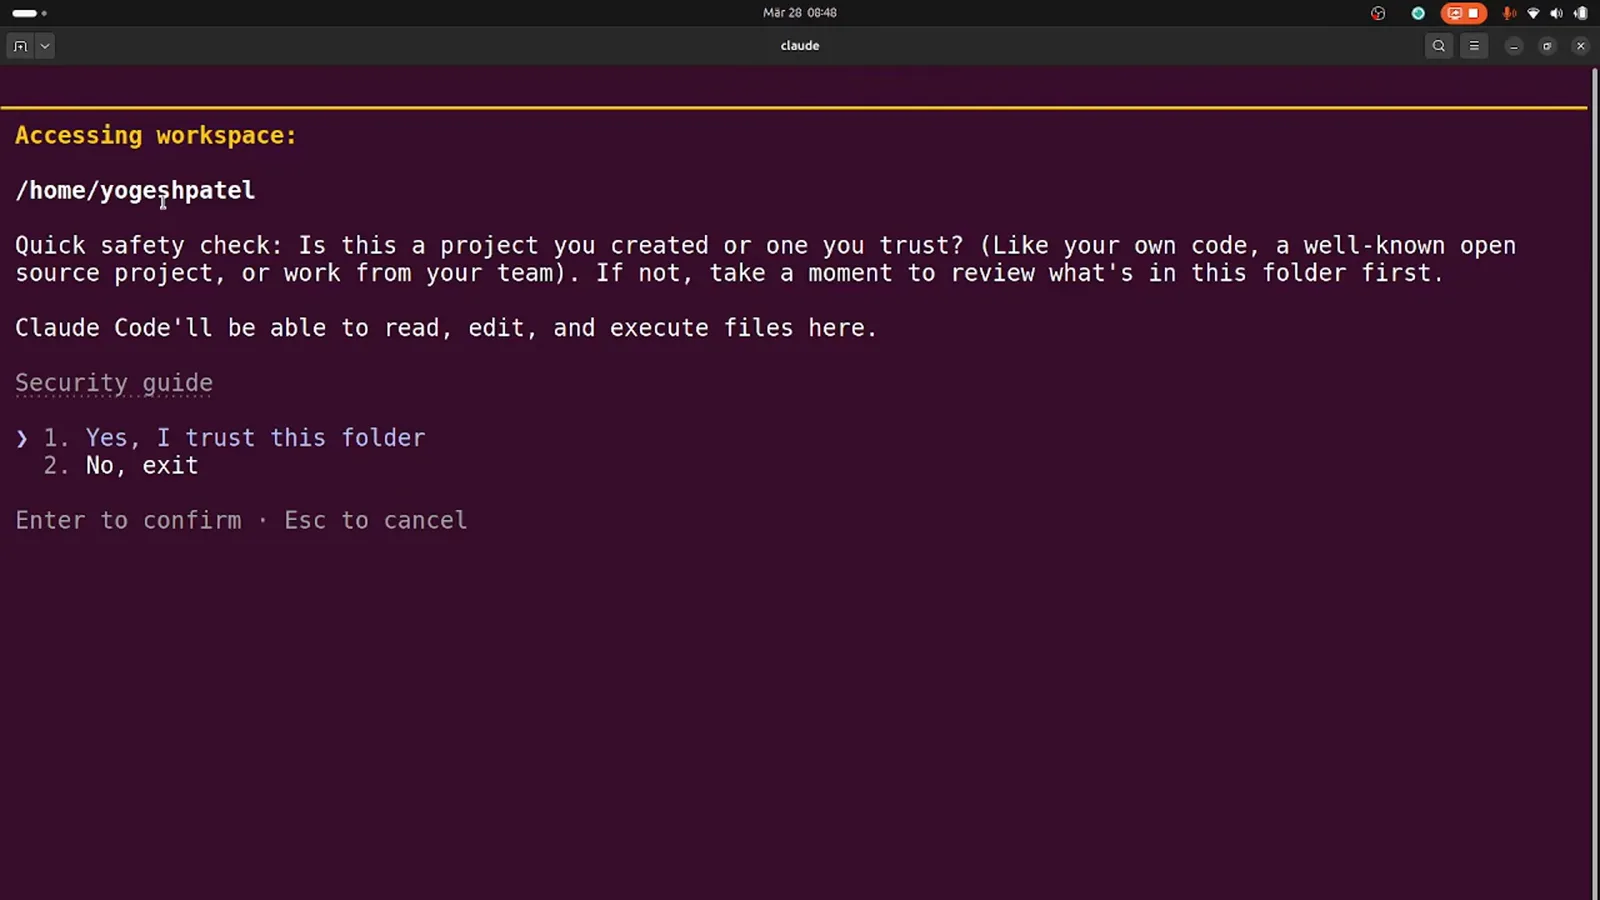
信頼対象のパスが明示されます — ここでは /home/yoogeshpatel。動画の 2:38 で確認
パート 2 · インストールの動作確認
VS Code に触れる前に、質問 1 つとスラッシュコマンド 1 つで、CLI の権限確認の仕組みと保存先が分かります。
- 5
最初のシェルコマンドを承認する
"what are the specs of this computer?" と尋ねると、Claude は実行したいコマンド — lscpu、free -h、nproc、lspci — を提示します。ダイアログの選択肢は 1. Yes(今回のみ)、2. Yes and don't ask again(同じコマンドを再確認しない)、3. No。
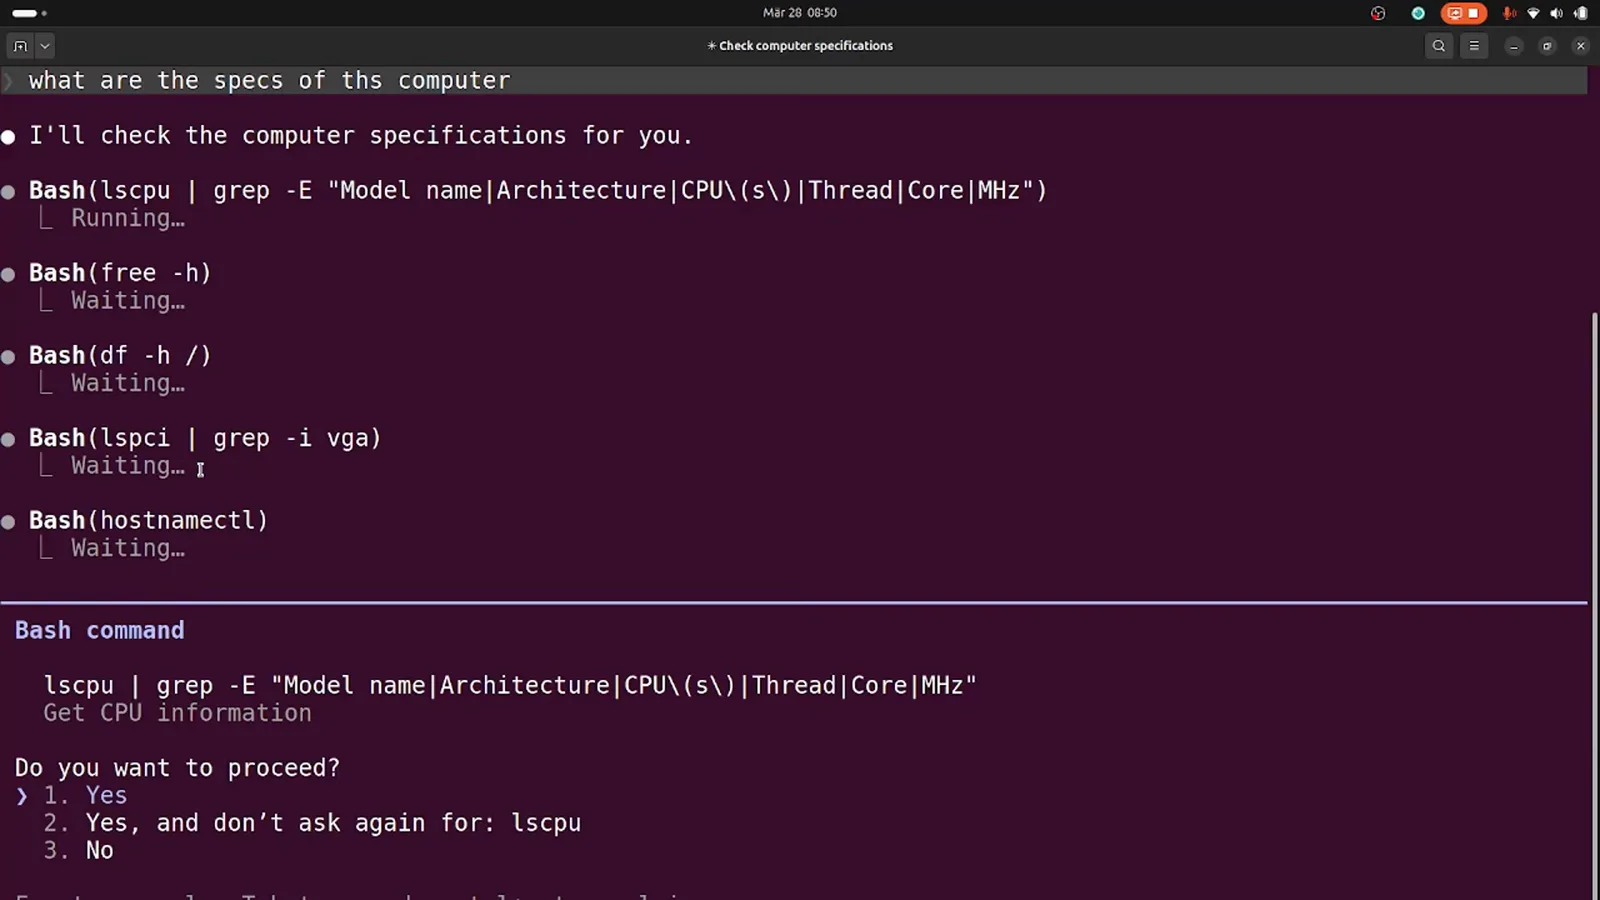
権限ダイアログは実行前に完全なコマンドラインを示します。動画の 3:40 で確認 - 6
検証レポートを読む
数秒で構造化レポートが返ります:CPU(Intel Core Ultra 7 155H・16 コア)、メモリ(合計 62 GB)、ストレージ(914 GB)、グラフィックス、そして OS 行 — Ubuntu 24.04.2 LTS。ここまで具体的な答えが出れば CLI は正しく動いています。
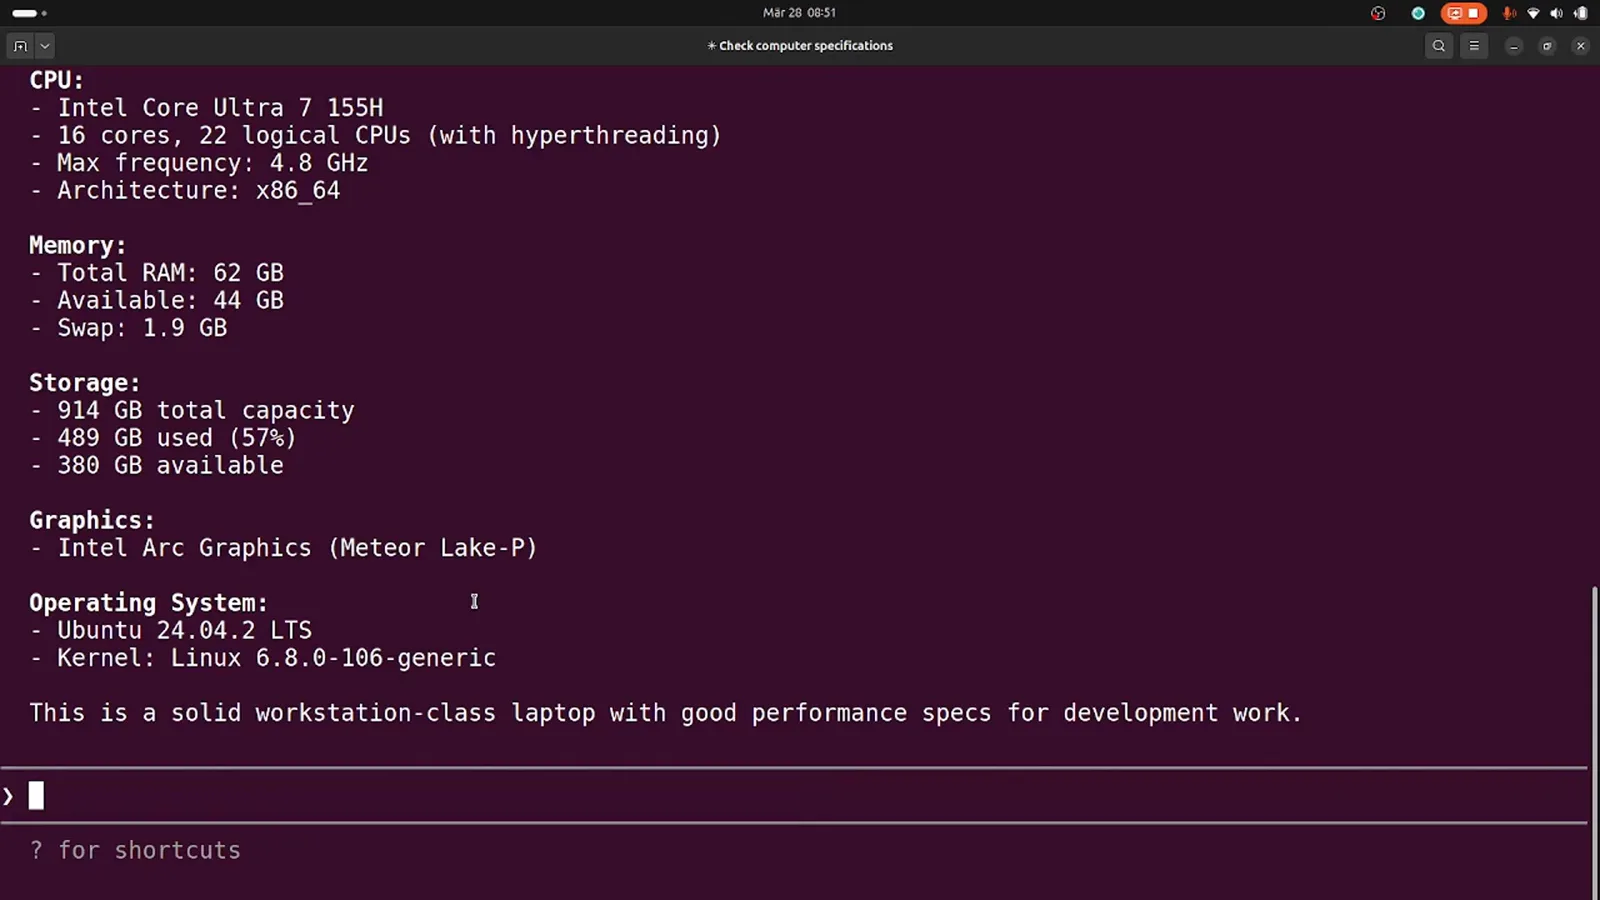
具体的で正確な答えが、インストール確認の最速スモークテスト。動画の 4:00 で確認 - 7
スラッシュコマンドを見て回る
/ を入力するとコマンドメニューが開きます。録画では /skills で止まり、No skills found と答えた上でスキルの保存先 2 箇所 — .claude/skills/ または ~/.claude/skills/ — を教えてくれます。拡張を入れてもこのメニューの操作は同じです。
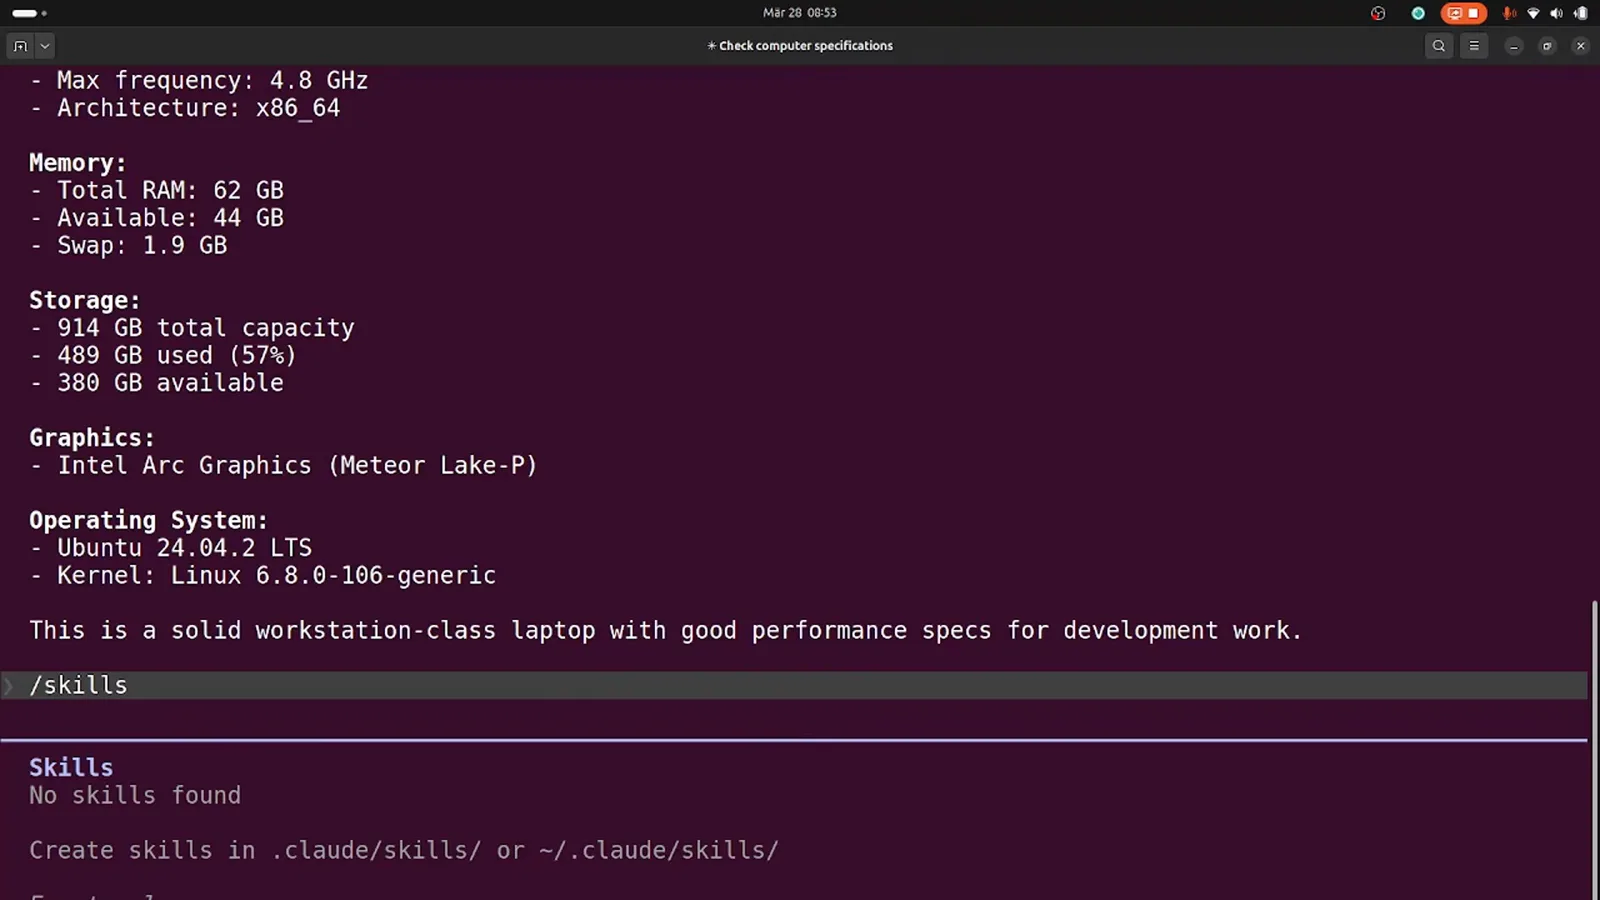
/skills はカスタムスキルの置き場所案内も兼ねています。動画の 5:00 で確認
パート 3 · VS Code 拡張を追加
公式拡張は Anthropic が VS Code マーケットプレイスに公開しています — サードパーティアカウントも追加手順も不要。
- 8
マーケットプレイスから拡張をインストール
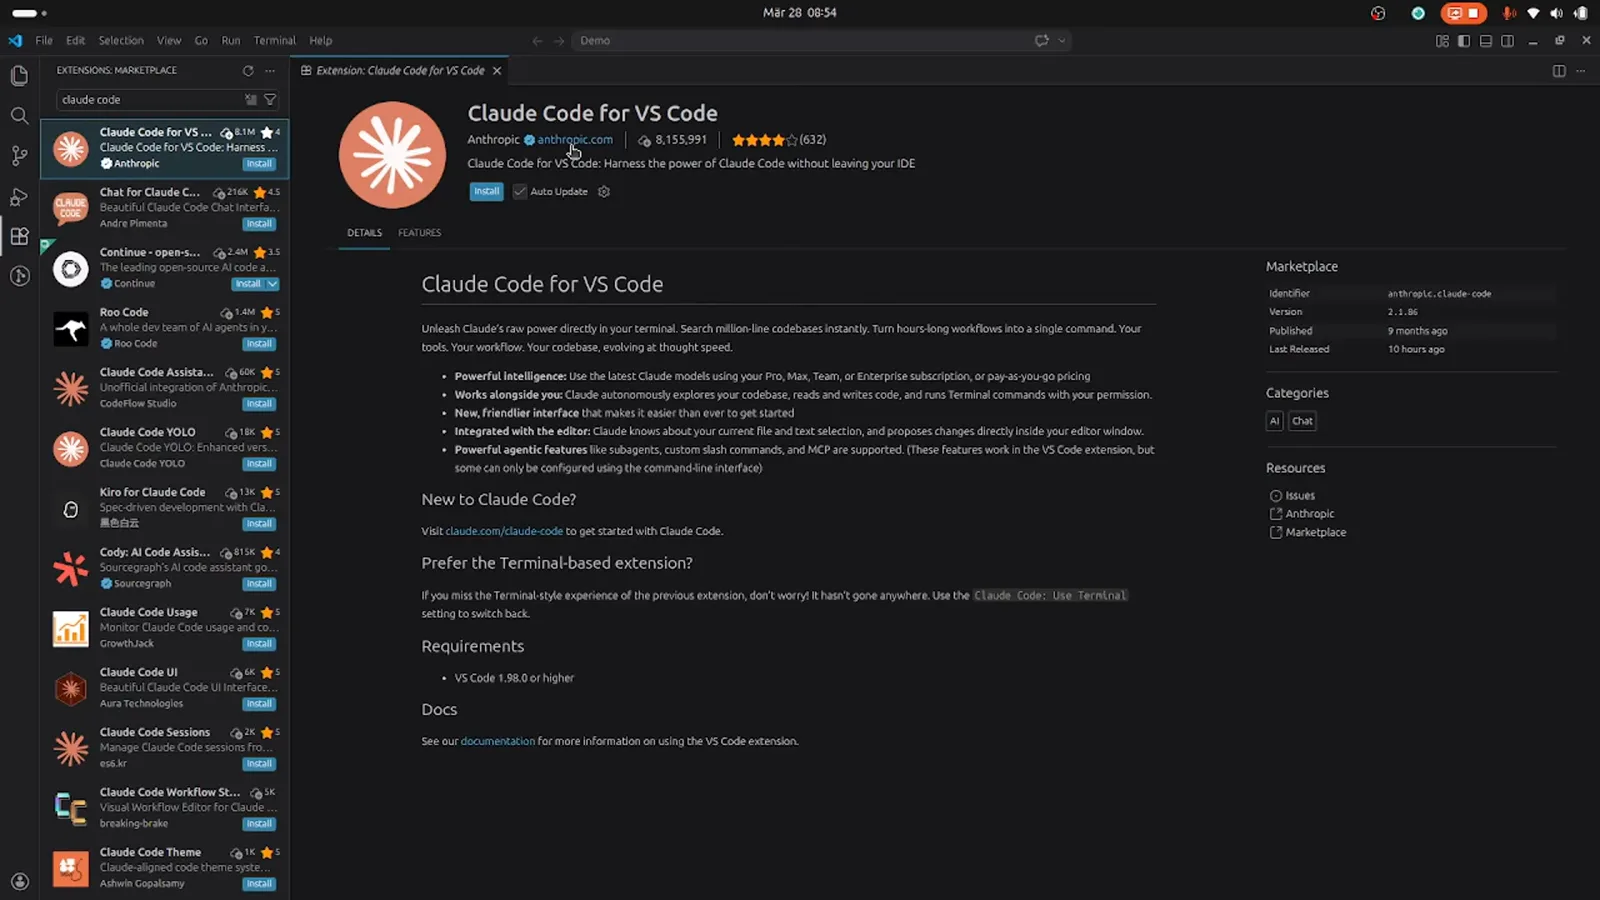
VS Code の拡張機能ビューを開き、"claude code" で検索して Anthropic が発行した項目を開きます — 識別子 anthropic.claude-code、収録時のインストール数 810 万。VS Code 1.98.0 以上が必要で、Install を押せば入ります。
インストール前に発行元・インストール数・バージョンをマーケットプレイスで確認できます。動画の 5:30 で確認 - 9
Getting Started タブを一巡する
インストール後、Welcome タブが開きます:Get started with Claude Code、Your AI coding partner カード、そして Open Claude Code・Chat with Claude・Past conversations の 3 行チェックリスト。ターミナル代替の Claude Code: Open in Terminal(コマンドパレット)にも触れられています。
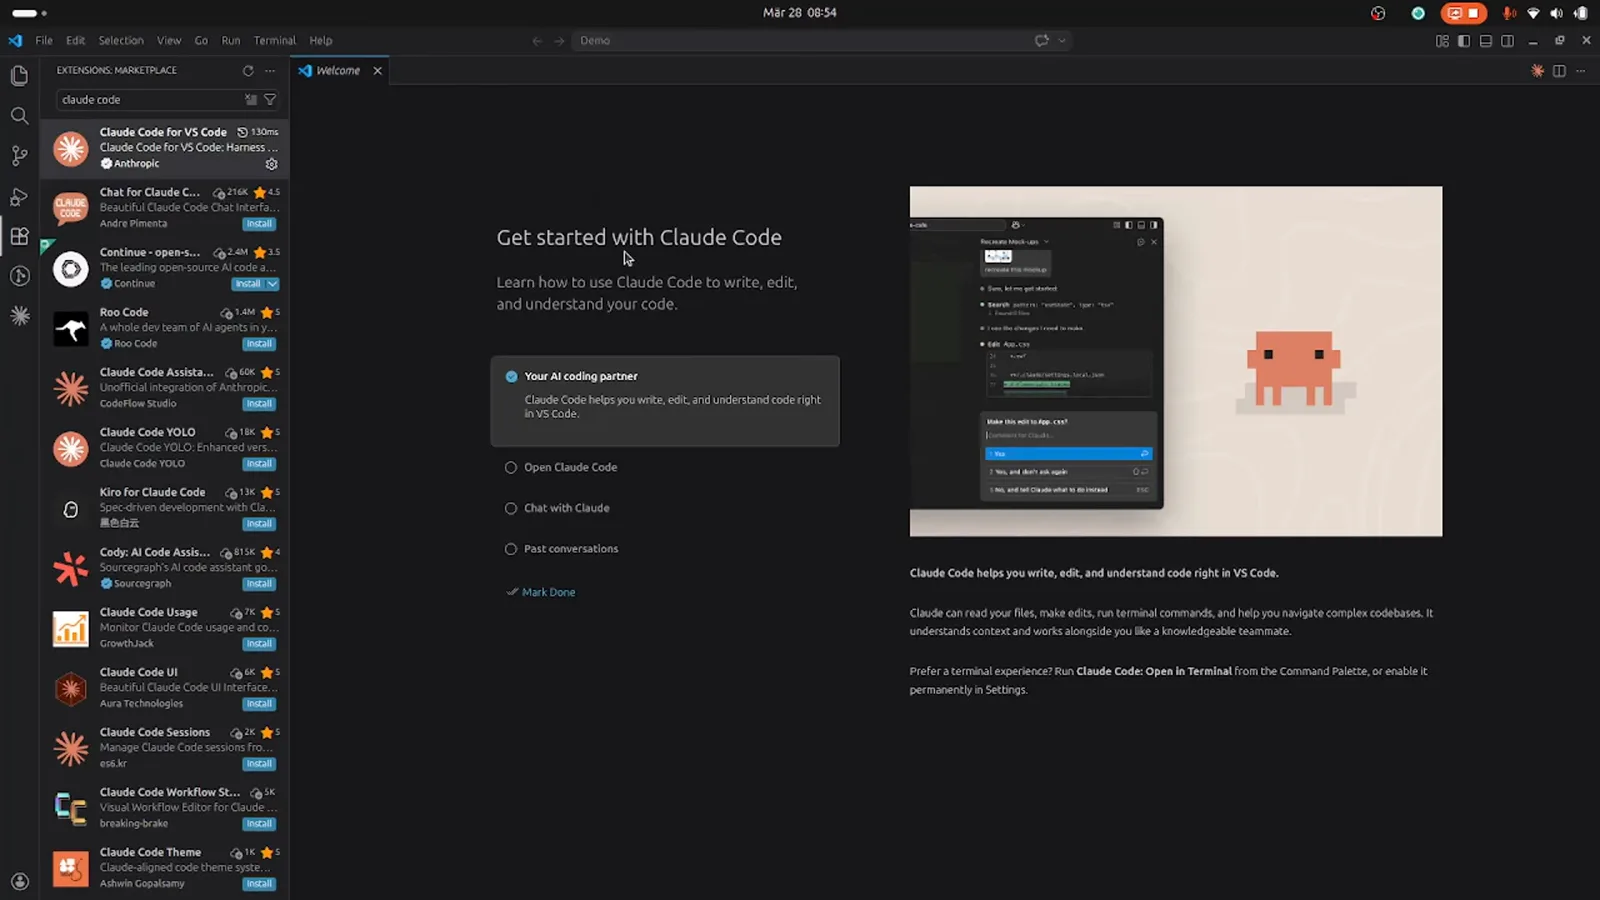
ウォークスルータブは一度だけ表示。Mark Done で消せます。動画の 5:48 で確認 - 10
Claude パネルを開く
アクティビティバーの Claude Code アイコンで、エディタの隣にドッキングされたサイドパネルが開きます。空の状態の文言は端的:What to do first? Ask about this codebase or we can start writing code。下部には Settings でターミナル体験に戻せるヒントもあります。
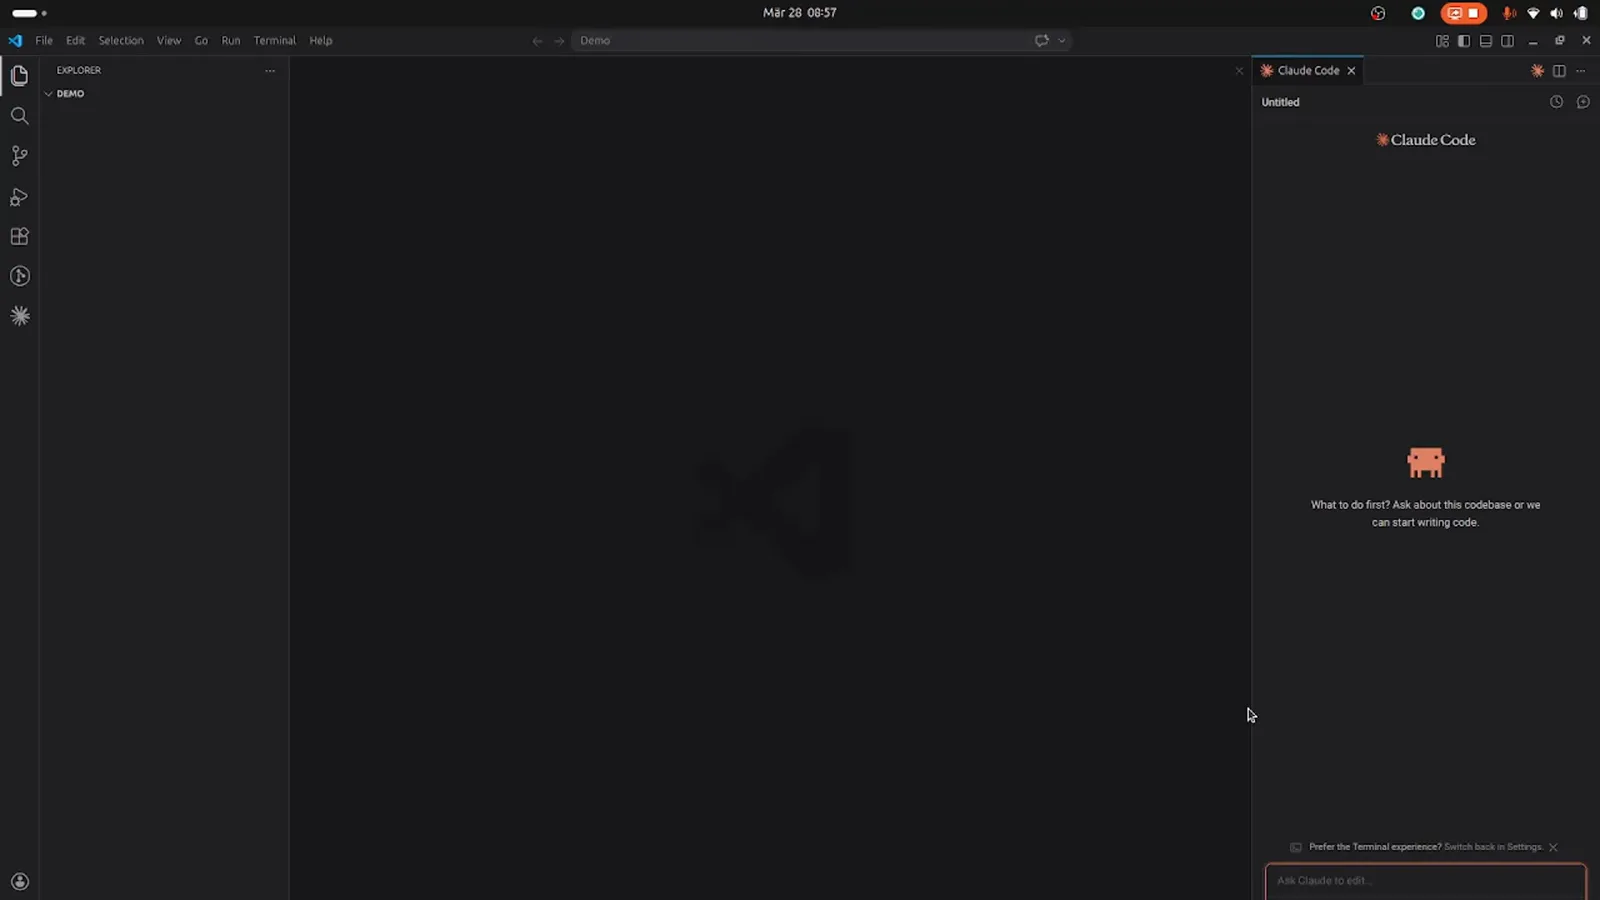
パネルはエディタの隣にあり、ワークスペースの文脈を共有します。動画の 6:46 で確認
パート 4 · パネルからアプリを構築して実行
Claude パネルにプロンプトを 1 つ送るだけで Express CRUD API の雛形が組み上がります。書き込みごとに diff が表示され、承認を求めます。
- 11
本物のビルドプロンプトを送る
録画では 1 つのメッセージに仕様を全部書いています:シニアバックエンド開発者として、Express で簡単な Node.js CRUD アプリを作成、データベースなし — インメモリ配列 — エンドポイントとバリデーションを明記。ここまで具体的だと最初の試行で動く雛形が得られます。
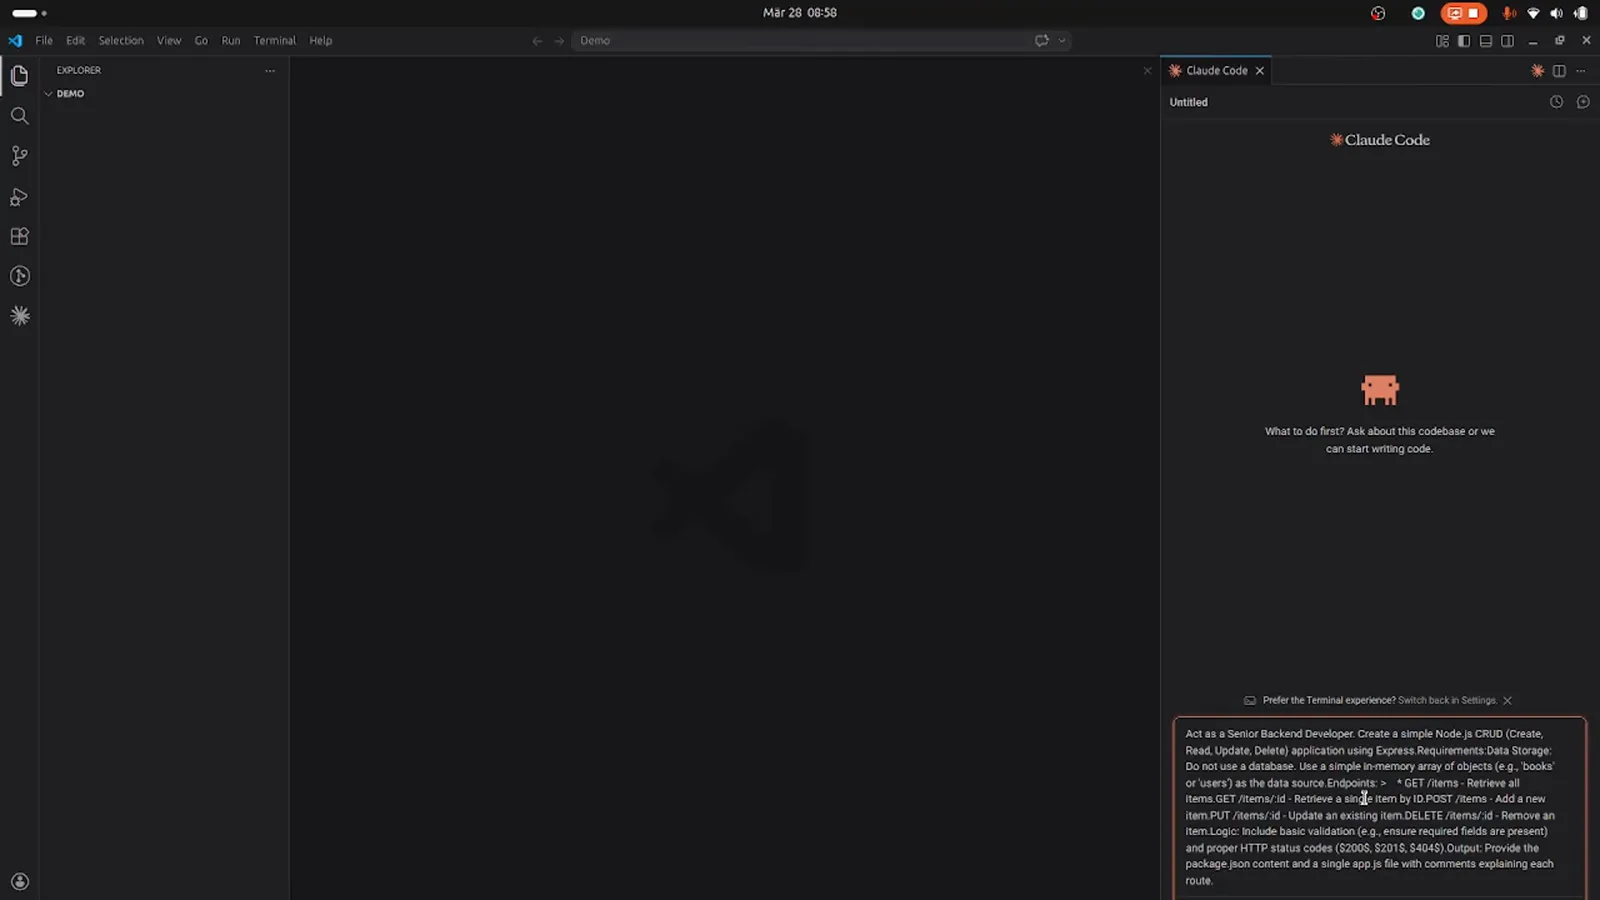
役割・スタック・受け入れ基準を 1 メッセージにまとめています。動画の 7:02 で確認 - 12
承認前に diff を読む
Claude は計画を答えた上でファイルを書きます。Write のたびに緑の diff が開く — これは app.js で、ポート 3000 の Express サーバー、インメモリの books 配列、GET /items ルート — 承認前にディスクに何が落ちるか正確に読めます。
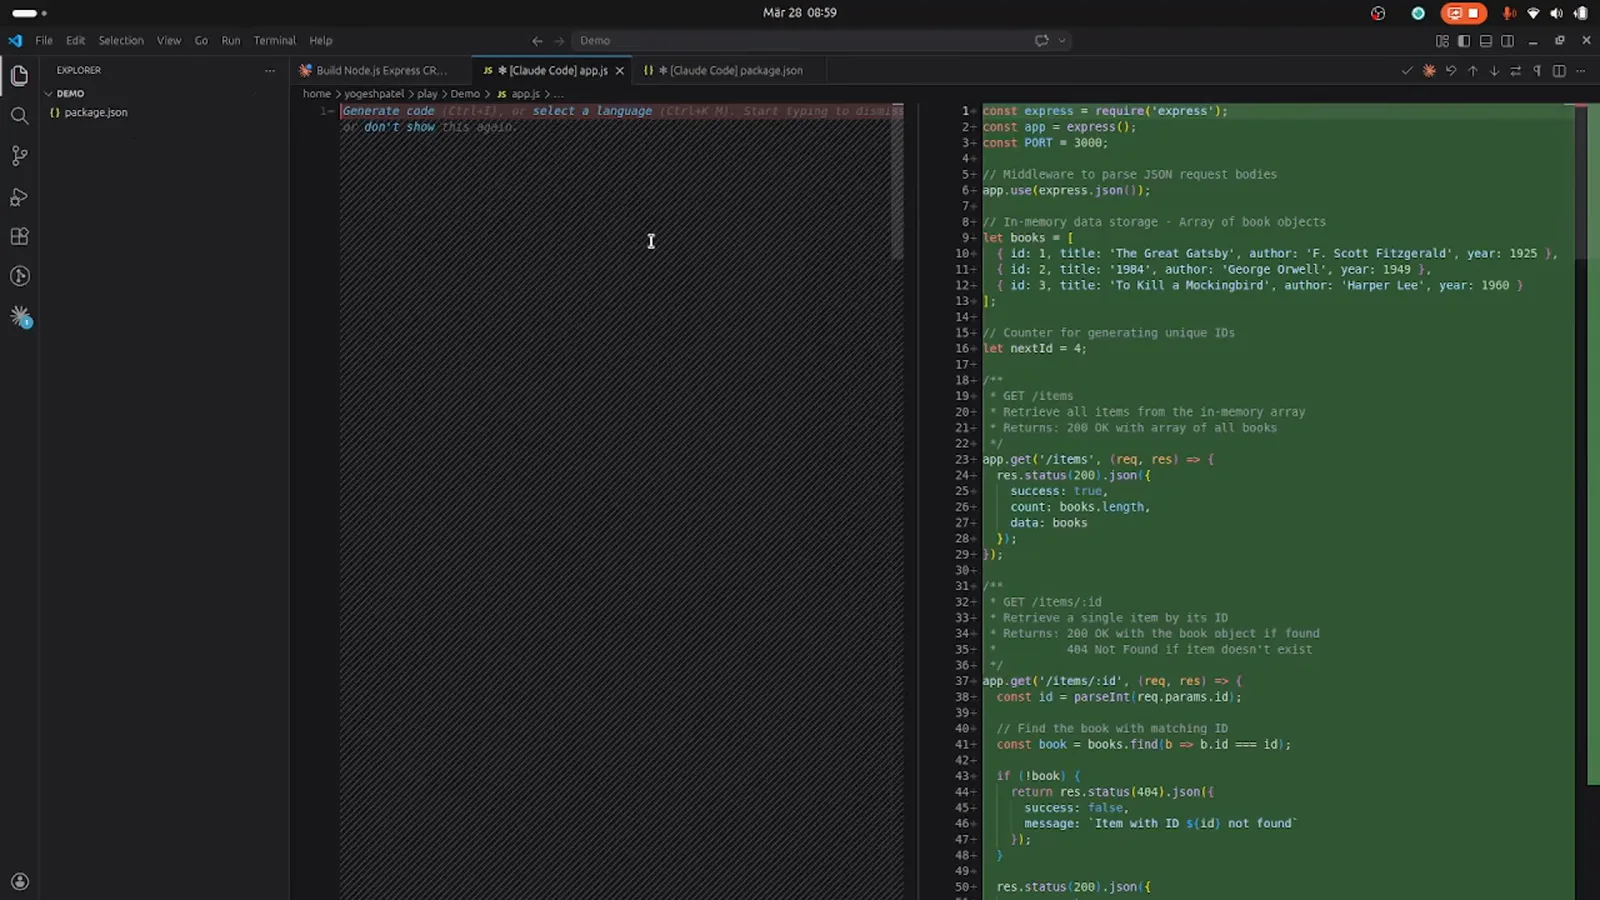
緑の行は Claude の提案;承認するまで何も書き込まれません。動画の 7:22 で確認 - 13
1 回だけ、またはセッション全体を承認
書き込みごとにダイアログが出ます — これは Allow write to app.js? — 選択肢は 1. Yes(今回のみ)、2. Yes, allow all edits this session(セッション中すべて)、3. No。雛形作成のような作業では 2 番目で中断がなくなります。まず見済みの diff を確認してから。
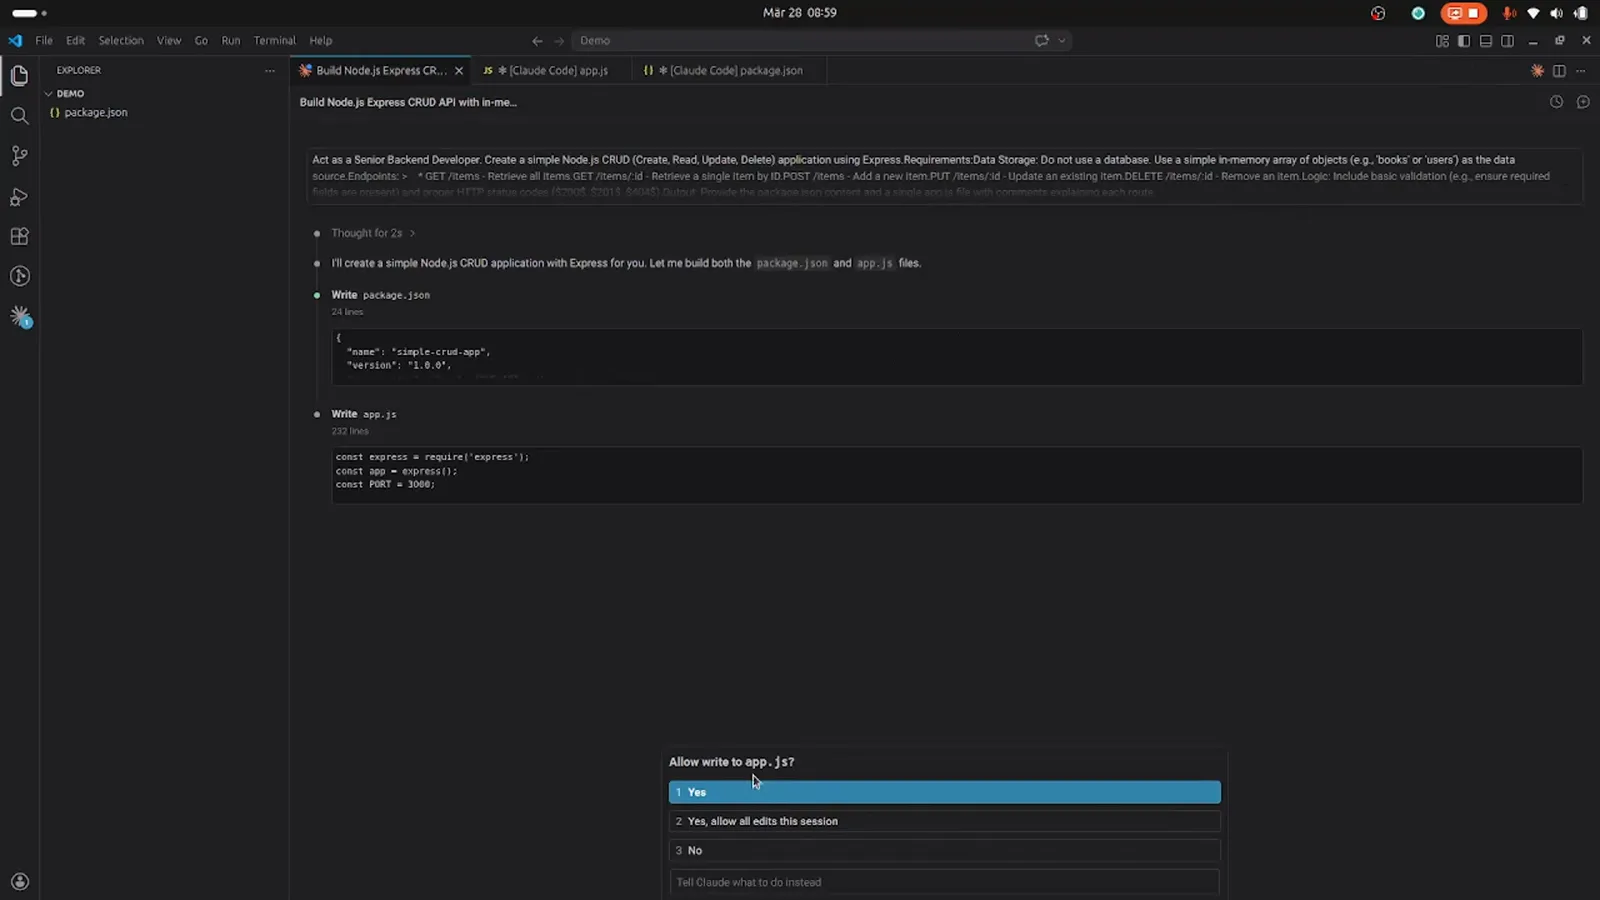
ダイアログは書き込み対象ファイルを明示 — この app.js は 232 行です。動画の 7:29 で確認 - 14
Claude が作ったアプリを実行・テスト
最後の返信はバリデーションとエラー処理にチェックを付けた後、実行手順を印刷します:npm install、npm start、自動再起動の npm run dev、さらに localhost:3000 への全エンドポイントの curl コマンド — GET /items、GET /items/:id、POST、PUT、DELETE。
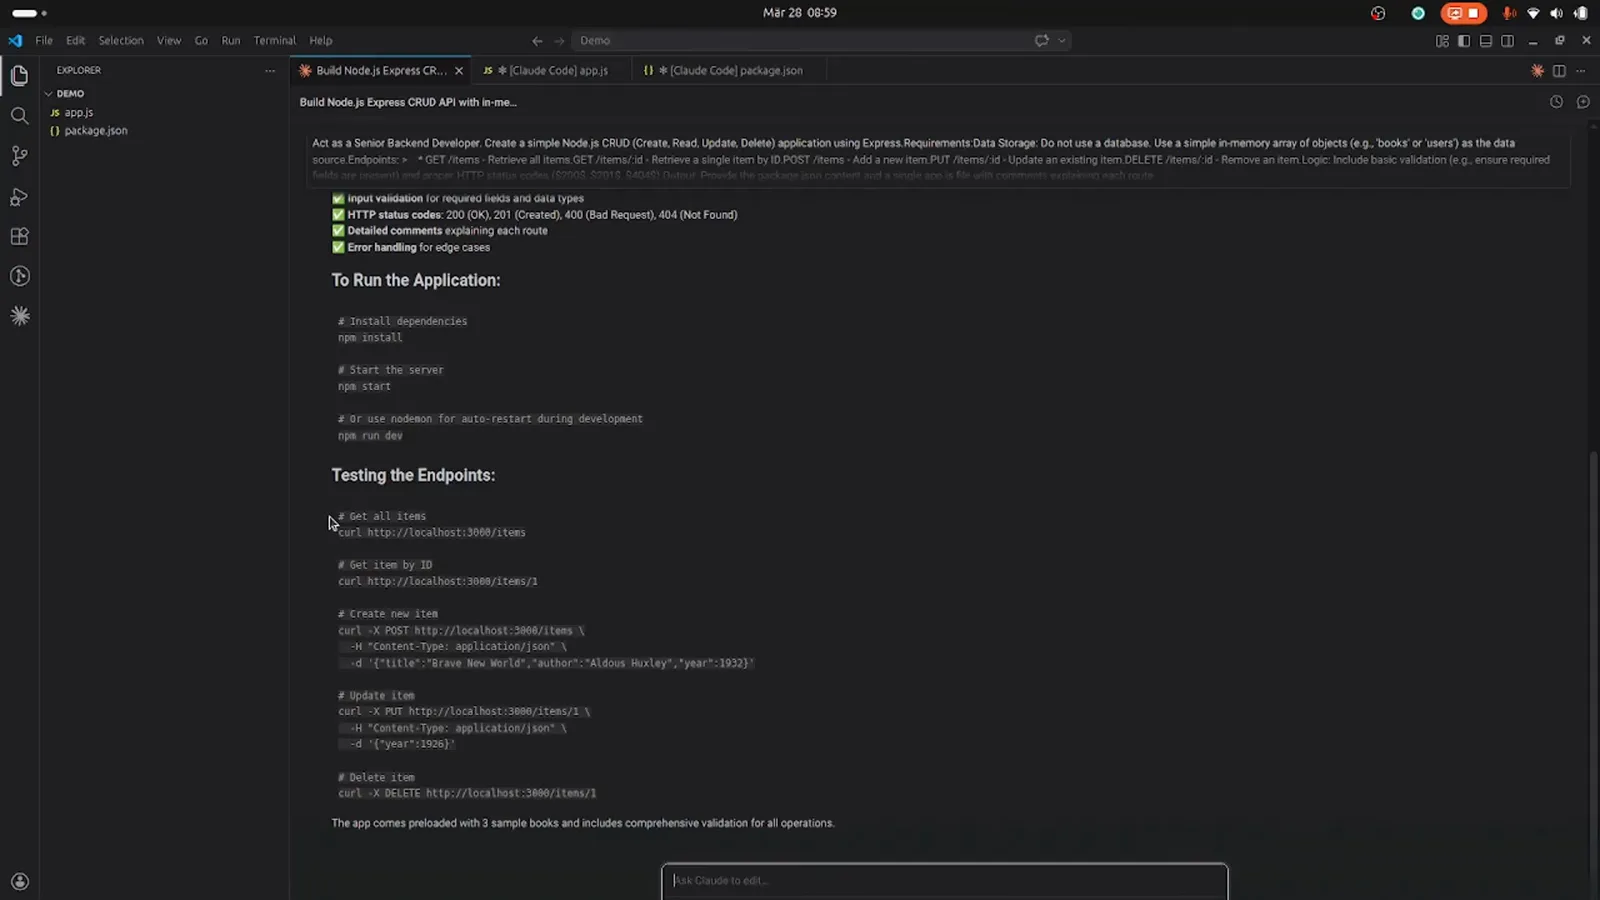
返信の末尾には各ルートの貼り付け可能な curl コマンド並びます。動画の 7:48 で確認