
図解ウォークスルー · スクリーンショット16枚
Claude Code Plan Mode 図解ガイド:計画してから、書かせる
Claude Code がコードベースを調査し、実装計画を示し、承認を待ってからコードを書く流れを実タスクで解説。1ステップ1スクリーンショット。
約 6 分 · 16 ステップ、各ステップから元動画の該当秒へジャンプ可能
要点だけ
Plan mode は Claude Code に「まず調査、コードは後」をさせるモードです。入力欄下のモード表示を “plan mode on” まで切り替えてタスクを伝えると、Claude はまずファイルを検索し、変更対象のファイル名と行番号まで書かれた番号付き実装計画を返してきます。選べるのは「編集を自動承認」「1件ずつ手動承認」「No, keep planning(計画を継続)」の3つ。実行段階では計画は取り消し線付きの Todo リストになり、Bash コマンドはディレクトリ単位で「次回から確認しない」を指定できます。変更点が多数のファイルに広がるが各変更は単純、というときが Plan mode の狙い目。逆に範囲は狭いがロジックが重いときは、プロンプトに “think hard” や “ultrathink” を添えましょう。
ソース動画について
このページのスクリーンショットはすべて Net Ninja の Claude Code 講座「Planning & Thinking」の回から。VS Code 上で動く shinobi という実際の Next.js ブログプロジェクトを使った収録です。
スクリーンショットはクレジット付きで利用し、各ステップから動画の該当秒に直接リンクしています。本文は当サイトのオリジナルで、字幕の転載ではありません。
Plan mode とは
入力欄の下にあるひとつのインジケータが、Claude の挙動を決めます。
- 1
Plan mode に切り替える
Plan mode は Claude Code 入力欄下のモードインジケータの一段です。“accept edits on” の先まで切り替える(この環境では alt+m。表示自体 “plan mode on (alt+m to cycle)” と出ます)と緑色に変わり、以降 Claude はファイルを編集せず、調査と計画だけを行います。多くのファイルにまたがるが個々の変更は複雑ではない、という種類のタスクに向いたモードです。
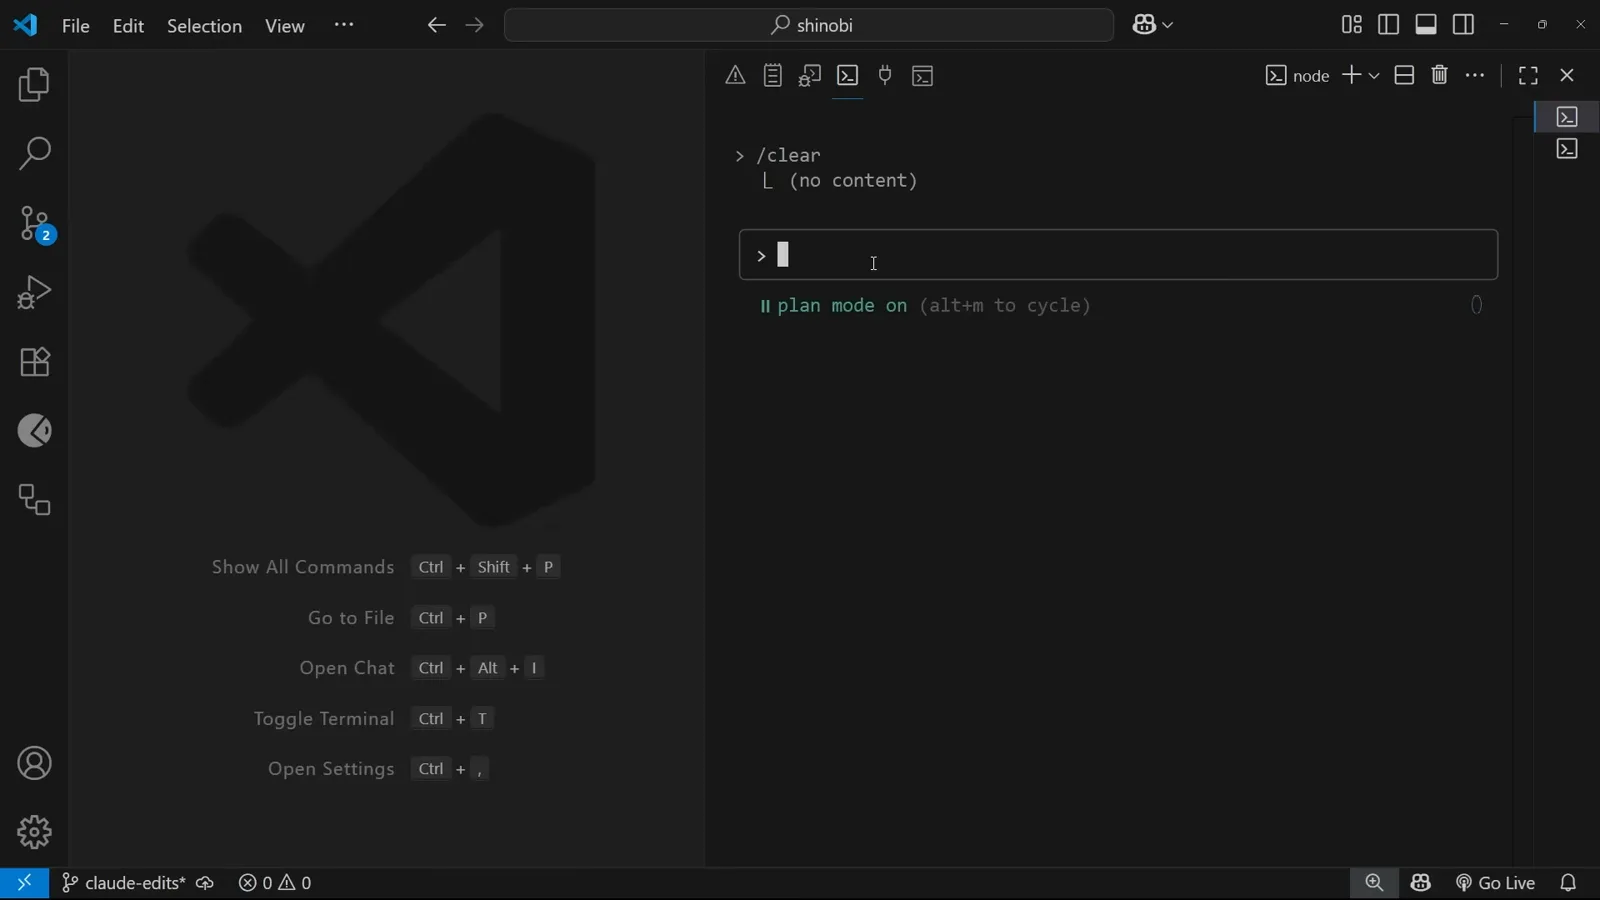
入力欄の下が “plan mode on (alt+m to cycle)” に。計画が承認されるまで Claude は何も編集しません。0:38 の場面を見る
Plan mode で実タスクを動かす
アバターコンポーネントの依頼が、プロンプトから調査、6ステップの計画になるまで。
- 2
タスクを書き、Plan mode を維持
デモのタスクは “Can you make a custom component for an Avatar (no pic, only initial) and find any places in the project where it can replace Avatar-like templates”。このプロンプトが良いのは、制約(画像なし・イニシャル表示のみ)が明確な点と、プロジェクト内のアバター風実装をすべて洗い出すよう指示している点です。Enter を押してもまだ編集は始まらず、調査が走るだけです。
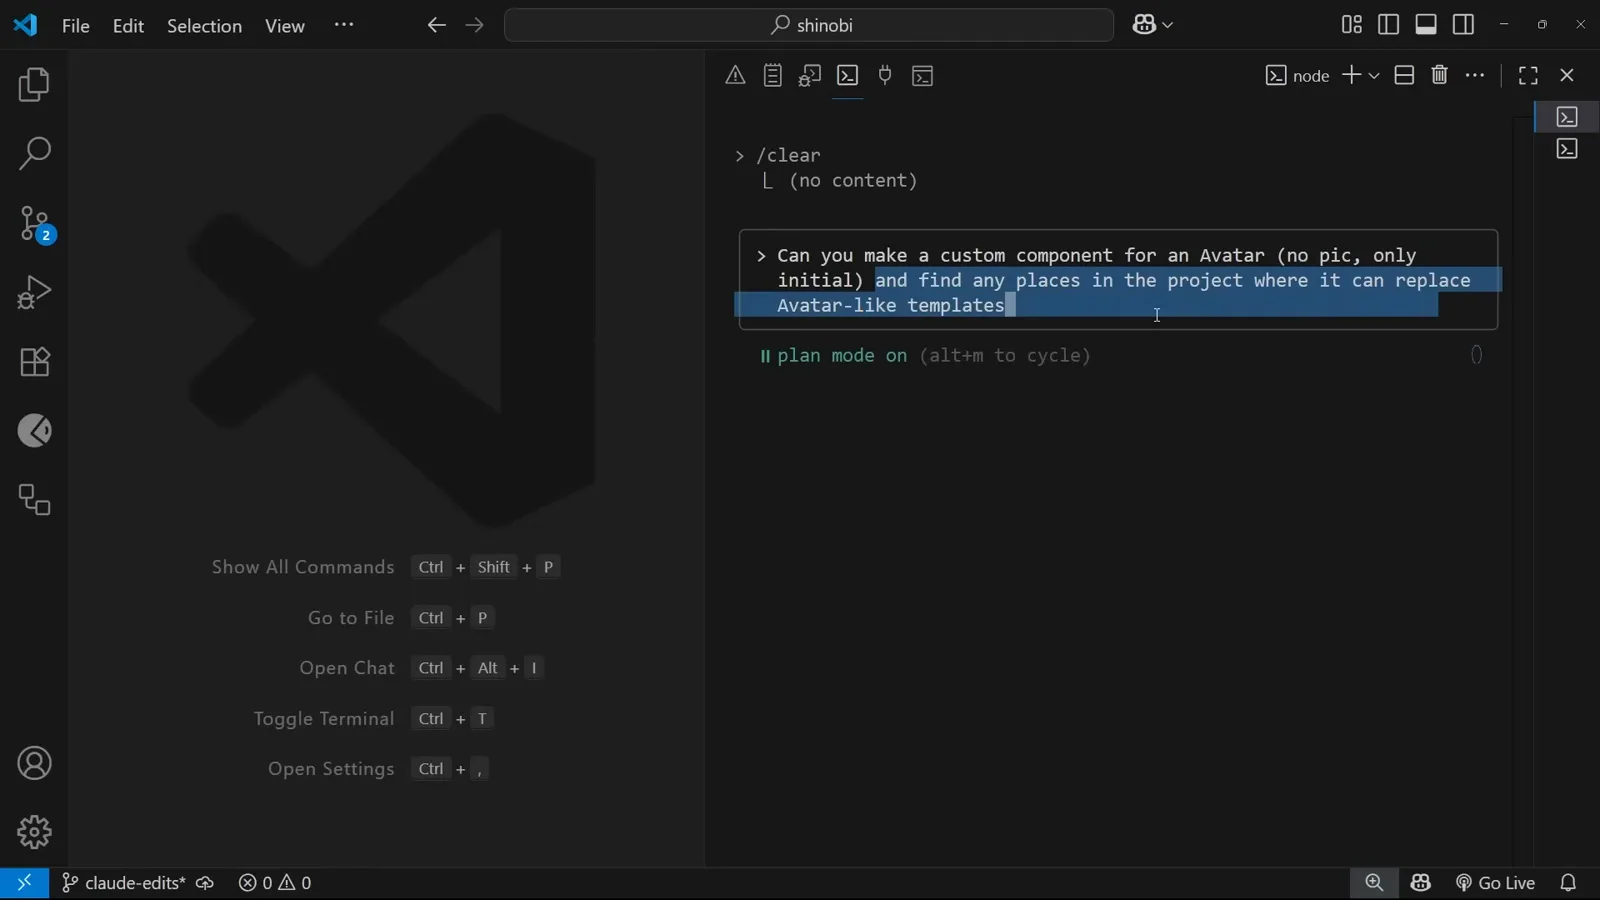
アバタータスクを入力欄に打ち込んだ状態。フッターにはこの時点でも “plan mode on” と表示されたまま。1:10 の場面を見る - 3
Claude は計画の前に調査する
提案の前に、Claude Code は読み取り専用の検索を実行します。“avatar|Avatar|initial|profile|user” のパターン検索で4ファイル、リポジトリ全体の .tsx/.ts/.jsx/.js 検索で100ファイルを検出。「アバターコンポーネントが活きる場所を把握し、実装を計画する」と宣言した上で進みます。Plan mode ではこの種の検索は安全で、ファイルは一切触られません。
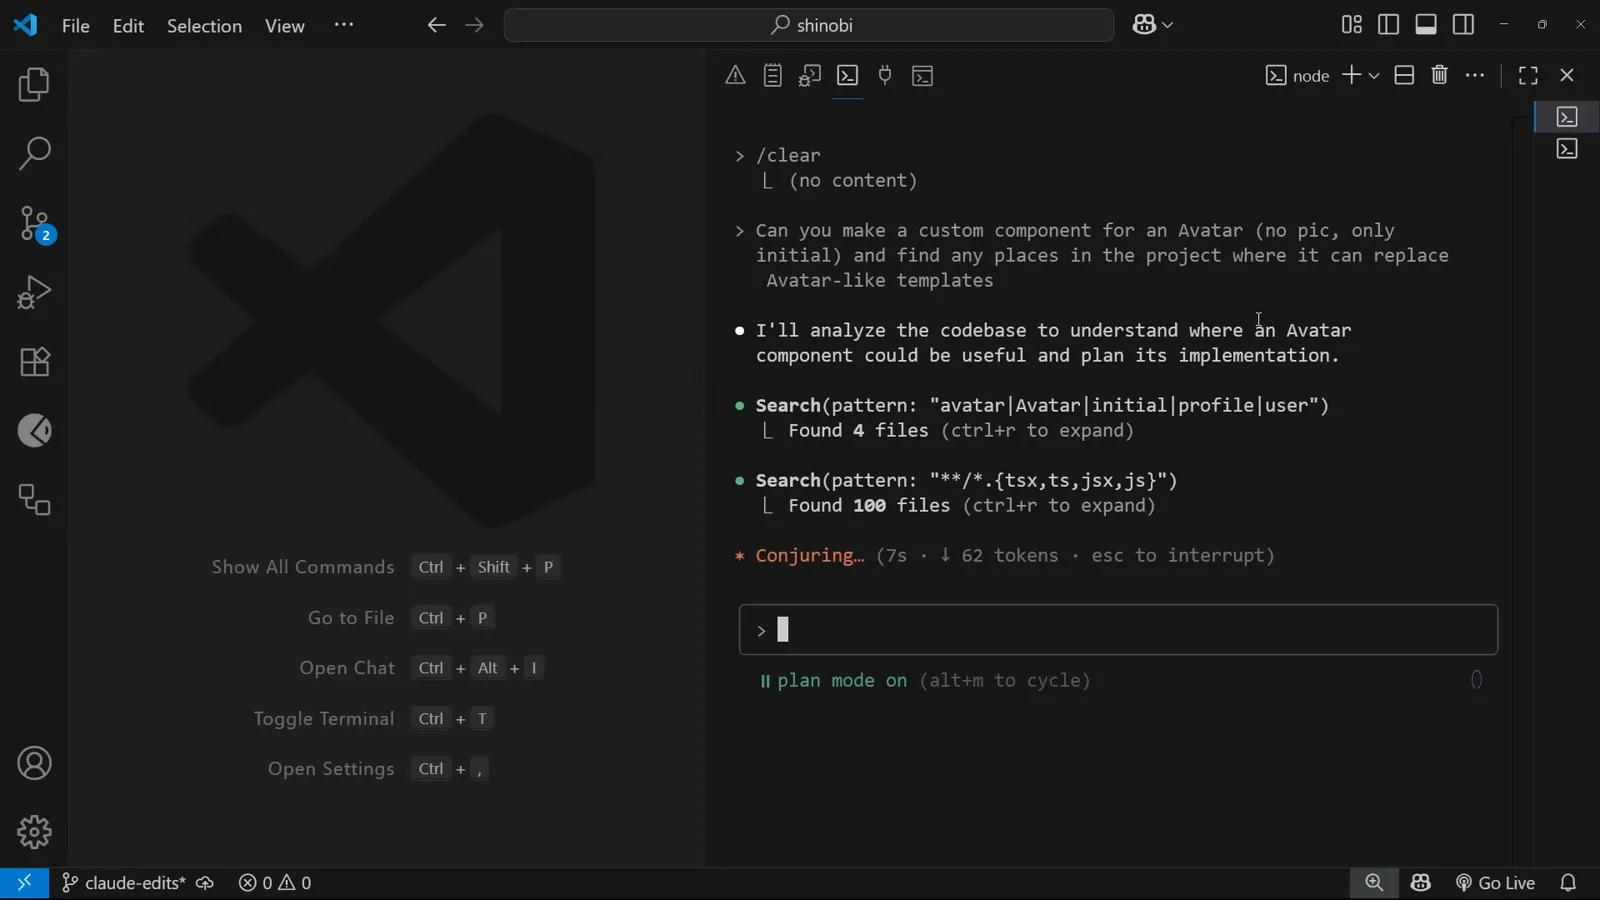
Search 2回とステータス表示。Plan mode で Claude ができるのは読み取り専用操作だけです。1:18 の場面を見る - 4
計画は「見つけたもの」から始まる
計画は “Ready to code?” の見出しで始まります。最初の “Current Avatar Usage Found” では、Blog Post Cards(src/app/blog/page.tsx:56-58、著者イニシャルをグラデーション背景の inline div で表示)と Recent Activity(src/components/BlogSidebar.tsx:43、色付きドットを使用)が指摘されます。ファイル名と行番号まで特定するからこそ、Claude Code の計画は検証できるのです。
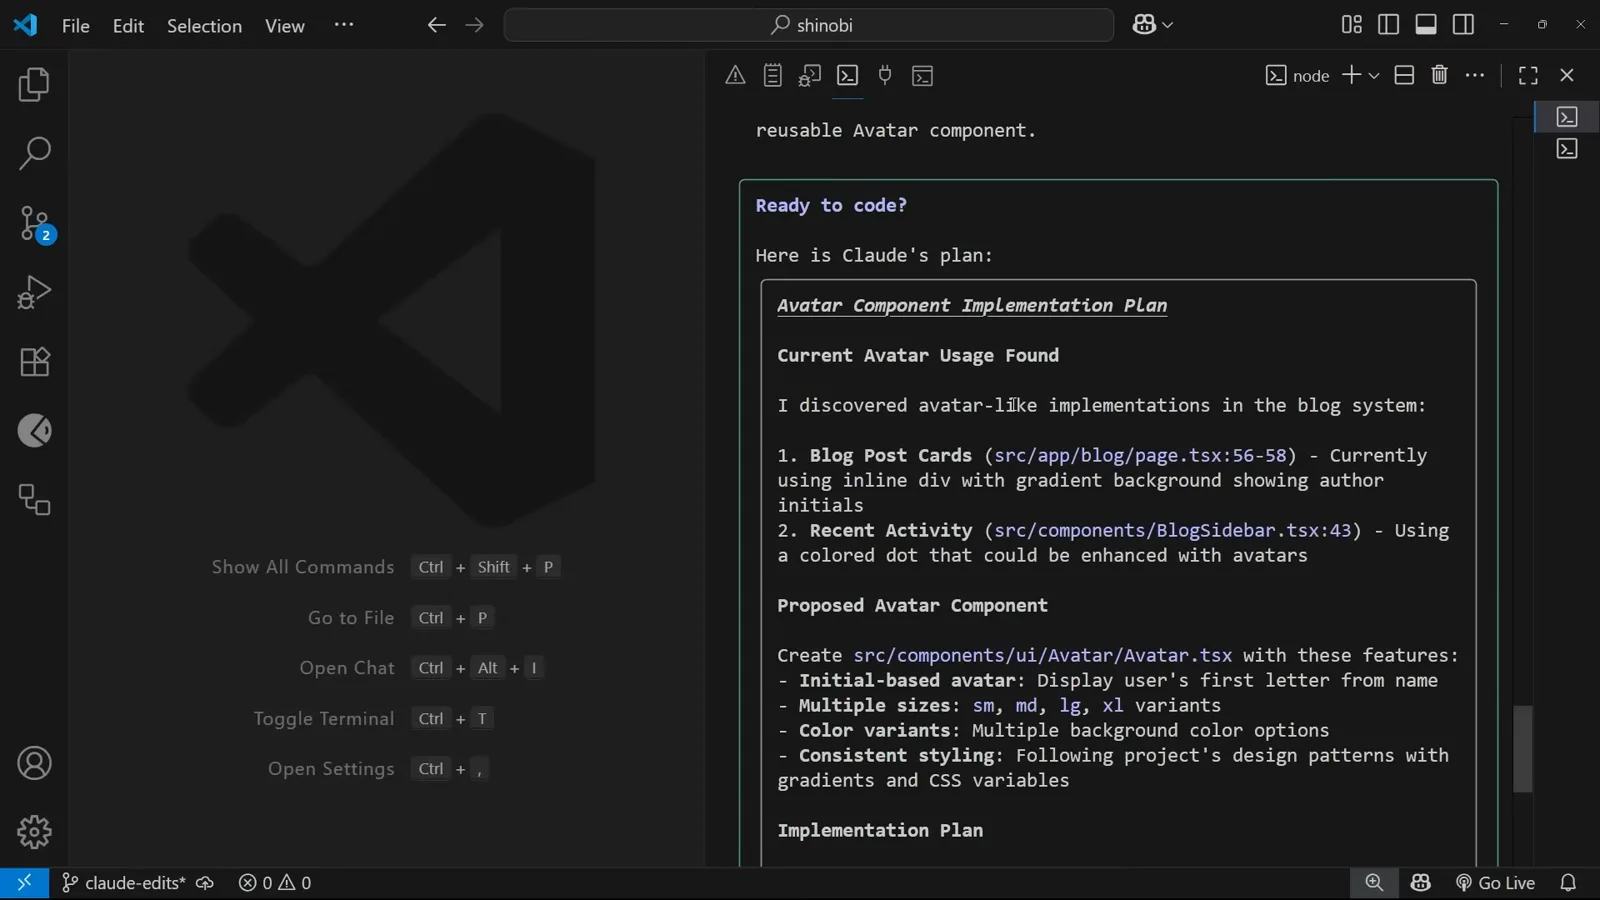
「Ready to code? Here is Claude’s plan」——見つけた2箇所のアバター実装から始まります。1:34 の場面を見る - 5
6ステップ・5ファイルの実装計画
Proposed Avatar Component セクションは、src/components/ui/Avatar/Avatar.tsx にイニシャル表示・sm/md/lg/xl サイズ・6色のバリアントを備え、既存の Button コンポーネントのパターンに沿うと約束します。続く Implementation Plan は6ステップ:コンポーネント作成、ブログカードのアバターコード置換(56-58行目)、BlogSidebar 強化、個別記事ヘッダーへのアバター追加、Button 流れのテストファイル作成、「プロジェクトの指示どおり」ヘッダーナビへのプレビューリンク追加。
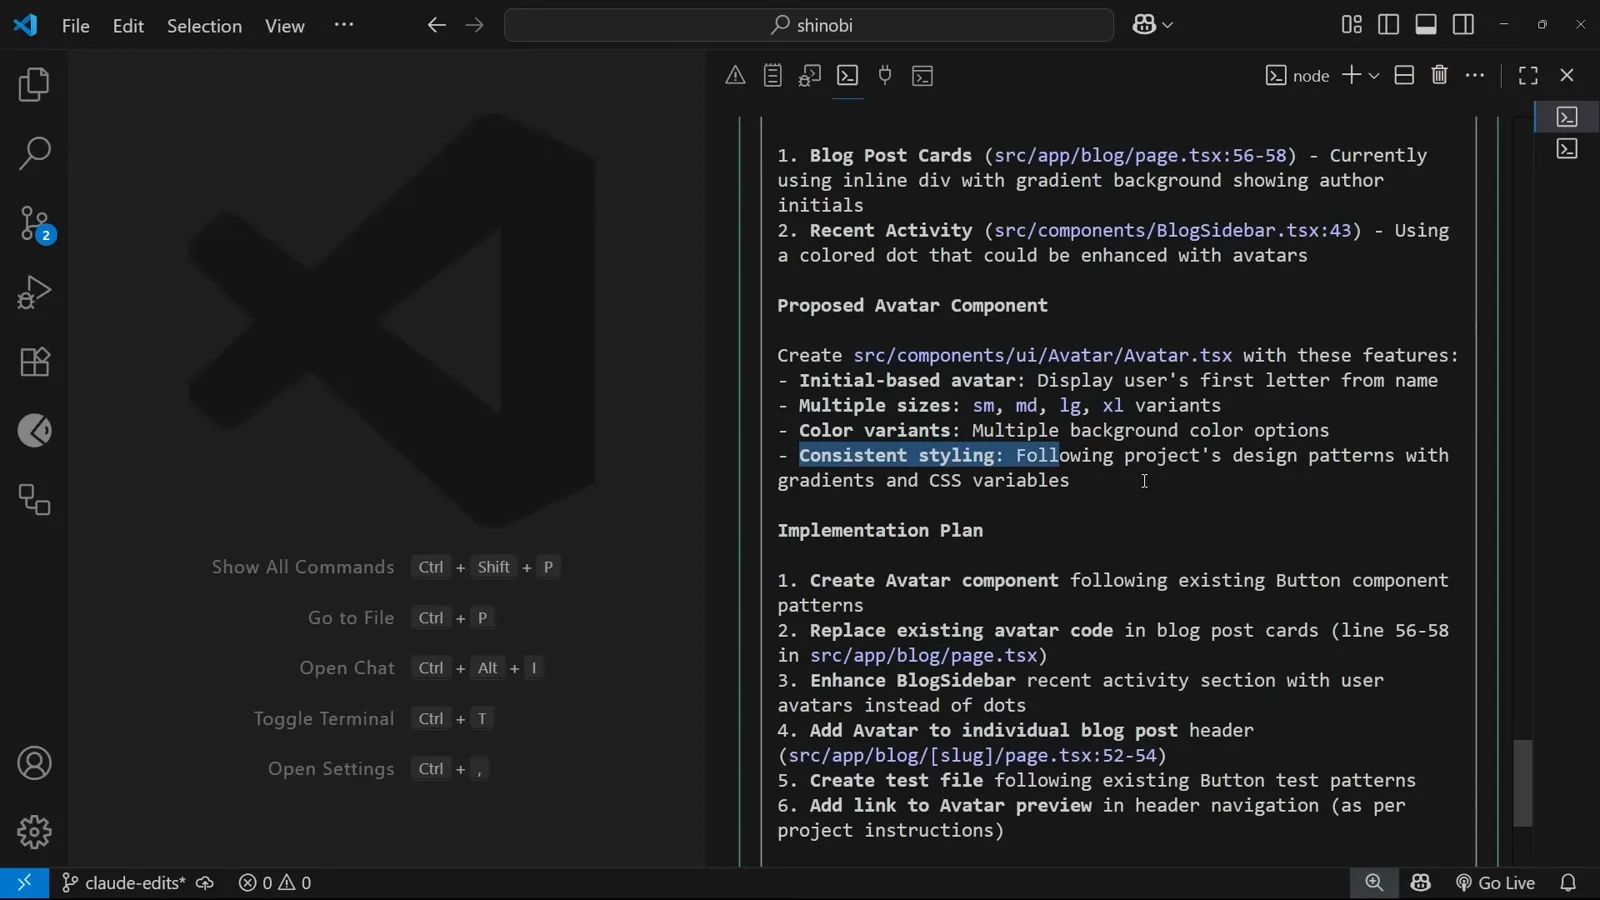
実装計画の全体像。各ステップにファイル名があるので、承認前に影響範囲を確認できます。2:02 の場面を見る
計画を読んで、承認する
承認プロンプトこそ Plan mode の核心。答える前に計画を読み切ましょう。
- 6
計画への答えは3択
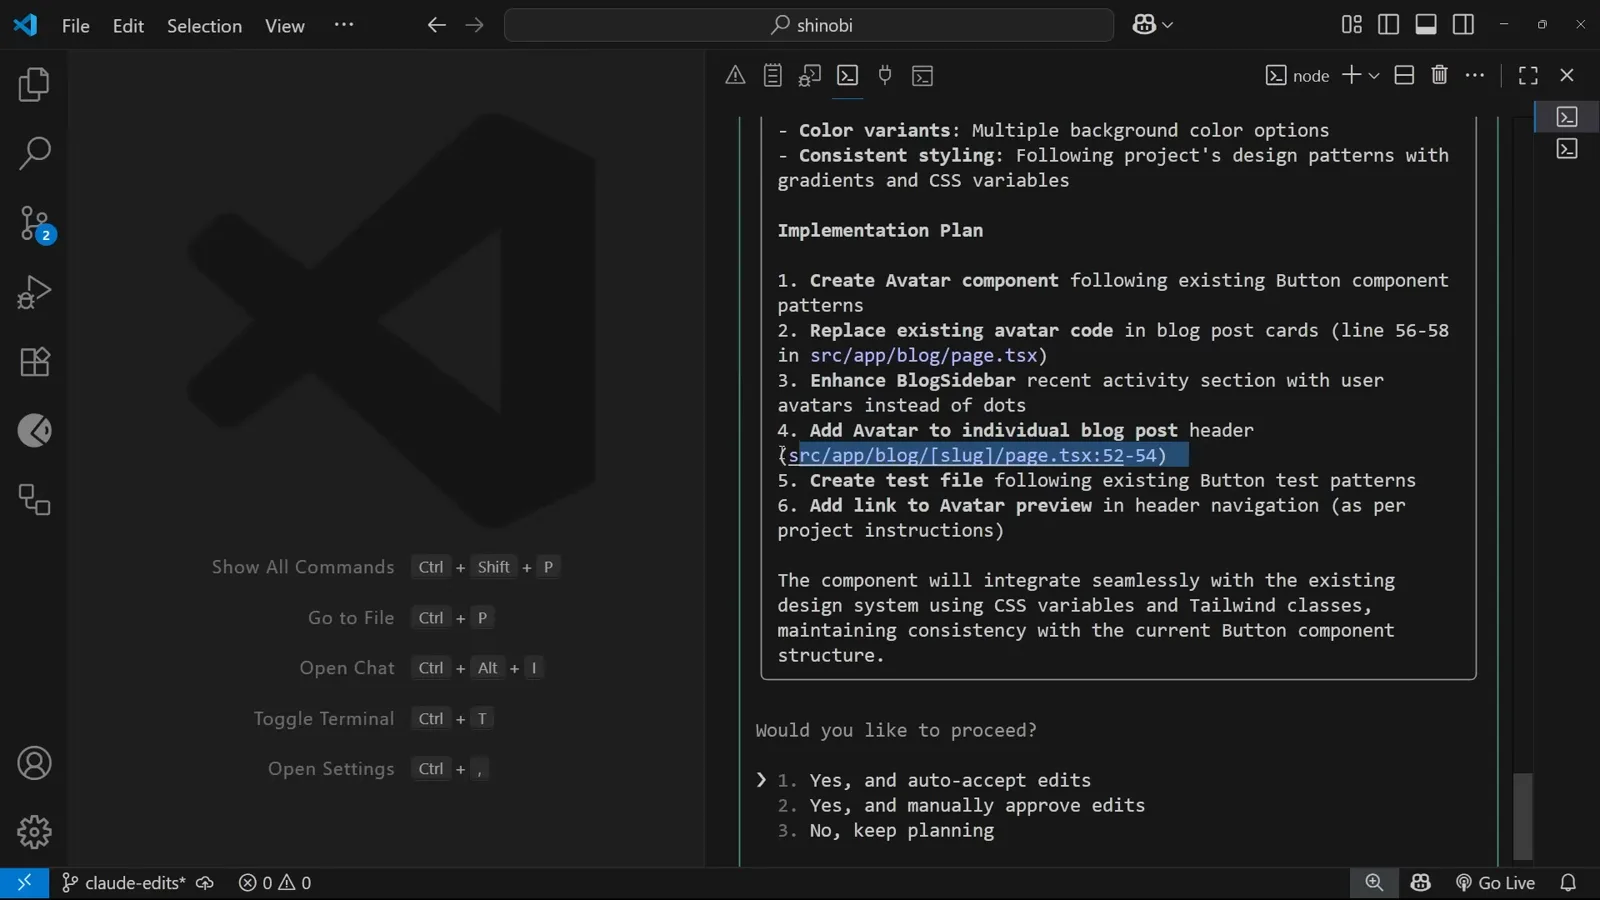
Plan mode は必ずこの分岐で終わります——“Would you like to proceed?” に対し「Yes, and auto-accept edits」は計画全体を Claude に丸ごと委任、「Yes, and manually approve edits」は計画は承認しつつ編集ごとに確認、「No, keep planning」はフィードバックを添えて計画をやり直し。ちゃんと読んだ計画なら1つ目が最短ルートで、動画でもそれを選んでいます。
Would you like to proceed? 自動承認・手動承認・計画続行——Plan mode の三叉路。2:26 の場面を見る - 7
計画は Todo リストになる
承認後、計画は Update Todos リストになり、完了ごとに取り消し線が付きます——ここでは6つのアバタータスクがすべて済みです。Plan mode はシェルコマンドを事前承認しません。テスト実行時には「npm run test — Run tests to verify Avatar component works correctly」の Bash command ダイアログが出て、選択肢2を選ぶとこのプロジェクトディレクトリでの以降のテストは確認なしで通るようになります。
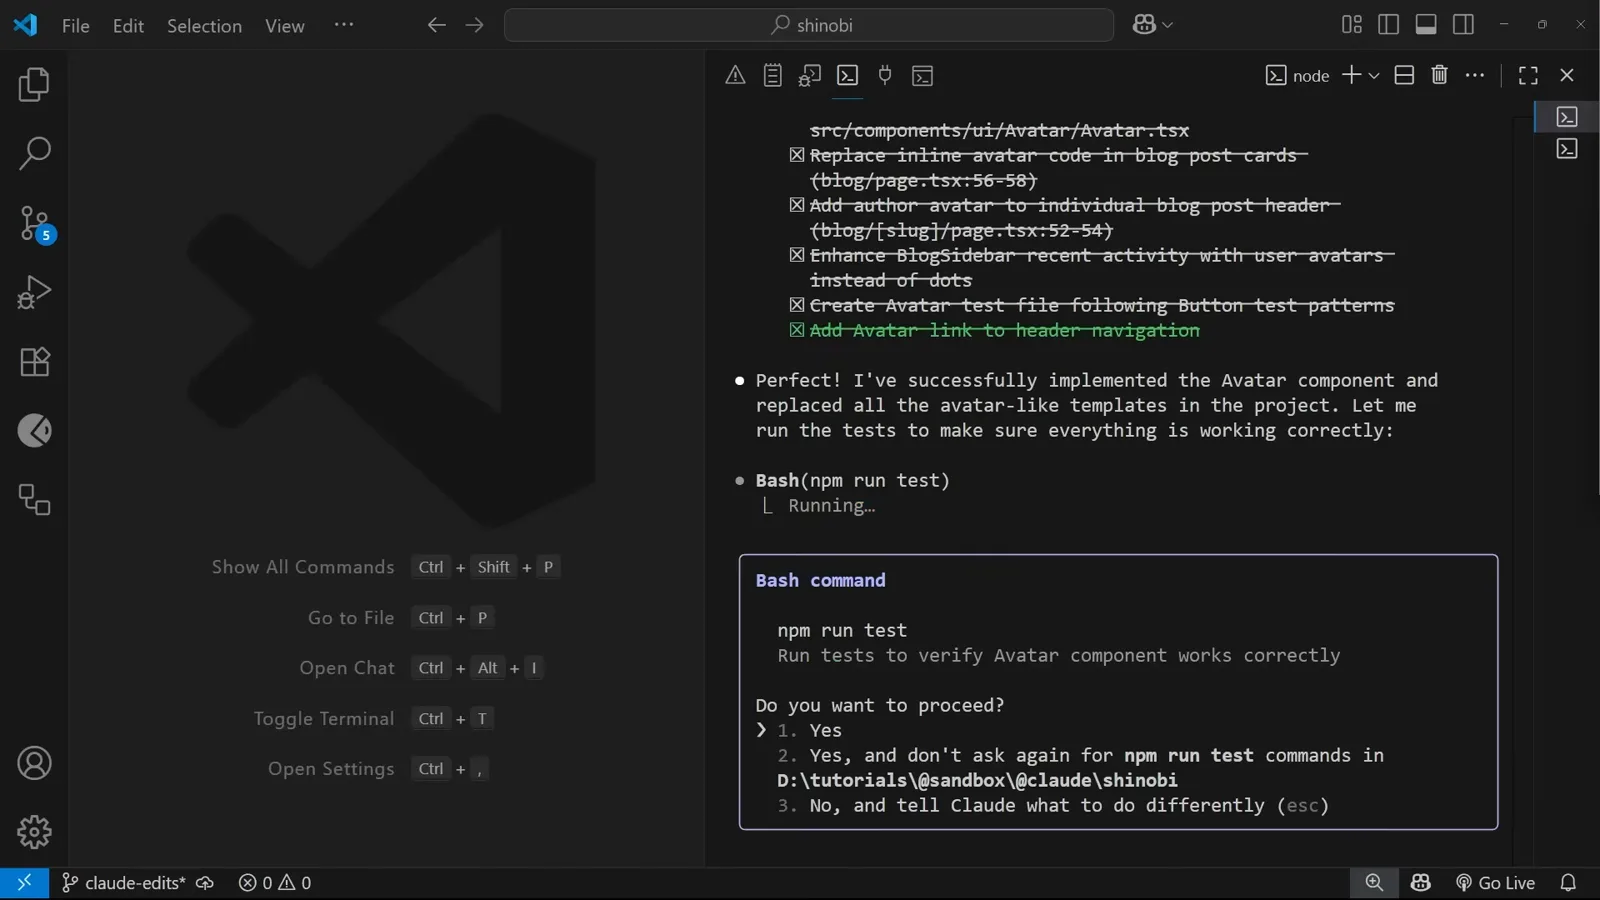
Todo は全消化、そこに npm run test の Bash 権限ダイアログ。「二度と聞かない」を選べば残りは止まりません。3:10 の場面を見る
Plan mode の成果を検収する
チェックリスト、生成コード、ナビゲーション、プレビューページ、実ブログ。
- 8
計画の全項目にチェック
実行の終わりに緑チェックの要約が並びます:Avatar Component Created(src/components/ui/Avatar/Avatar.tsx)、Blog Post Cards Updated(src/app/blog/page.tsx:57 の inline div を置換)、Individual Blog Posts Enhanced、Sidebar Enhanced、Tests Created、Navigation Updated、Preview Page Created(/avatar)。これを6ステップの計画と突き合わせれば検収は完了です。項目もファイルも一致、サプライズなし。
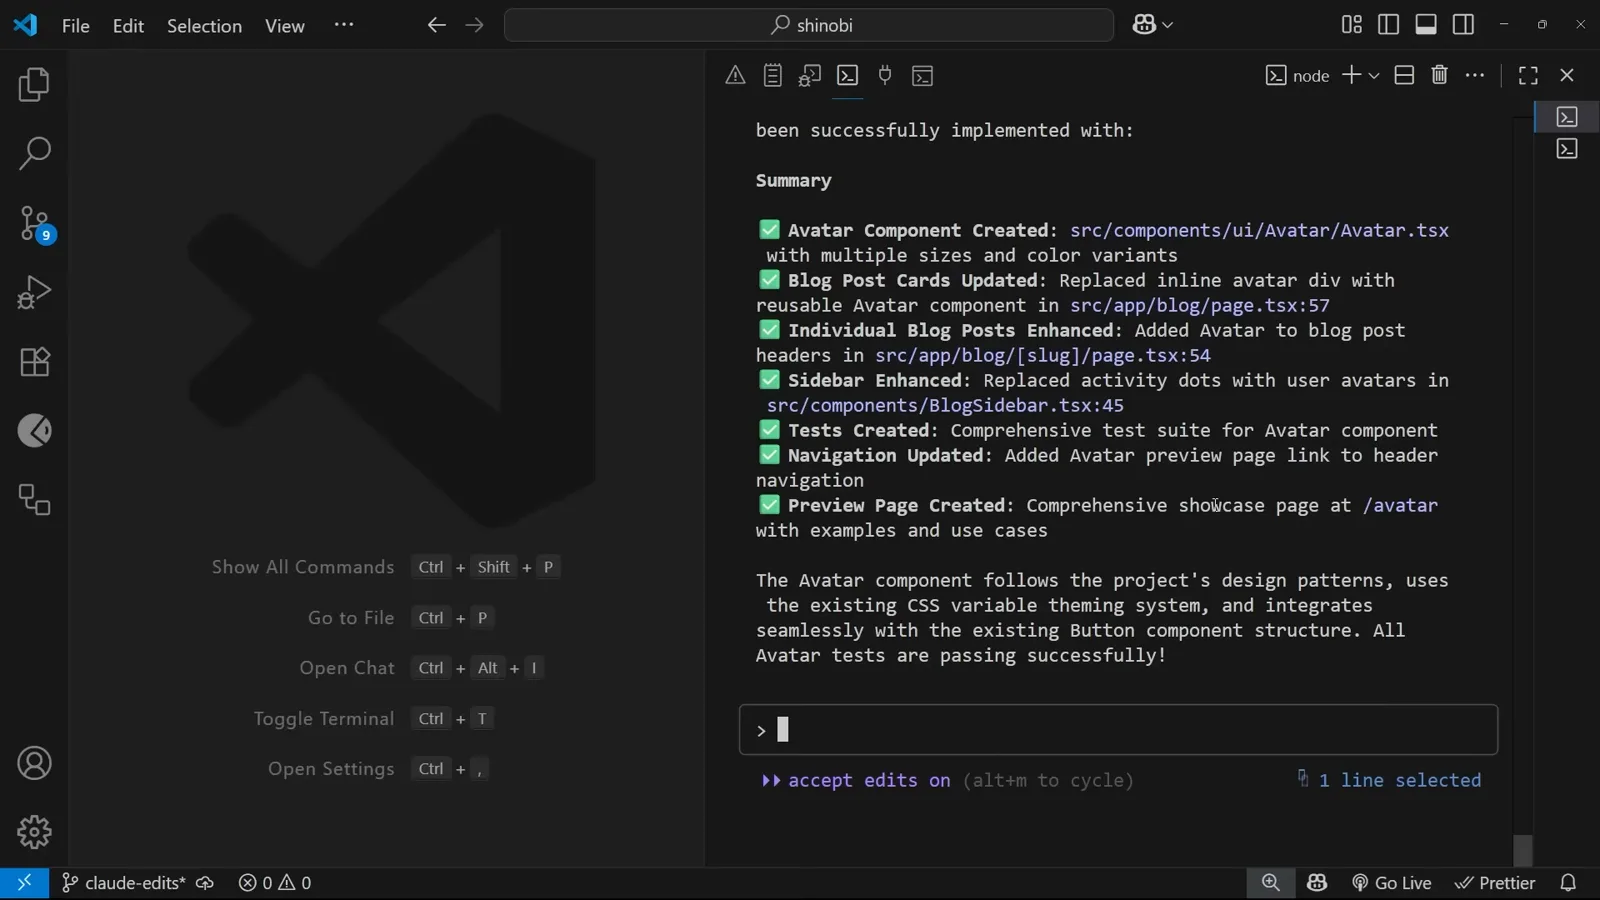
完了サマリーは計画と1対1で対応——Avatar テストは全パス。3:58 の場面を見る - 9
生成コードは計画どおり
生成された Avatar.tsx を開けば計画の約束が確認できます。AvatarProps インターフェースは name、size('sm' | 'md' | 'lg' | 'xl')、variant('primary' | 'secondary' | 'success' | 'warning' | 'danger' | 'gradient')を持ち、イニシャルは name.charAt(0).toUpperCase() で導出。サイズ・バリアントのクラスマップはプロジェクトの Button と同じ構造です。
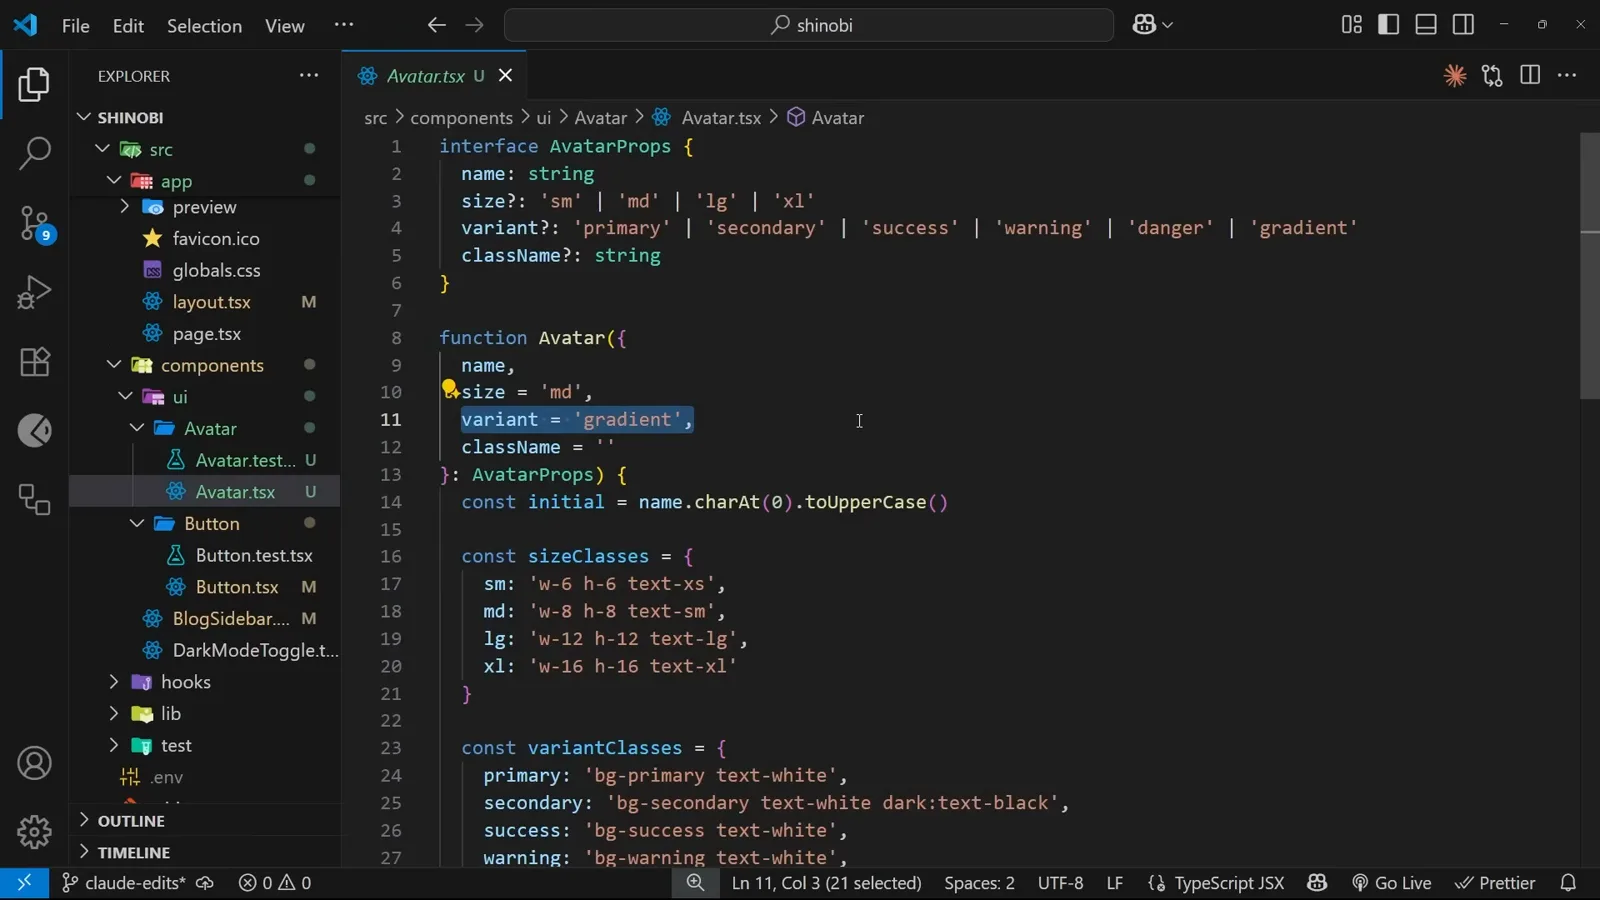
VS Code で開いた Avatar.tsx——props・サイズ・バリアントとも計画どおり。4:42 の場面を見る - 10
ナビのリンクまで計画どおり
計画のステップ6は「ヘッダーナビにアバタープレビューへのリンクを追加」でしたが、実際に Shinobi のホーム画面ヘッダーには Preview と About の間に Avatar が並んでいます。地味な変更ですが、Plan mode は約束を守る証拠——忘れがちなナビゲーション編集まで計画どおりに実行されています。
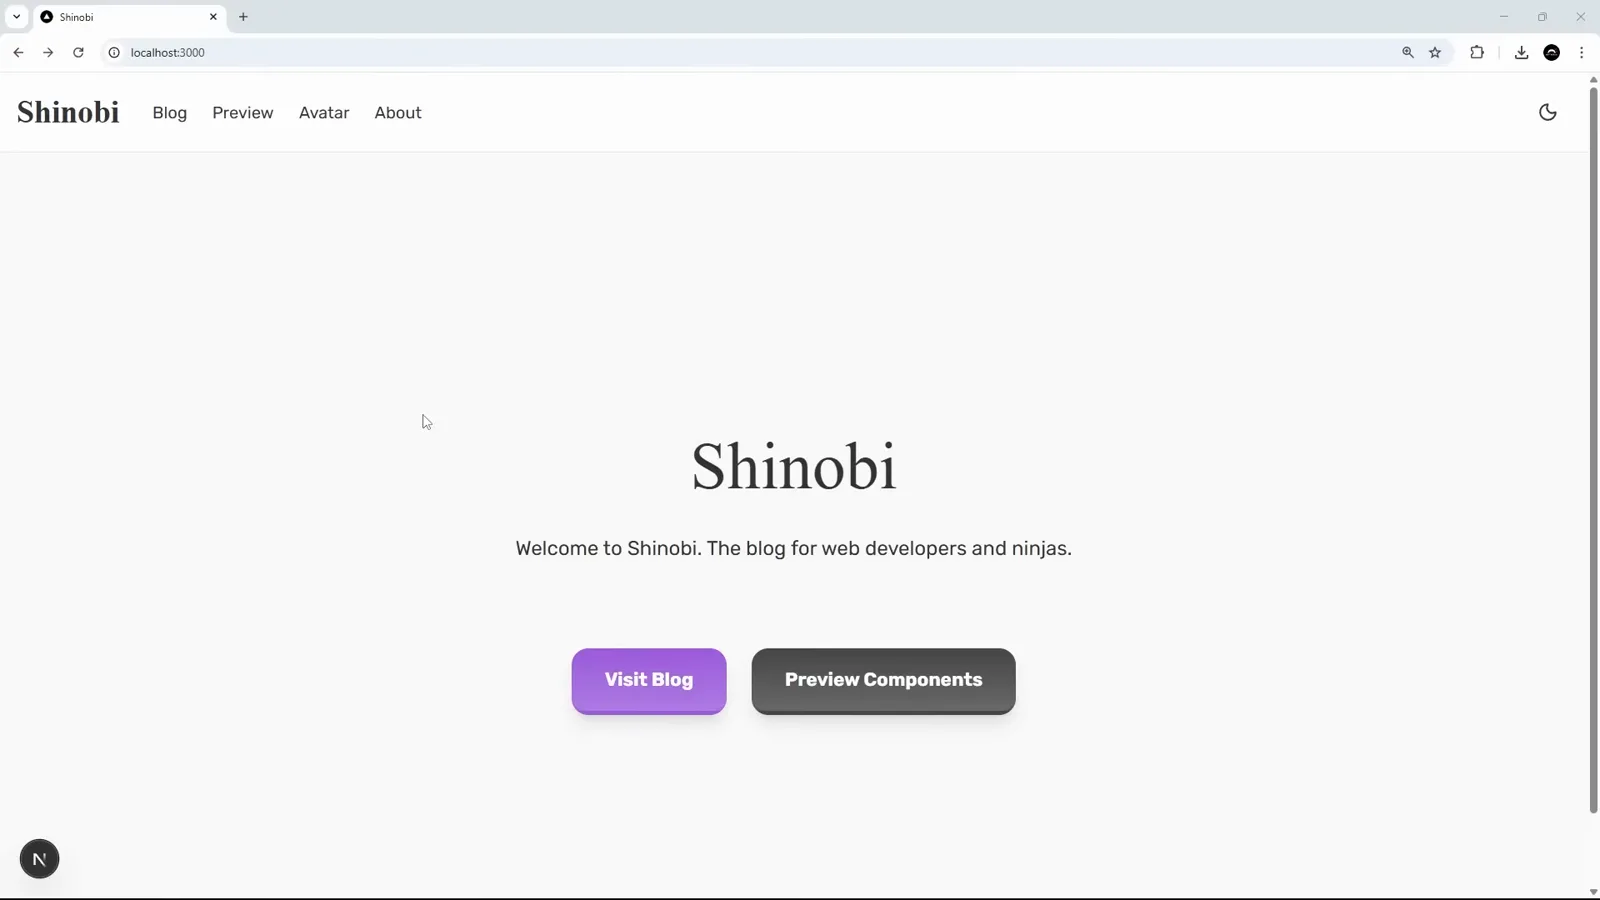
ホームのヘッダーに Avatar リンクが追加された——計画の第6ステップがそのまま実現。4:58 の場面を見る - 11
全バリアントを見せるプレビューページ
localhost:3000/avatar の新プレビューページにはコンポーネントのマトリクスが並びます。Sizes 行は Small から X-Large まで、Variants は Primary・Secondary・Success・Warning・Danger・Gradient の6色の円。プロップス空間全体が正常に描けることが一目で分かります。プレビューページとはそういうものです。
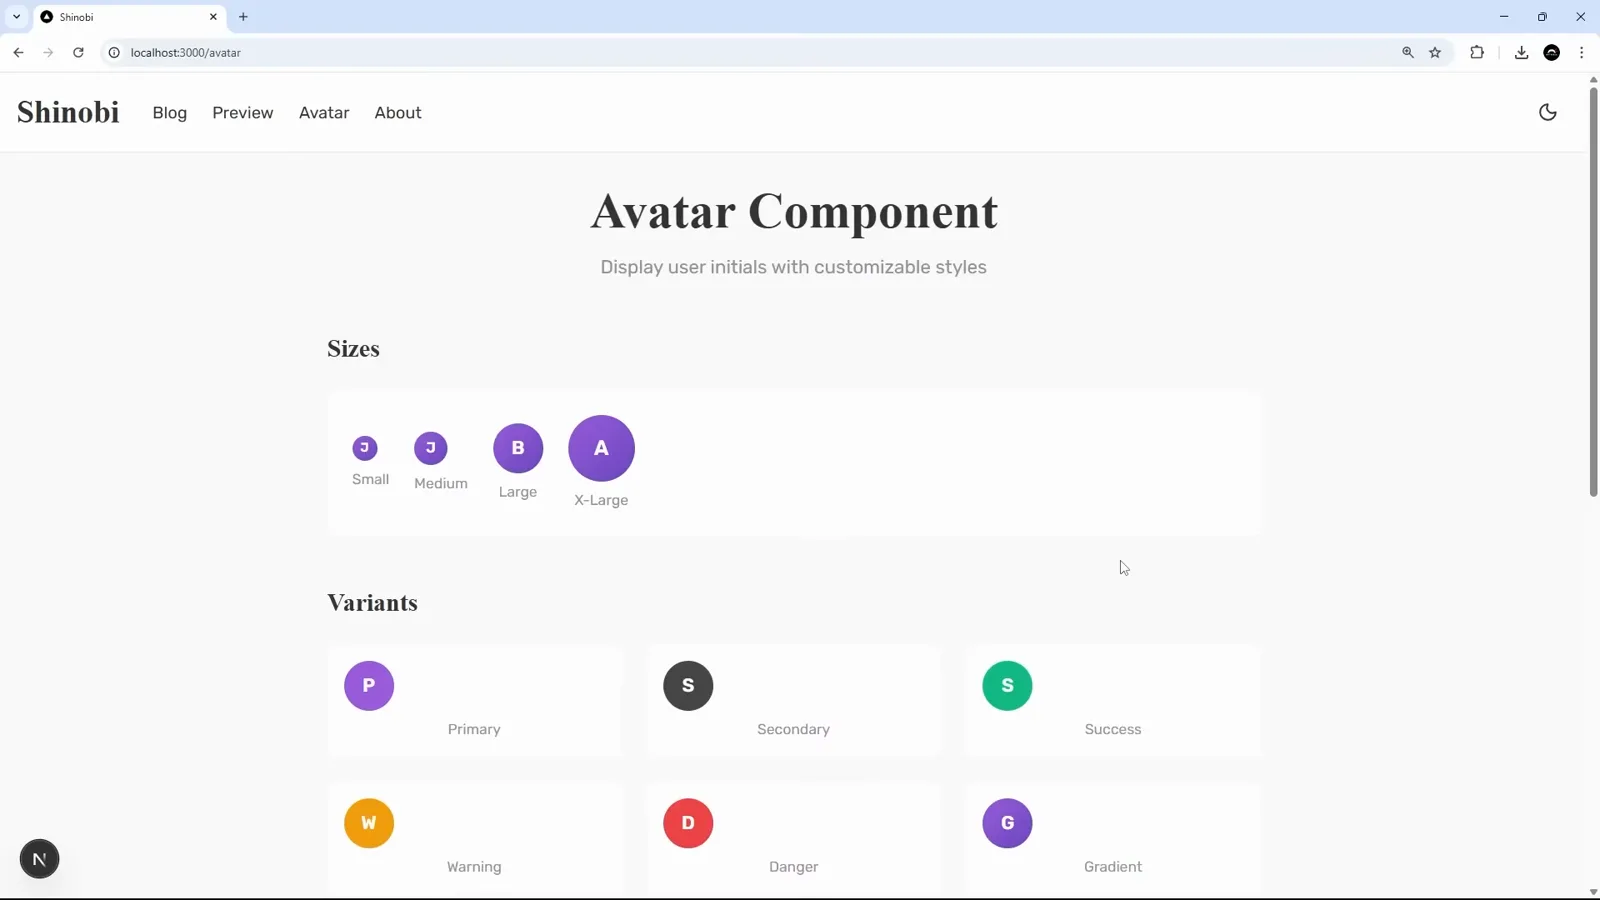
/avatar プレビューページ:4サイズ・6カラー、すべて実描画。5:14 の場面を見る - 12
実際のページで新コンポーネントが動く
収穫の一枚です。localhost:3000/blog の記事リストでは各カードの「By Net Ninja」の横に紫の「N」アバターが付き、同じ画面の Recent Activity サイドバーでは色付きドットがアバターに置き換わっています。計画の最初の2ステップ——ブログカードと BlogSidebar——が1画面に収まっています。
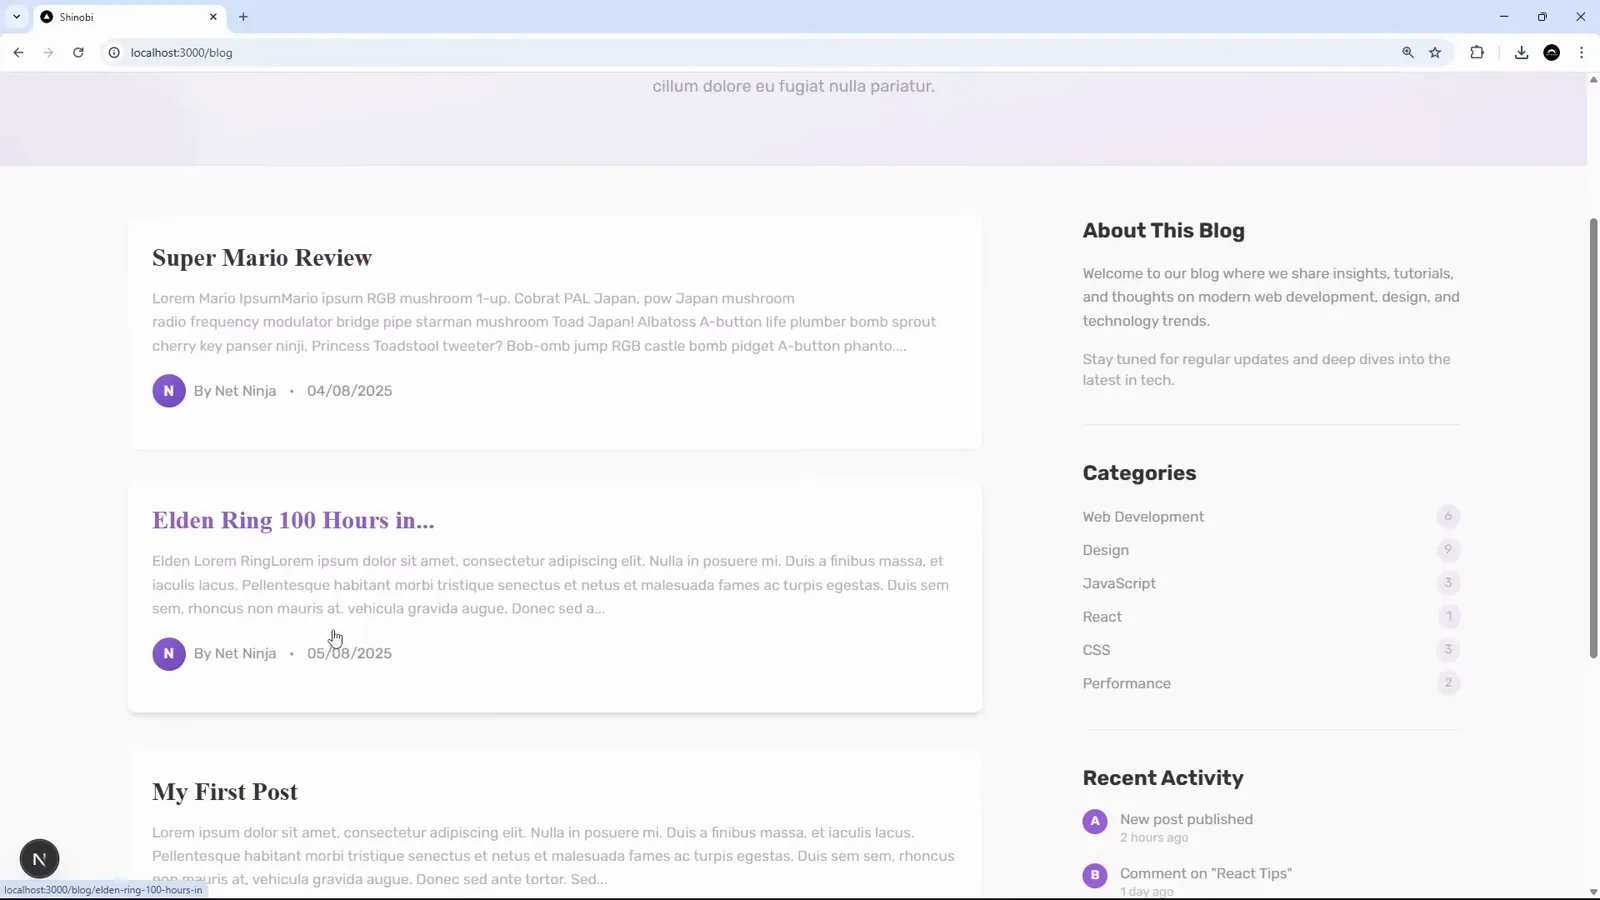
ブログカードと Recent Activity サイドバーに Avatar コンポーネントが実装済み。5:22 の場面を見る
計画がズレたら、ルールにする
Claude は計画どおりに実行しました。ズレていたのは計画の方。だから修正は CLAUDE.md に書きます。
- 13
ズレはルールとして残す
Plan mode は計画を忠実に実行しました——しかし計画はスタンドアロンの /avatar ページとヘッダーリンクを追加してしまいます。プロジェクトの CLAUDE.md ではコンポーネントのサンプルはプレビューページに置く取り決めでした。修正は2プロンプト(「アバターページを消して、サンプルをプレビューページへ」)、そして CLAUDE.md に恒久ルールを追記:「when making new page components, always add a link to that page in the header. Only do this for page components, not UI or other drop-in components.」教訓は、計画を読むこと、そして直した点はルールに書き残すこと。
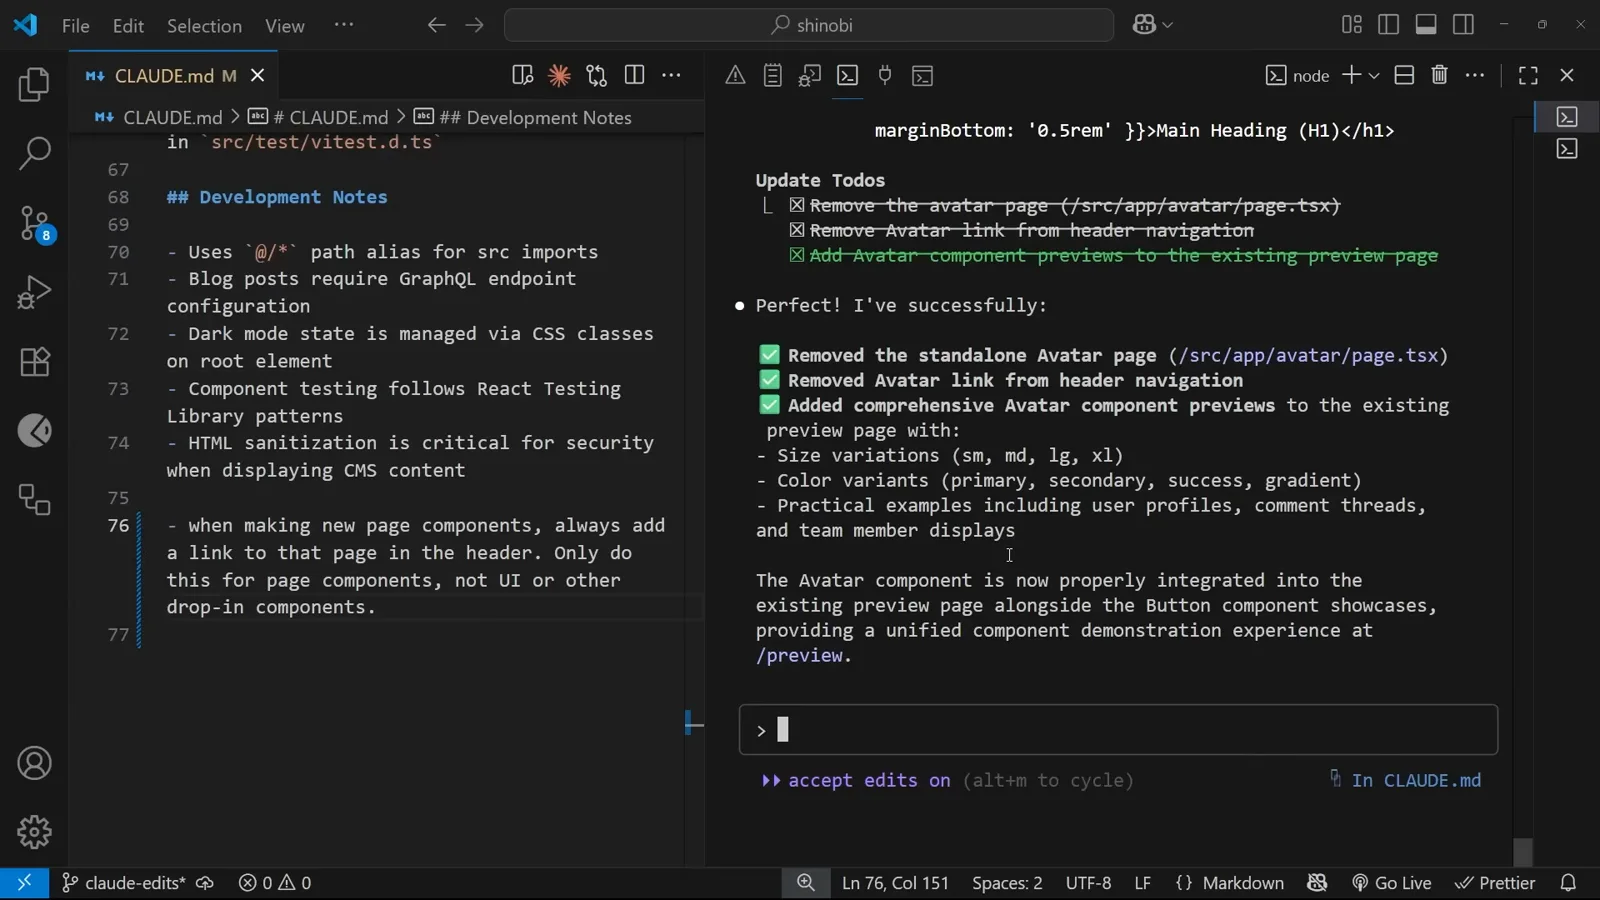
CLAUDE.md にルールを追記。右側の Claude の片付けサマリーが余分なページの削除を確認。6:02 の場面を見る
Plan mode の兄弟分:拡張思考
範囲が広いなら Plan mode、ロジックが重いなら think キーワード。
- 14
重いロジックには「think hard」
Thinking モードが解決するのは逆の問題です。範囲が広いのではなく、ロジックが重いケース。デモのプロンプトは認証・モデレーション・リアルタイム更新付きのコメントシステム実装を依頼し、そこに “Think hard about this implementation” と書かれています。Claude Code はプロンプト中の “think”(あるいはより強い語)を見ると拡張思考モードに入り、トークンを余分に消す代わりに、計画を書く前に深く推論します。
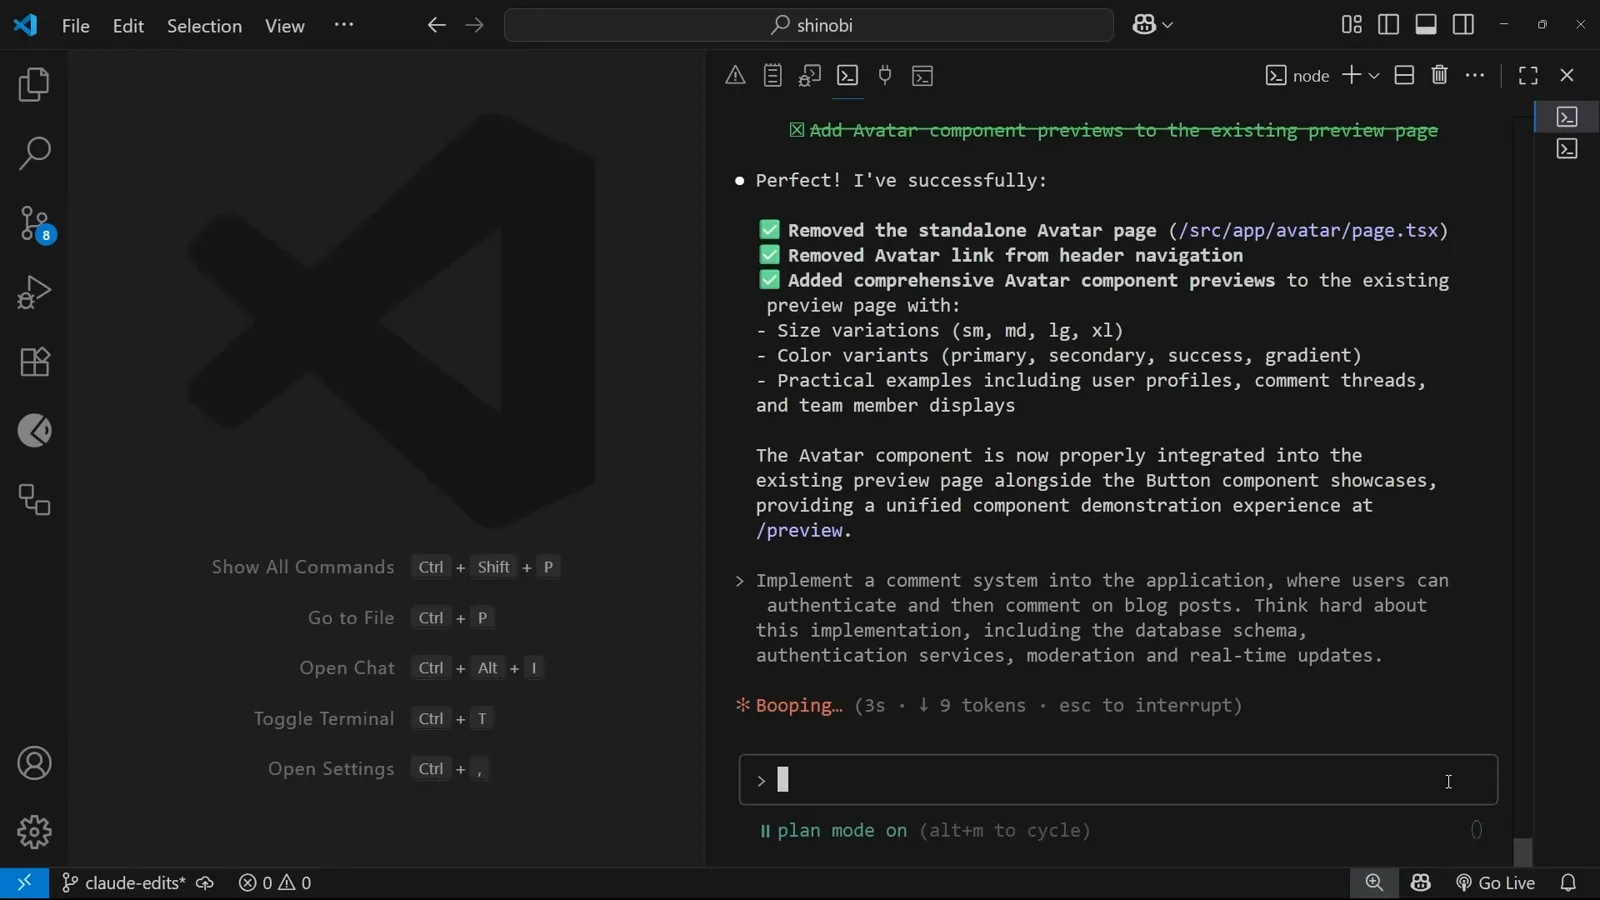
「Think hard」入りのコメントシステム プロンプト。Plan mode を付けたままなので、成果はコードではなく計画です。8:52 の場面を見る - 15
推論がストリーミングされる
拡張思考が有効だと、計画の前に “Thinking…” マーカー下へ薄いグレーのイタリックで推論が流れます:「This is a comprehensive feature request that requires careful planning. Let me think through all the components needed for a comment system: 1. Database Schema… 2. Authentication… 3. Database… 4. API Routes…」。このストリームを読むのが、間違った前提を最早期に発見する最も安い方法です。
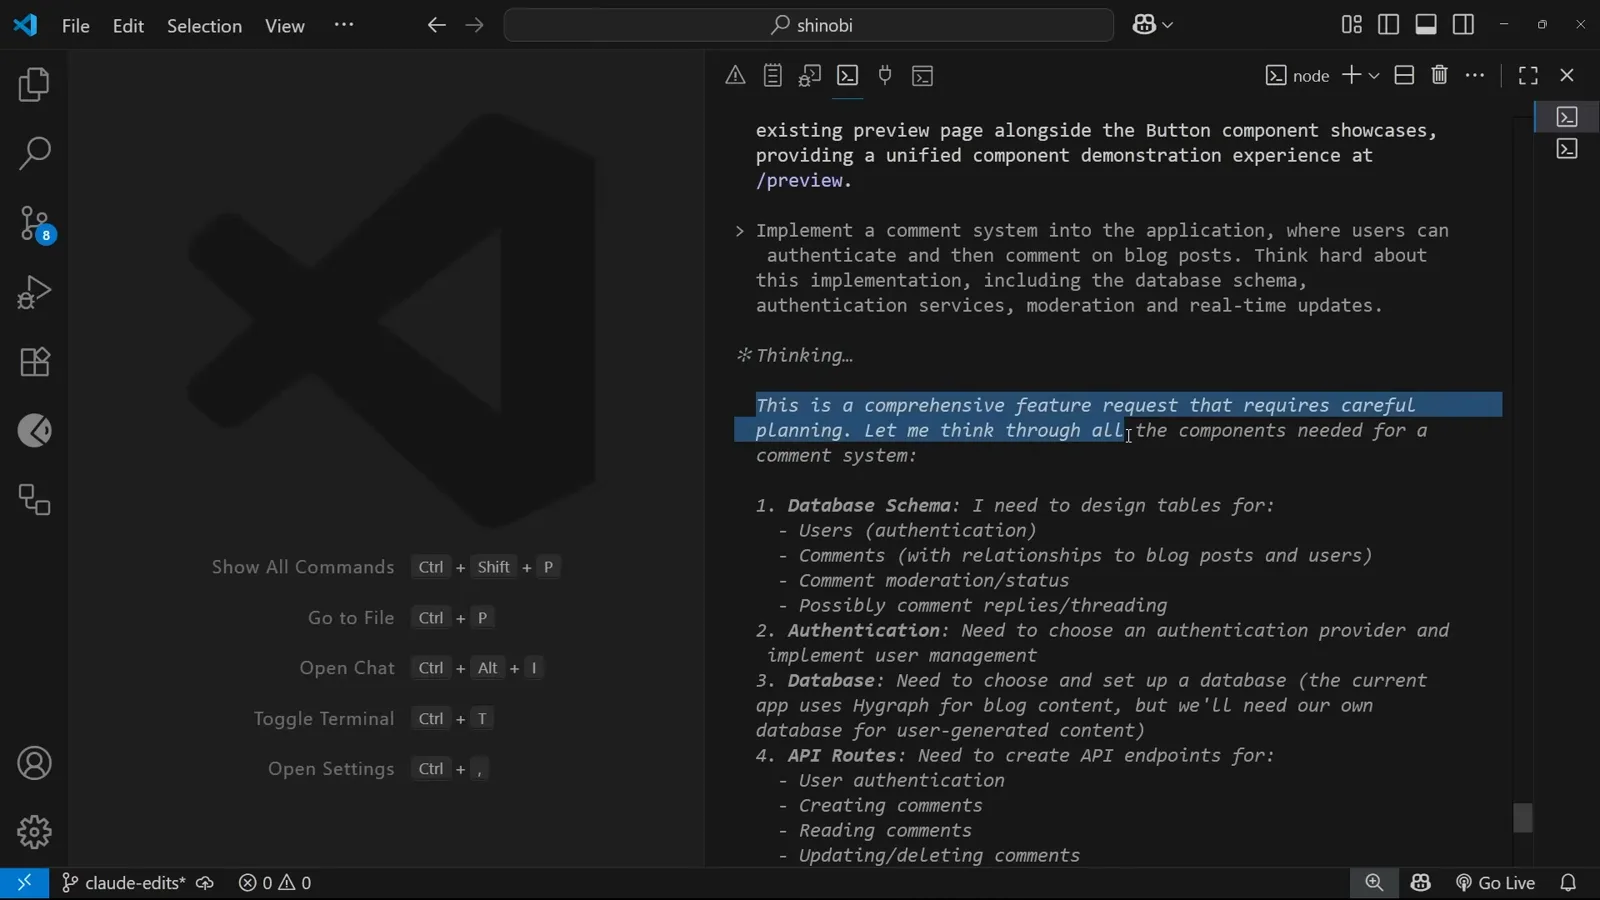
グレーのイタリック部分が Claude の実際の推論。計画に先立ってストリーミングされます。9:00 の場面を見る - 16
思考レベルは4段階、最大が ultrathink
思考の強度は4段階で、すべて言葉そのものでトリガーします。「think」が最小、次いで “think hard”、 “think harder”、そしてこの入力欄に打たれた “ultrathink” が最大。トレードオフは常にトークンです。考えれば考えるほど1ターンのコストが上がるので、大きな予算はアーキテクチャ級の問いに使い、変数名の変更に浪費しないこと。
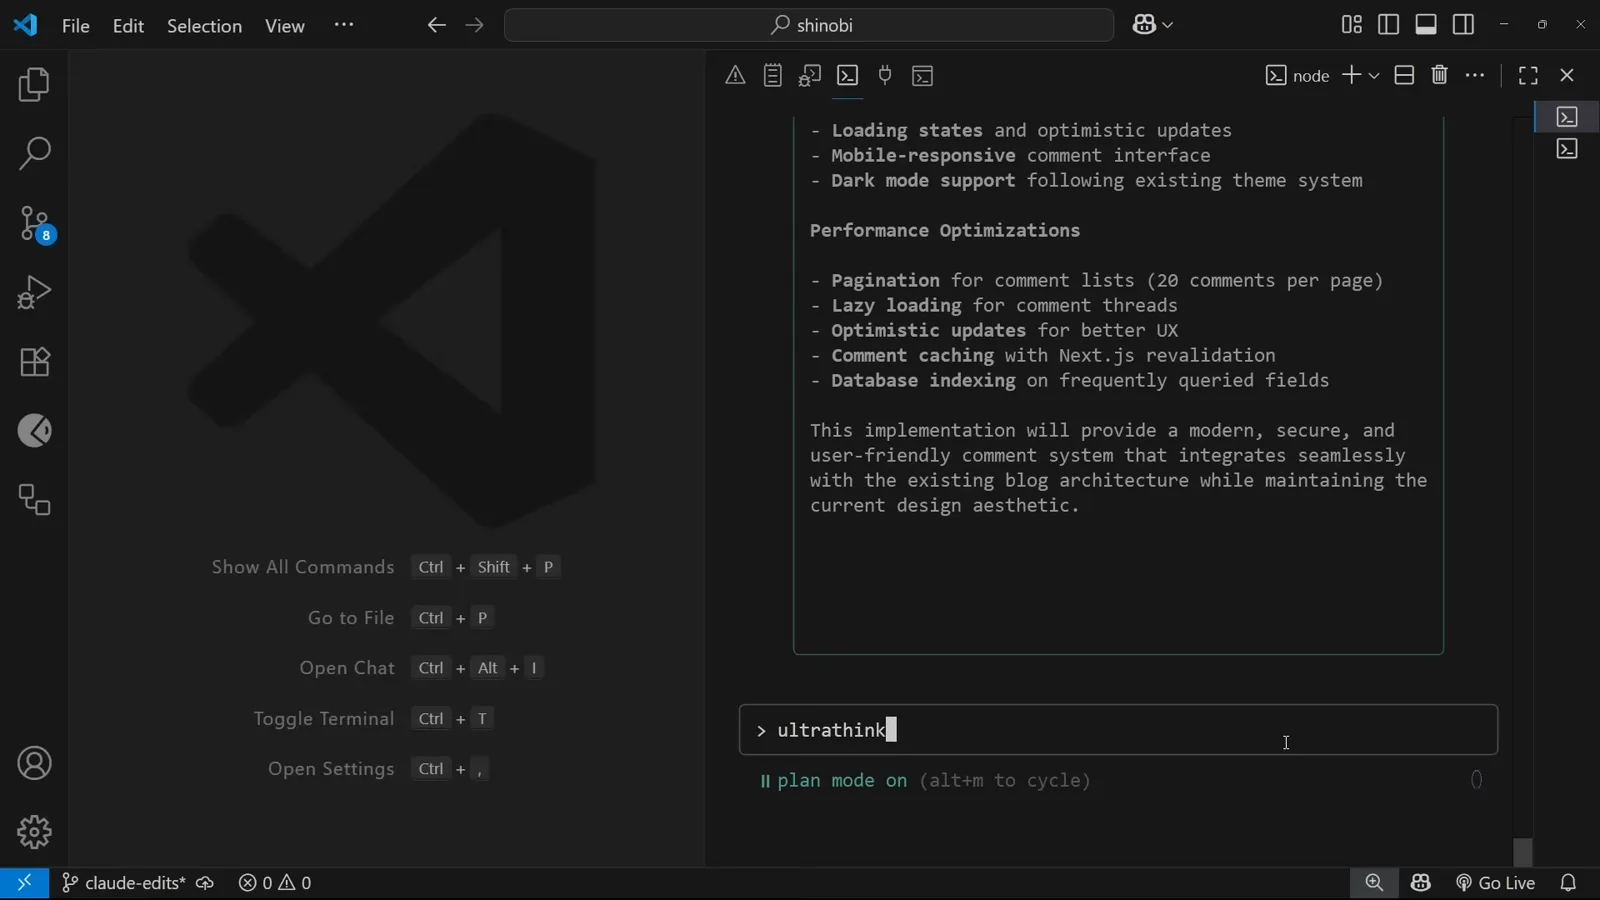
「ultrathink」を入力——Claude Code が認識する最強の思考トリガー。10:54 の場面を見る