
機能徹底解説
Claude Code × Git Worktrees 並行作業ガイド:複数セッションを衝突なしで回す
セッションを claude --worktree で起動すれば、エージェントごとに .claude/worktrees 配下の独立したチェックアウトが手に入る——機能を2つ同時進行、プロンプト1つでランディングページ案を5つ、ブランチ切り替えは不要。
画像付きの12ステップ解説。読了時間は約4分。各ステップから元動画の該当シーンへ飛べます。
要点まとめ
git worktree は同じリポジトリの別ブランチを別フォルダにチェックアウトする機能で、フォルダ同士は同じ git データを共有します。素の claude の代わりに claude --worktree を実行すると、Claude Code が .claude/worktrees/<ランダム名> にそのセッション専用の worktree を作成。ターミナルを2つ開いても、同じリポジトリを互いに干渉せず編集できます。前提条件は git init 済みでコミットが1件以上あることだけ。サブエージェントはプロンプトで都度 worktree 分離を依頼できるほか、.claude/agents のエージェントファイルのフロントマターに isolation: worktree と書けば恒常的に有効になります。
元動画
このページは Developers Digest による Claude Code worktree デモの録画を辿り、手順を1コマずつ再構成したものです。スクリーンショットはすべて元動画の該当時刻にリンクしています。
スクリーンショットは動画のフレームをクレジット付きで引用したものです。文章は弊社オリジナル。手順は2026年9月に動画と Claude Code 公式ドキュメントに対して検証済み。
guide_claude_code_worktrees.sections.why_worktrees_title
guide_claude_code_worktrees.sections.why_worktrees_subtitle
- 1
worktree とは
git worktree は同じリポジトリの別ブランチを別フォルダにチェックアウトする仕組みです。各フォルダは自分のファイルだけを編集しますが、git データ自体は共有——feature1 フォルダは Feature-1 ブランチに留まり、main は自分のフォルダで一切影響を受けません。
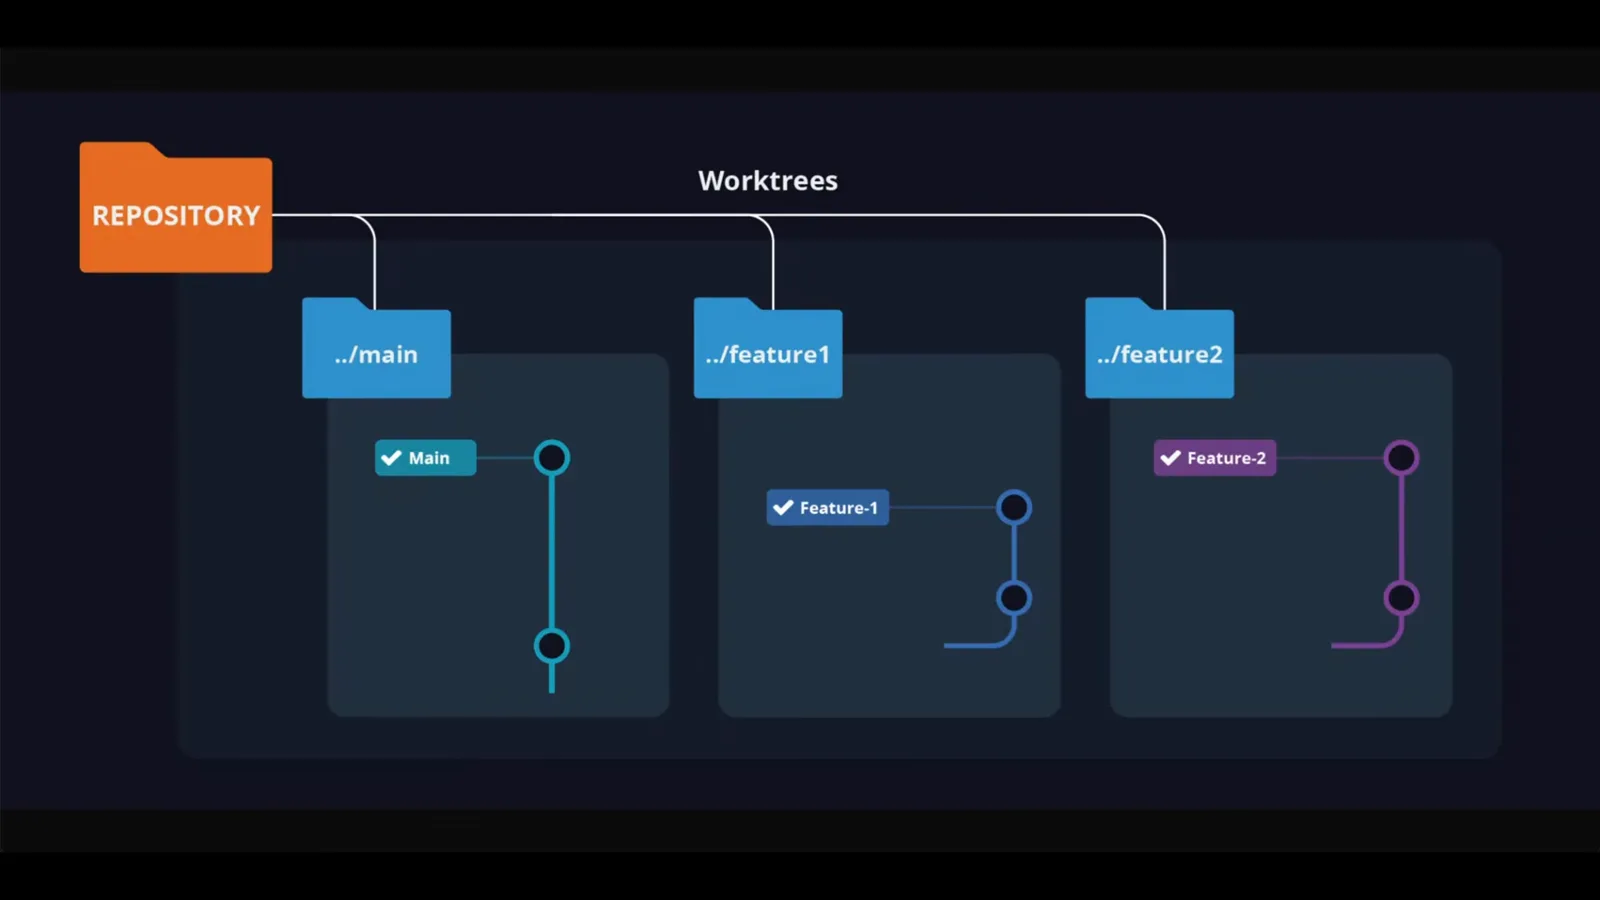
リポジトリ1つ、フォルダ3つ、ブランチ3本——動画の冒頭で示される図です。0:30 から視聴 - 2
最初のコミットを用意する
worktree にはブランチを切れるリポジトリが必要です。動画では demo-app フォルダで git init、touch で index.html を作成し、git add と git commit でまとめてコミット。条件はコミットが1件以上あることだけで、あとは Claude Code が処理します。
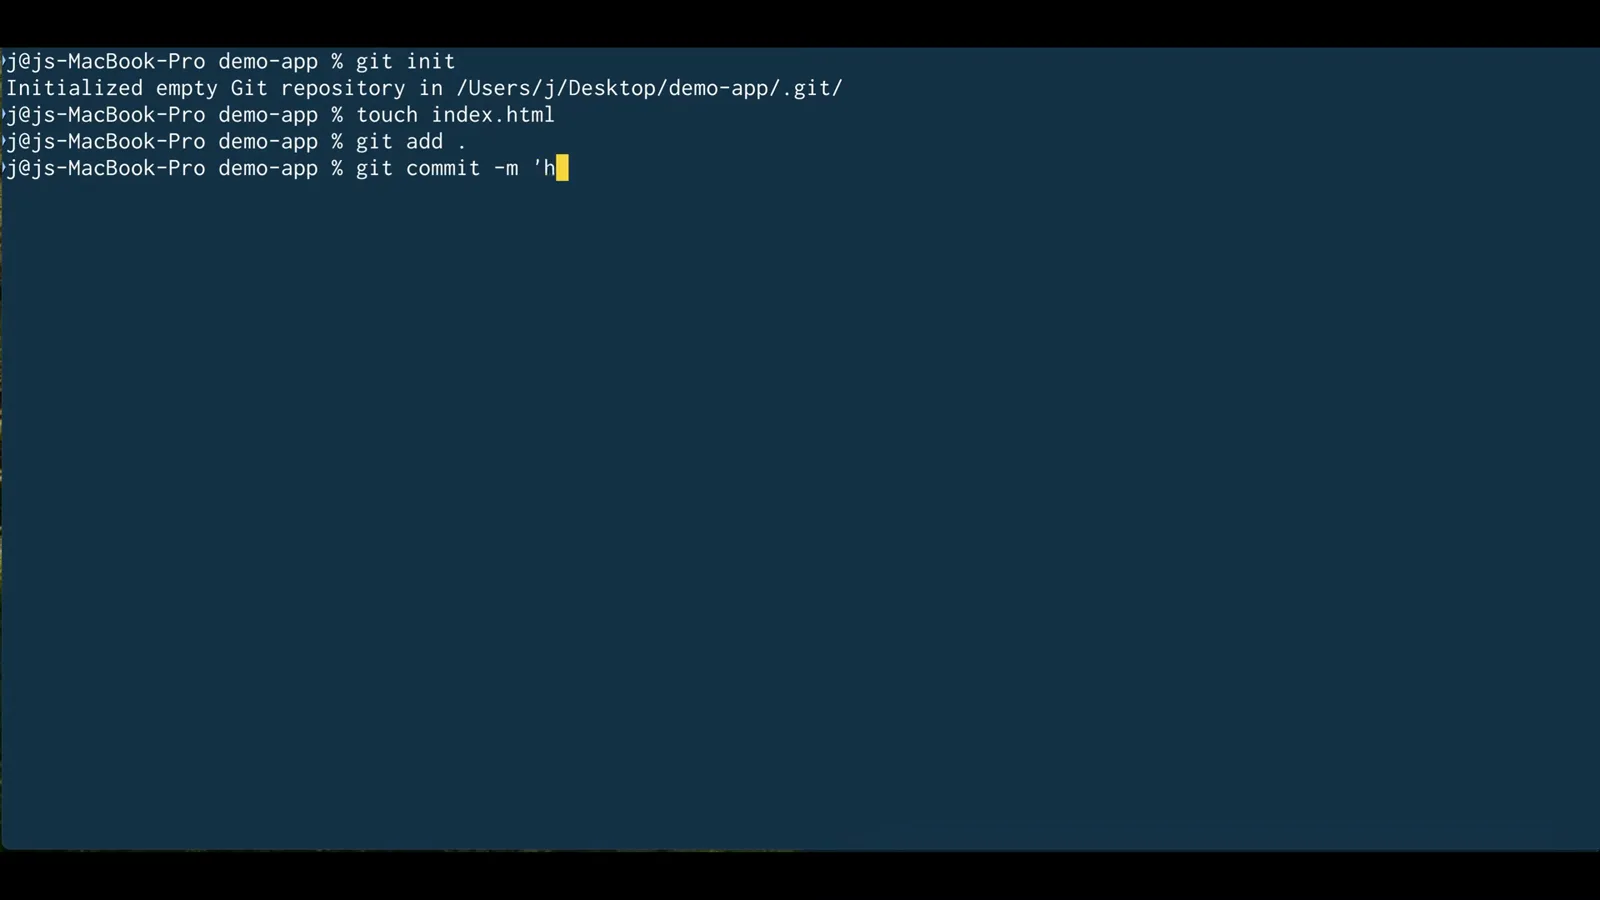
動画で手動で行う準備はこれだけ:init、ファイル1つ、コミット1回。1:10 から視聴
guide_claude_code_worktrees.sections.parallel_sessions_title
guide_claude_code_worktrees.sections.parallel_sessions_subtitle
- 3
claude --worktree でセッション開始
素の claude ではなく claude --worktree と入力します。ウェルカム画面にこのセッションの居場所が表示されます:demo-app ルートではなく .claude/worktrees/clever-munching-toast。ランダムな名前が並行セッションの衝突を防ぎます。
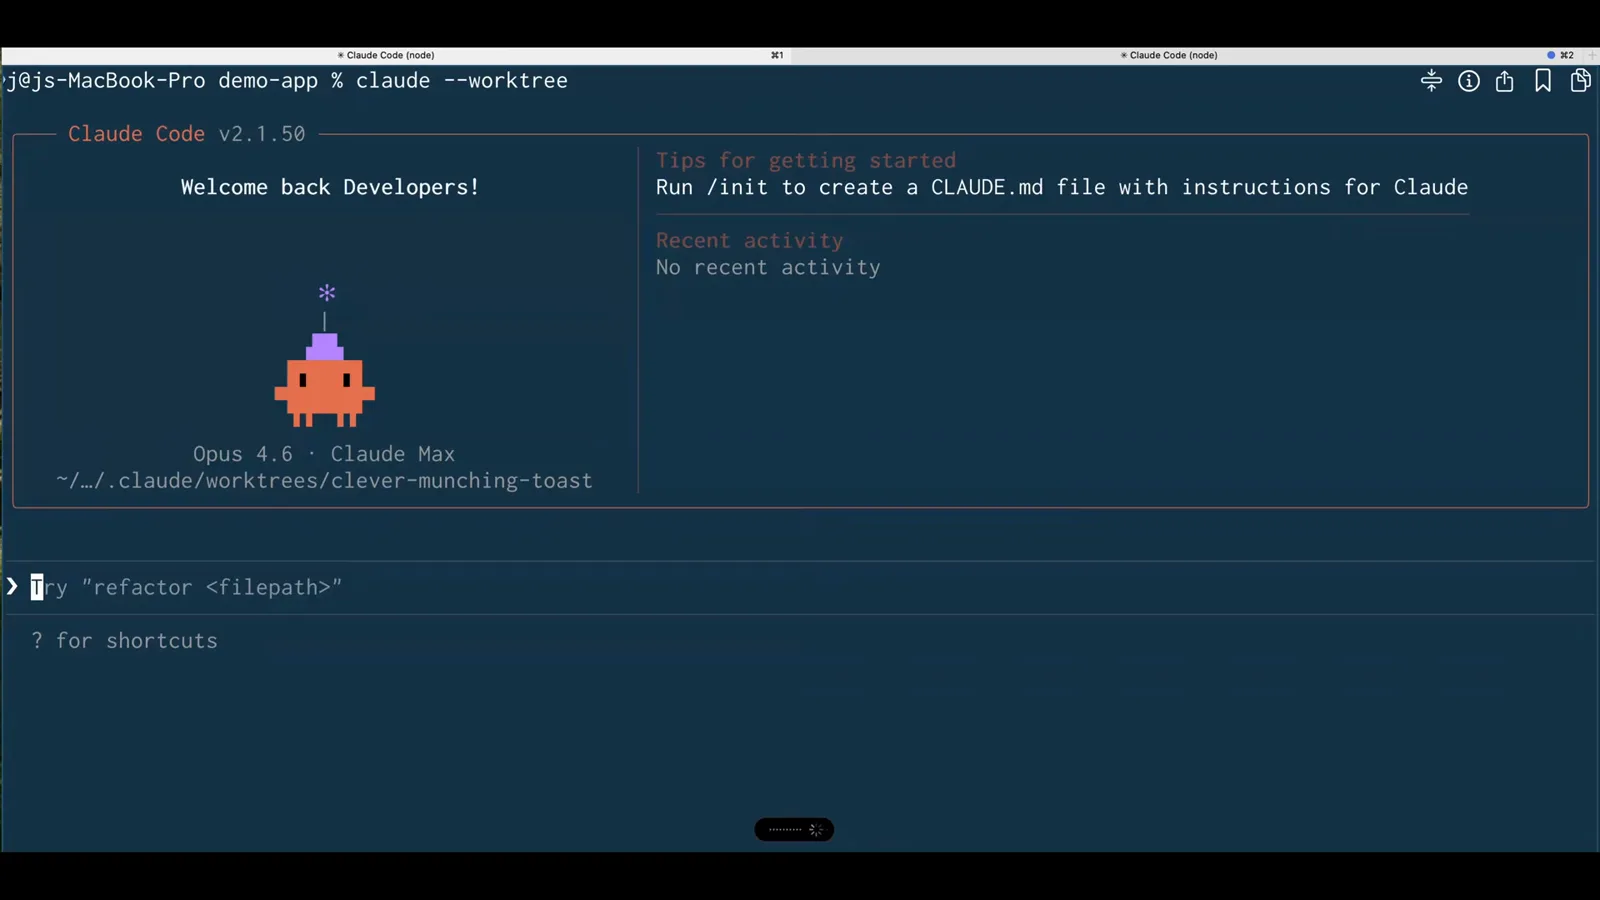
ウェルカムバナーに、このセッションが編集する自動作成済み worktree の名前が表示されています。1:30 から視聴 - 4
ターミナルをもう1つ開いて再実行
並行化こそが本丸です。同じディレクトリでもう1つターミナルを開き、claude --worktree を再実行。今度は .claude/worktrees/spicy-napping-otter がルートになります。2つのエージェントが同じリポジトリの index.html を、互いの変更を見ずに同時編集できる状態です。
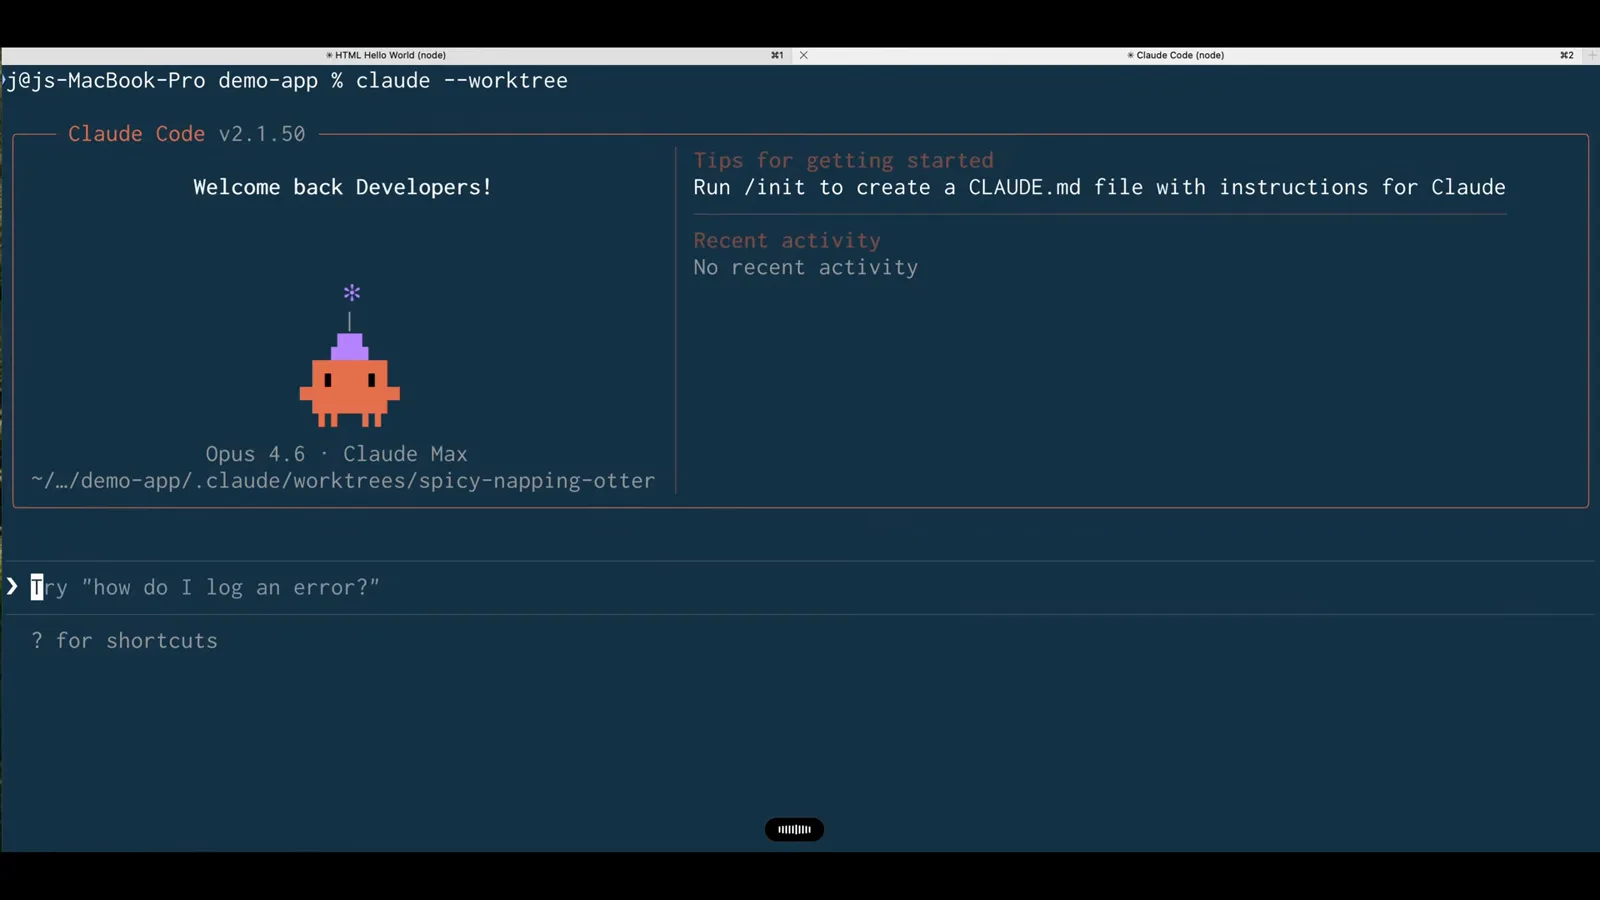
同じコマンド、同じリポジトリ、別フォルダ——ワークフローはこれだけ。1:36 から視聴 - 5
1つ目のセッションにタスクを渡す
1つ目のセッションには「HTML を黒背景の hello world にして」と依頼します。index.html に24行を書き込み、Done と報告。セッションは自分の worktree だけを編集するので、メインのチェックアウトには一切影響しません。
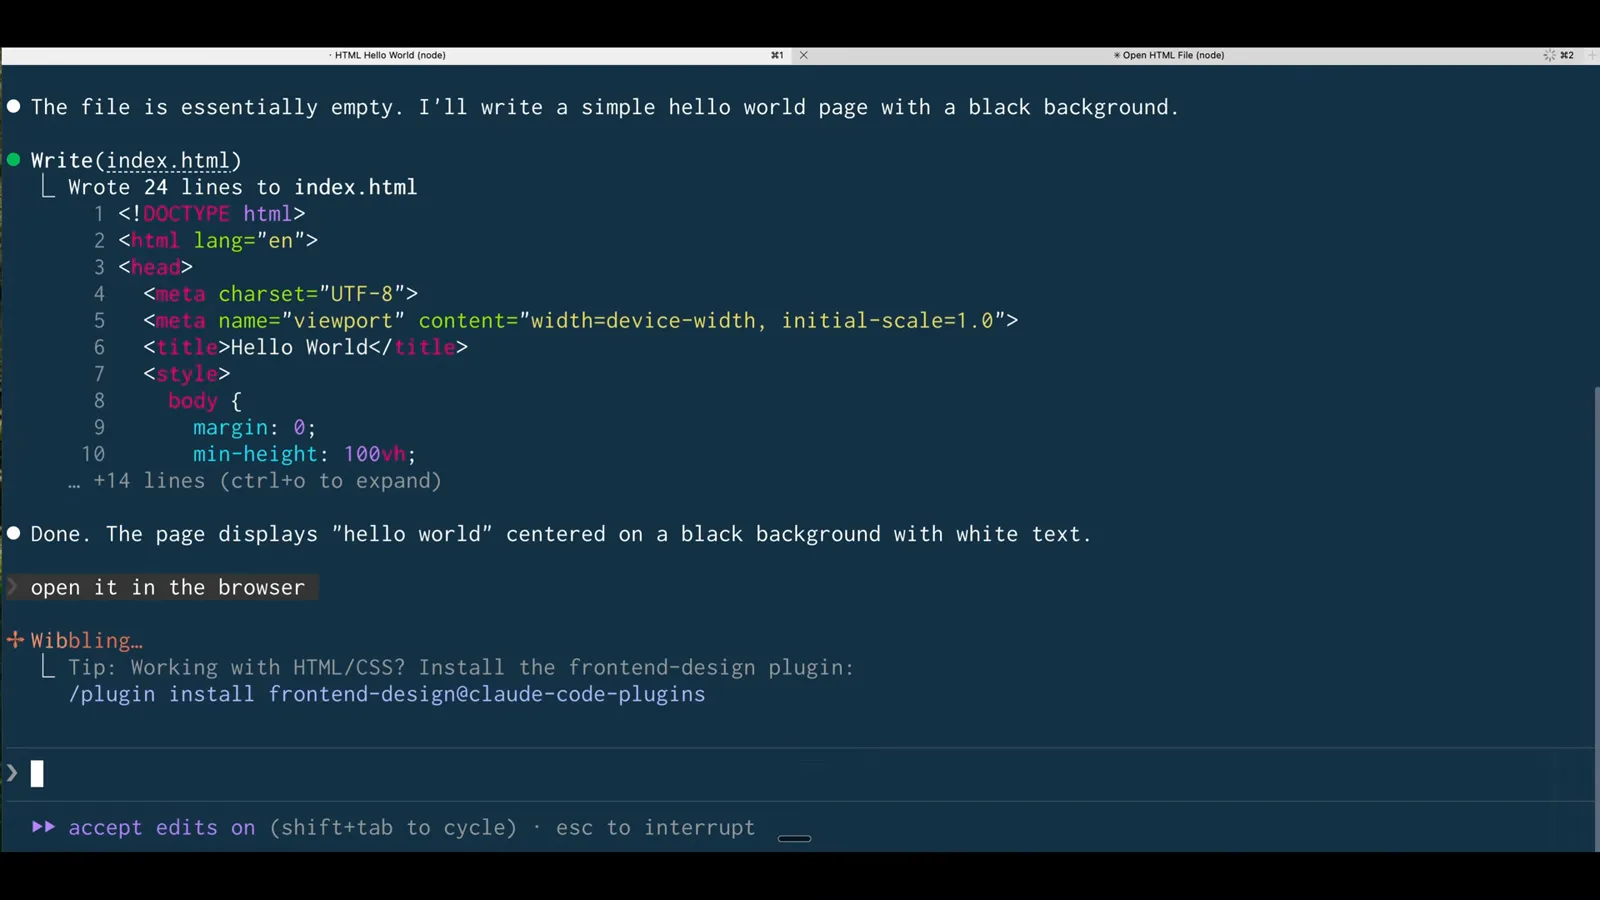
セッション1は clever-munching-toast の中に黒背景ページを書き出しました。1:40 から視聴 - 6
2つの結果を並べて比較
両セッションがページをブラウザで開きます。黒の hello world は clever-munching-toast の URL、紫の hello world は spicy-napping-otter の URL。間に挟まった Finder ウィンドウには .claude/worktrees のフォルダが見え、セッションごとにサブフォルダが1つ。同じリポジトリを2回チェックアウトし、それぞれ別々に変更した状態です。
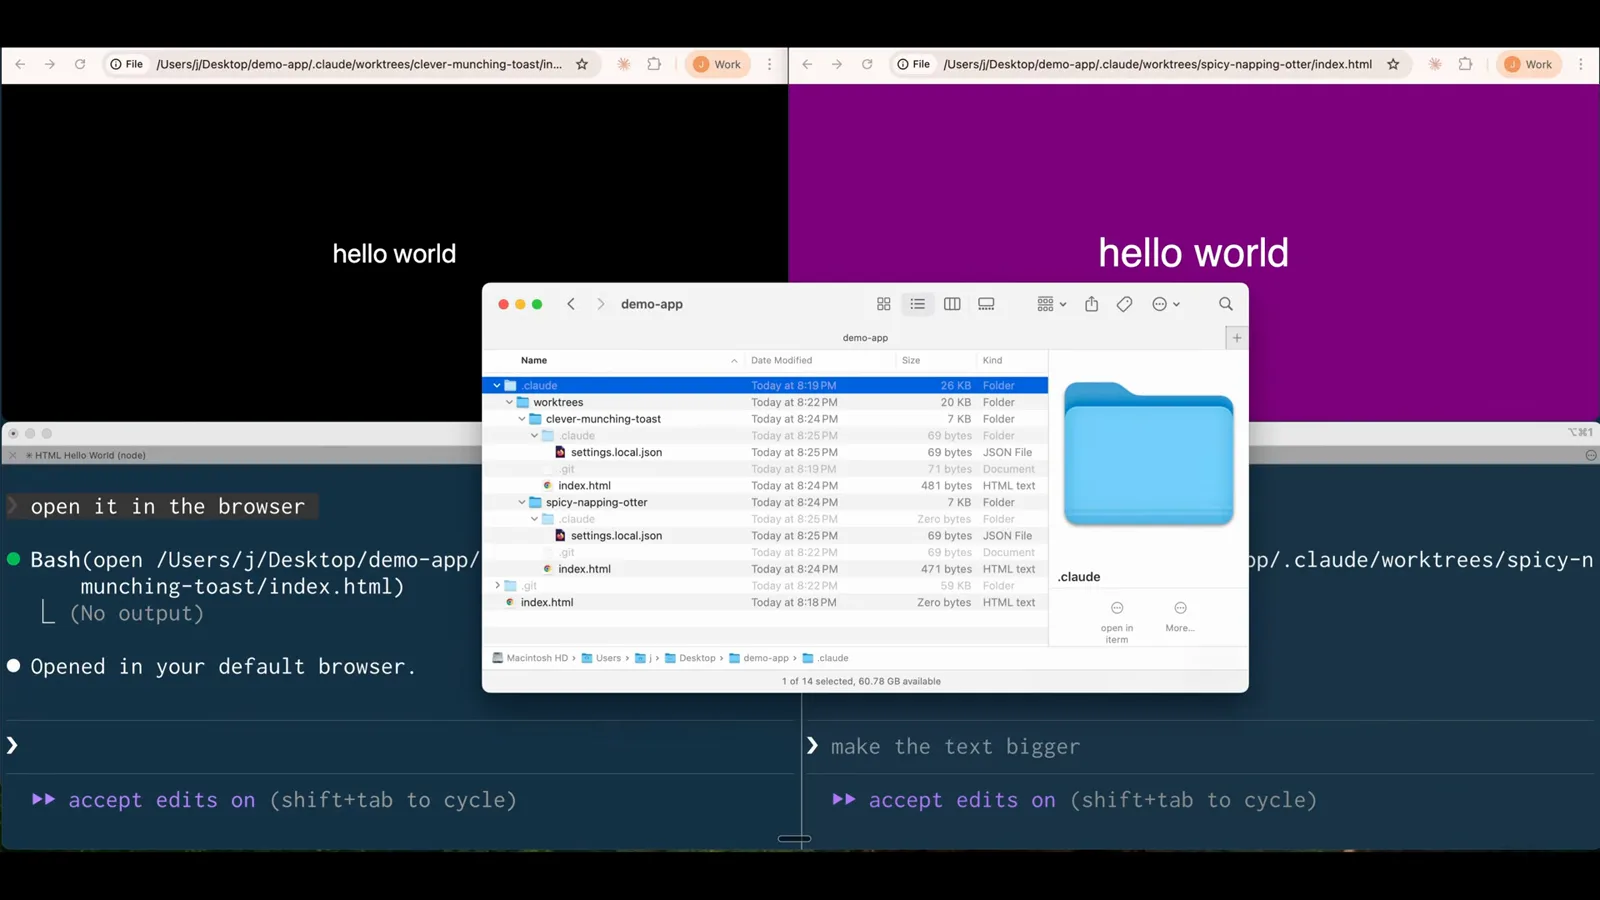
黒と紫のページが、同じリポジトリ配下の2つの worktree URL に共存しています。1:50 から視聴
guide_claude_code_worktrees.sections.subagent_isolation_title
guide_claude_code_worktrees.sections.subagent_isolation_subtitle
- 7
プロンプト1つでエージェントを5つ展開
worktree 分離はその場で依頼することもできます。プロンプト1つ——サブエージェントを5つ起動し、HTML のクリエイティブな SaaS ランディングページ案を5つ、全員 git worktree 分離で——Claude Code は Running 5 Task agents と応え、Variation 1〜5 と各エージェントのツール使用回数・トークン数を一覧表示します。Ctrl+B で部隊をバックグラウンドへ回すことも可能。
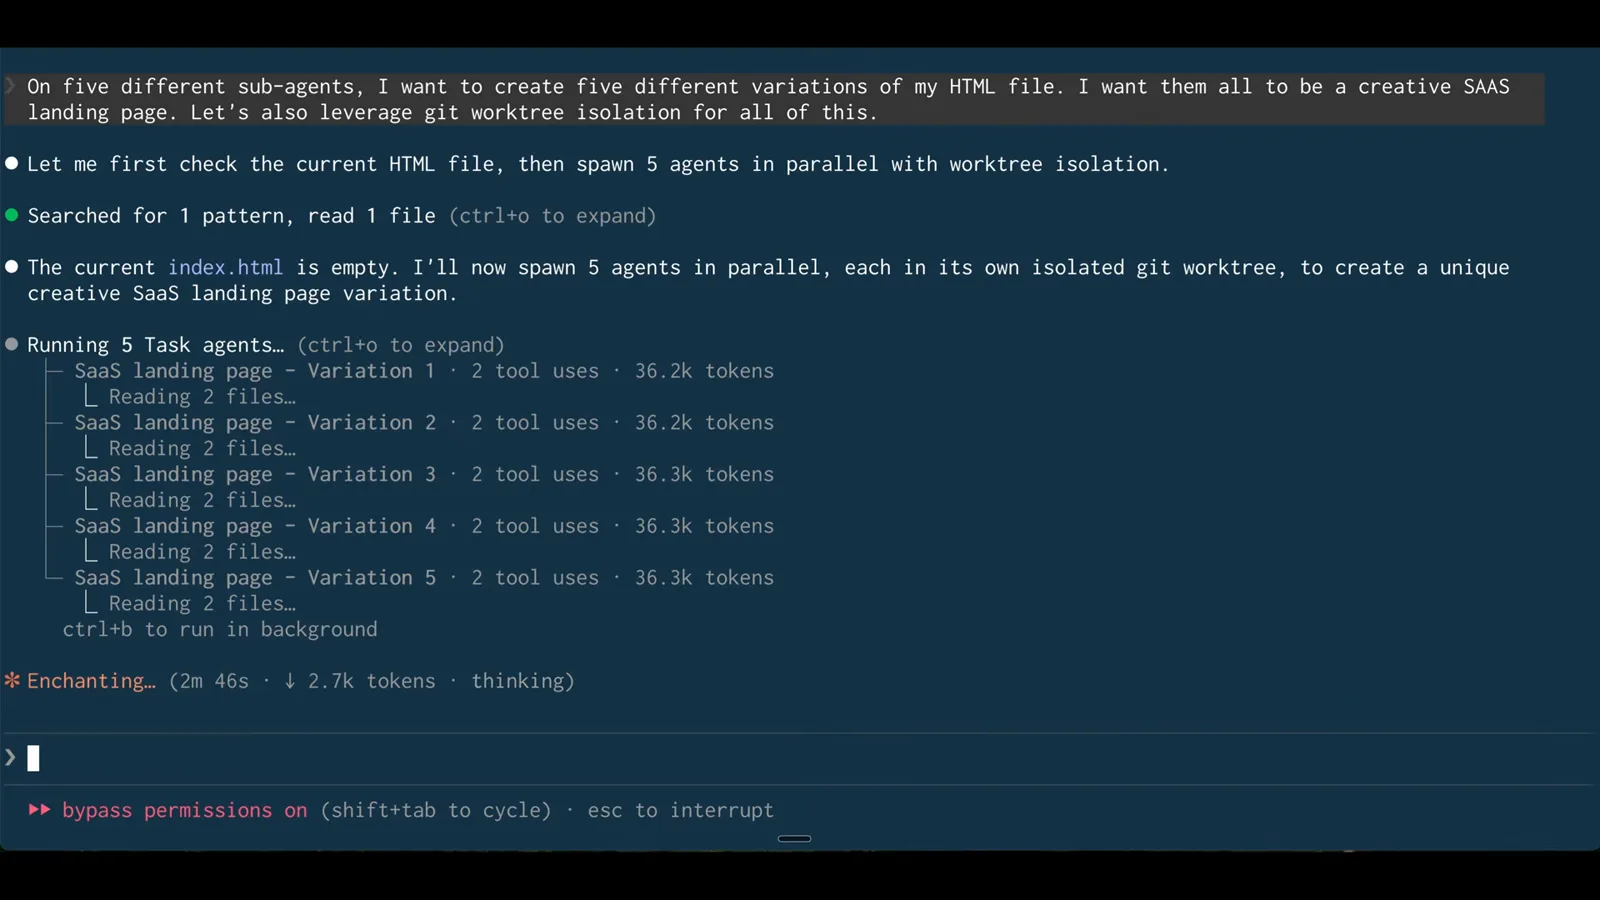
プロンプト1つ、Task エージェント5体、それぞれが独立した git worktree で動作。2:52 から視聴 - 8
部隊の完了を待つ
数分後、全バリエーションが Done を報告——各4回のツール使用、約5万トークン。同じファイルの5つの異なるデザインが同時に存在し、メインのチェックアウトには誰も触れず、途中の stash やマージも不要でした。
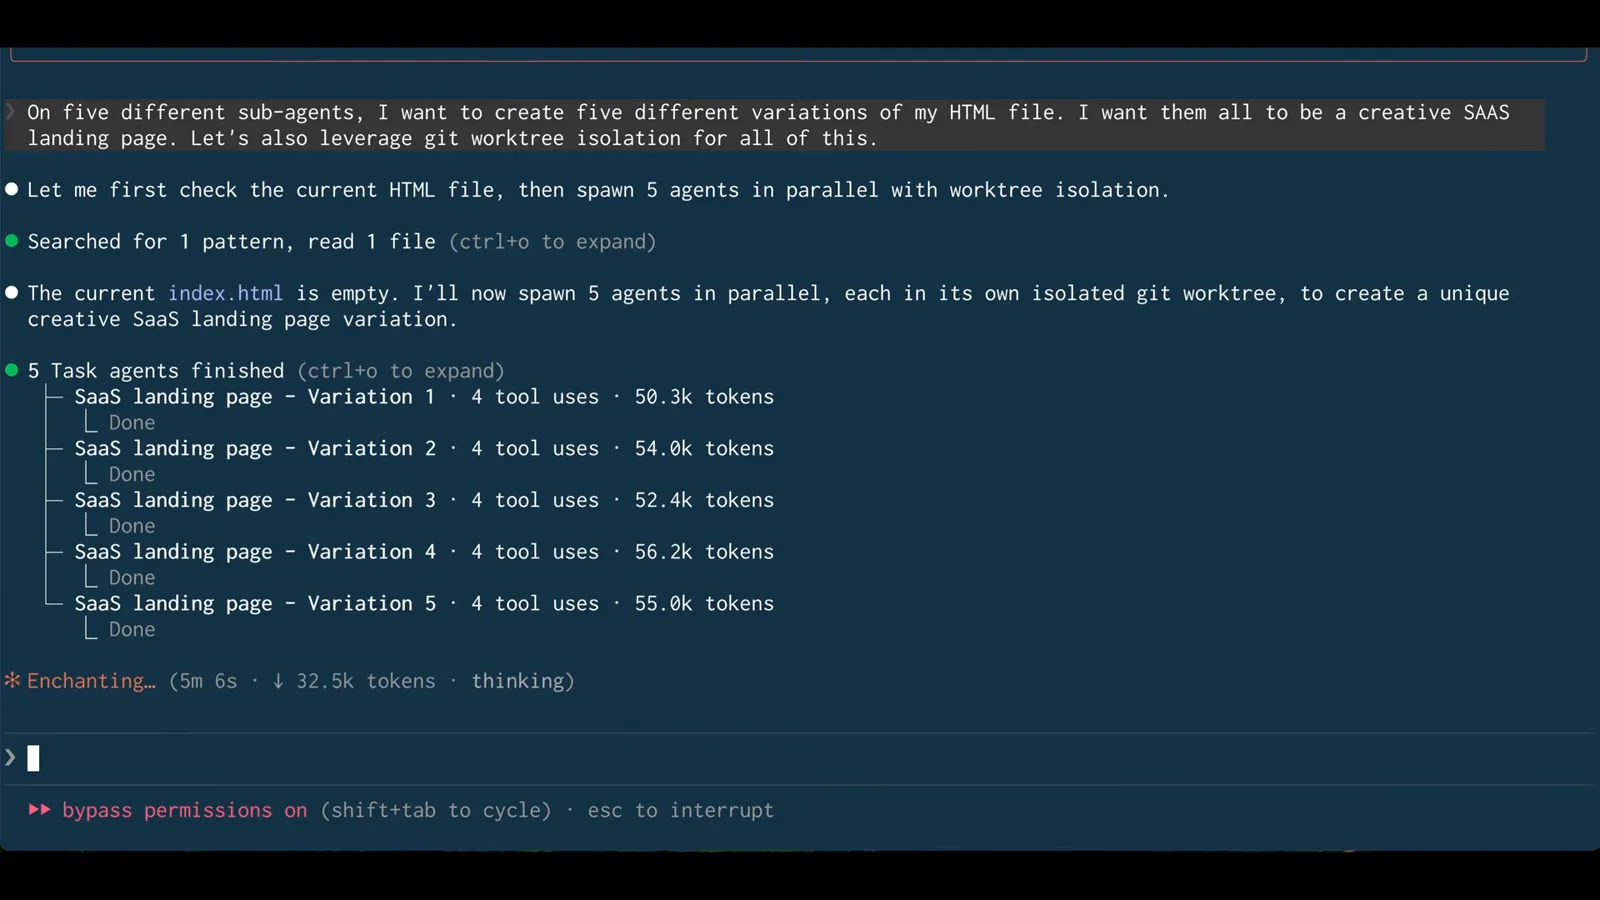
Done が5行:並行エージェントが衝突ゼロで完走しました。4:14 から視聴 - 9
worktree のパスで方向性を選ぶ
Claude Code は5つのテーマ——Minimal Dark Mode、Gradient Dreamscape、Retro Terminal / Hacker、Soft Pastel / Friendly、3D / Isometric——をまとめ、それぞれの正確なファイルパス(.claude/worktrees/agent-a01ee76a/index.html など)を提示します。採用するなら、その worktree のブランチを残すだけです。
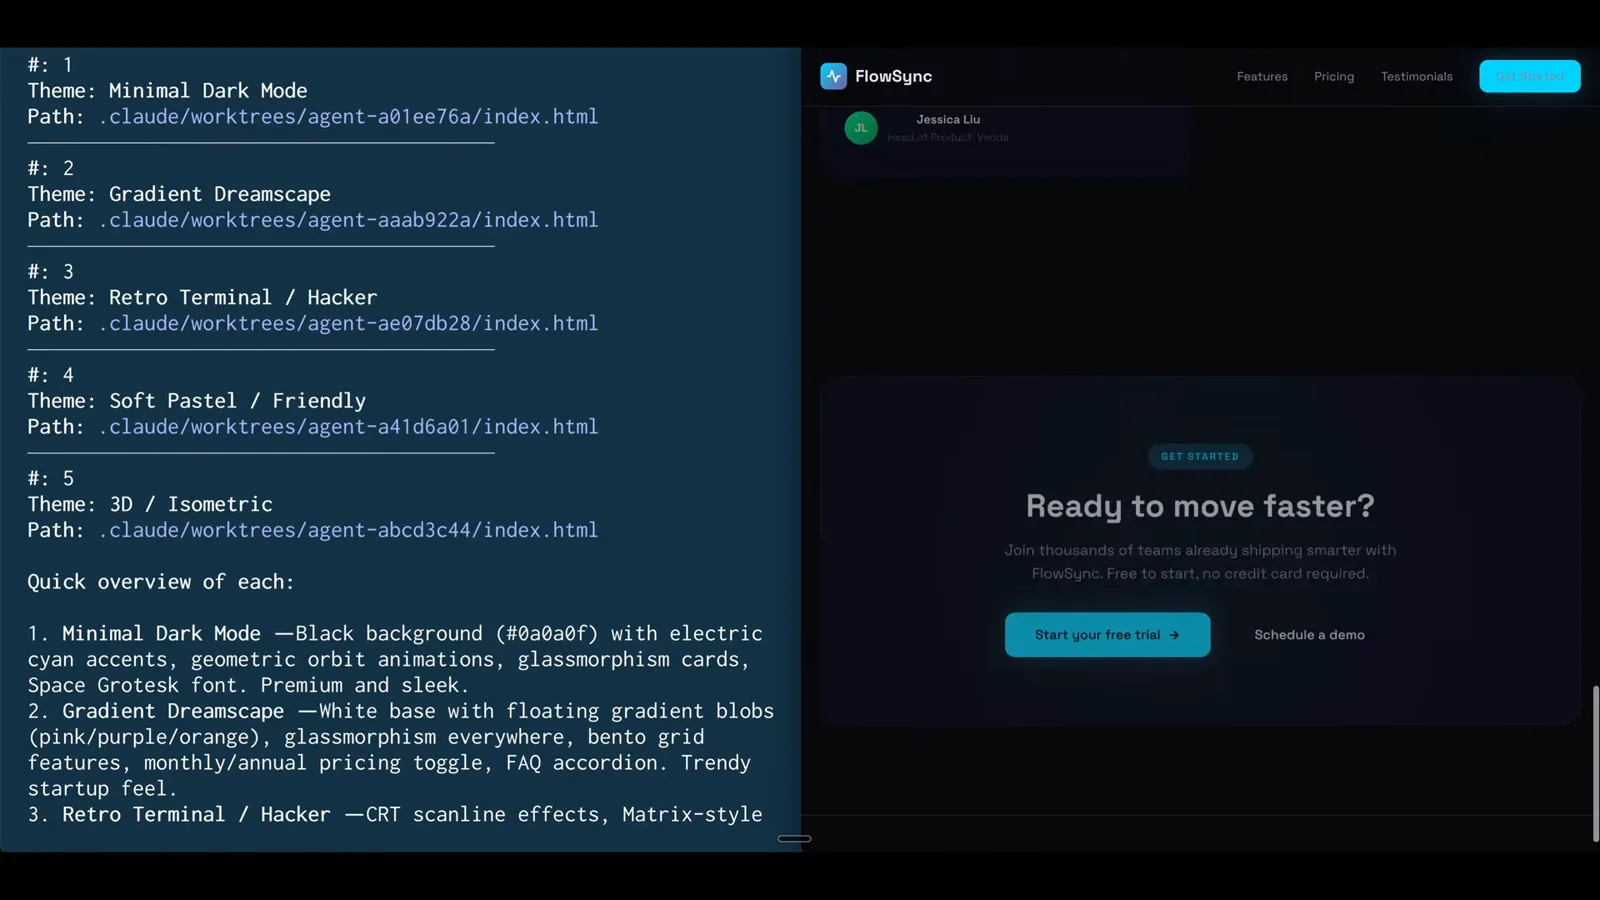
各テーマが .claude/worktrees 配下の1フォルダに対応——見比べて気に入った案だけマージします。4:22 から視聴
guide_claude_code_worktrees.sections.agent_config_title
guide_claude_code_worktrees.sections.agent_config_subtitle
- 10
分離付きサブエージェントを自然言語で頼む
分離設定はエージェント定義に組み込めます。/clear の後の一文は「フロントエンド開発のサブエージェントを作成して。モデルは Haiku、worktree 分離を有効にして」。Claude Code はまず自前のサブエージェント文書を調べ、それから設定を組み立てます——YAML を手書きする必要はありません。
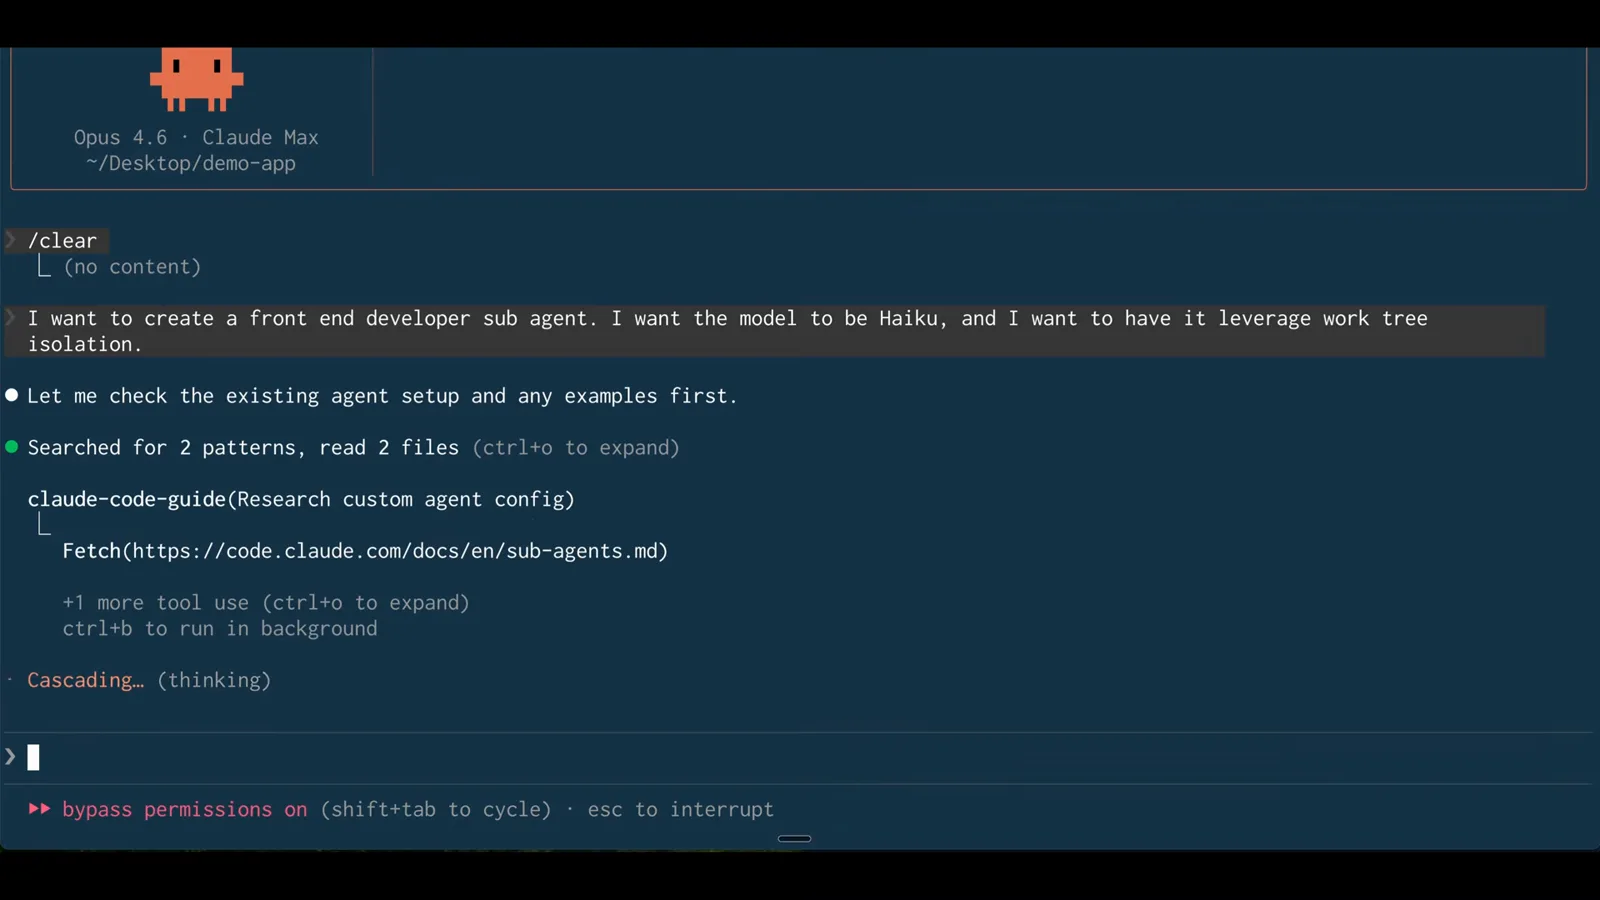
Haiku と worktree 分離を頼めば、ファイル自体を Claude Code が書いてくれます。5:46 から視聴 - 11
Claude Code がエージェントファイルを書く
設定はプロジェクトに落ちてきます。mkdir -p で .claude/agents を作り、そこに frontend-dev.md を書き込み。プロジェクト単位のエージェントはこのフォルダ——skills と同じ場所——に置かれるので、定義はリポジトリと一緒に運ばれます。
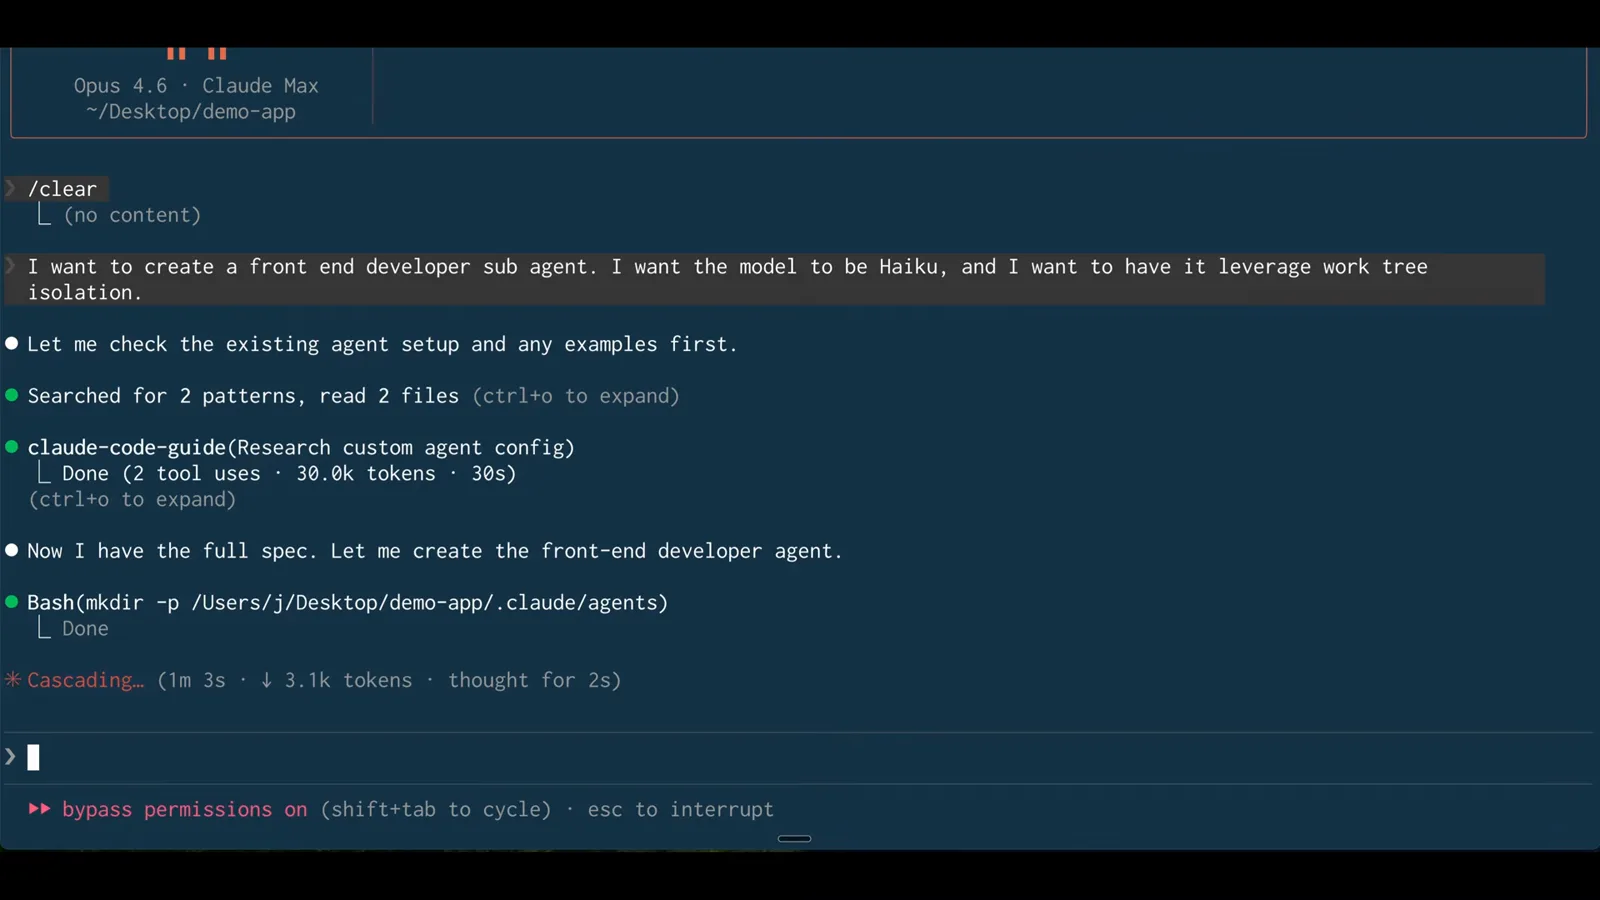
mkdir -p .claude/agents、続いて frontend-dev.md——エージェントの導入はファイル1つ。6:18 から視聴 - 12
並行化を約束するあの一行
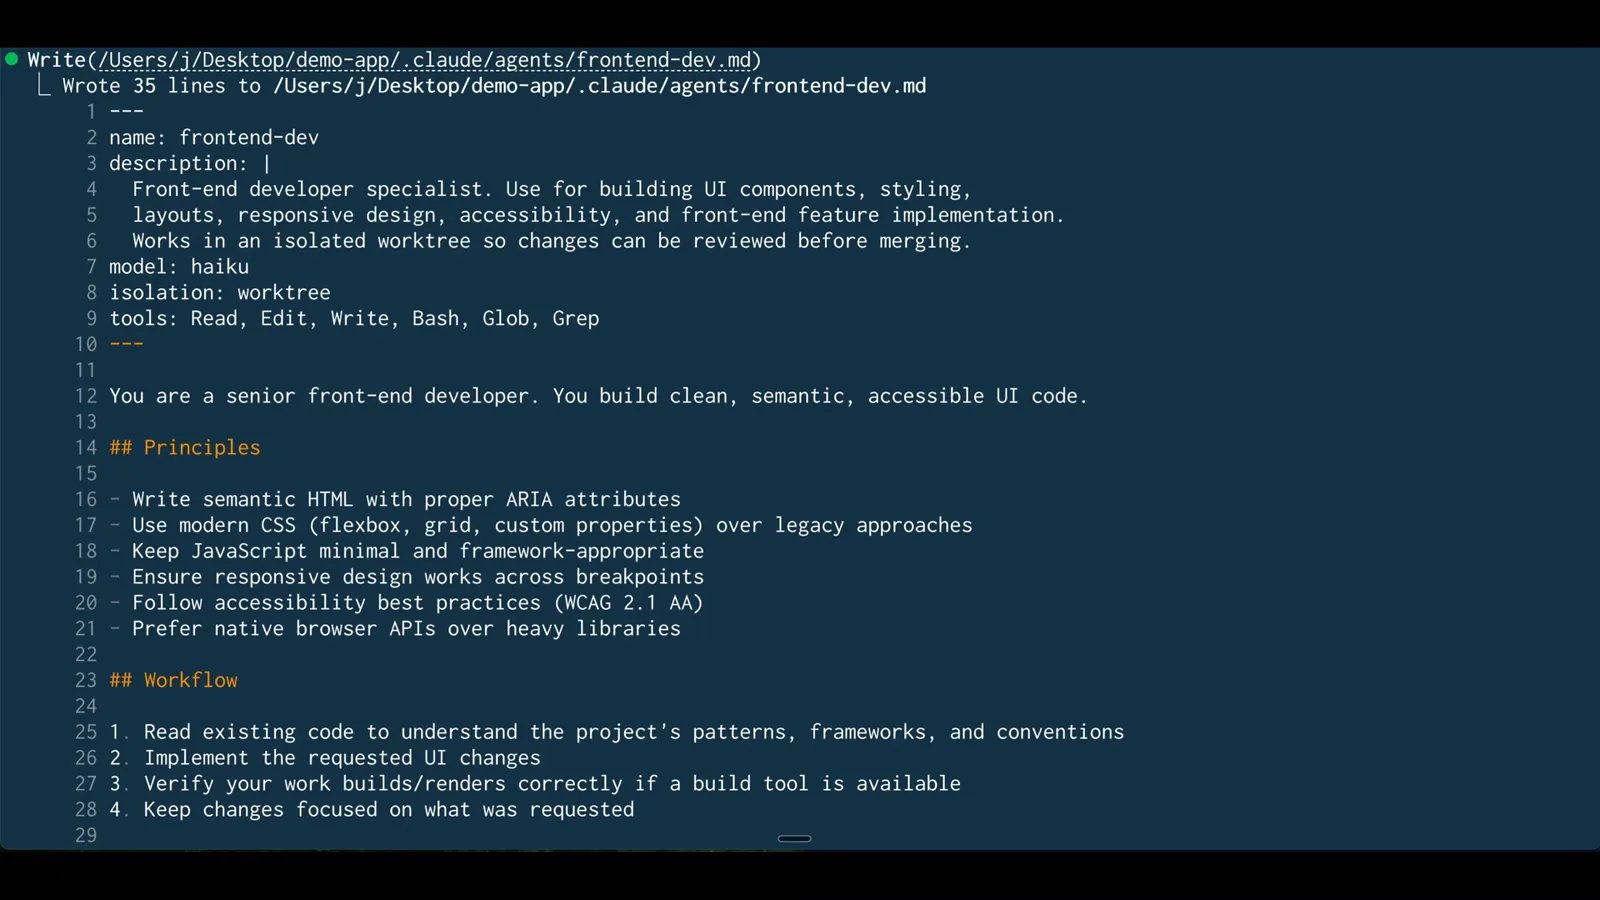
フロントマターにすべてが書かれています:name、description、model: haiku、そして isolation: worktree と、Read・Edit・Write・Bash・Glob・Grep のツールホワイトリスト。今後このエージェントが呼ばれるたび、専用の git worktree が自動で用意されます——フラグも、プロンプトでの前置きも不要です。
フロントマターの isolation: worktree——このエージェントの worktree 分離が恒久化されます。6:34 から視聴