
Illustrated walkthrough
Claude Code Statusline: Set Up the Status Line with /statusline
A screen-recorded walkthrough of turning on Claude Code's status line with the /statusline command — from PowerShell to the configured bar showing your user, directory, branch, model and context usage.
5 min read · 13 illustrated steps
The short version
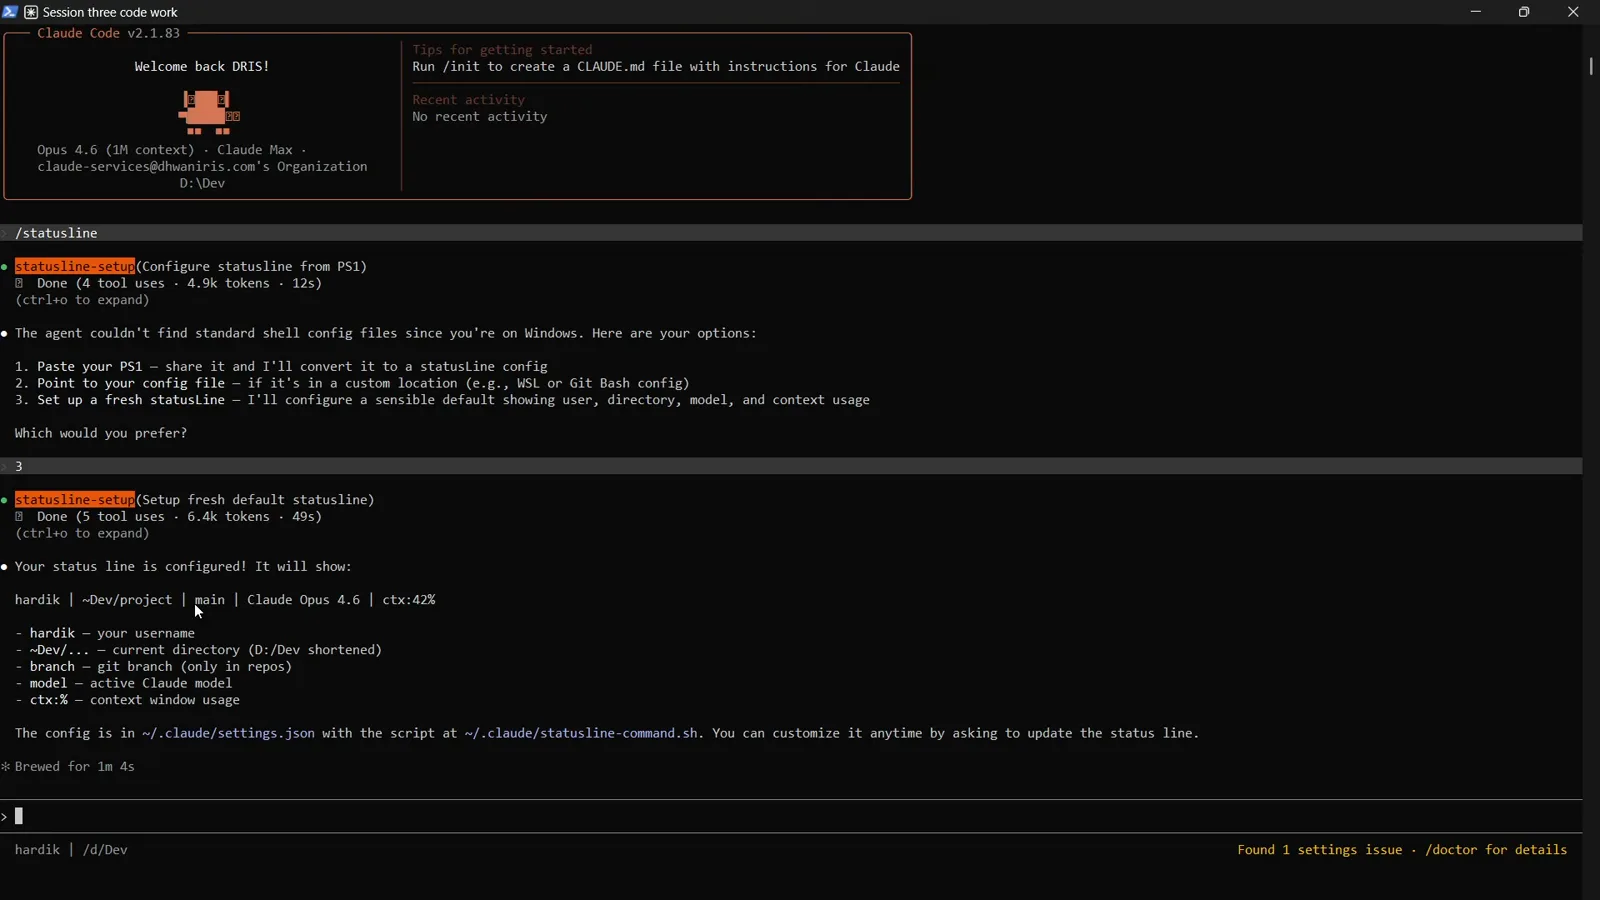
Start claude, type /statusline and answer the setup question. On Windows the agent can't find a shell config, so option 3 — a fresh default — is the fastest path: it generates ~/.claude/statusline-command.sh, updates ~/.claude/settings.json and shows your username, current directory, Git branch, model and context window usage in a bar at the bottom of the terminal. Approve the diff when asked, and whenever you want to change the bar later, just ask Claude to update the status line.
About the source video
Every frame on this page comes from ProgrammingKnowledge2's screen recording - a Claude Code v2.1.83 session (Opus 4.6 · 1M context · Claude Max) in D:\Dev on Windows, recorded in March 2026.
Frames are used with attribution and each step links back to the exact second in the video. The narration is not quoted - the text above was written from the screen contents and cross-checked against code.claude.com/docs.
Open Claude Code in your terminal
Everything happens inside one PowerShell window — no editor or dashboard needed.
- 1
Launch the CLI
Open Windows PowerShell (any terminal works — the recording uses PowerShell on Windows), cd into your project folder and type claude. Press Enter and the CLI starts in that directory.
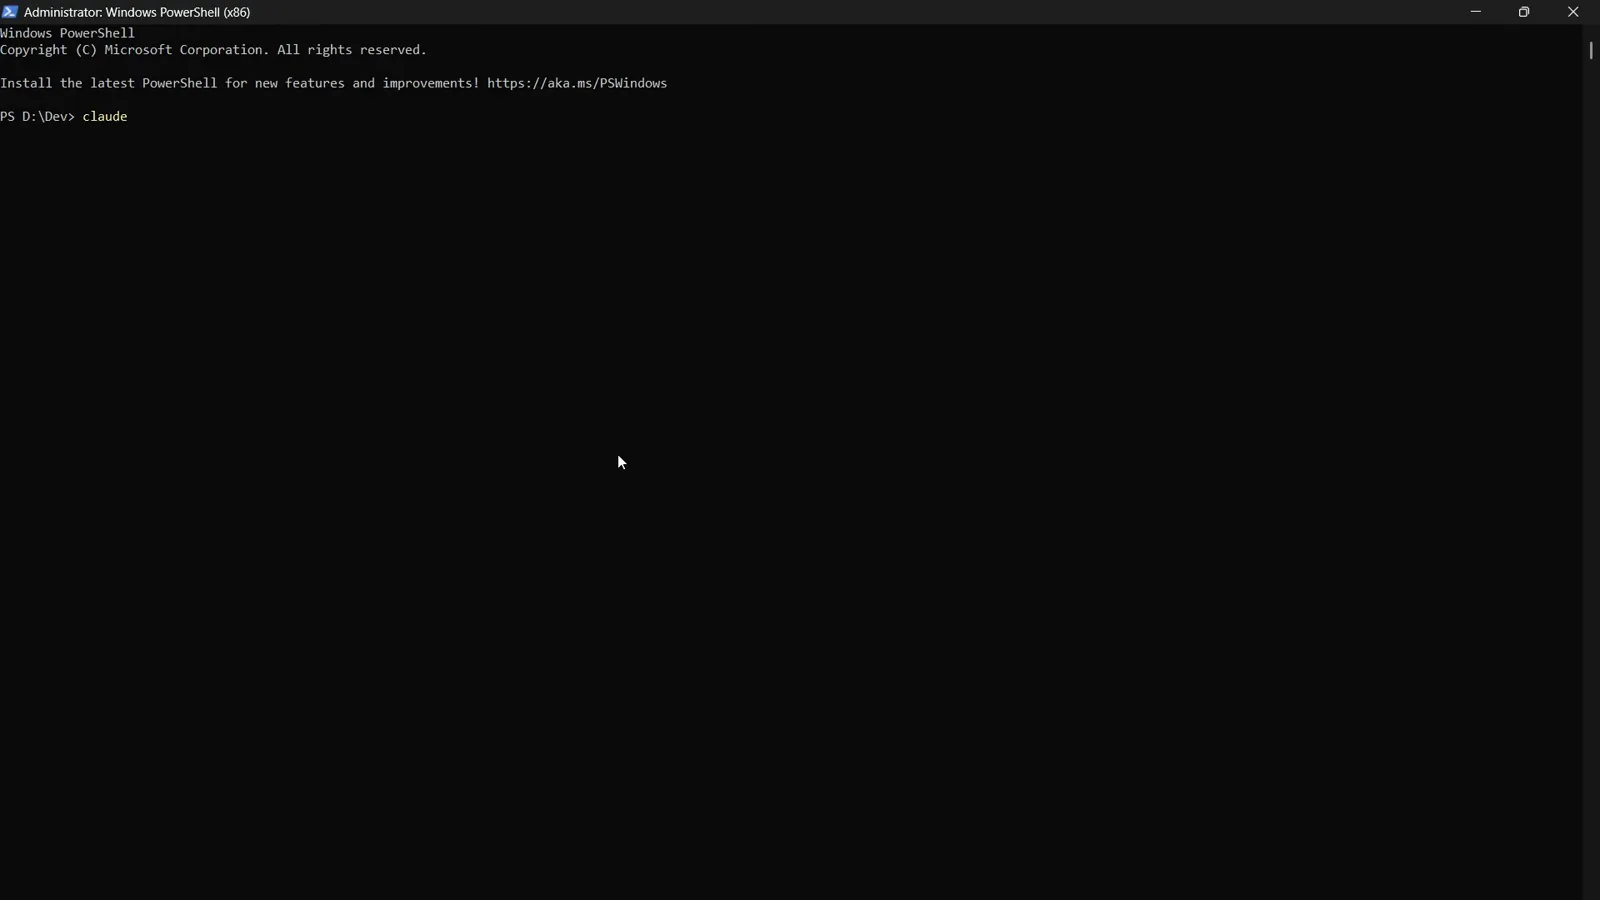
The claude launch command typed at the PowerShell prompt in D:\Dev.Watch at 0:18 - 2
The welcome box
Claude Code greets you with a welcome box showing the version (v2.1.83 in the recording), your plan and the model in use — Opus 4.6 with the 1M context window on a Claude Max account. Everything that follows happens inside this terminal session.
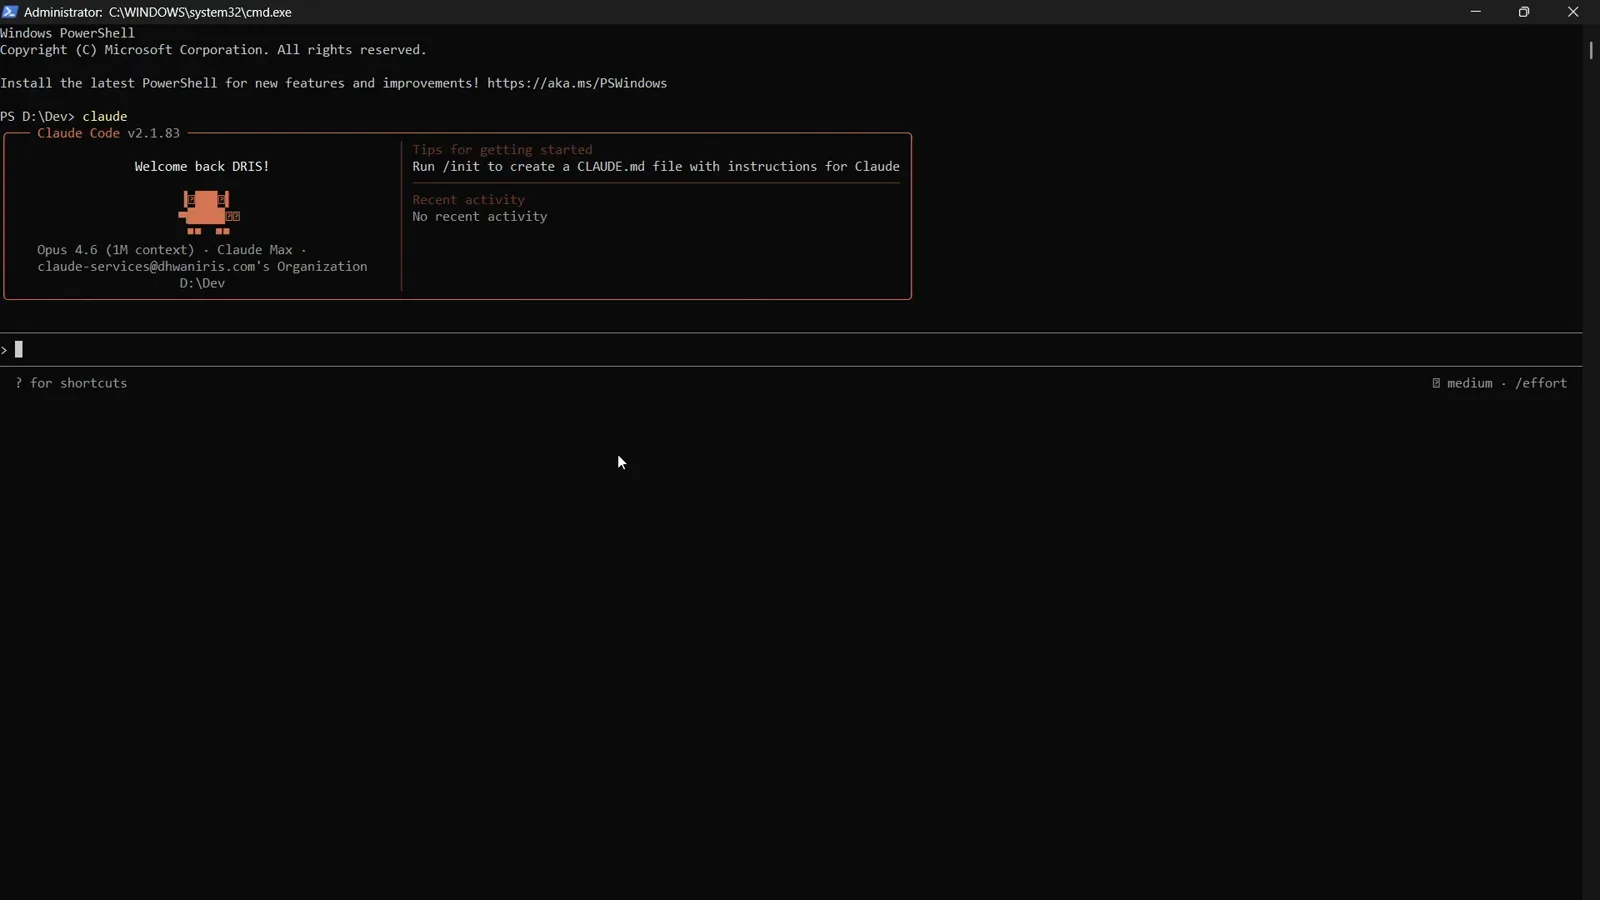
Claude Code v2.1.83 starting in D:\Dev on a Claude Max plan.Watch at 0:22
Run the /statusline command
One slash command hands the job to a dedicated setup agent.
- 3
Type the slash command
In the input box, type /statusline. The autocomplete menu shows two related commands: /statusline — "Set up Claude Code's status line UI" — and /status, which prints version, model, account, API connectivity and tool statuses on demand. Submit /statusline.
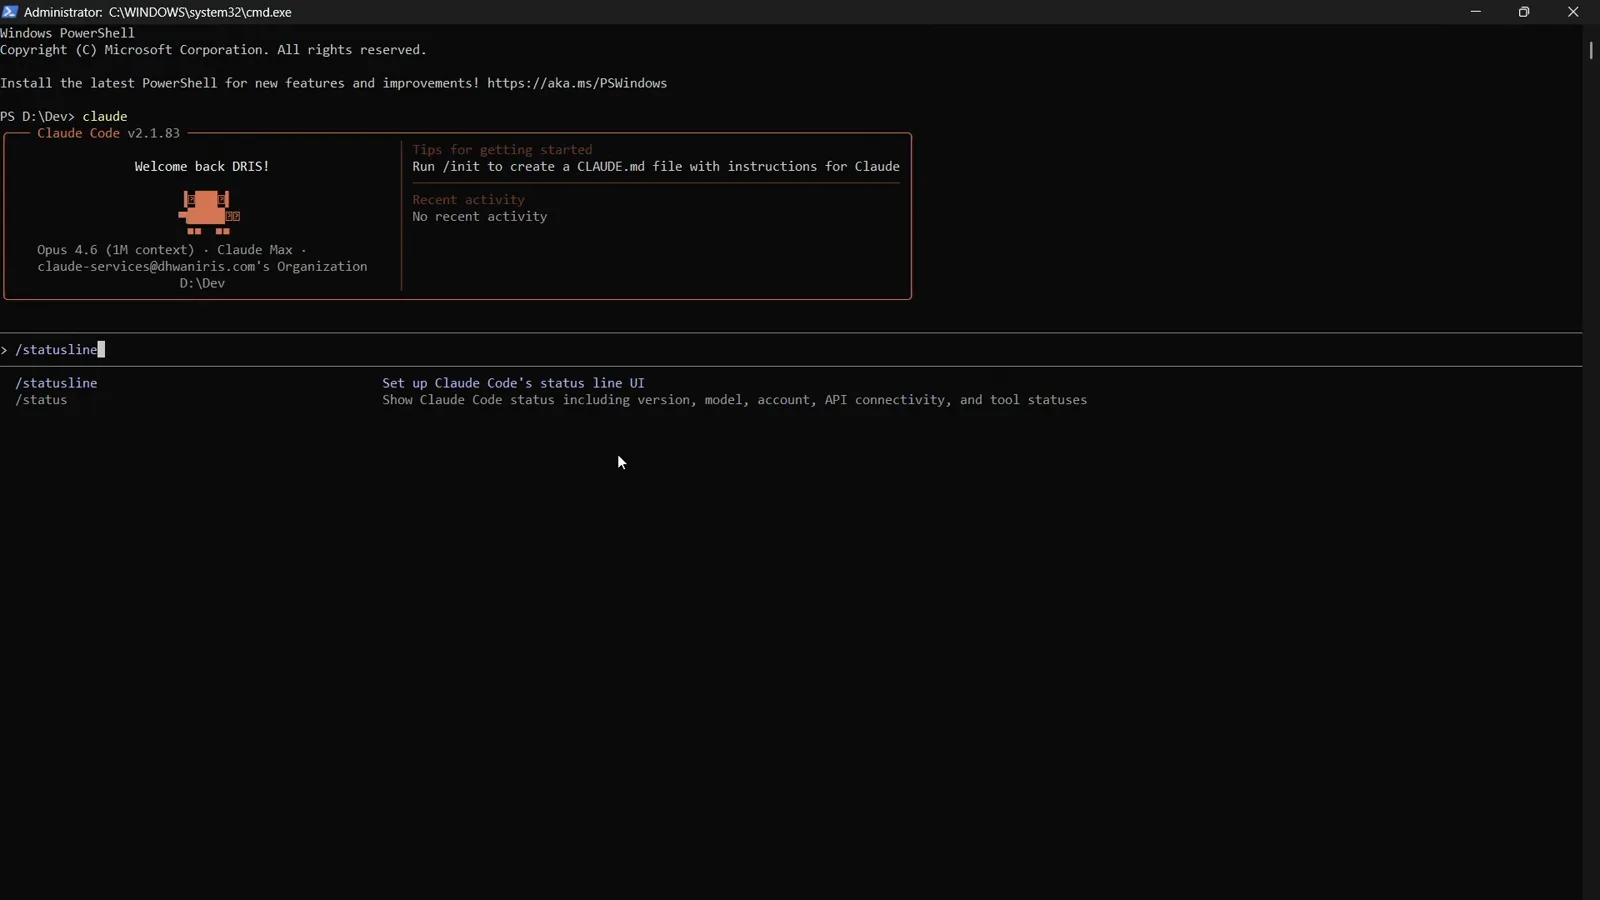
The /statusline autocomplete entry, right above /status in the command menu.Watch at 0:32 - 4
The agent takes over
Submitting /statusline doesn't just flip a setting — it spawns a small setup agent (statusline-setup, "Configure statusline from PS1") that works out the right configuration for your shell and platform. You'll see it start with an Initializing spinner.
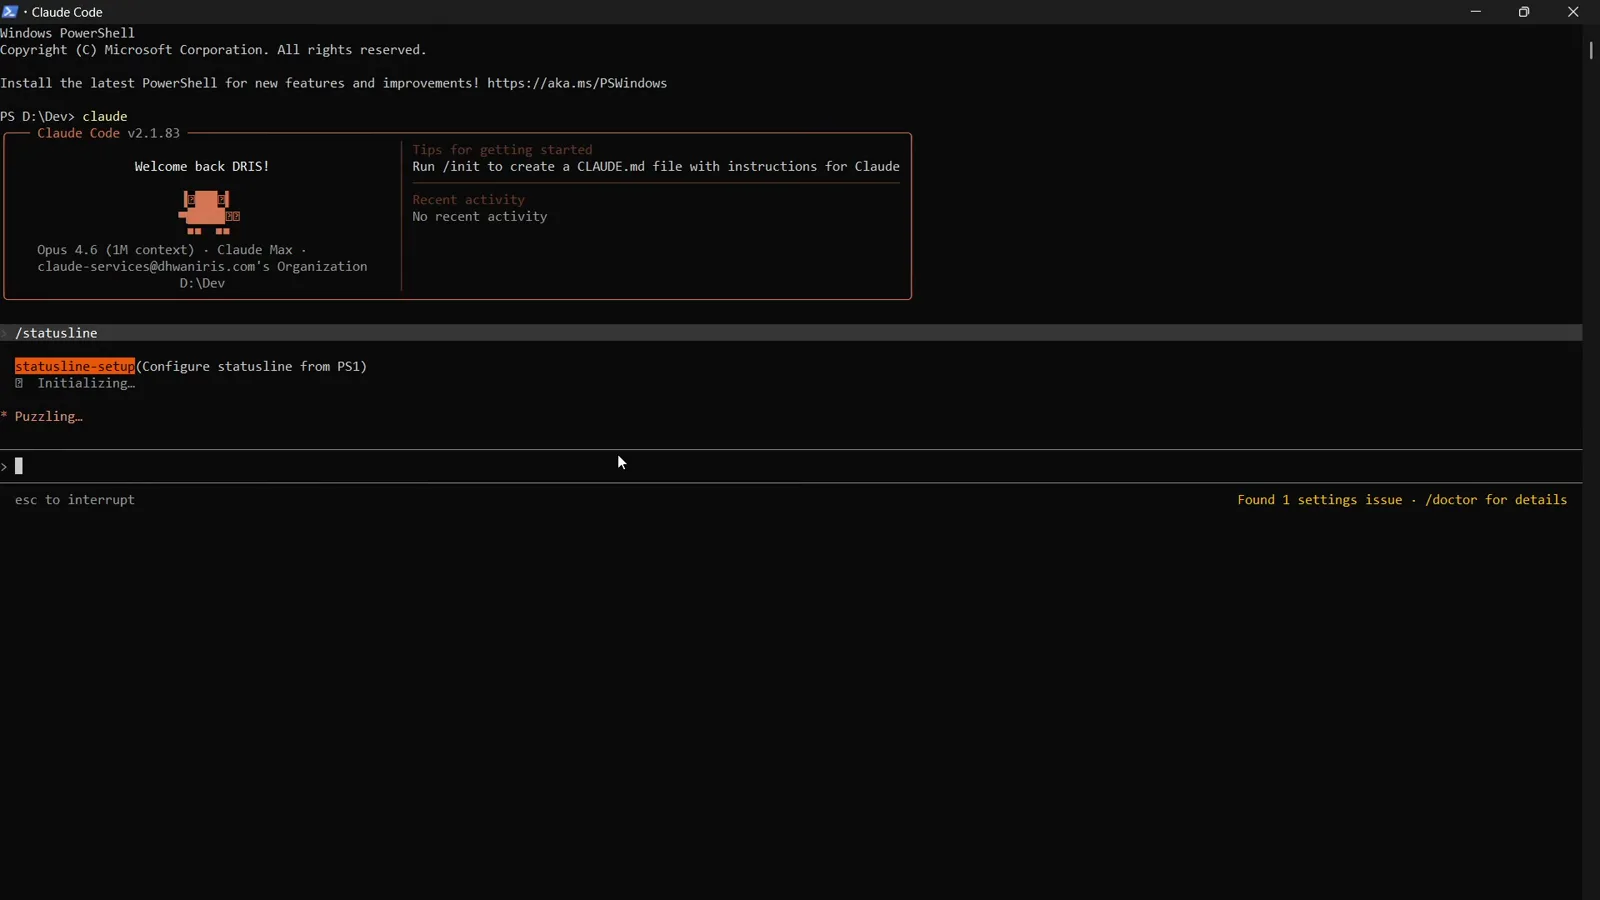
The statusline-setup agent spinning up right after the command is submitted.Watch at 0:42
Answer the setup question
Windows has no shell config to convert — the fresh default is the fastest route.
- 5
It checks for an existing PS1
The agent first looks for your shell's prompt definition, reading files like C:\Users\<you>\.bashrc and .bash_profile to see whether there's a PS1 it can convert. On this Windows machine there isn't one.
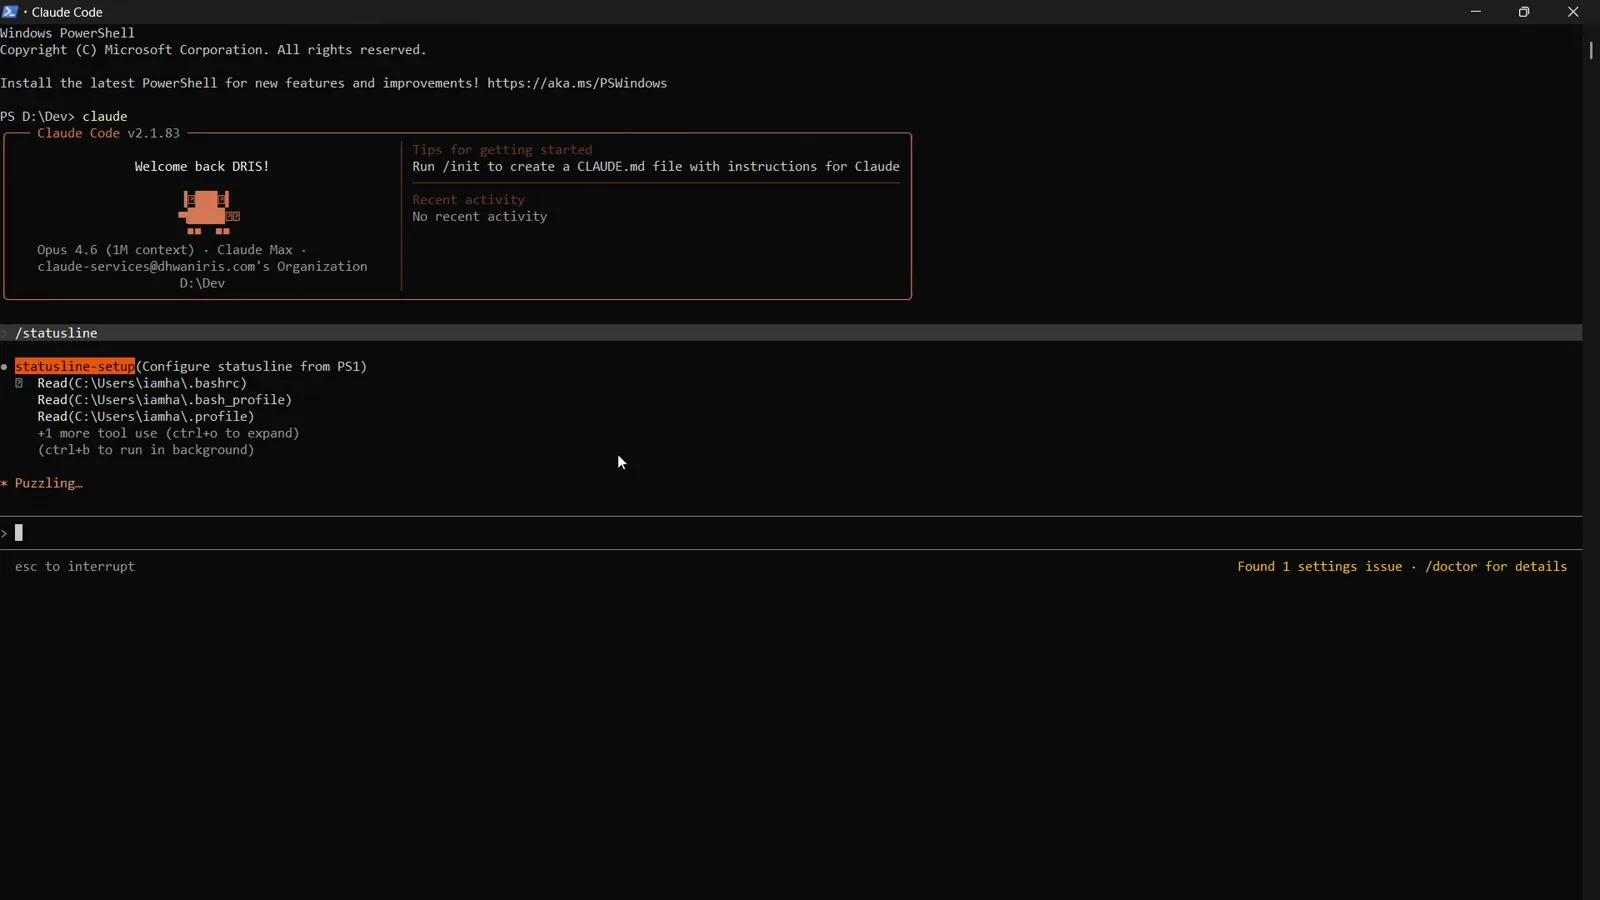
Read calls on .bashrc and .bash_profile while the agent hunts for a PS1.Watch at 0:52 - 6
Three ways forward
On Windows the agent reports it "couldn't find standard shell config files" and offers three choices: 1. paste your PS1 and it will convert it; 2. point to a config file in a custom location such as WSL or Git Bash; or 3. set up a fresh statusline — "a sensible default showing user, directory, model, and context usage."
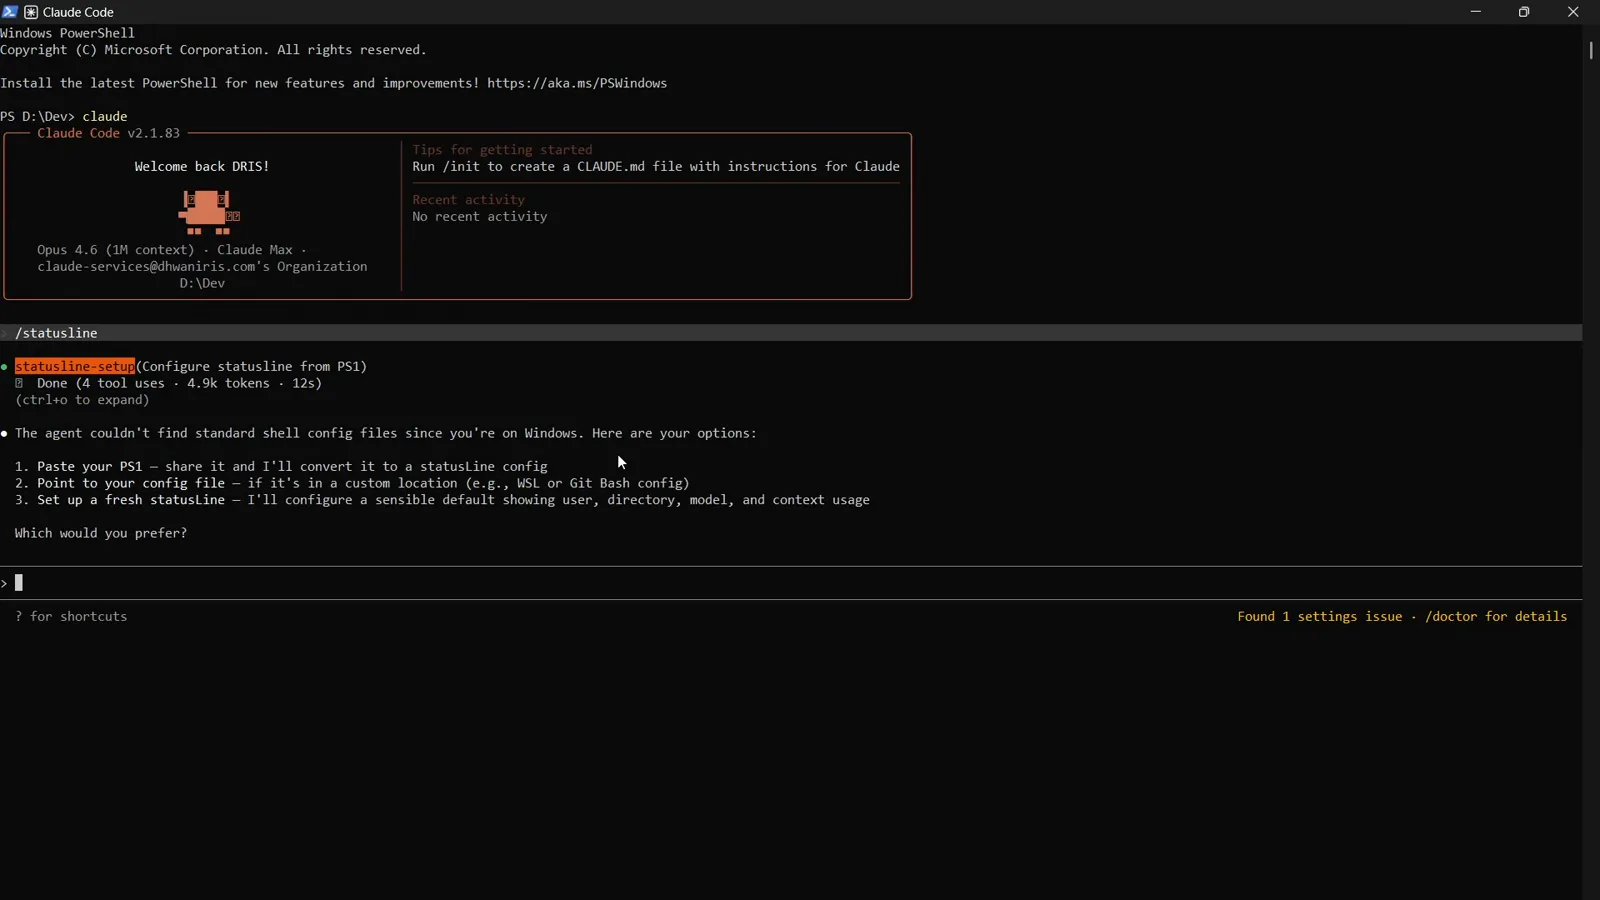
The agent's question after finding no shell config on Windows — three numbered options.Watch at 1:02 - 7
Pick the fresh setup
The creator types 3. The fresh-default route needs nothing from your existing shell prompt, which makes it the quickest path on Windows — and it works the same way on macOS and Linux if you don't want to translate a PS1.
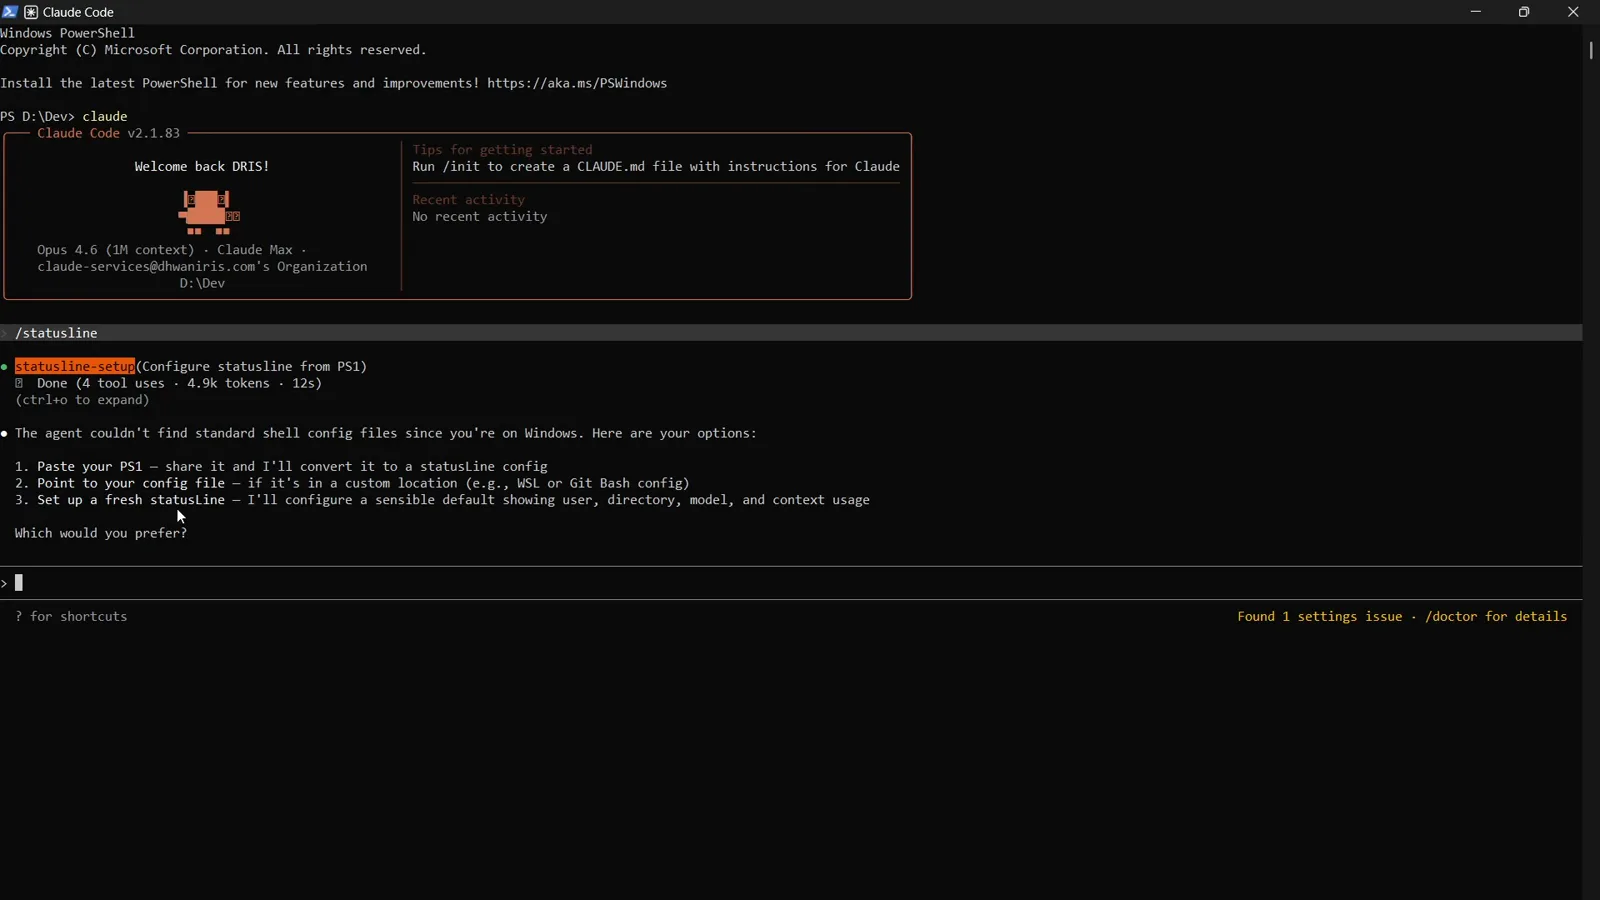
Answering 3 to request the fresh default statusline.Watch at 1:24 - 8
Generating the default
With the answer in, the statusline-setup agent re-labels its task "Setup fresh default statusline" and starts configuring — reading your current ~/.claude/settings.json before touching anything.
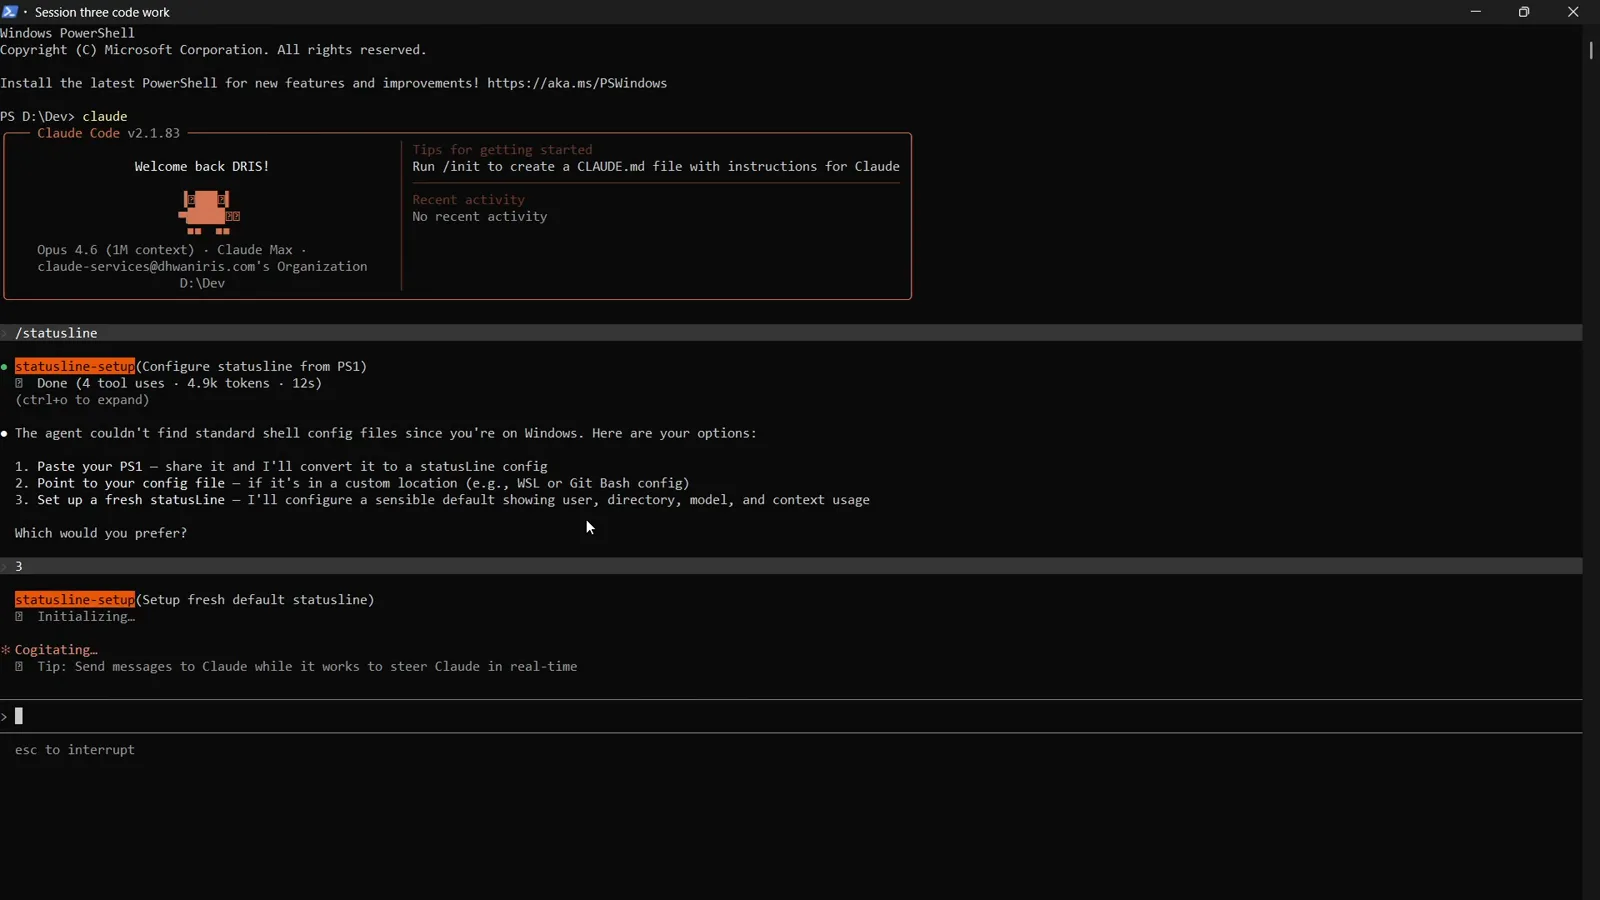
Setup fresh default statusline running after option 3 is confirmed.Watch at 1:48
Review and approve the generated script
Before it touches your settings, Claude shows you the exact diff.
- 9
Approve the diff
Claude shows you exactly what it wants to write: a small bash script that pipes the status JSON through jq to pull the context-window percentage, git branch and model name, then printfs them into one line. The dialog asks "Do you want to make this edit to statusline-command.sh?" — the creator picks option 2, "Yes, and allow Claude to edit its own settings for this session", so future tweaks don't need re-approval.
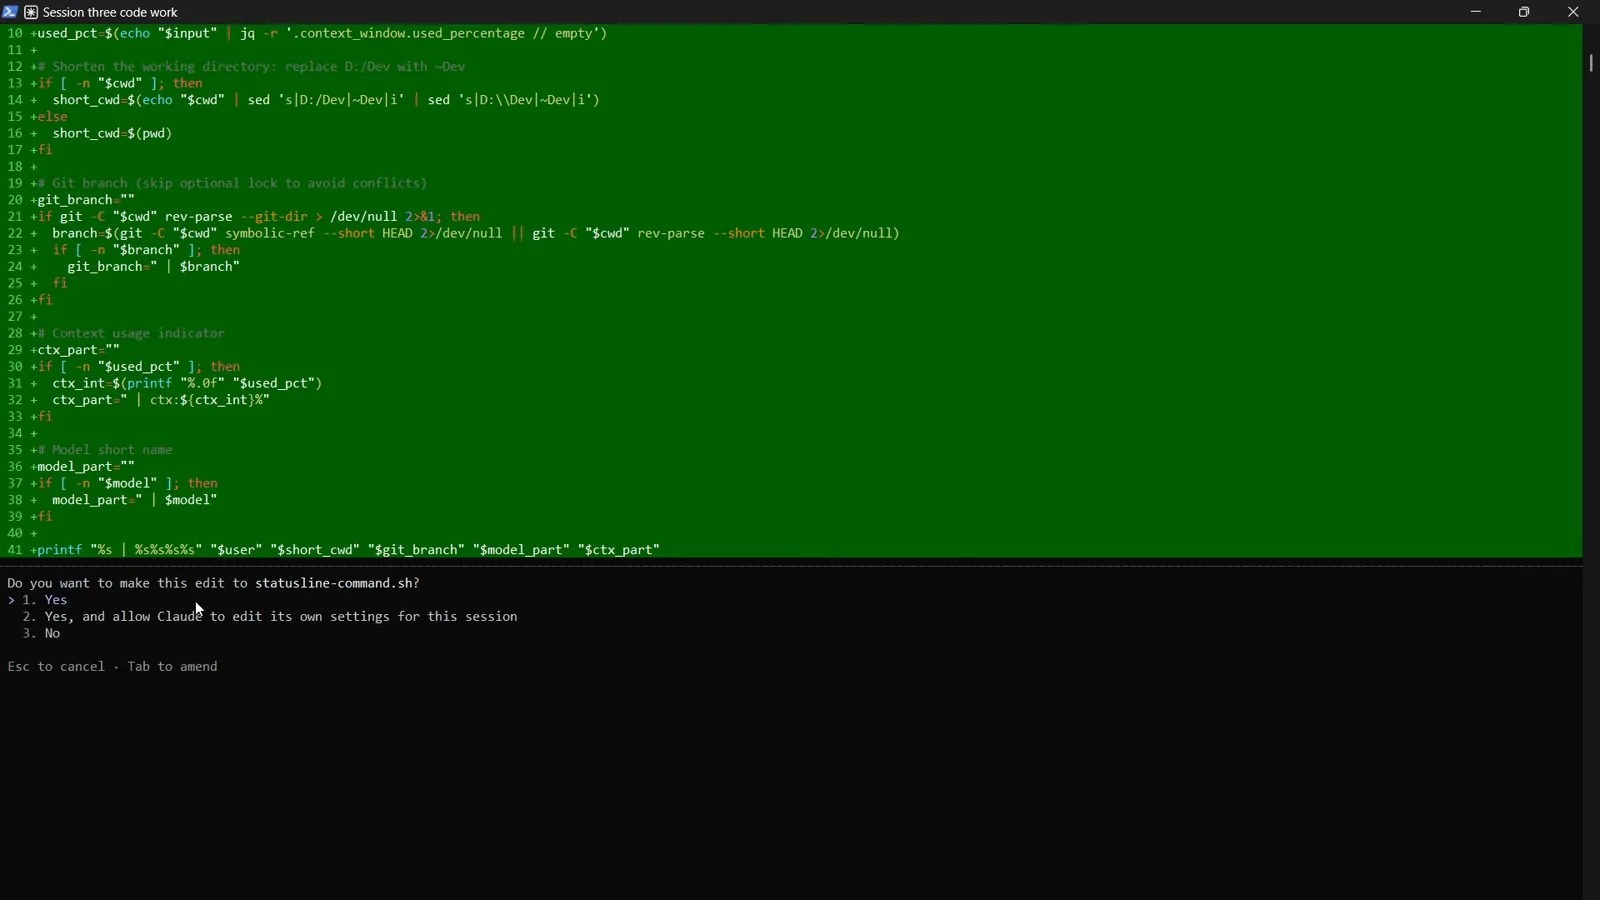
The generated statusline-command.sh diff with its approval dialog.Watch at 2:10 - 10
Files it writes
Once approved, the tool's action list shows the two touchpoints: it creates ~/.claude/statusline-command.sh (the script that renders the line) and updates ~/.claude/settings.json (the config entry that tells Claude Code to run it).
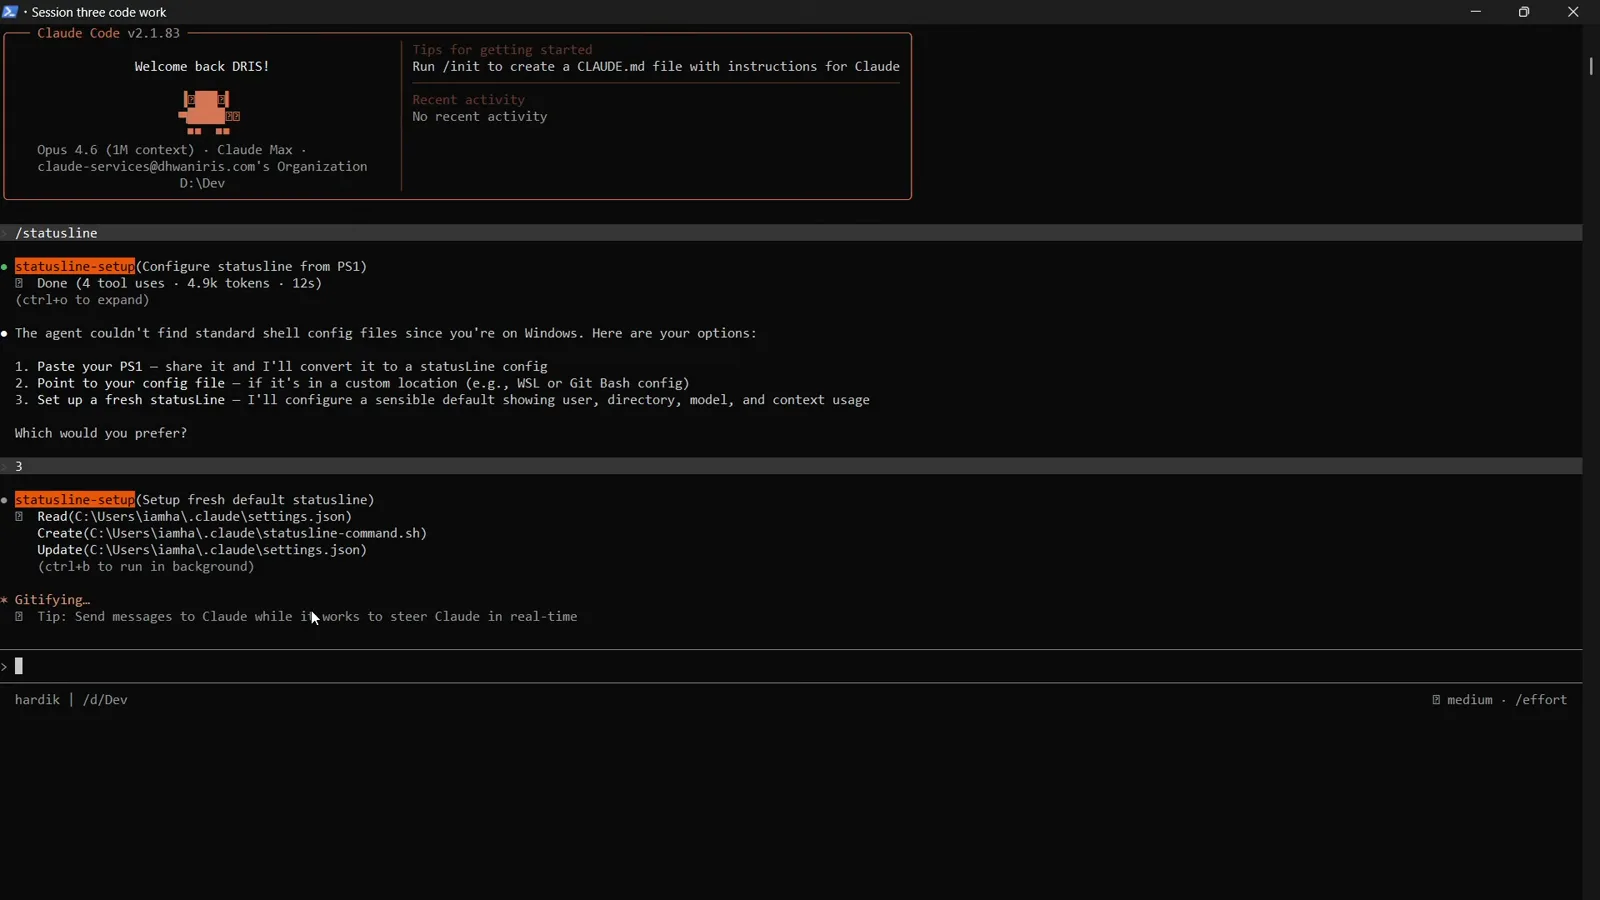
Create statusline-command.sh and Update settings.json in the tool's action list.Watch at 2:22
See it configured
The bar goes live at the bottom of the same terminal, with two paths to remember for later customization.
- 11
Done in 49 seconds
The run wraps up as "Done (5 tool uses · 6.4k tokens · 49s)". Watch the bottom edge of the terminal: the new bar is already live there — harddik | d:/Dev — before the agent even finishes narrating.
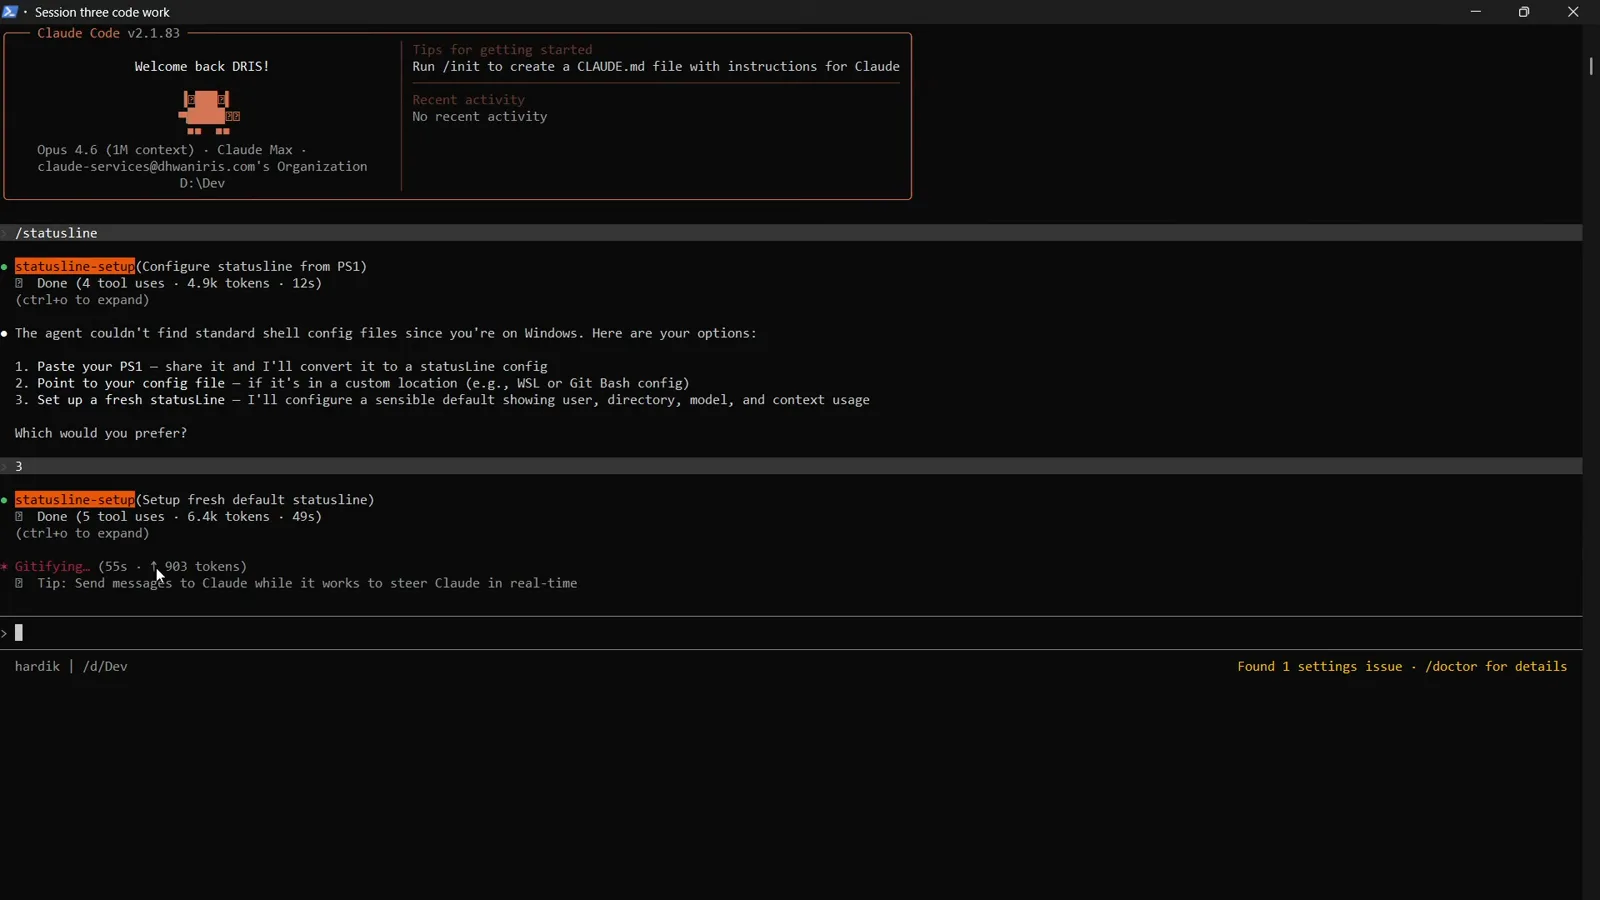
The finished tool call with the real status line already rendering at the bottom.Watch at 2:48 - 12
What each segment means
The confirmation spells out the format with a sample — harddik | ~/Dvs/project | main | Claude Opus 4.6 | ctx:42% — and a legend: your username, the current directory (shortened), the Git branch when you're in a repo, the active model, and context window usage.
"Your status line is configured!" — the sample line and its five-segment legend.Watch at 3:06 - 13
Where the config lives
Two paths to remember: the config is in ~/.claude/settings.json, and the script is at ~/.claude/statusline-command.sh. To change what the bar shows later, just ask Claude to update the status line — no manual editing required.
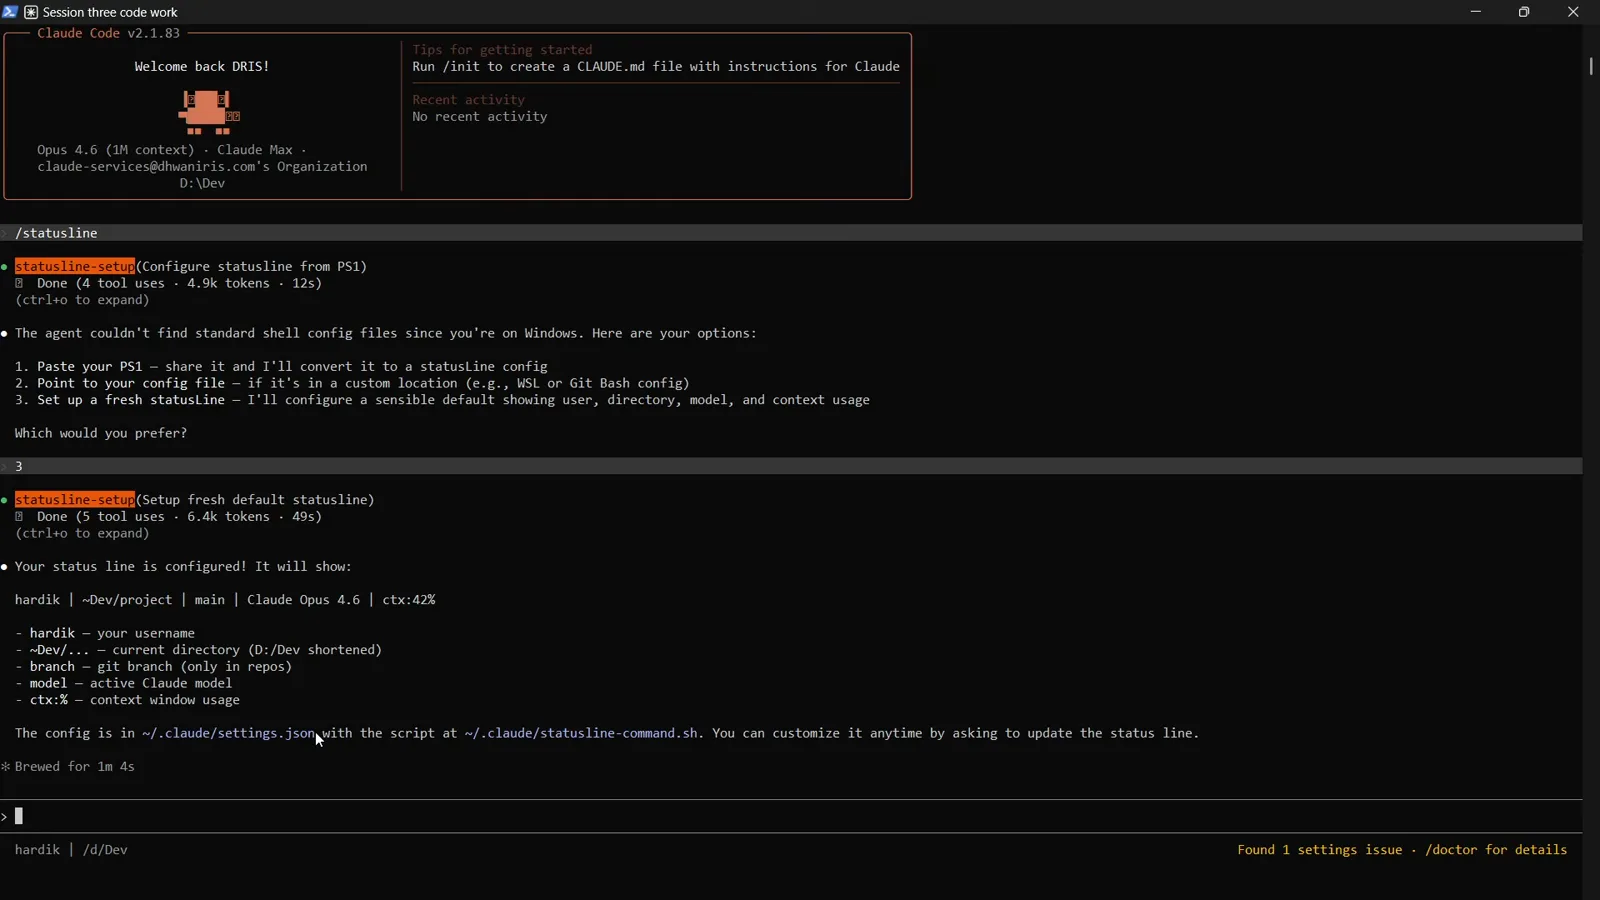
The final summary naming both file paths, with the live bar at the bottom.Watch at 3:12