
实战教程
Claude Code 自定义斜杠命令
把最常用的一段提示词变成一条命令:只写一次 Markdown 文件,Claude Code 每次都遵循你的目录约定、命名规范和测试要求。
14 个步骤的图文教程,阅读约需 5 分钟。每个步骤都深链回源视频的对应时刻。
太长不看
自定义斜杠命令就是 .claude/commands 目录下的一个 Markdown 文件,Claude Code 会把它当作一整段提示词。文件名即命令名,把指令写一次——输出位置、命名约定、变体、测试——重启会话后输入 /命令名 即可运行。再加上 description 和 argument-hint 组成的 front matter,解析 $ARGUMENTS 得到命名参数,同一条命令每次调用都能生成不同的组件。
关于源视频
本页跟随 Net Ninja Claude Code 课程的斜杠命令一课,逐步复现其中的自定义 /ui-component 命令。
截图为视频画面,版权归创作者所有;文字说明为本站原创。内容已于 2026 年 9 月对照视频逐帧核对。
自定义命令放在哪里
.claude/commands 里的一个 Markdown 文件,就是斜杠菜单里的一个新条目。
- 1
从内置命令开始
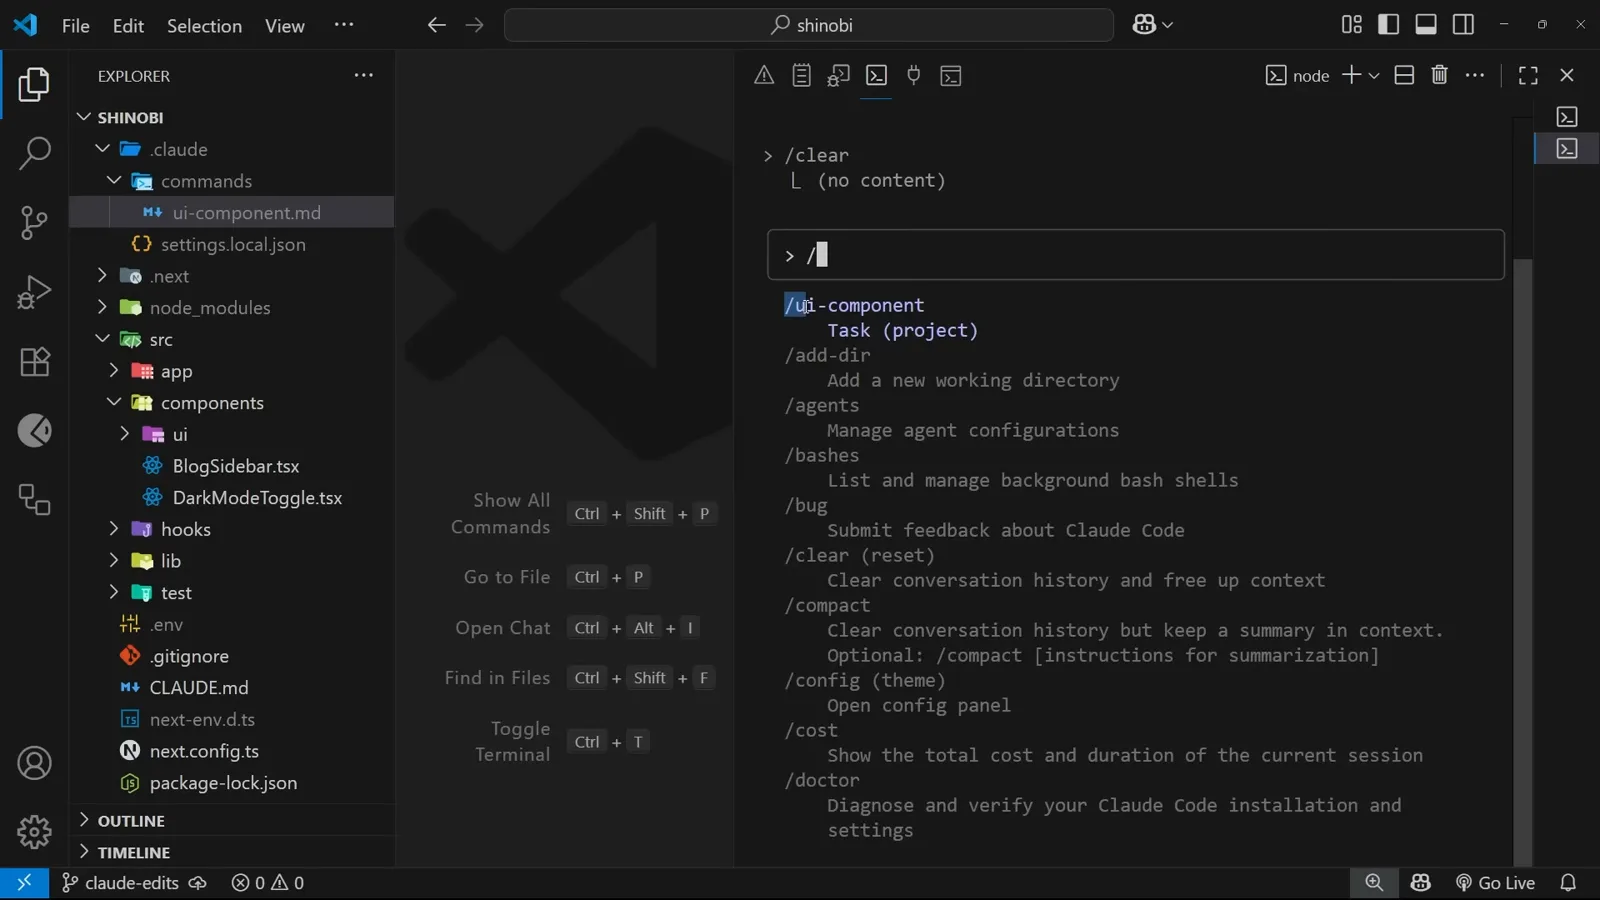
只输入一个斜杠,就会打开 Claude Code 自带的命令菜单:/add-dir 添加工作目录,还有 /agents、/clear、/compact、/model、/permissions 等等。每个内置命令都是一段预写操作的快捷方式——而这个列表是可以扩展的,本指南余下部分就是做法。
尚无任何自定义命令时的内置斜杠菜单。在 0:34 处观看 - 2
在 .claude 中新建 commands 目录
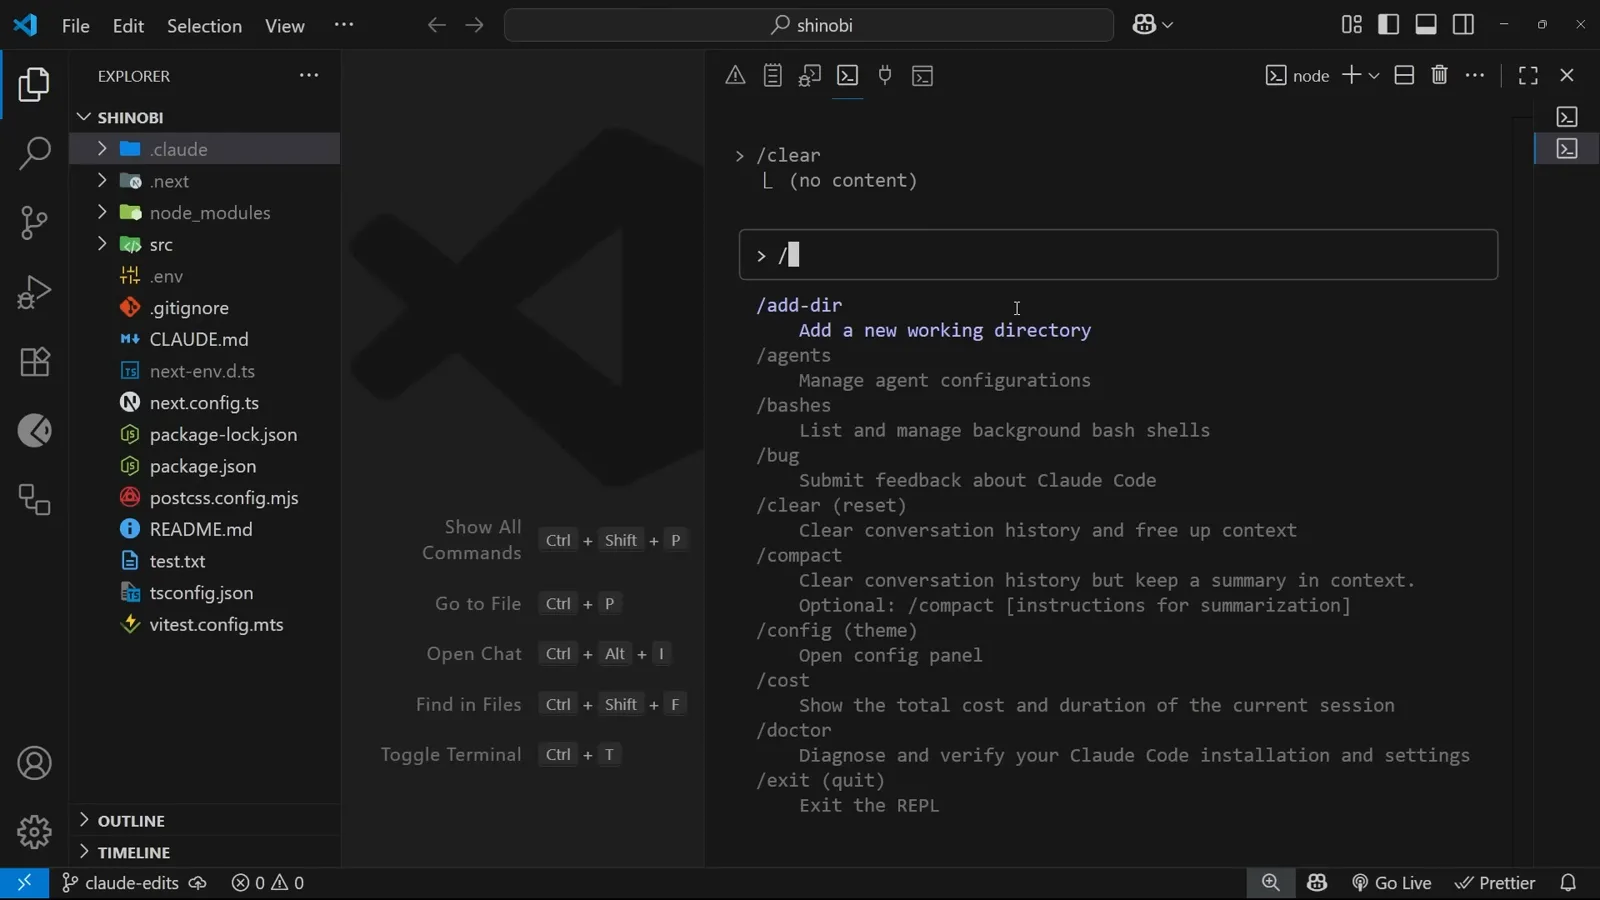
自定义斜杠命令存放在项目 .claude 目录下的 commands 文件夹中,没有就手动创建。这个文件夹里每放一个 Markdown 文件,就多出一条命令,命令名就是文件名。
.claude/commands 中,一条命令对应一个 Markdown 文件。在 2:03 处观看 - 3
把命令写成 Markdown 文件
这里的 ui-component.md 告诉 Claude Code:新组件放在哪里、文件名用 PascalCase、要定义哪些主题色变体,以及如何编写测试文件并跑到全部通过。@路径 语法可以把另一个文件作为上下文引入。对 Claude Code 而言,这个文件就是一整段精心编写的提示词。
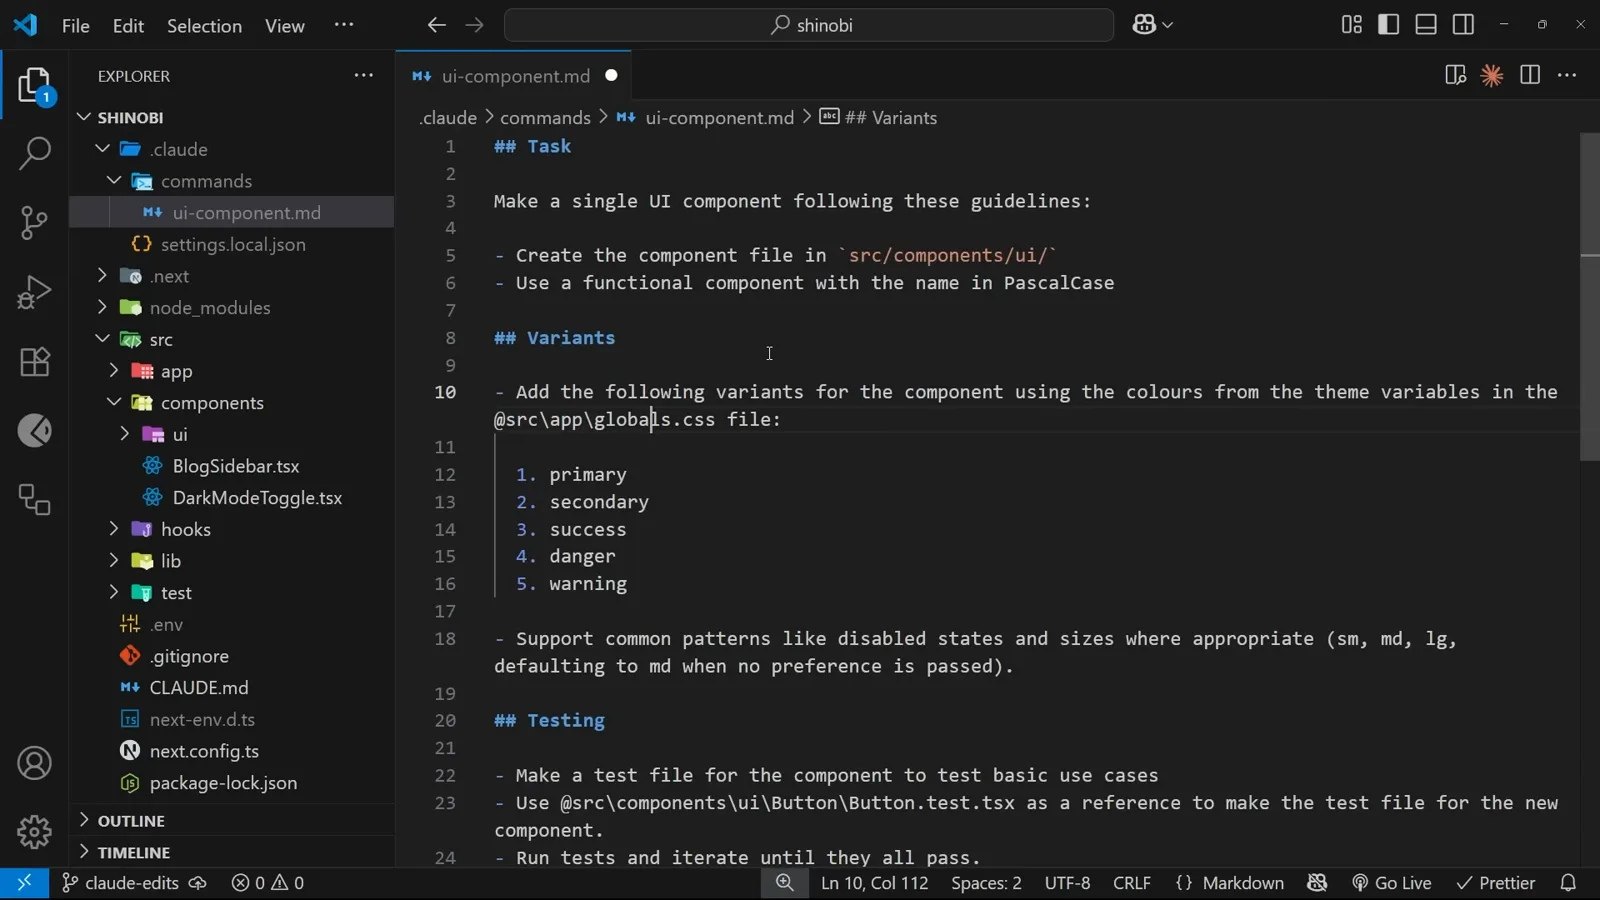
完整的提示词就住在一个 Markdown 文件里。在 3:06 处观看
端到端运行一条命令
重启会话,从菜单选择 /ui-component,让它按你的方式构建组件。
- 4
重启后,在菜单里找到新命令
Claude Code 只在新会话启动时读取命令文件,所以要退出并重新启动。此时输入斜杠,ui-component 会排在菜单最顶部,标注为项目命令——选中后回车即可运行。
新会话中,/ui-component 排在所有内置命令之前。在 4:05 处观看 - 5
审批命令要执行的操作
命令文件并没有说要做哪种组件,于是 Claude Code 自己选了卡片组件,并在执行 mkdir 创建目录前请求批准。选项 2 会记住本次决定,以后同一项目中的 mkdir 不再反复询问。
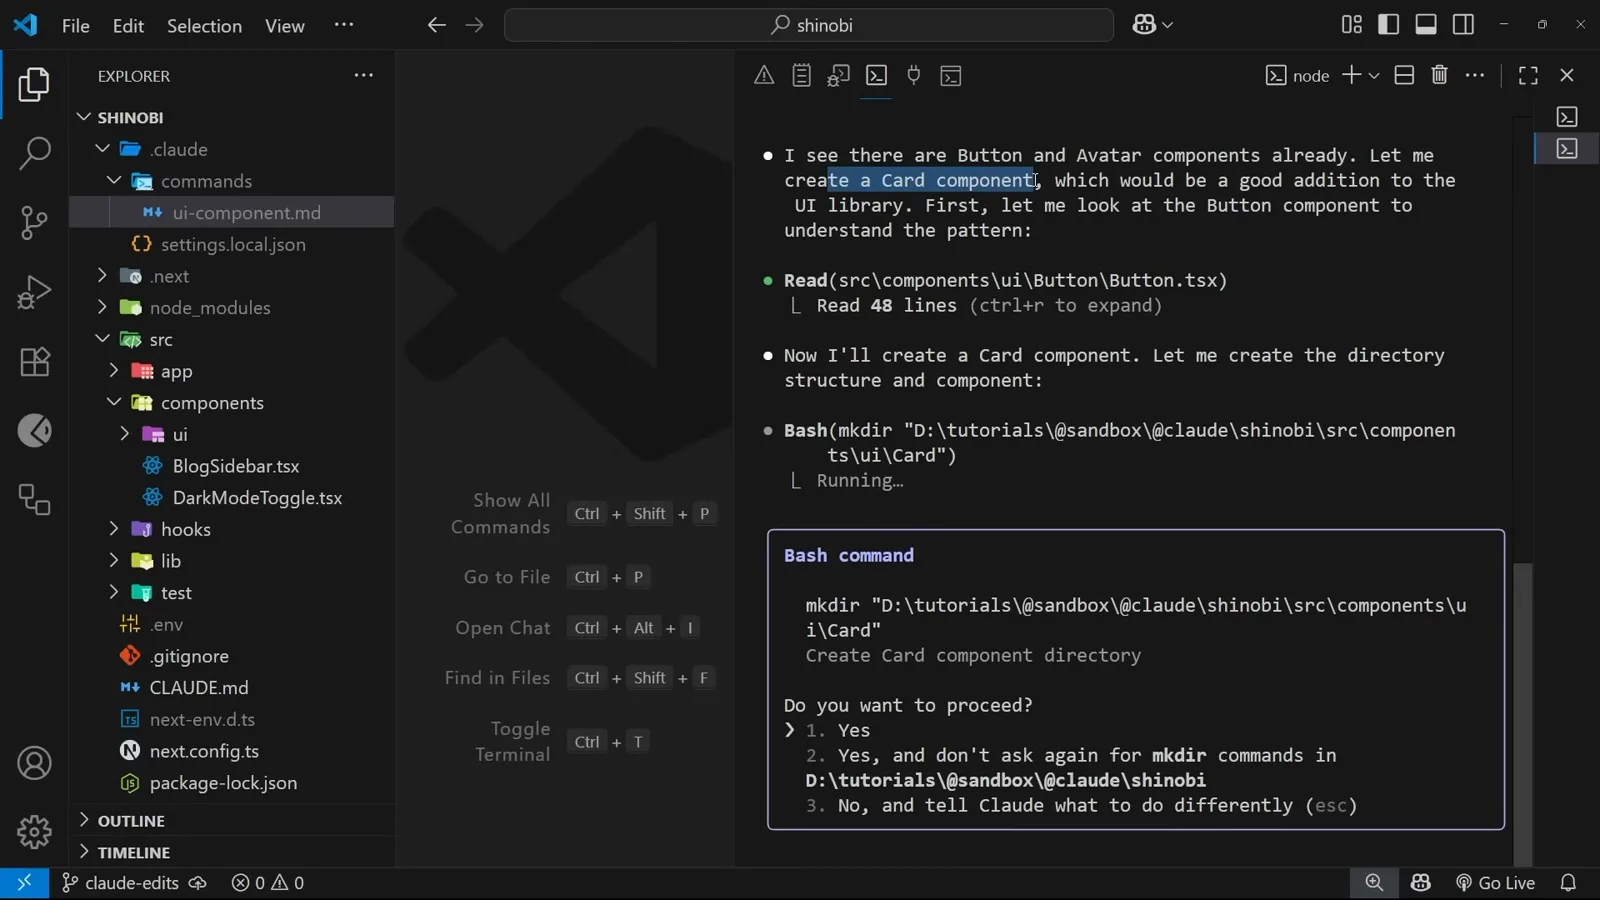
本次运行第一次审批:创建 Card 组件目录。在 4:32 处观看 - 6
先读运行总结,再决定是否信任结果
很快终端会汇报:五个使用主题色的变体、三种尺寸、交互状态、九个全部通过的测试,以及预览页的更新。这个总结是检查命令运行结果最快的途径——不过每个文件的具体内容仍值得通读一遍。
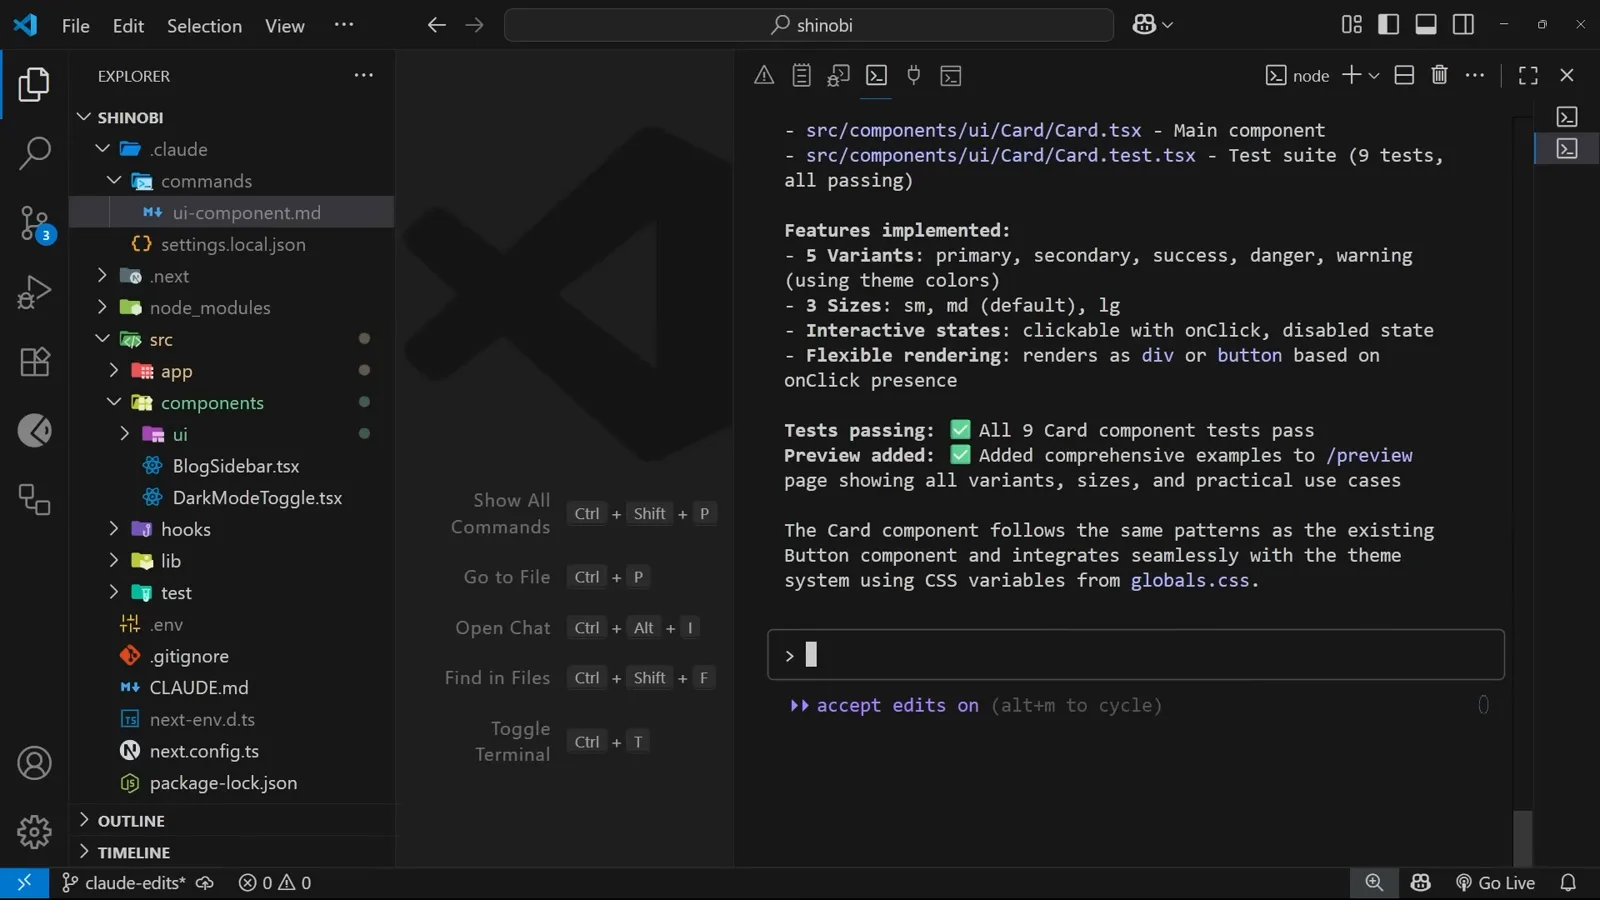
功能、测试与预览更新,浓缩在一段总结里。在 5:01 处观看 - 7
在浏览器中预览成果
命令已把新卡片加入项目的预览页,往下滚动就能看到 primary、secondary、success、warning、danger 五种变体,多种尺寸且带悬停效果——全部来自一条斜杠命令。
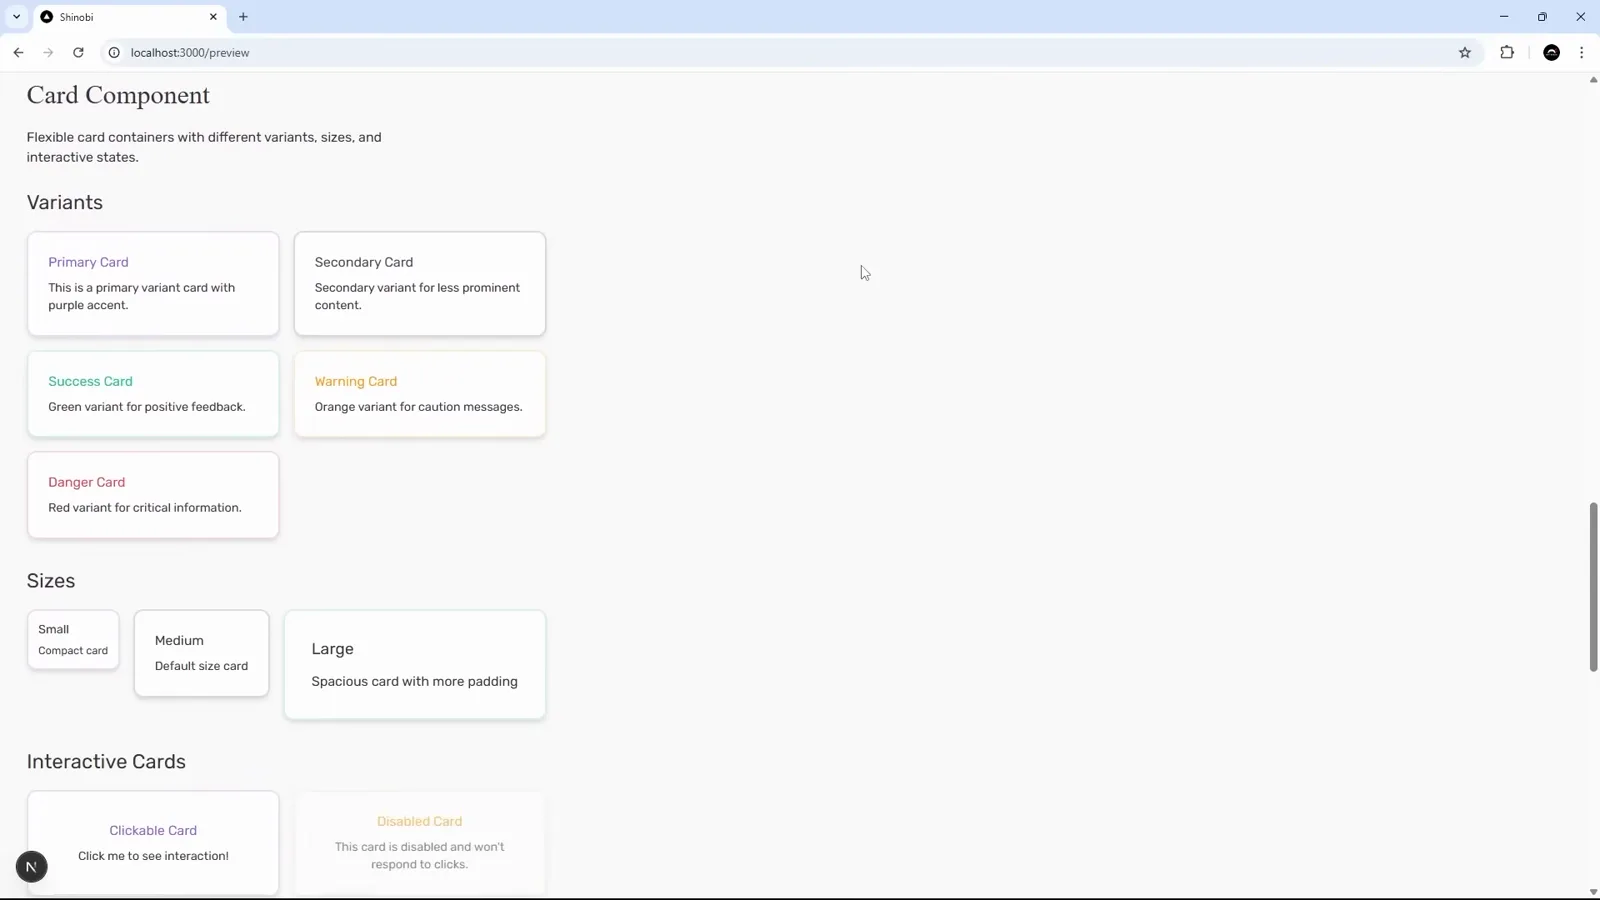
亮色模式下渲染出的卡片变体。在 6:03 处观看 - 8
检查你没想到的主题
预览页自带暗色模式开关,生成的组件在暗色下同样成立——同一份标记,通过命令文件中指定的主题变量重新着色。这就是在命令里写上“使用主题变量中的颜色”的回报。
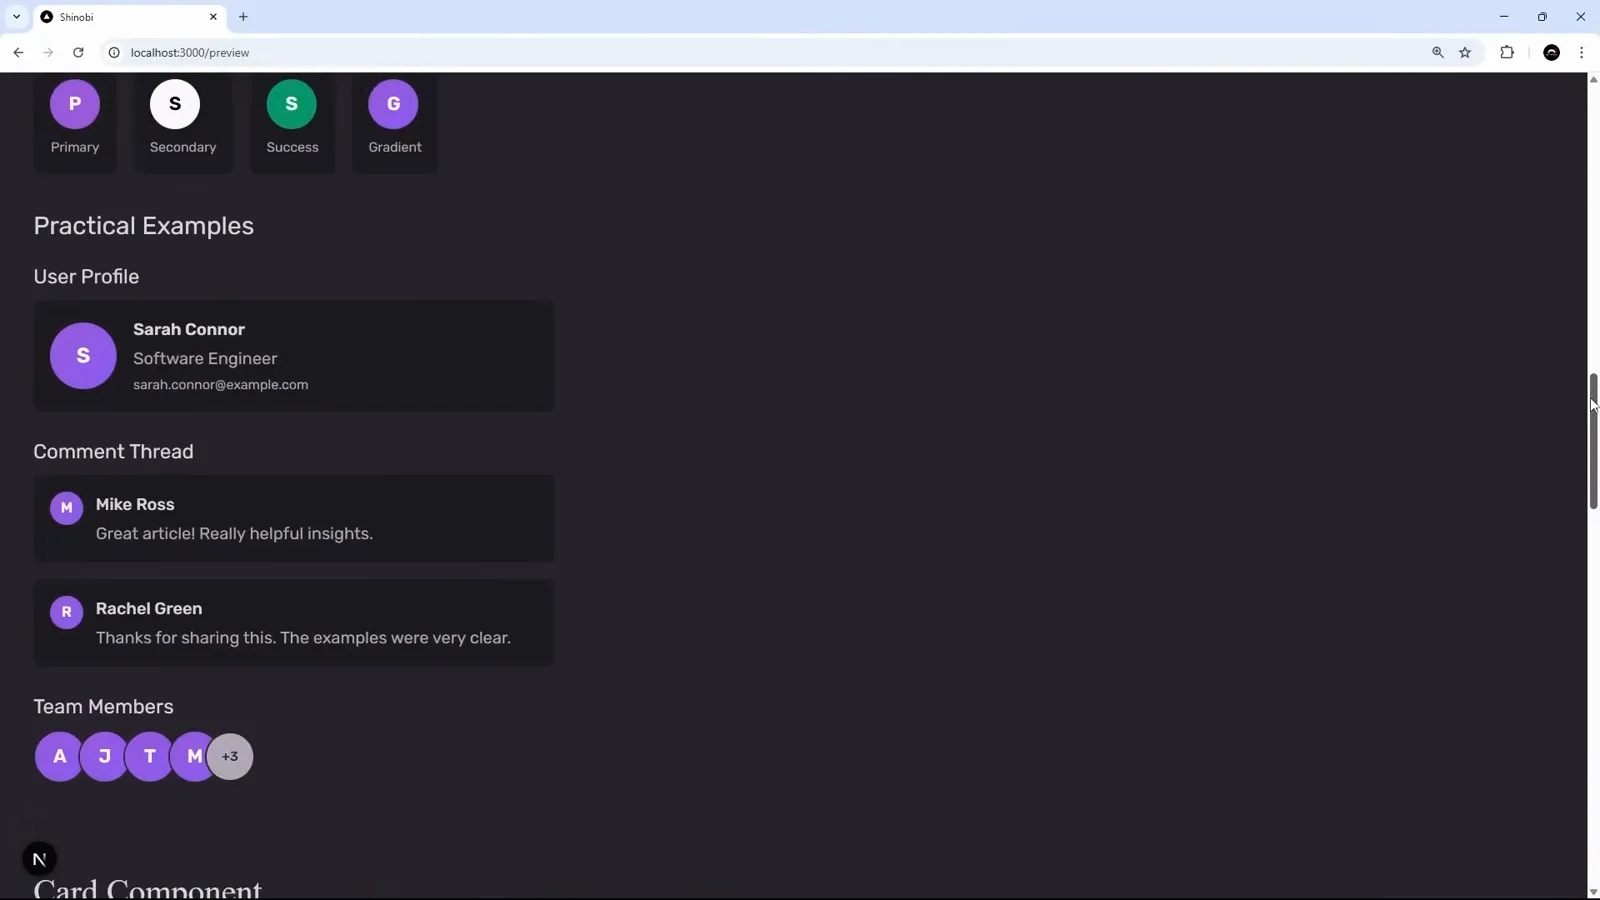
同一批组件,在暗色模式下经 CSS 变量重新着色。在 6:34 处观看
让命令接受参数
front matter 加 $ARGUMENTS,一条命令变成可复用的生成器。
- 9
用 front matter 描述命令
修改命令文件从 front matter 开始——即两条 --- 线之间的元数据块。description 说明命令的作用,argument-hint 提示期望的参数格式;两者之后都会显示在菜单和提示行里,再也不用打开文件回忆用法。
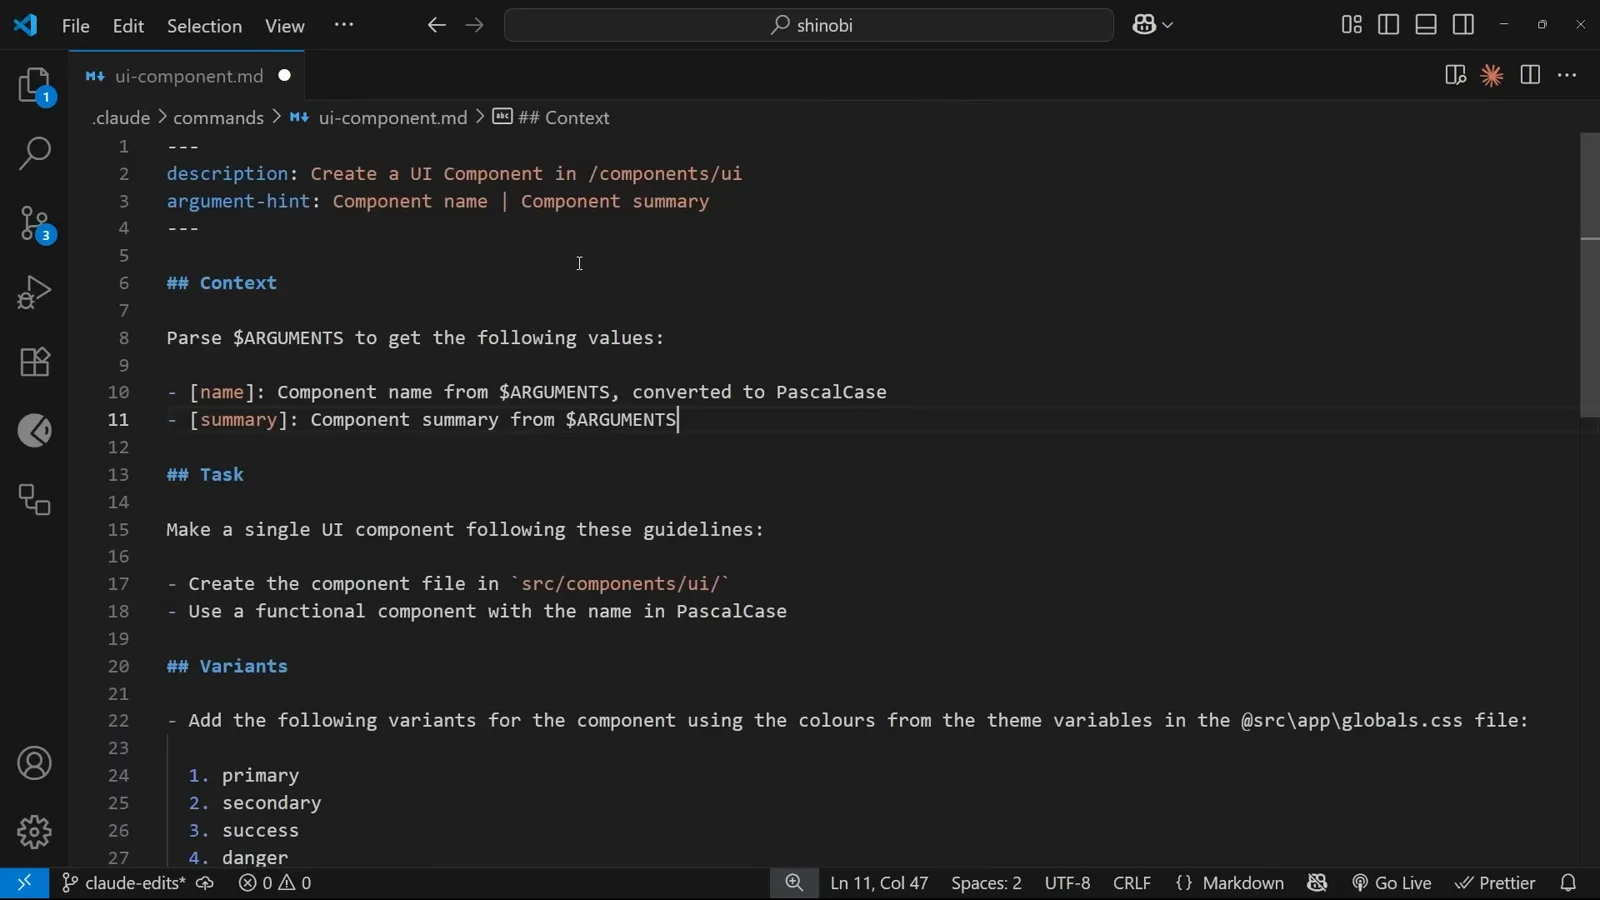
description 与 argument-hint,在文件顶部定义一次。在 7:13 处观看 - 10
把 $ARGUMENTS 拆成命名值
命令名之后输入的所有内容都会进入 $ARGUMENTS 变量。这里的技巧是用 Markdown 参考式语法把它解析成命名值——[name] 接收组件名,[summary] 接收描述——下方的任务指令就能用它们作占位符。
![Task section of a custom slash command file referencing the [name] and [summary] values parsed from the command arguments](/images/guides/claude-code-slash-commands/claude-code-slash-commands-task-arguments.webp "Task section using parsed arguments")
参考式写法把一个 $ARGUMENTS 字符串拆成命名值。在 9:01 处观看 - 11
输入时就有提示
再次重启后,从菜单接受该命令,front matter 的两部分都会生效:description 确认命令用途,幽灵文本给出参数格式——组件名、竖线,然后是一段描述。
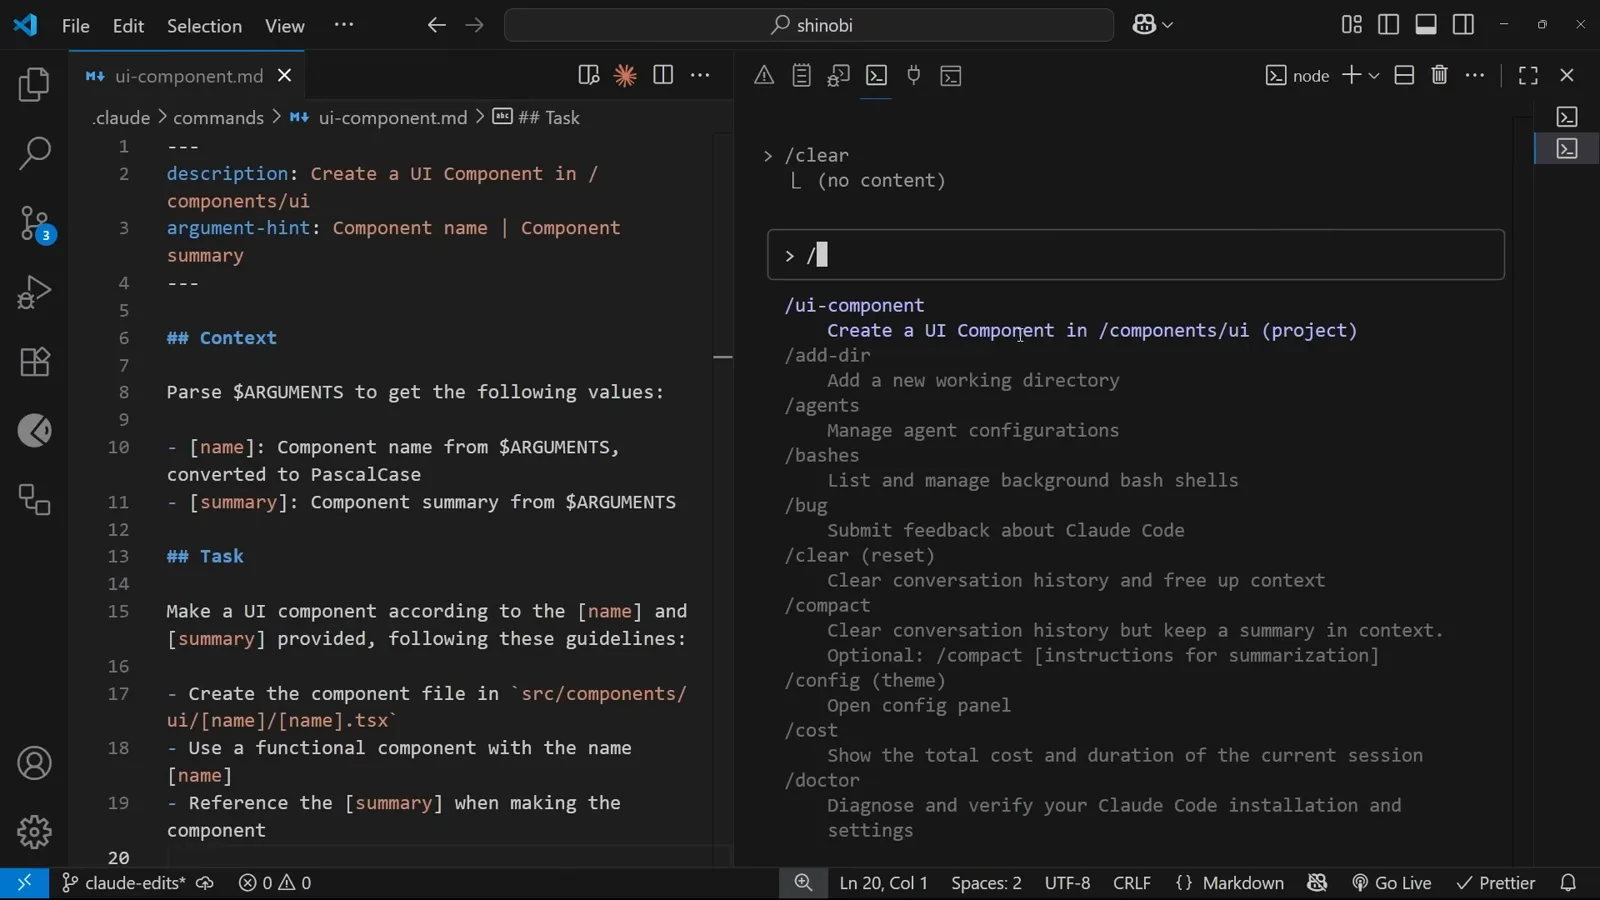
front matter 的回报:描述加行内参数提示。在 9:29 处观看 - 12
带参数调用命令
这次调用传入 icon 作为名称,“an icon component for showing icons with a circular background” 作为描述,中间用竖线分隔。同一个命令文件,如今能精确生成你点名的组件,而不再把选择权交给模型。
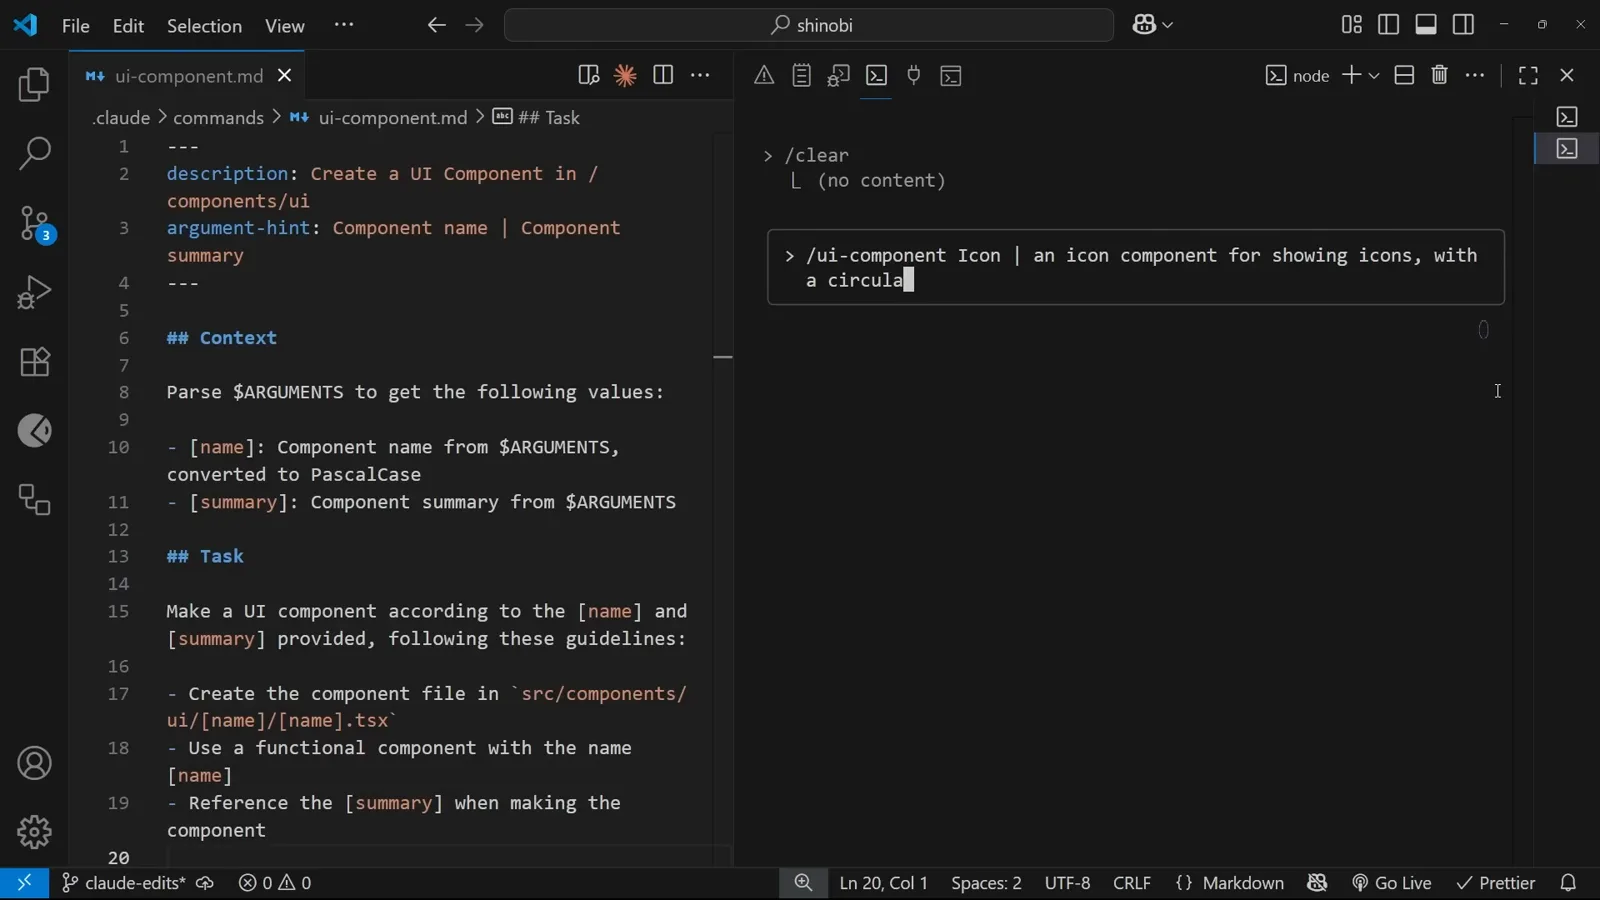
先是名称,竖线,然后一行描述。在 9:54 处观看 - 13
检查它创建的文件
资源管理器展示了命名参数的价值:components/ui 下出现新的 Icon 文件夹,里面是 Icon.tsx 及其测试文件,布局和之前的 Card 完全一致。同一条命令,不同输入,结构始终如一。
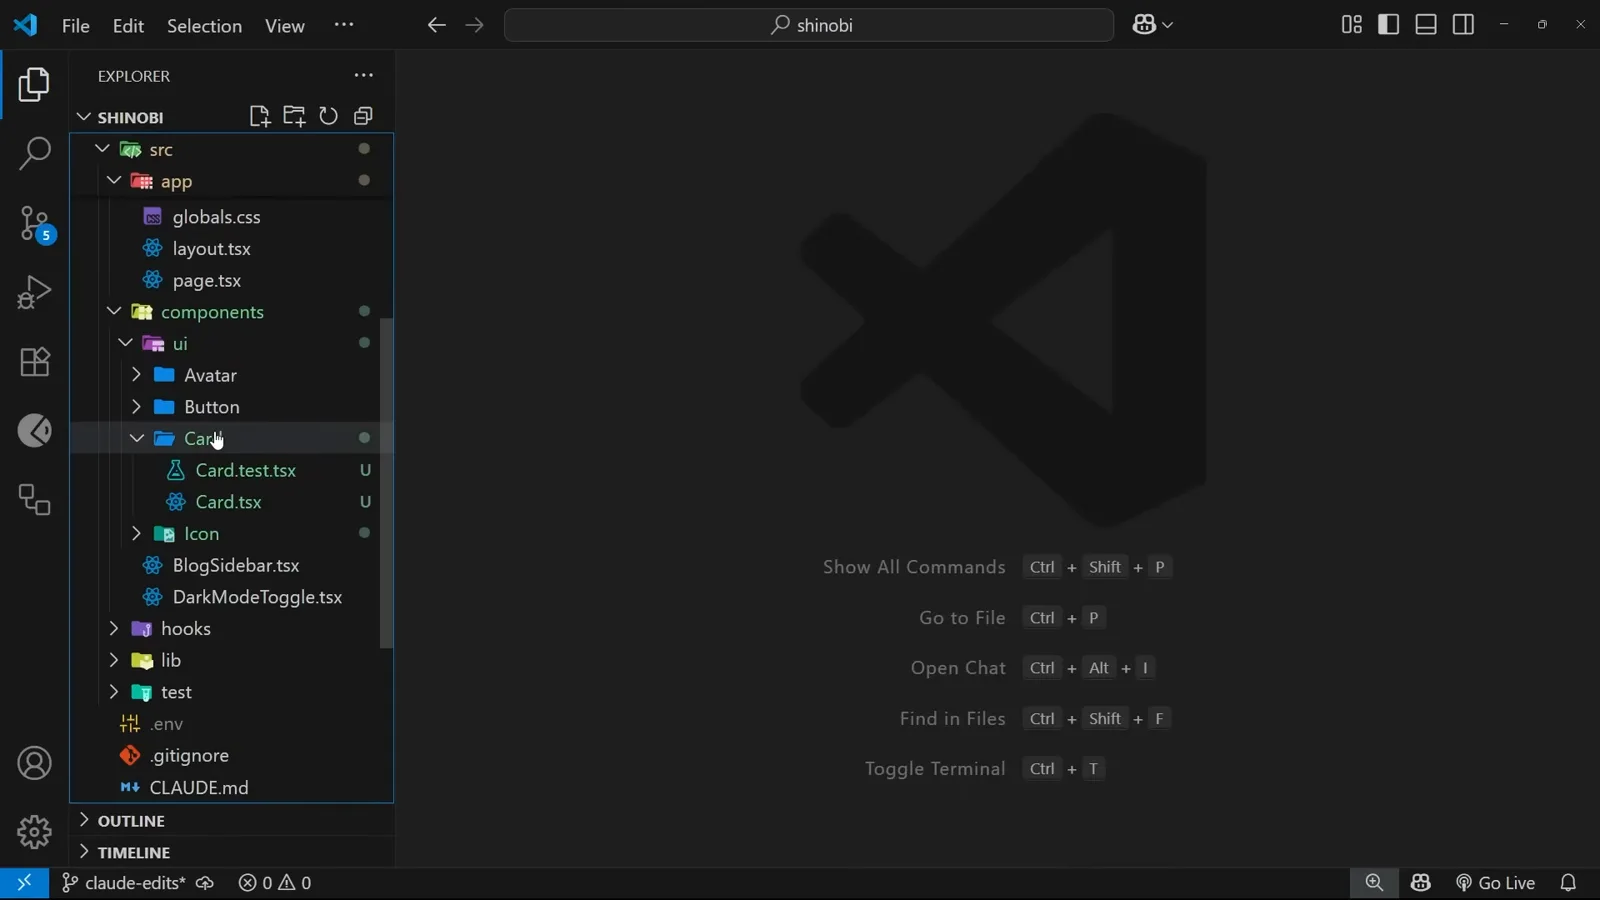
Icon.tsx 和它的测试文件落在预期目录中。在 10:27 处观看 - 14
对着看得见的输出迭代
第一版直接用了 emoji 图标,作者提出了异议——Claude Code 按要求换成了正式的图标库,预览里现在能看到操作栏、状态指示器和五种变体。自定义命令决定质量下限,而复审决定上限。
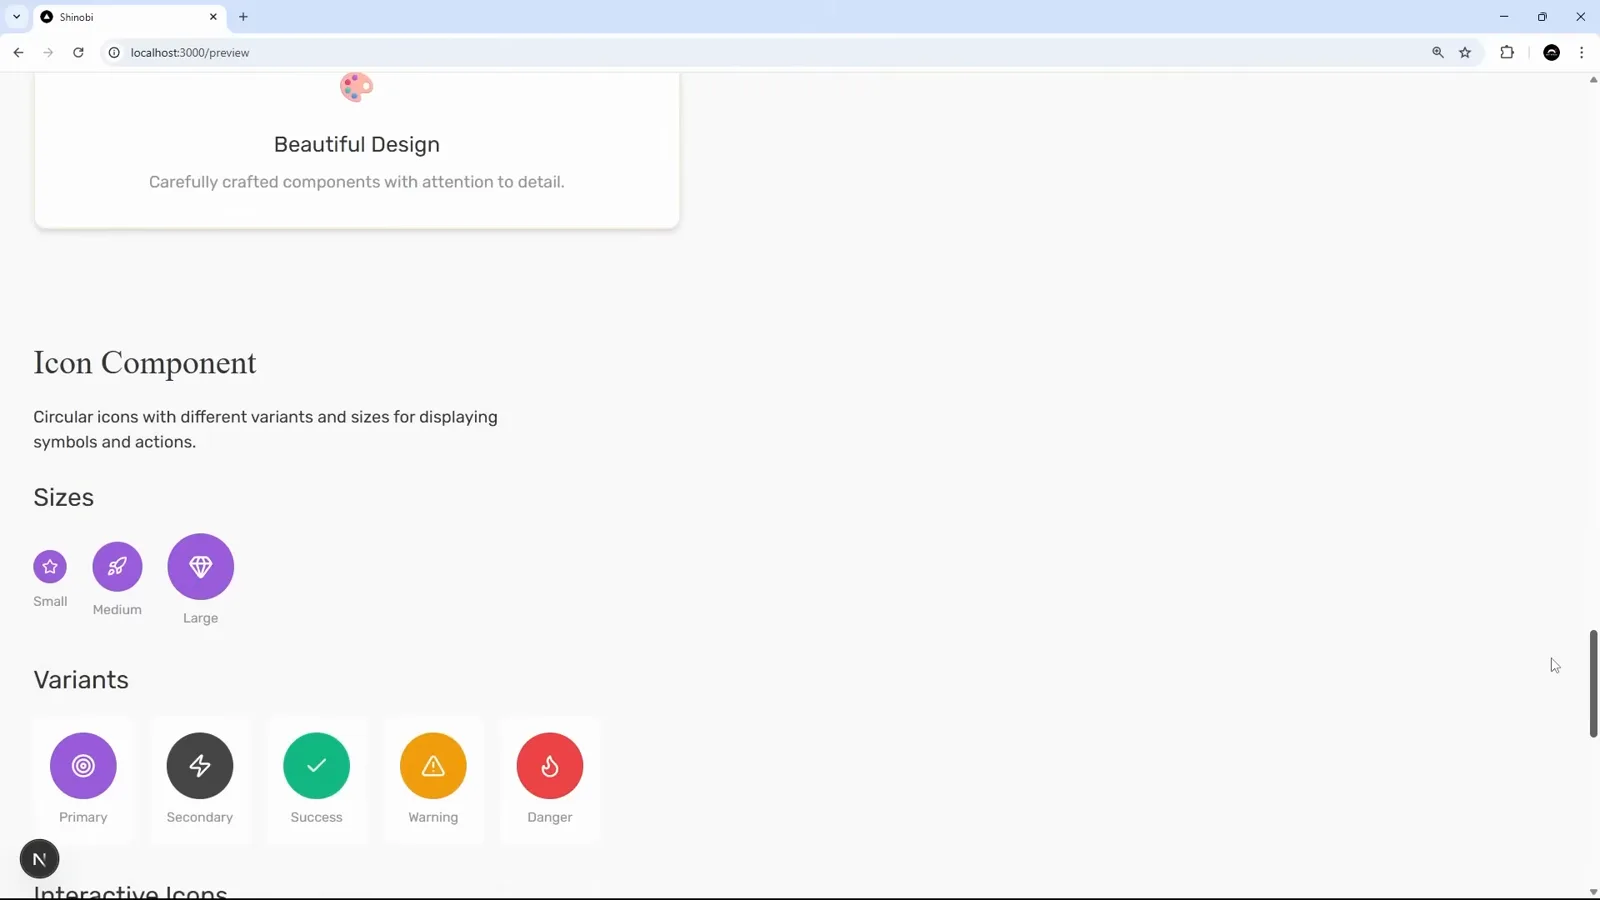
一轮反馈之后:真图标、五种变体、操作栏。在 11:52 处观看