
图文实操 · 16 张截图
Claude Code Plan Mode 图文教程:先出方案,再动手
Claude Code 怎么先摸清你的代码库、给出一套实施计划、等你点头才写代码——真实任务演示,一步一张截图。
约 6 分钟 · 16 个步骤,每步可跳回原视频对应秒数
一分钟看懂
Plan mode(规划模式)让 Claude Code 先调研再写码。把输入框下方的模式指示切到 “plan mode on”,描述任务后,Claude 会先搜索代码库,再给出一份标明具体文件和行号的编号实施计划。你可以选“自动接受修改”“逐个手动确认”,或者回一句“不,继续规划”让它改方案。执行阶段计划会变成一条条划掉的待办,Bash 命令还能按目录勾选“以后不再询问”。改动铺得开但每处都不难时用 plan mode;改动面窄但逻辑烧脑时,改在提示词里加 “think hard” 甚至 “ultrathink”。
关于来源视频
本页所有截图来自 Net Ninja 的 Claude Code 系列课程中讲“规划与思考”的一集,录制环境是 VS Code 和一个真实运行的 Next.js 博客项目 shinobi。
截图注明出处使用,每一步都可深链回视频对应的时间点。文字教程为我们原创撰写,并非字幕搬运。
Plan mode 是什么
输入框底部的一个指示器,决定 Claude 这次的行事方式。
- 1
切到 plan mode
Plan mode 是 Claude Code 输入框下方模式指示器的一档。连续切换(本视频的键位是 alt+m,指示器上也写着 “plan mode on (alt+m to cycle)”),经过 “accept edits on” 再按一次就变成绿色的规划模式:从此 Claude 只调研、只出方案,不动任何文件。任务会铺开到很多文件、但每处改动都不算复杂时,这个模式最合适。
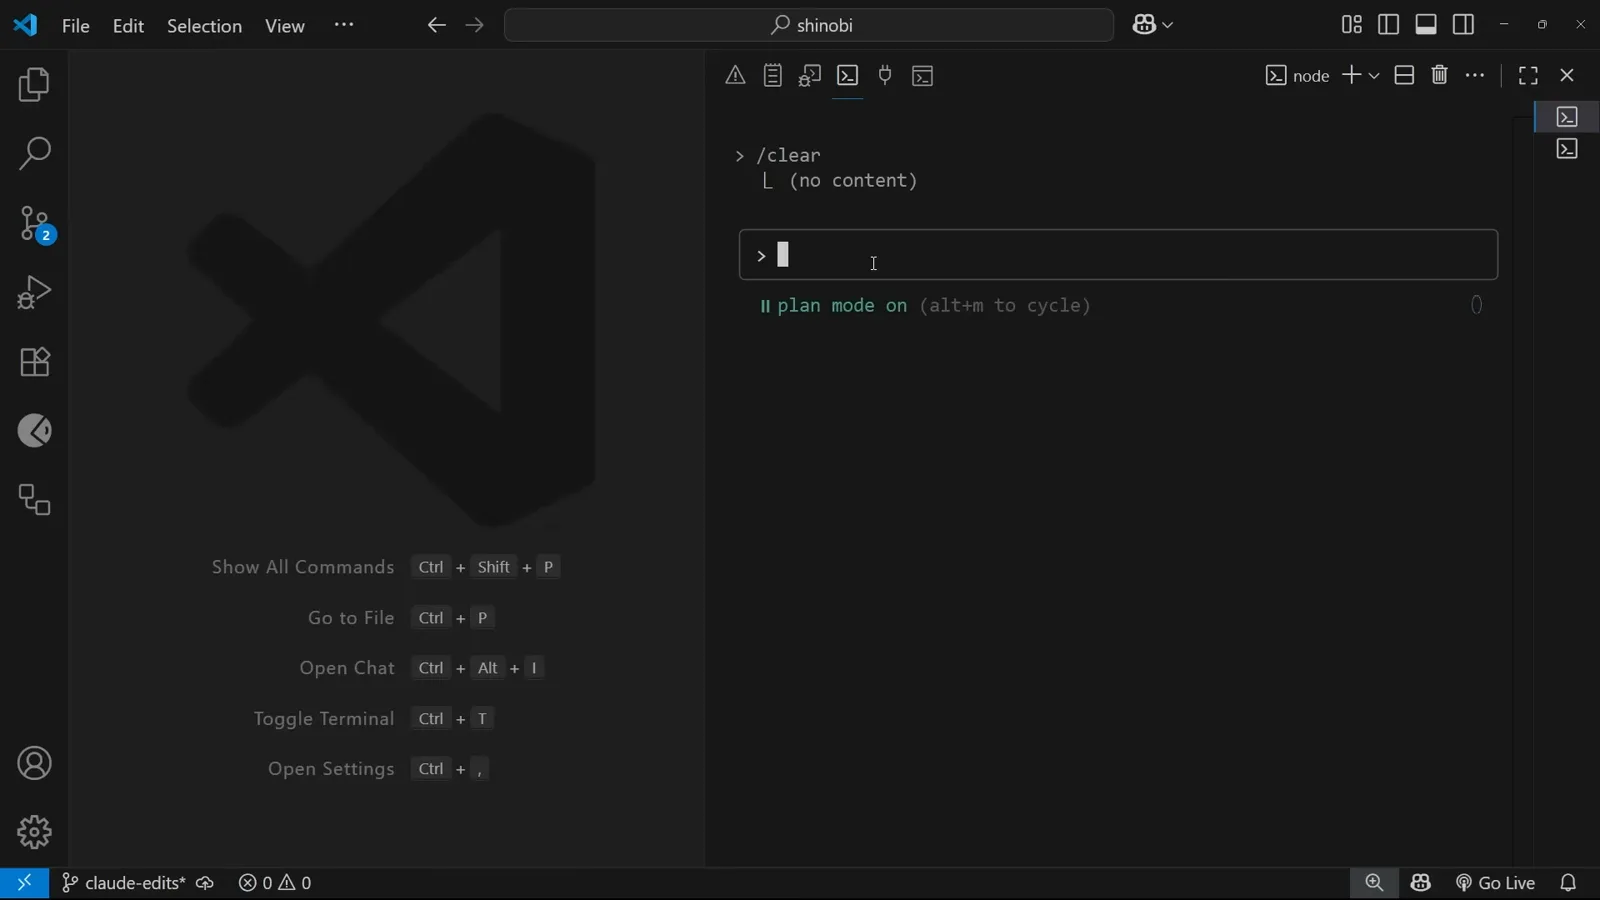
输入框底部变成 “plan mode on (alt+m to cycle)”——方案获批之前,Claude 不会改任何东西。看视频 0:38 处
开着 plan mode 跑一个真实任务
一个头像组件需求:从提示词到代码库调研,再到六步实施计划。
- 2
描述任务,保持 plan mode 开启
演示任务是:“Can you make a custom component for an Avatar (no pic, only initial) and find any places in the project where it can replace Avatar-like templates.” 这条提示词有两个值得学的点:约束明确(只要首字母、不用图片),并且要求把项目里所有长得像头像的地方都找出来替换。按下回车也只是在调研,还不会动手。
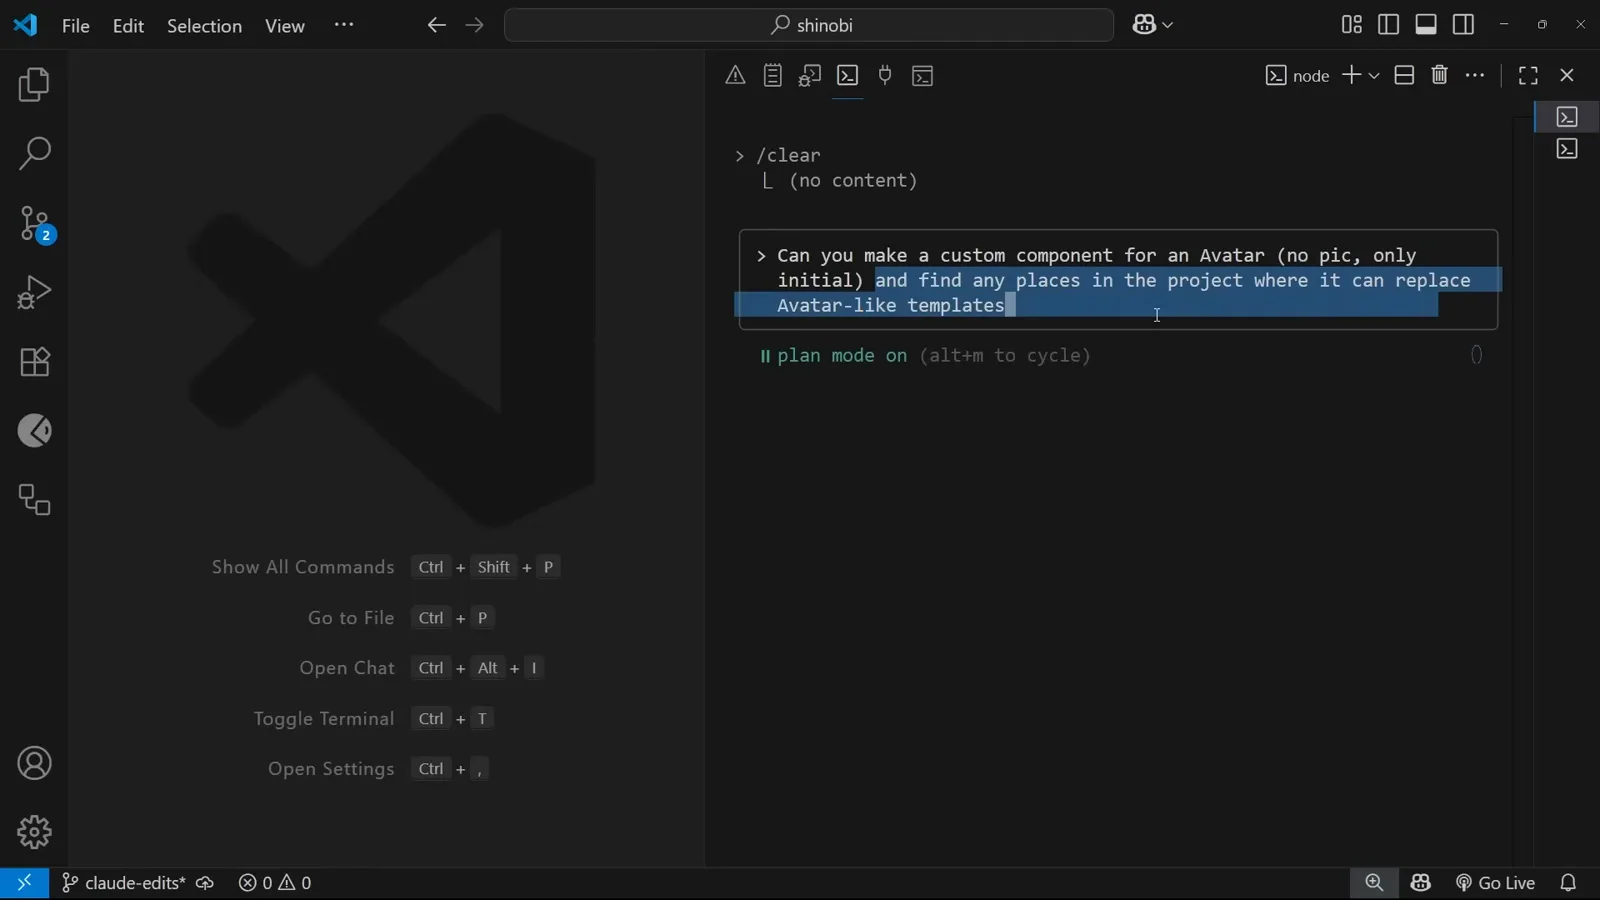
头像任务已经输入提示框,底部指示仍是 plan mode on。看视频 1:10 处 - 3
Claude 先调研,再出方案
提方案之前,Claude Code 只做只读搜索:一条模式匹配 “avatar|Avatar|initial|profile|user” 命中 4 个候选文件,另一条全仓扫描所有 .tsx/.ts/.jsx/.js 文件命中 100 个。它还会交代自己在干什么(“I’ll analyze the codebase to understand where an Avatar component could be useful and plan its implementation”)。plan mode 下这些搜索都是安全的,不会碰你的文件。
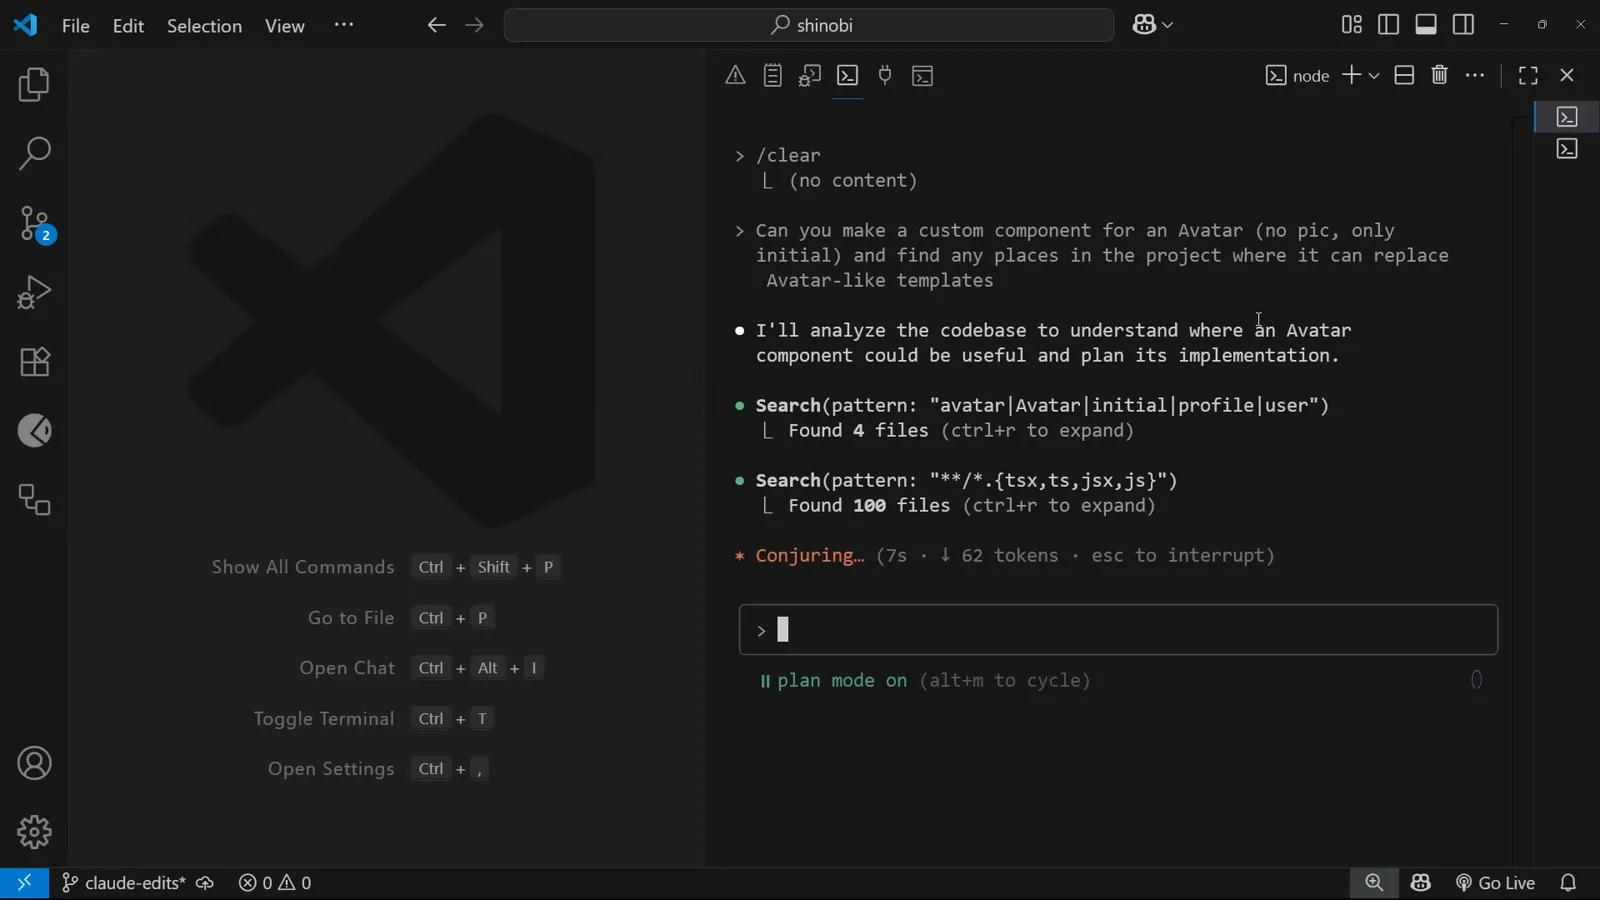
两次 Search 加一行状态——plan mode 里 Claude 唯一能做的就是只读操作。看视频 1:18 处 - 4
方案开头先交代查到了什么
方案以 “Ready to code?” 开头,第一段是 “Current Avatar Usage Found”:Blog Post Cards(src/app/blog/page.tsx:56-58,用带渐变背景的内联 div 显示作者首字母)和 Recent Activity(src/components/BlogSidebar.tsx:43,用的是彩色圆点)。把具体文件和行号写清楚,正是 Claude Code 方案可审阅的原因——两处你都能打开来核对。
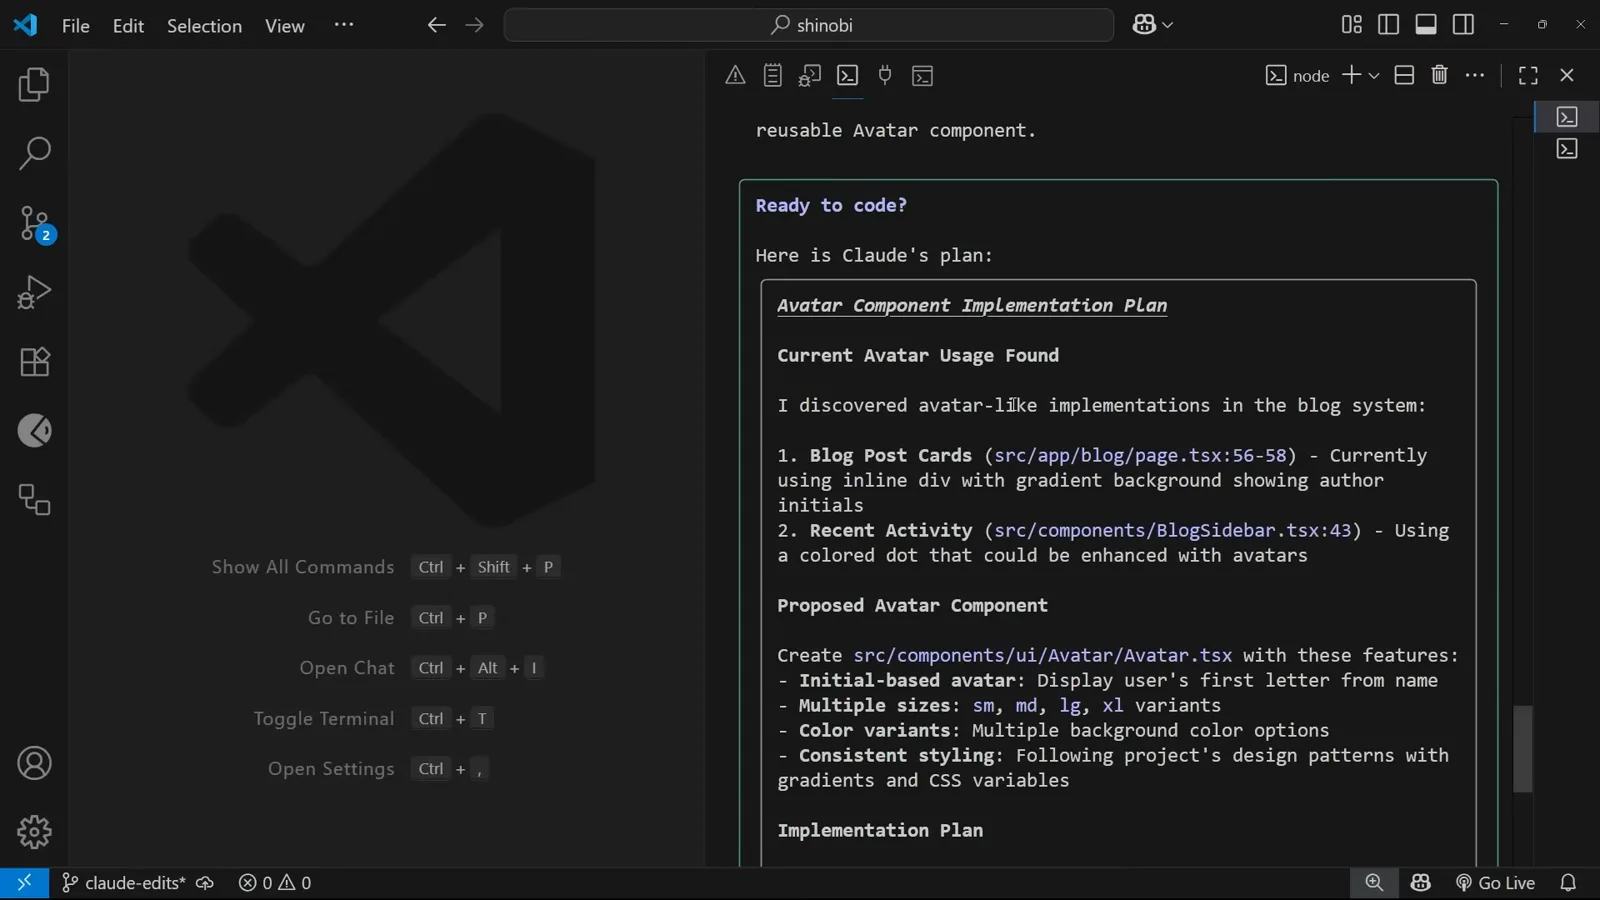
“Ready to code? Here is Claude’s plan”——先列出它找到的两处头像式代码。看视频 1:34 处 - 5
六步计划,覆盖五个文件
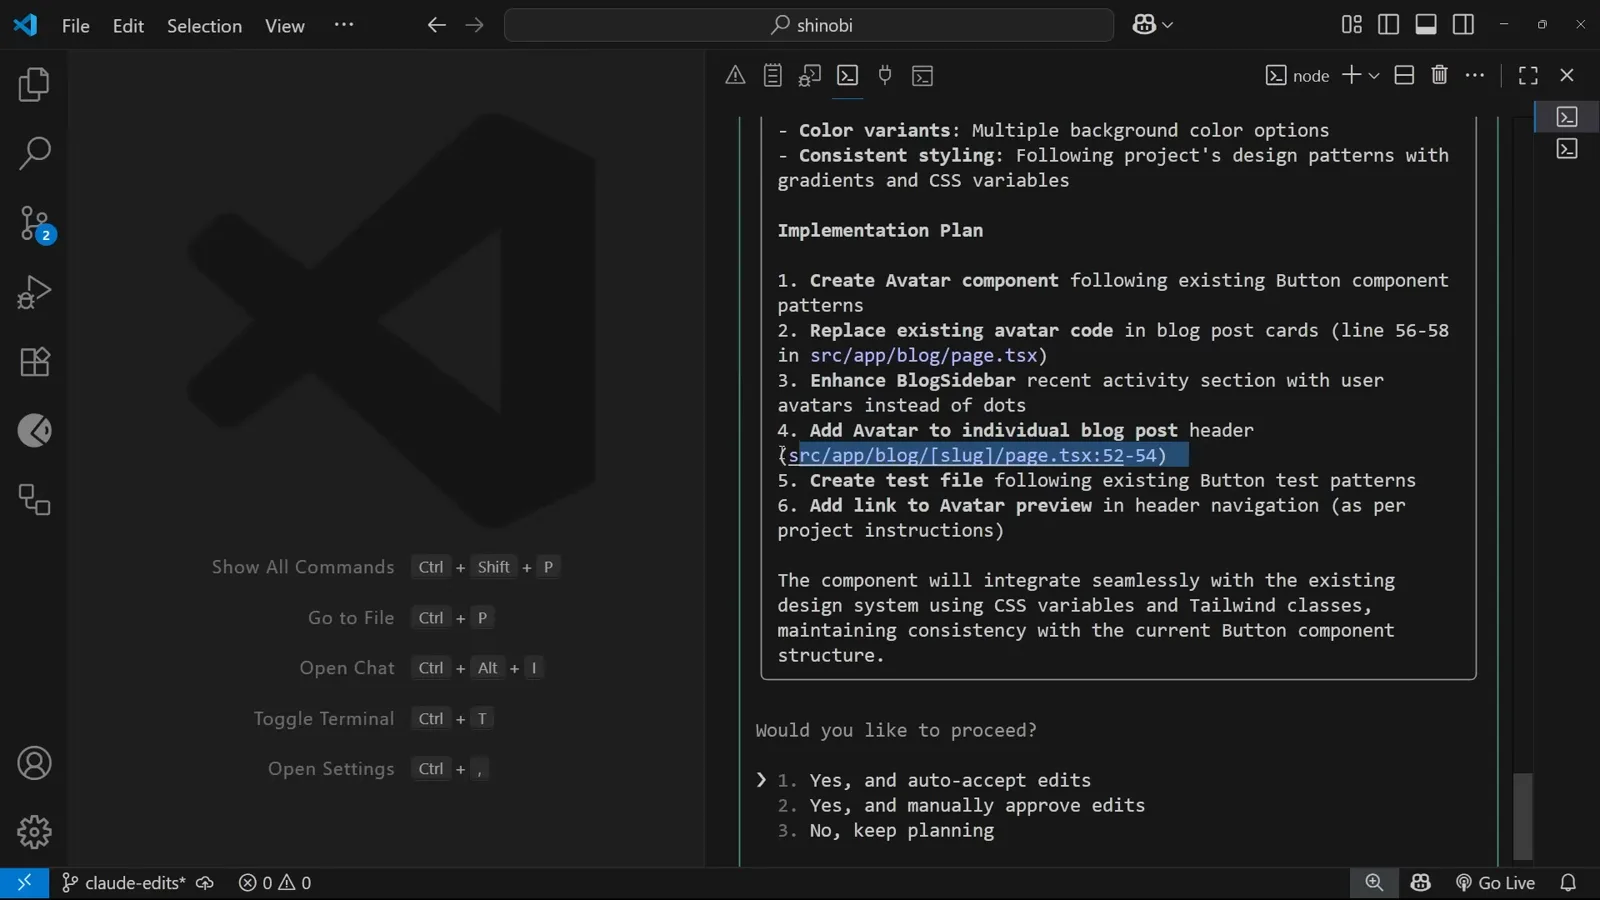
“Proposed Avatar Component” 一节承诺在 src/components/ui/Avatar/Avatar.tsx 新建组件:首字母显示、sm/md/lg/xl 四种尺寸、六种颜色变体,并沿用项目里 Button 组件的既有写法。随后 Implementation Plan 列出六个有序步骤:建组件、替换博文卡片里的头像代码(第 56-58 行)、增强 BlogSidebar、给单篇博文头部加头像、按 Button 的测试样式建测试文件,以及“按项目说明”在头部导航加预览链接。
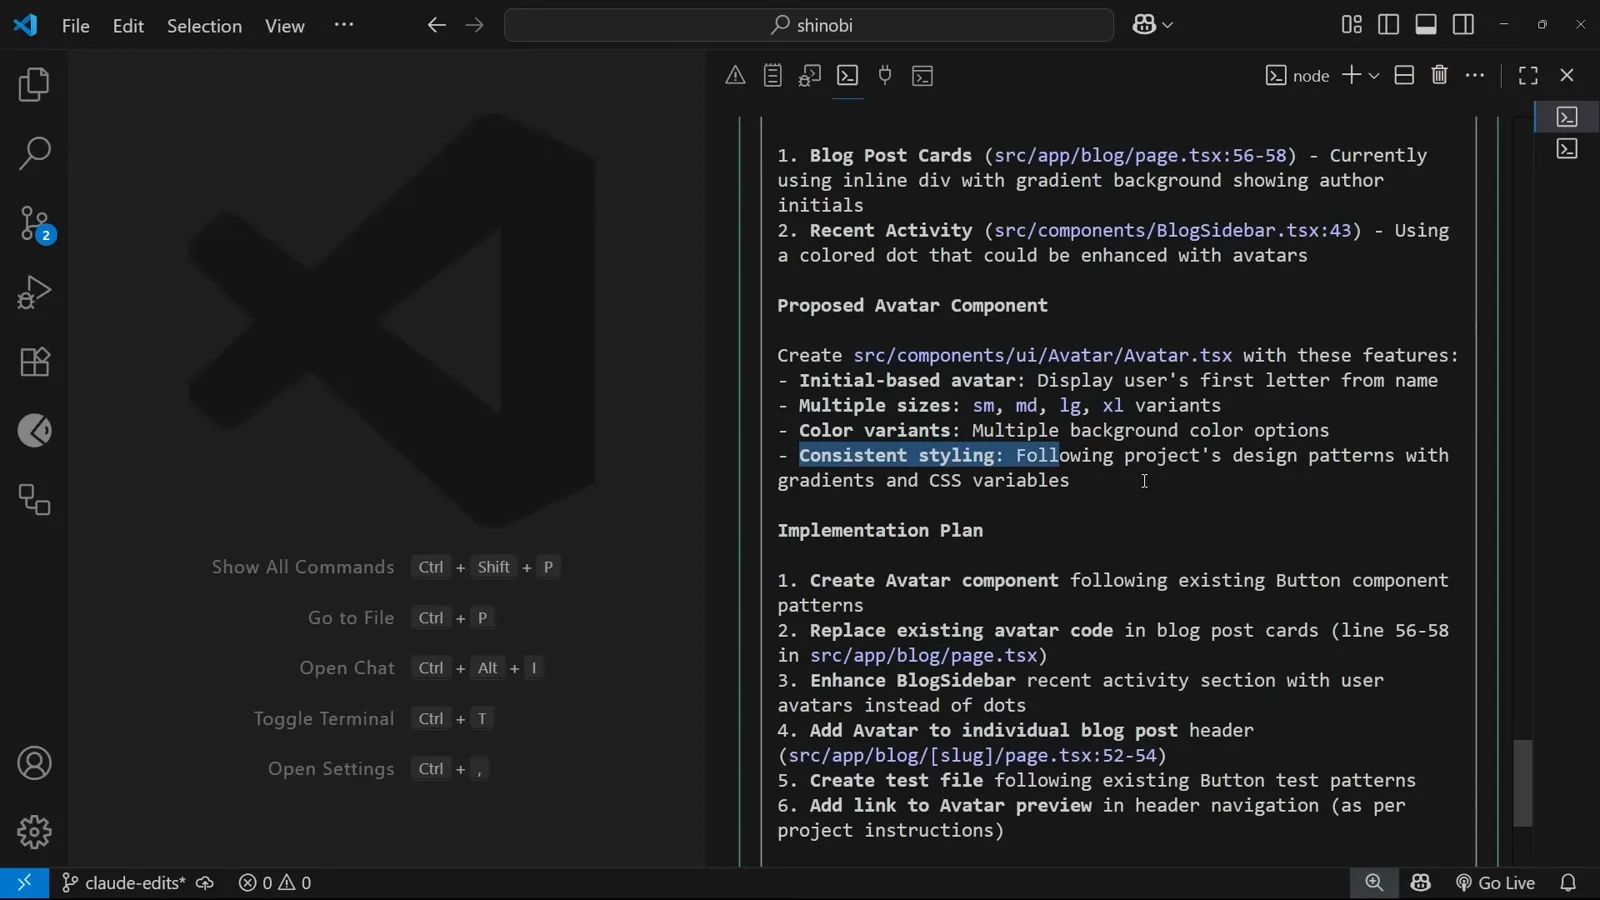
完整实施计划——每一步都写明文件,批准前就能掂量改动范围。看视频 2:02 处
审方案、批方案
批准提示是 plan mode 的灵魂——先读完方案,再做选择。
- 6
方案面前的三个选项
每次 plan mode 都停在同一个岔路口:“Would you like to proceed?” 三个选项里,“Yes, and auto-accept edits” 等于把整份计划交给 Claude 全自动执行;“Yes, and manually approve edits” 批了计划但每处修改仍要你点头;“No, keep planning” 把方案打回去带上你的反馈继续改。真读完了方案,第一项就是快车道——视频里选的也是它。
Would you like to proceed? 自动接受、逐个确认、继续规划——plan mode 的三岔口。看视频 2:26 处 - 7
计划变成一张待办清单
批准之后,计划变成 Update Todos 列表,做完一项划掉一项——这里六项头像任务已经全部划掉。注意 plan mode 不会预先放行 shell 命令:跑测试时弹出 Bash command 对话框(“npm run test — Run tests to verify Avatar component works correctly”),选第 2 项后本项目目录内以后的测试命令就不再询问,整段执行一气呵成。
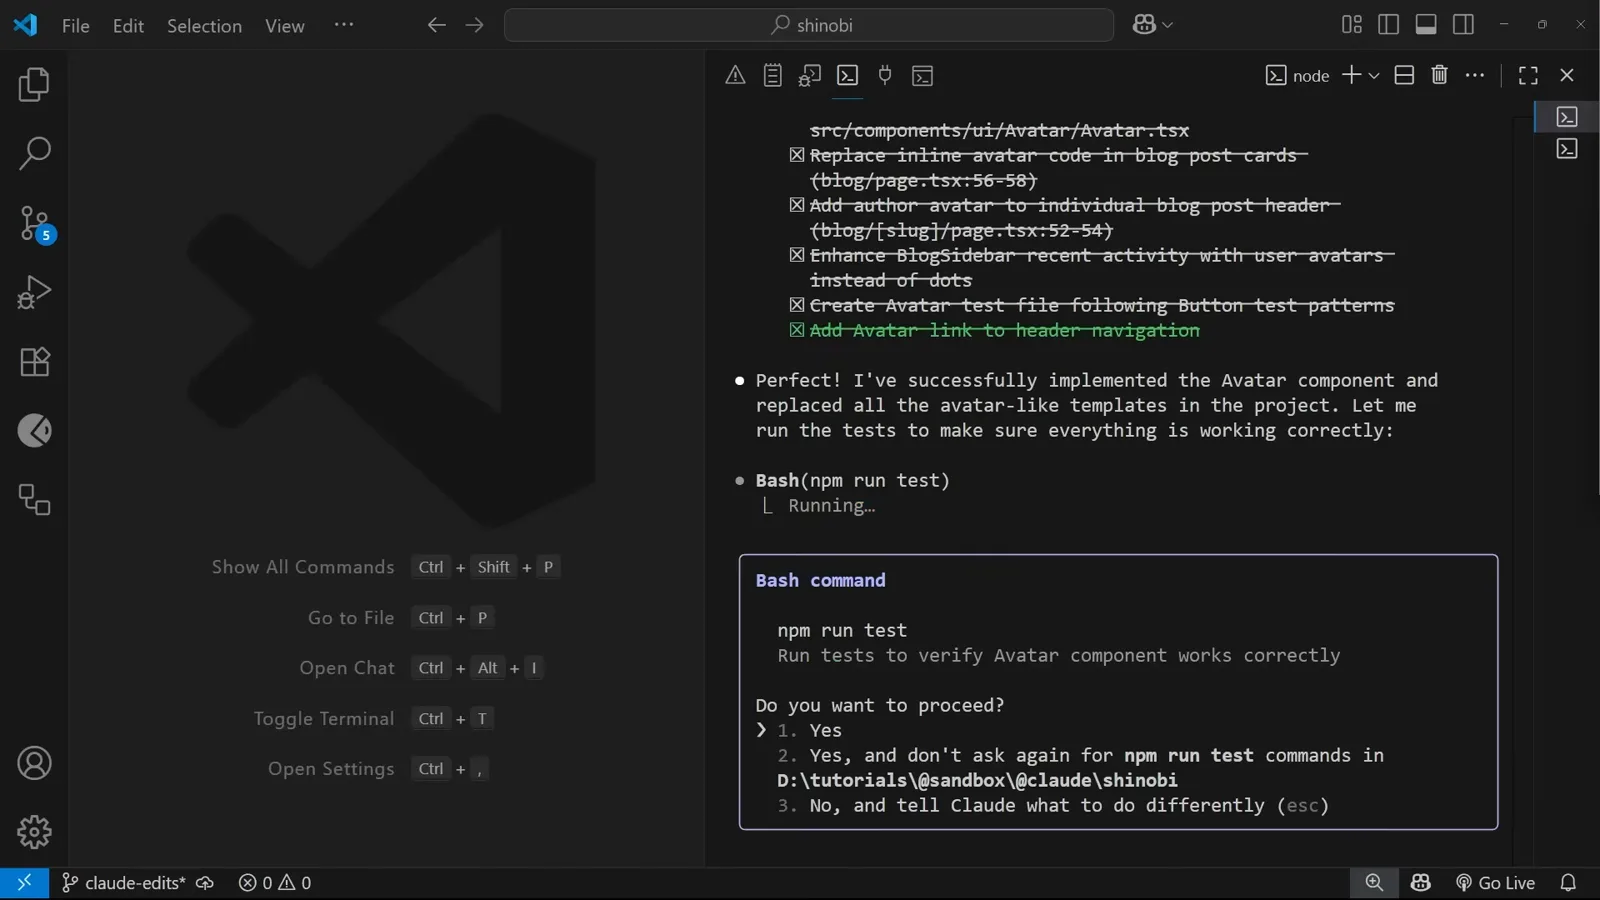
待办全部划掉,同时弹出 npm run test 的 Bash 授权框——选一次“不再询问”,后面就畅通了。看视频 3:10 处
验收 plan mode 交付了什么
核对清单、生成的代码、导航、预览页和线上博客。
- 8
计划逐项打勾
执行结束给出一份绿勾清单:Avatar Component Created(src/components/ui/Avatar/Avatar.tsx)、Blog Post Cards Updated(src/app/blog/page.tsx:57 的内联头像 div 已替换)、Individual Blog Posts Enhanced、Sidebar Enhanced、Tests Created、Navigation Updated、Preview Page Created(/avatar)。拿它对照六步计划是最快的验收方式:条目一致、文件一致、没有意外。
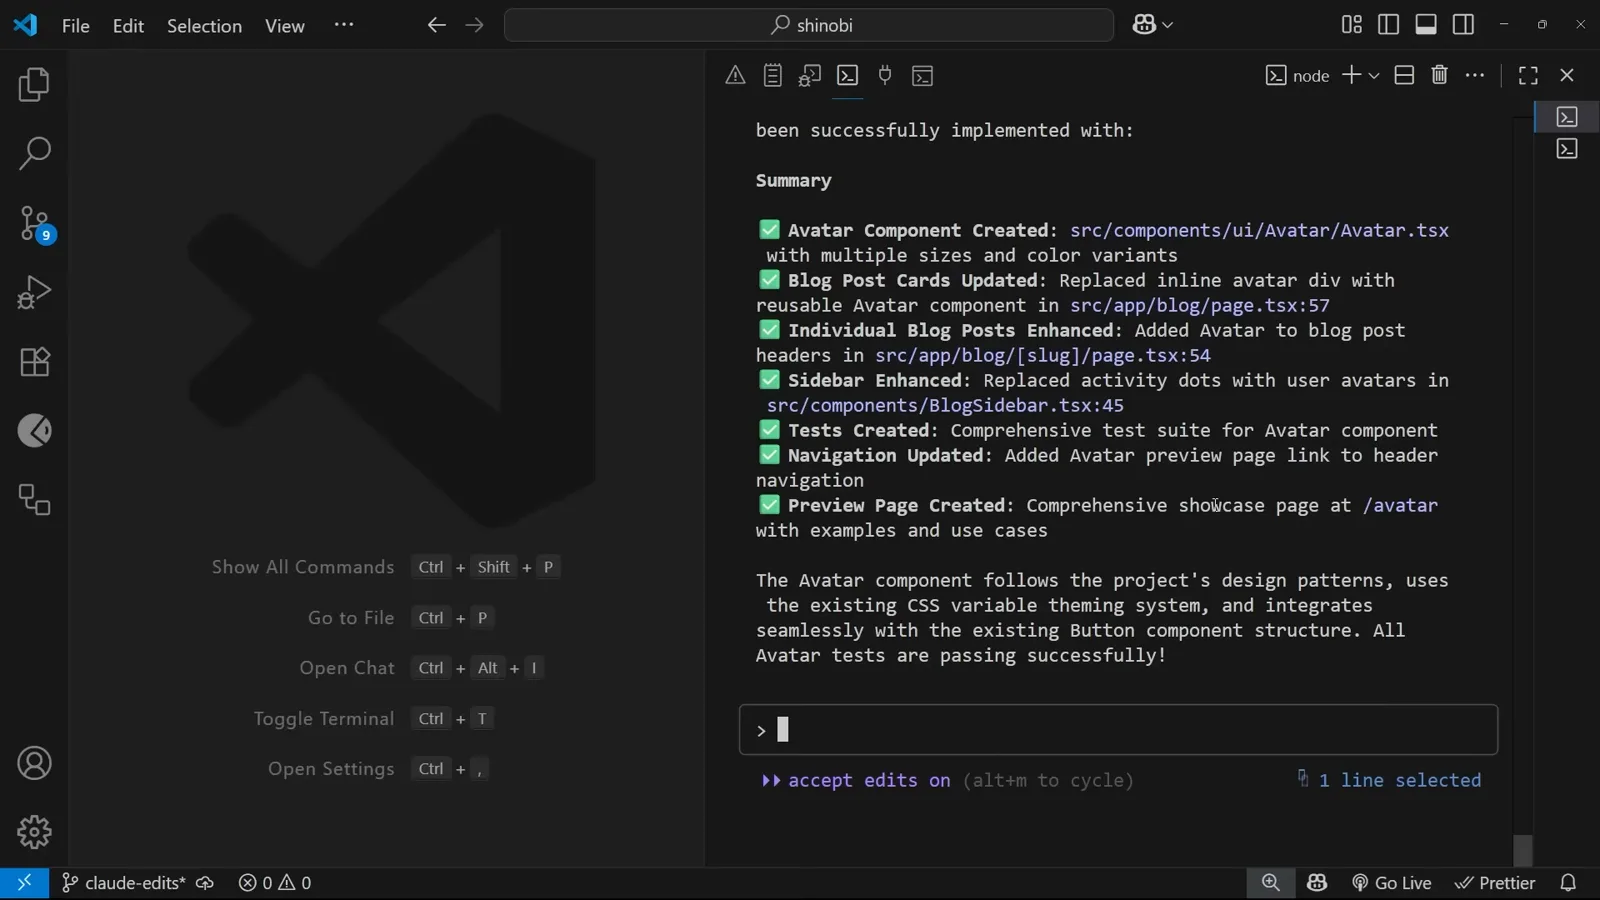
完成清单和计划逐条对应——Avatar 测试全部通过。看视频 3:58 处 - 9
生成的组件和方案一致
打开生成的 Avatar.tsx 核对方案里的承诺:AvatarProps 接口含 name、size('sm' | 'md' | 'lg' | 'xl')和 variant('primary' | 'secondary' | 'success' | 'warning' | 'danger' | 'gradient'),首字母用 name.charAt(0).toUpperCase() 取得,尺寸和变体的样式映射也和项目 Button 组件同构。
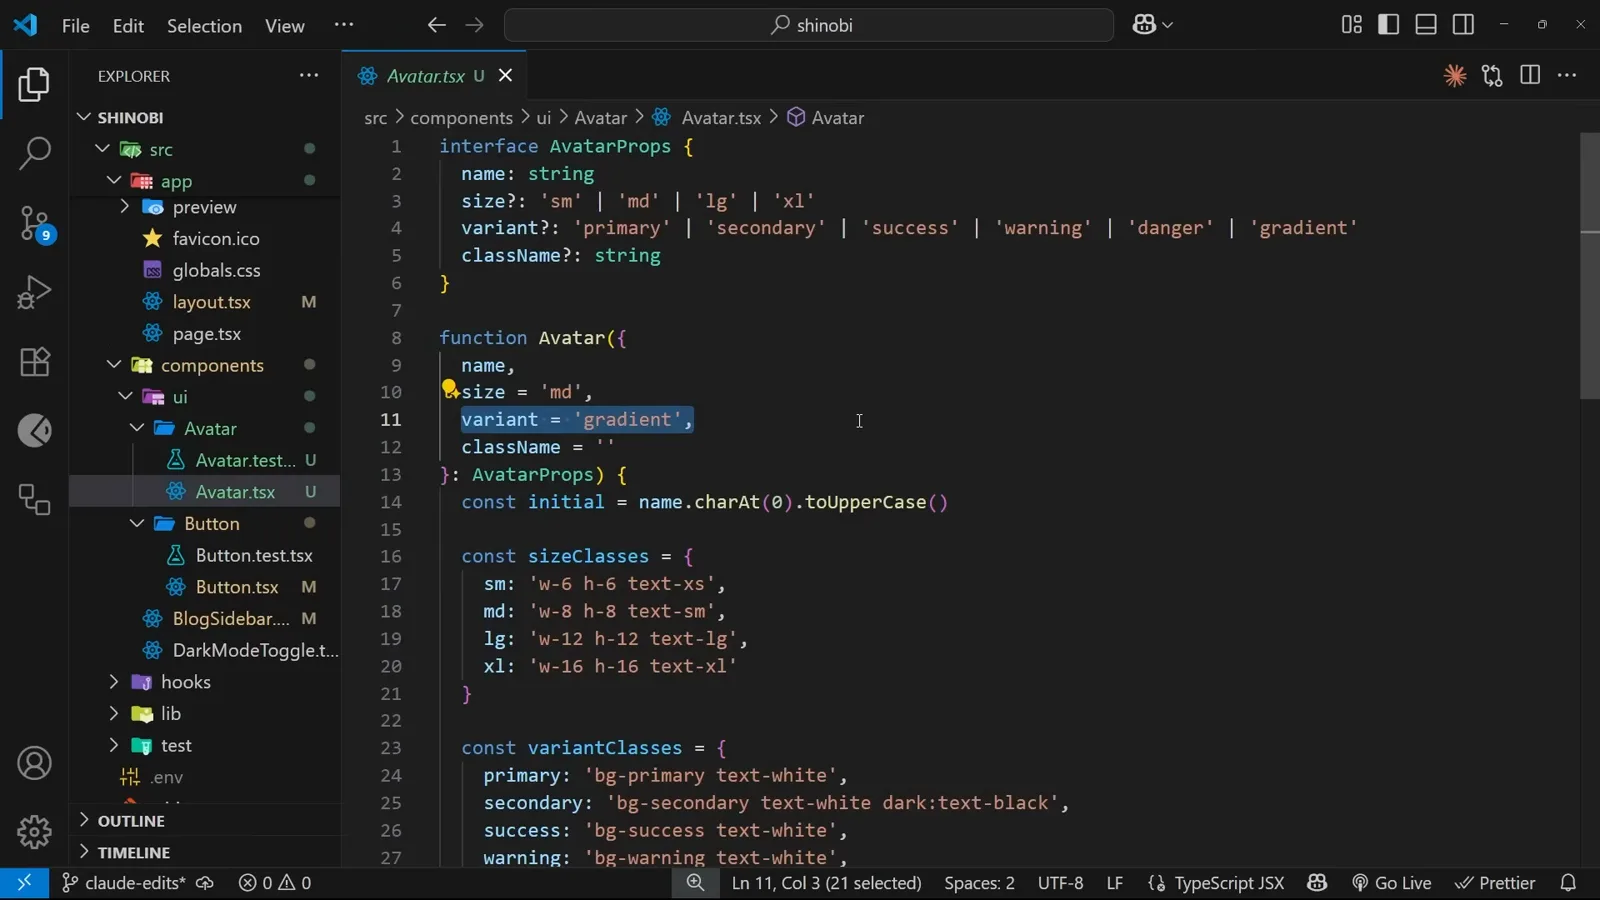
VS Code 里的 Avatar.tsx——props、尺寸、变体和方案里说的分毫不差。看视频 4:42 处 - 10
连导航链接都在计划之内
计划第 6 步写着 “Add link to Avatar preview in header navigation”,如今 Shinobi 首页的头部导航在 Preview 和 About 之间多出了 Avatar 一项。细节虽小,但说明 plan mode 说到做到——计划里的事都发生了,包括最容易漏掉的导航修改。
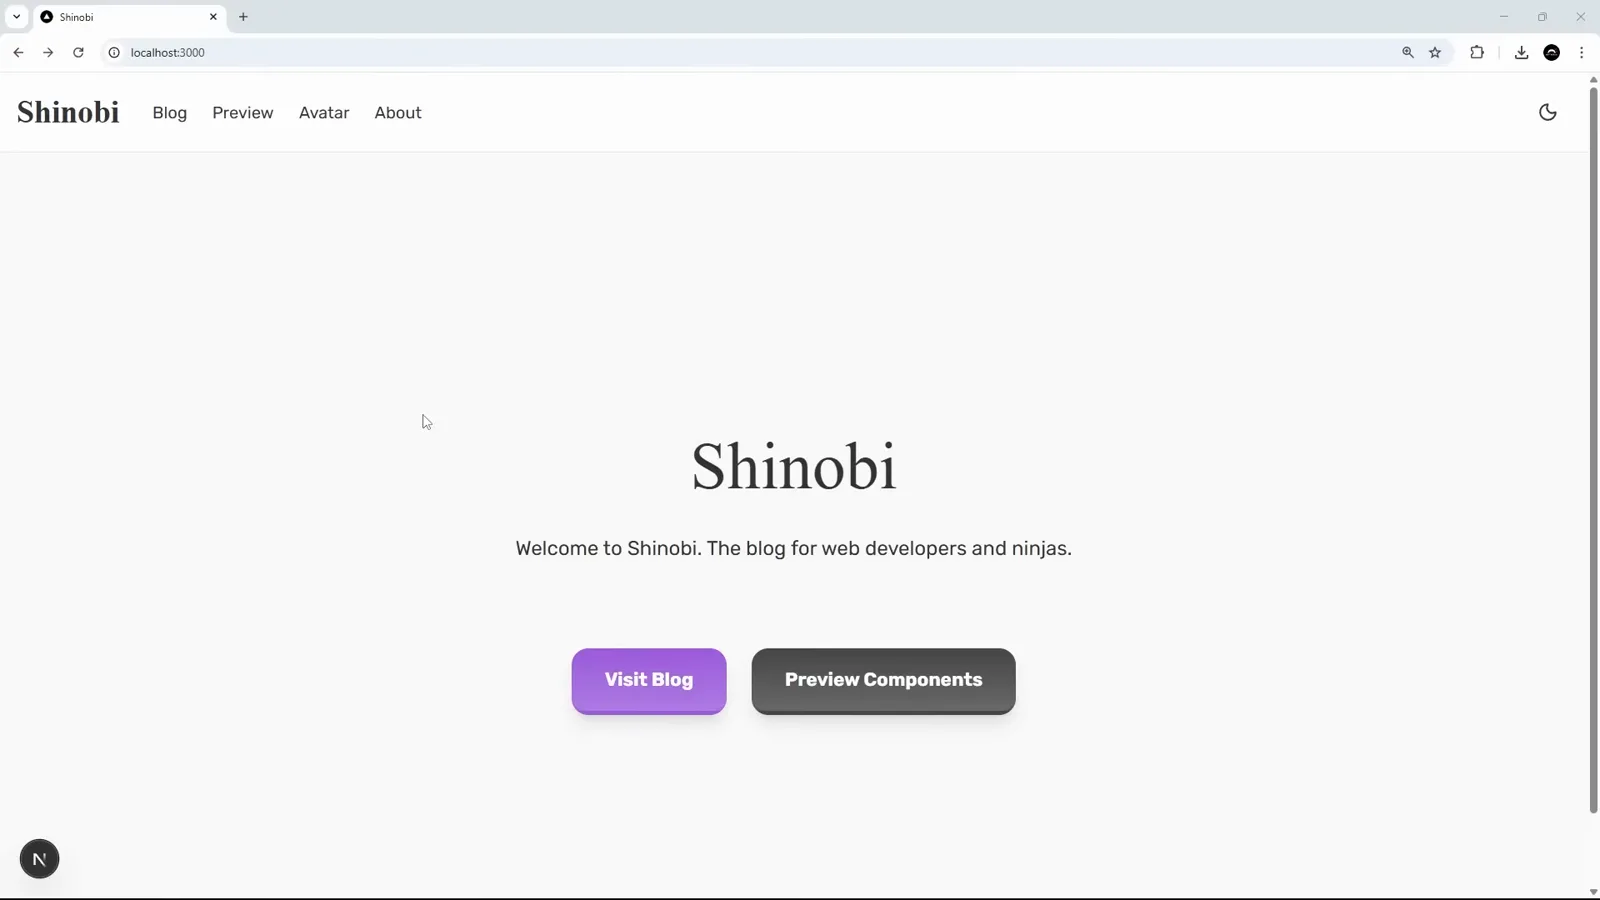
首页头部多了 Avatar 链接——计划第六步,原样兑现。看视频 4:58 处 - 11
一个预览页展示所有变体
localhost:3000/avatar 的新预览页把组件矩阵铺开:Sizes 一行从 Small 到 X-Large,接着 Variants 网格摆出 Primary、Secondary、Success、Warning、Danger、Gradient 六种颜色的圆形头像。一眼就能确认组件在整个属性空间内都正常——预览页本来就该这么用。
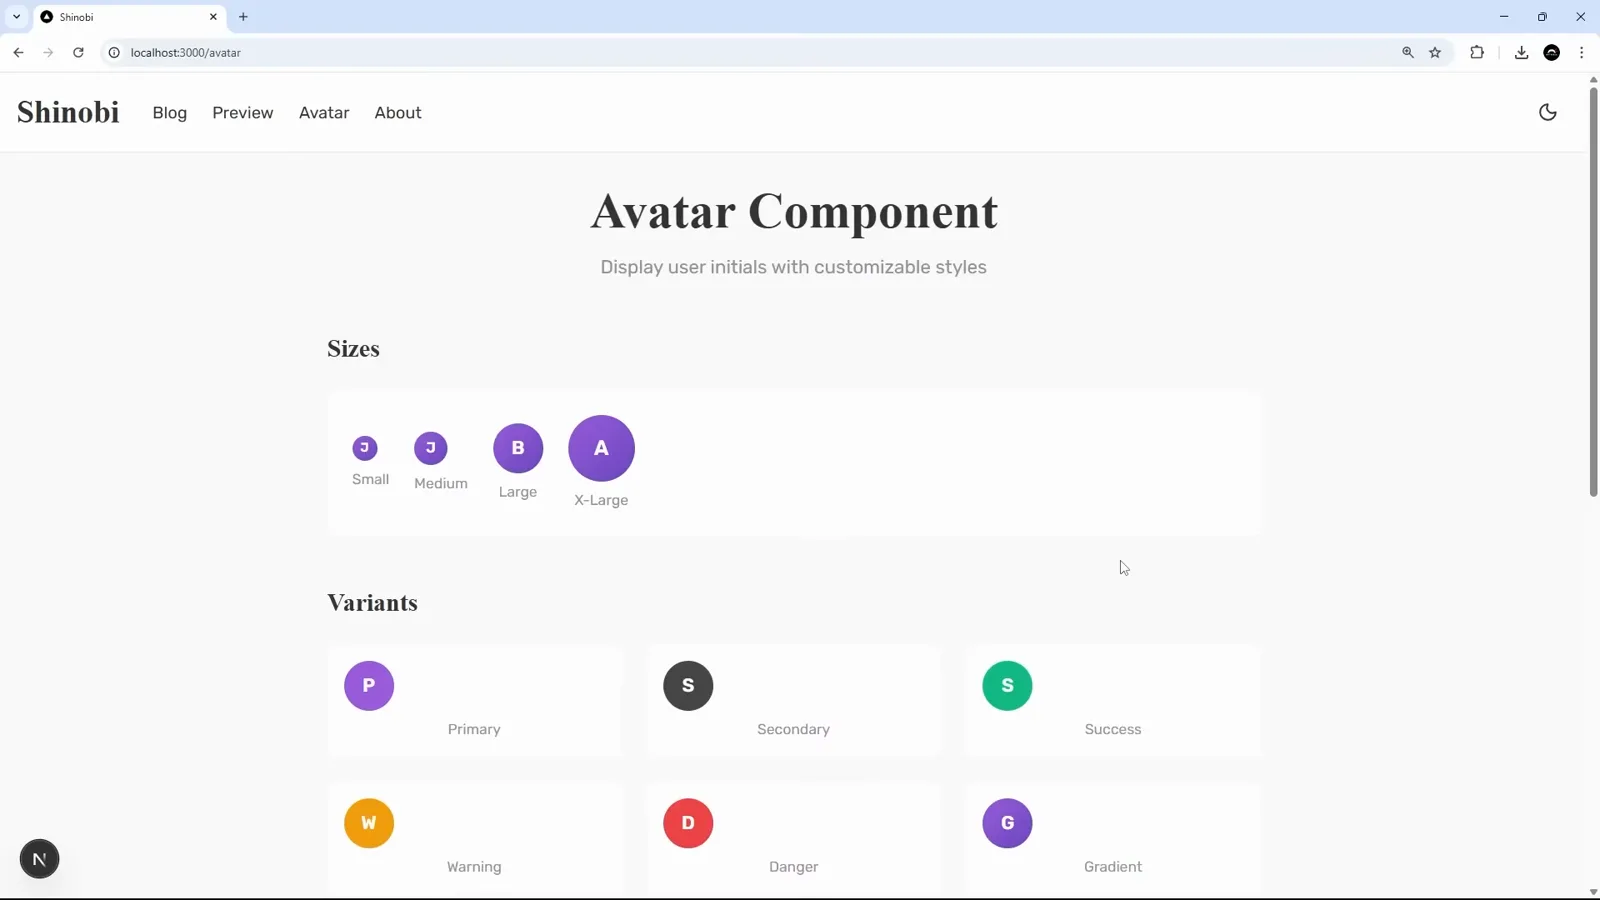
/avatar 预览页:四种尺寸、六种配色,全部真实渲染。看视频 5:14 处 - 12
真实页面用上了新组件
收获的一屏:localhost:3000/blog 的博文列表里,每张卡片“By Net Ninja”旁边都出现了紫色 “N” 头像,同一视图的 Recent Activity 侧栏也用头像替代了原来的彩色圆点。计划的前两步——博文卡片和 BlogSidebar——在同一屏里都能看到。
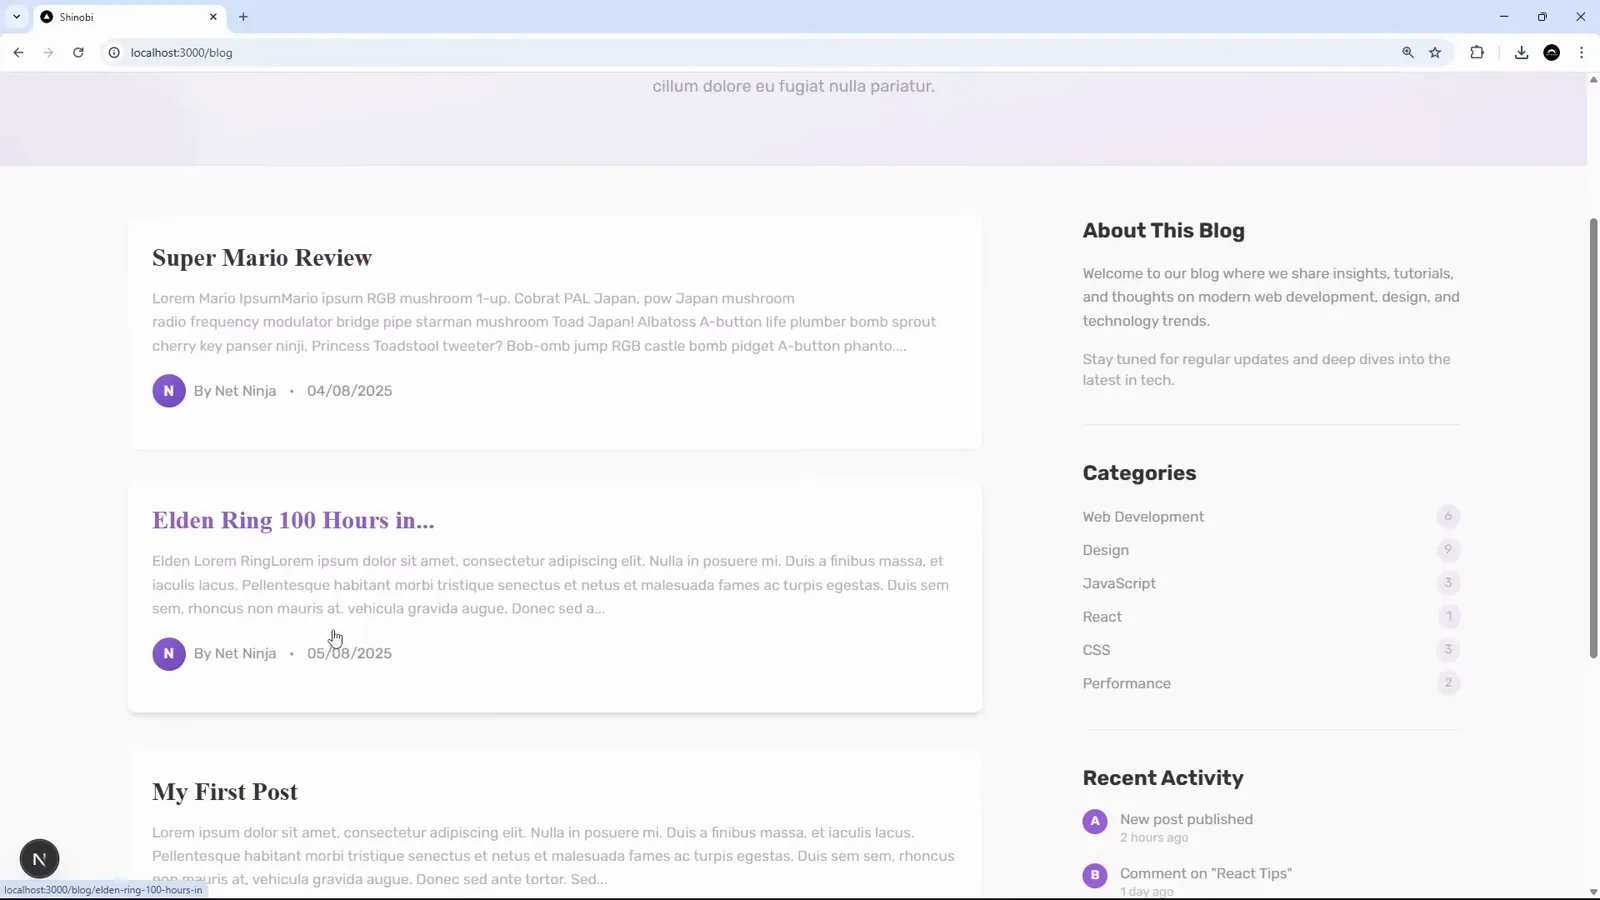
博文卡片和 Recent Activity 侧栏都渲染上了 Avatar 组件。看视频 5:22 处
方案跑偏了?写成规则
Claude 忠实执行了计划——是计划本身越过了项目约定,所以修正要写进 CLAUDE.md。
- 13
方案跑偏?把修正写成规则
Plan mode 忠实执行了计划——但计划里多建了一个独立的 /avatar 页面和头部链接,而项目 CLAUDE.md 里写的是组件示例统一放预览页。两句提示词就能纠正(“移除 avatar 页面,把示例放进预览页”),然后把长效规则写进 CLAUDE.md:“when making new page components, always add a link to that page in the header. Only do this for page components, not UI or other drop-in components.” 这一课是:方案要读,纠正过的地方要固化成规则。
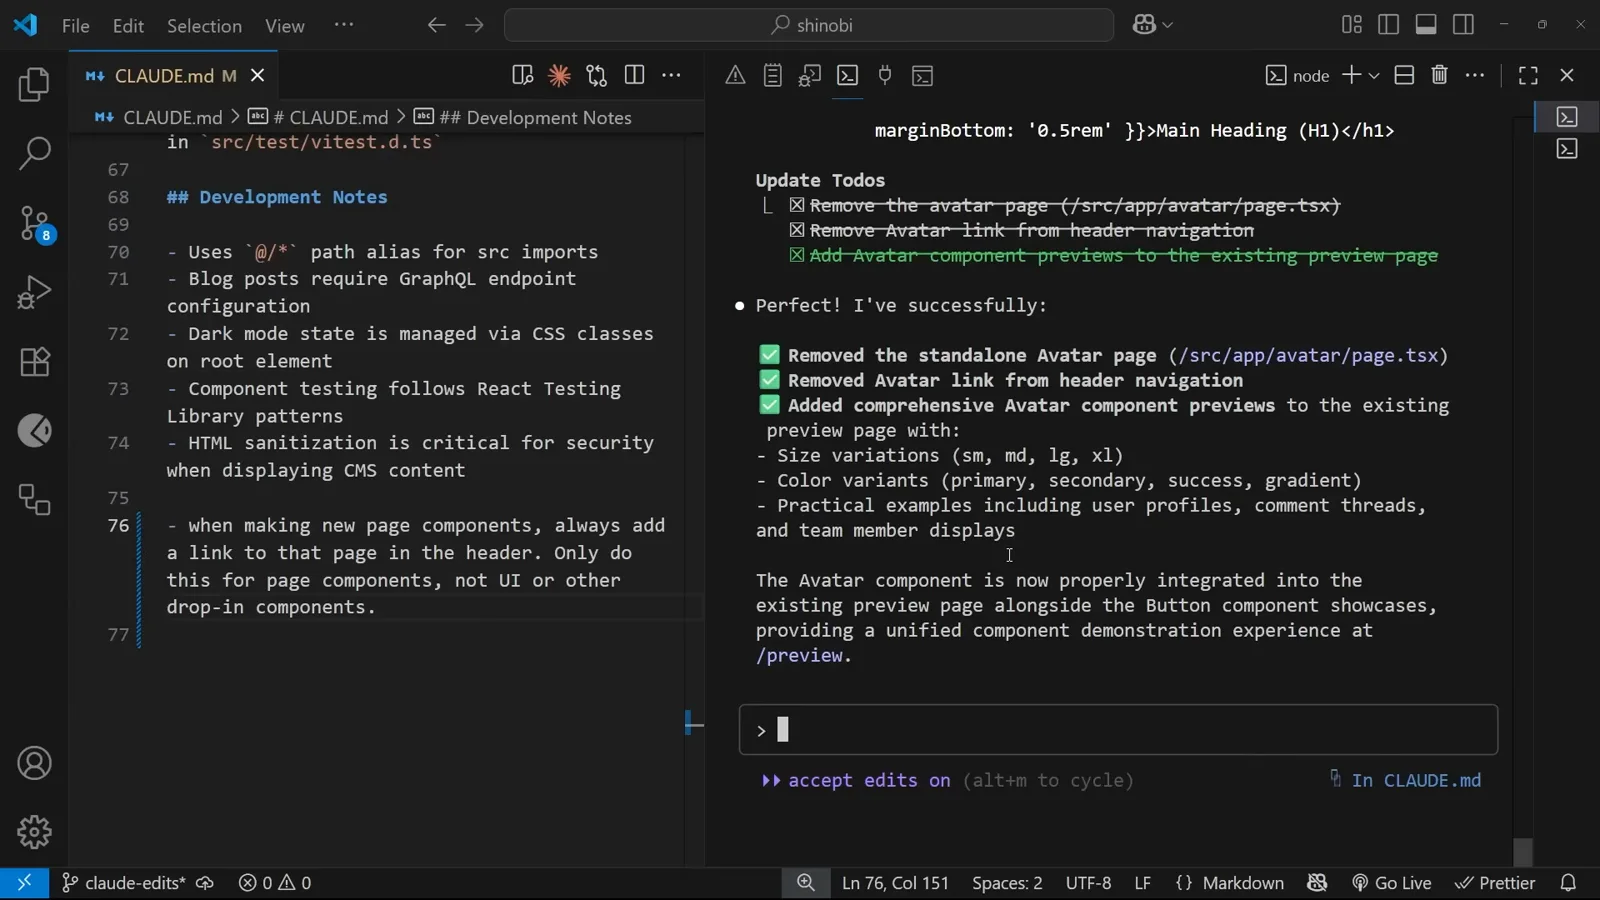
CLAUDE.md 写入新规则,右侧 Claude 的清理小结确认多余页面已删除。看视频 6:02 处
Plan mode 的兄弟:扩展思考
改动面广用 plan mode;逻辑烧脑用 think 关键词。
- 14
逻辑烧脑的任务,加上“think hard”
思考模式解决的是另一个问题:不是改动面广,而是逻辑难。演示提示词让 Claude 实现一套带认证、审核和实时更新的评论系统,其中刻意写了 “Think hard about this implementation”。Claude Code 在提示词里看到 “think”(或更强的变体)就会进入扩展思考:花更多 token,换方案落地前更充分的推理。
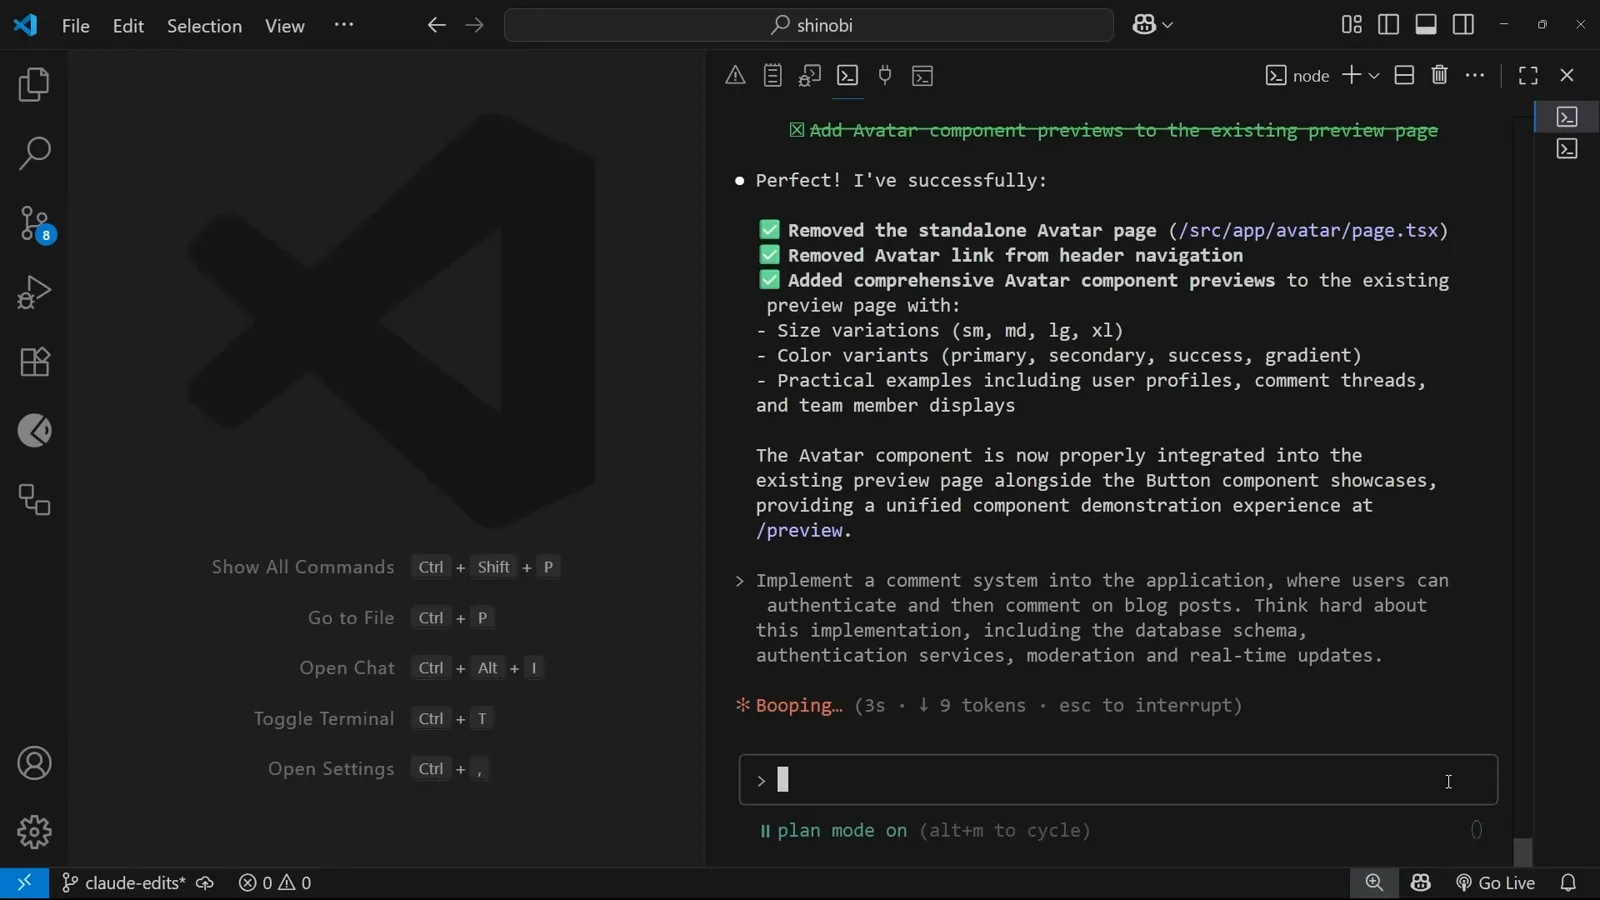
带 “Think hard” 的评论系统提示词,plan mode 仍开着——所以产出的还是方案而不是代码。看视频 8:52 处 - 15
看它把推理过程流式吐出来
扩展思考开启后,在方案出现之前,Claude Code 会在 “Thinking…” 标记下用灰色斜体流出推理:“This is a comprehensive feature request that requires careful planning. Let me think through all the components needed for a comment system: 1. Database Schema… 2. Authentication… 3. Database… 4. API Routes…”。读这段流是最便宜的错误预警——前提错没错,这里最先看出来。
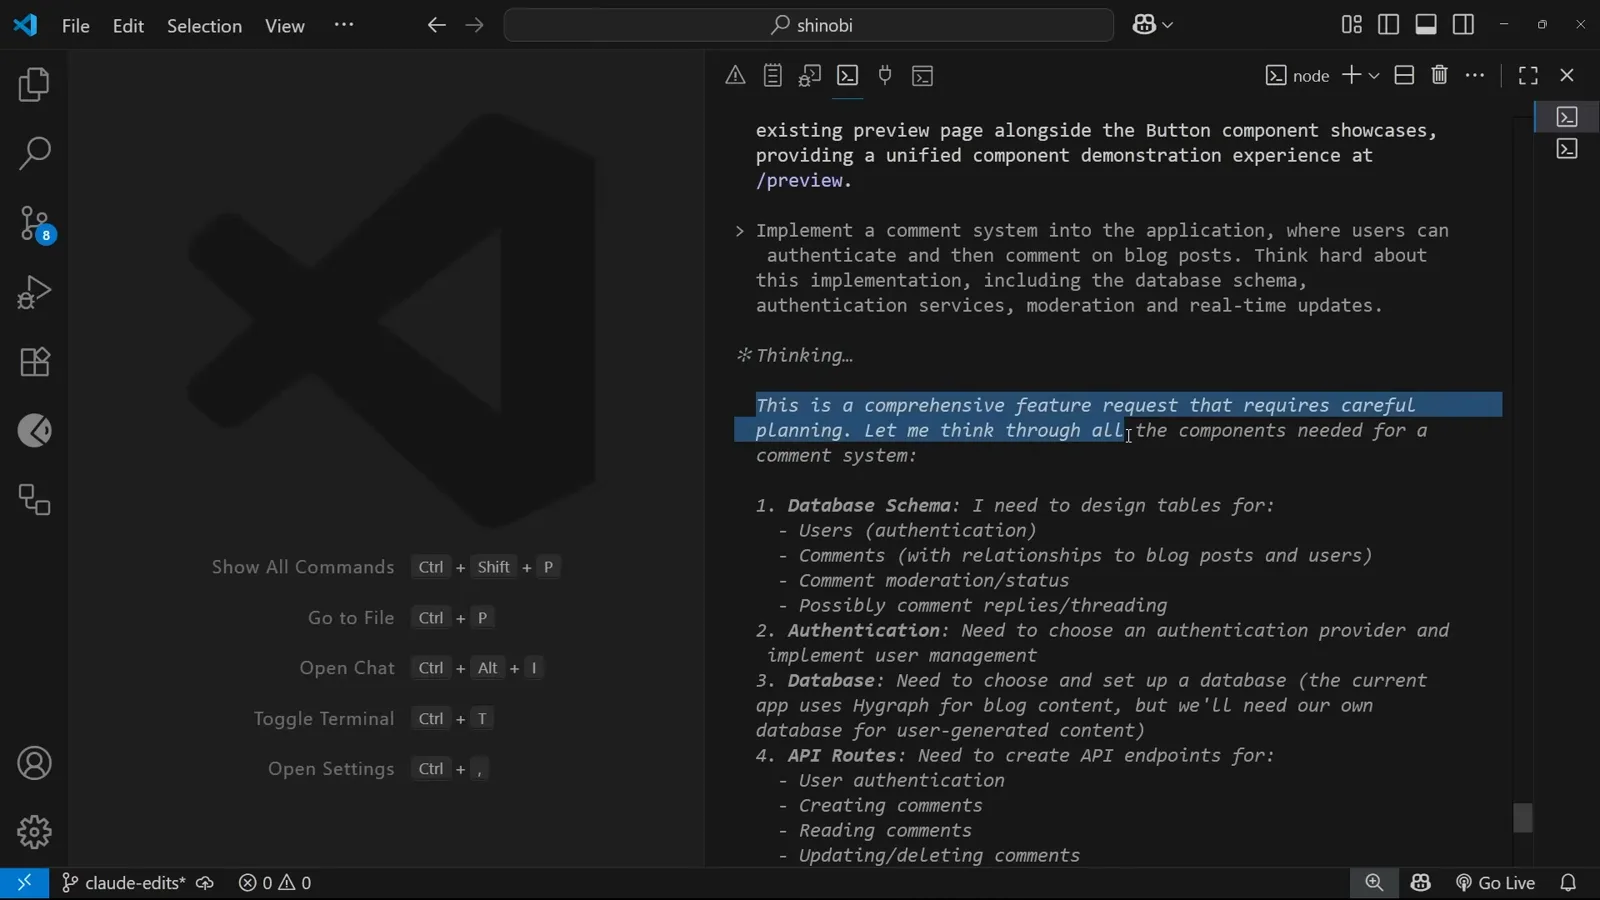
灰色斜体块就是 Claude 的真实推理,在方案之前流式给出。看视频 9:00 处 - 16
四个思考等级,ultrathink 到顶
思考强度分四档,全看提示词里用的词:“think” 最轻,然后是 “think hard”“think harder”,图中输入框里敲的 “ultrathink” 是最重一档。代价永远是 token:想得越深,每轮越贵,所以大预算留给架构级问题,别浪费在改个变量名上。
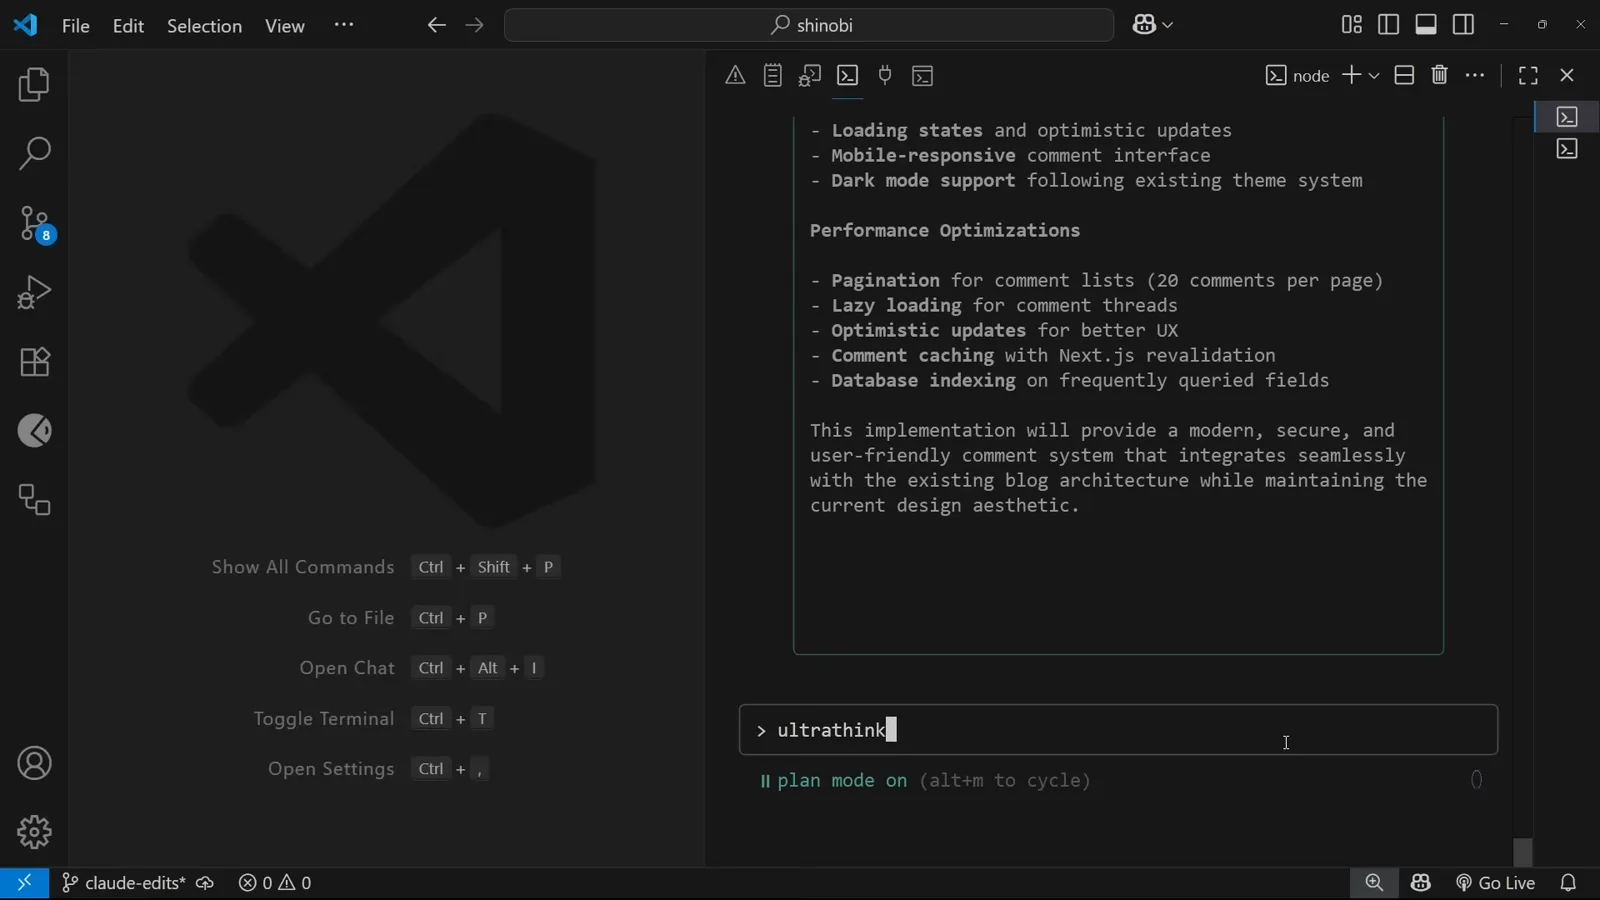
输入 “ultrathink”——Claude Code 认可的最强思考触发词。看视频 10:54 处