
Illustrated walkthrough
Claude Code in VS Code: From Install to a Running App
A step-by-step illustrated walkthrough of the official Claude Code extension for VS Code - installing the CLI, onboarding, the marketplace extension, and a full CRUD build the way a real session does it.
5 min read · 14 illustrated steps
The short version
Install the Claude Code CLI with one curl command, run claude once to pick a theme and trust your project folder, then install the Anthropic-published Claude Code for VS Code extension from the marketplace. The extension adds a Claude panel that reads your workspace, answers questions about it, and builds files with per-write approval dialogs. The walkthrough below follows a real session end to end: install, verify with a hardware question, add the extension, and ship a small Express CRUD app.
Source video
Every frame on this page comes from ProgrammingKnowledge's screen recording - an Ubuntu 24.04 session with Claude Code 2.1.86, recorded in April 2026.
Frames are used with attribution and each step links back to the exact second in the video. The narration is not quoted - the text above was written from the screen contents and cross-checked against code.claude.com/docs.
Part 1 · Install the Claude Code CLI
The extension drives the same Claude Code binary, so the terminal install comes first. These steps run on Ubuntu 24.04; the same docs page lists macOS, Homebrew and Windows commands.
- 1
Open the official quickstart
Search for "claude code install" and take the code.claude.com/docs/quickstart link. Step 1 lists the install command for every OS - the macOS/Linux curl one-liner, Homebrew, and separate Windows PowerShell and Windows CMD blocks.
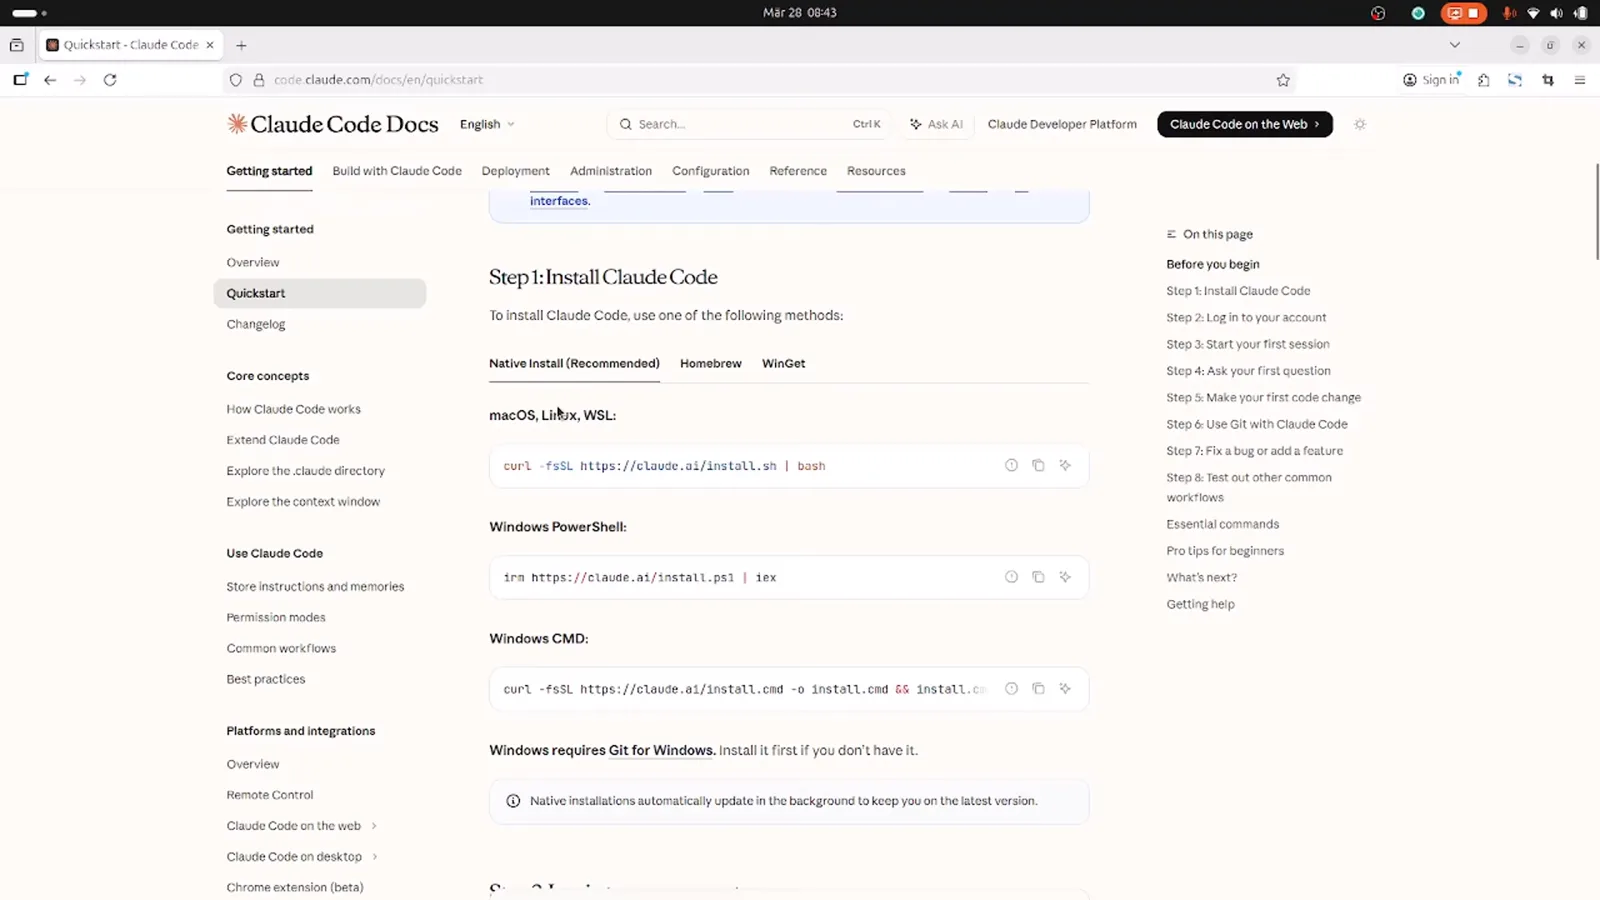
The quickstart page groups the install commands by operating system.Watch at 0:30 - 2
Run the curl install script
Paste curl -fsSL https://claude.ai/install.sh | bash into a terminal. When it finishes you get the banner in the screenshot: Claude Code successfully installed, Version 2.1.86 at ~/.local/bin/claude, and a hint to run claude --help.
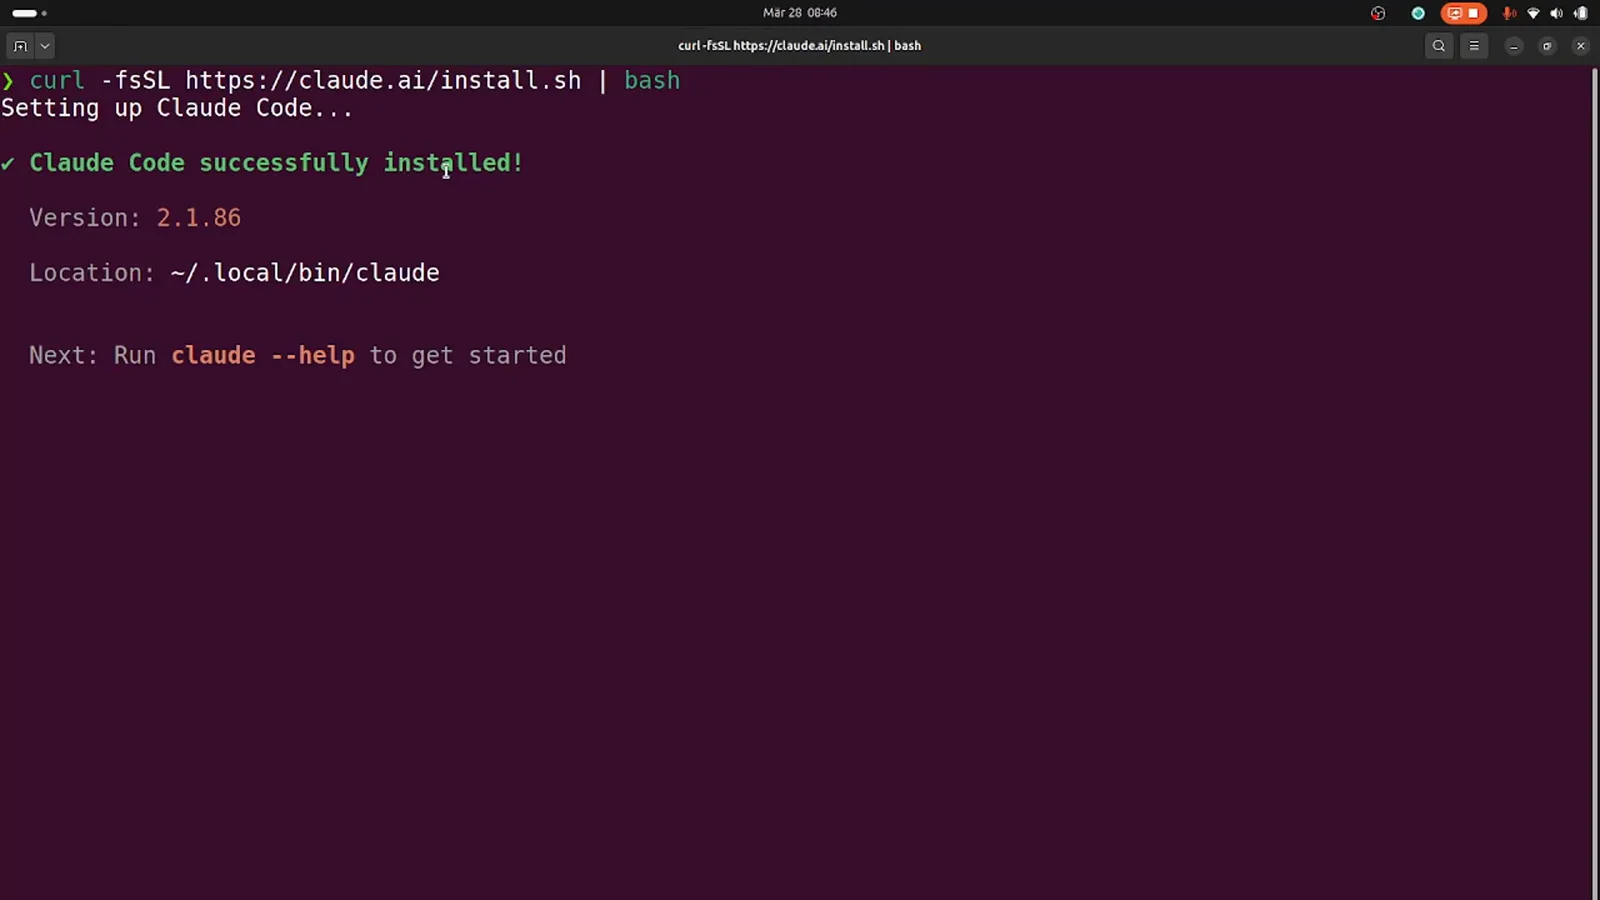
The installer prints the version and the binary location when it succeeds.Watch at 1:05 - 3
Pick a text style on first run
Launch claude and the first screen asks which text style looks best in your terminal - Dark mode is the default and what the recording keeps. Six variants cover light, colorblind-friendly and ANSI-colors-only terminals.
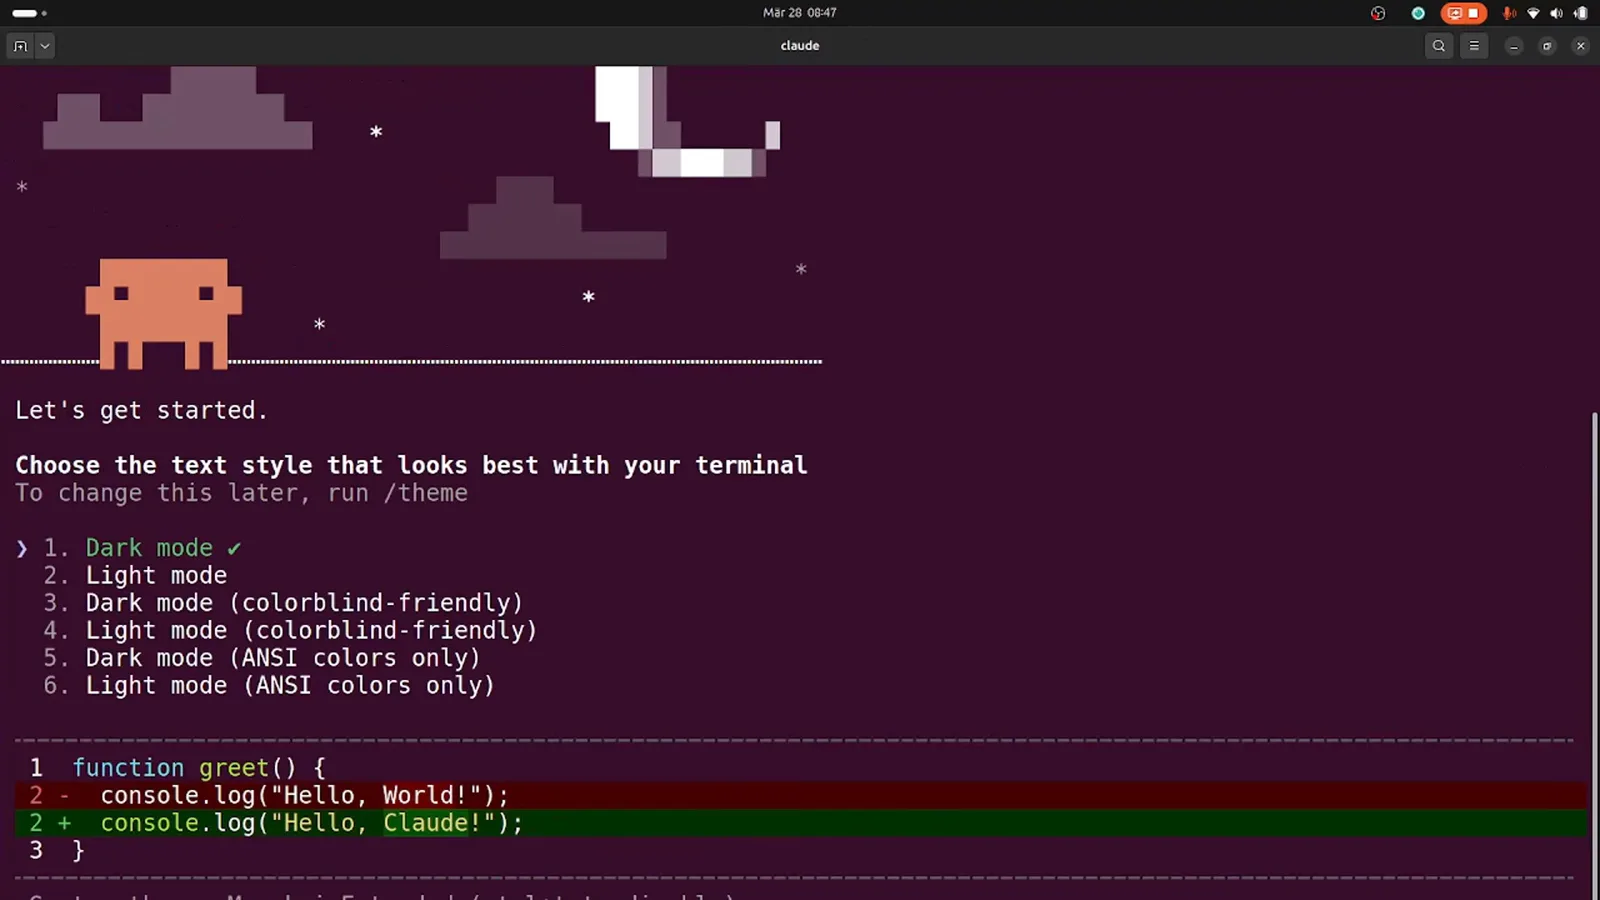
The theme picker doubles as a live preview with a tiny Hello World program.Watch at 1:28 - 4
Trust the folder you will work in
Before Claude reads anything it shows an Accessing workspace safety check: the folder path, a note that Claude Code will be able to read, edit, and execute files here, and a link to the security guide. Pick 1. Yes, I trust this folder for your own project.
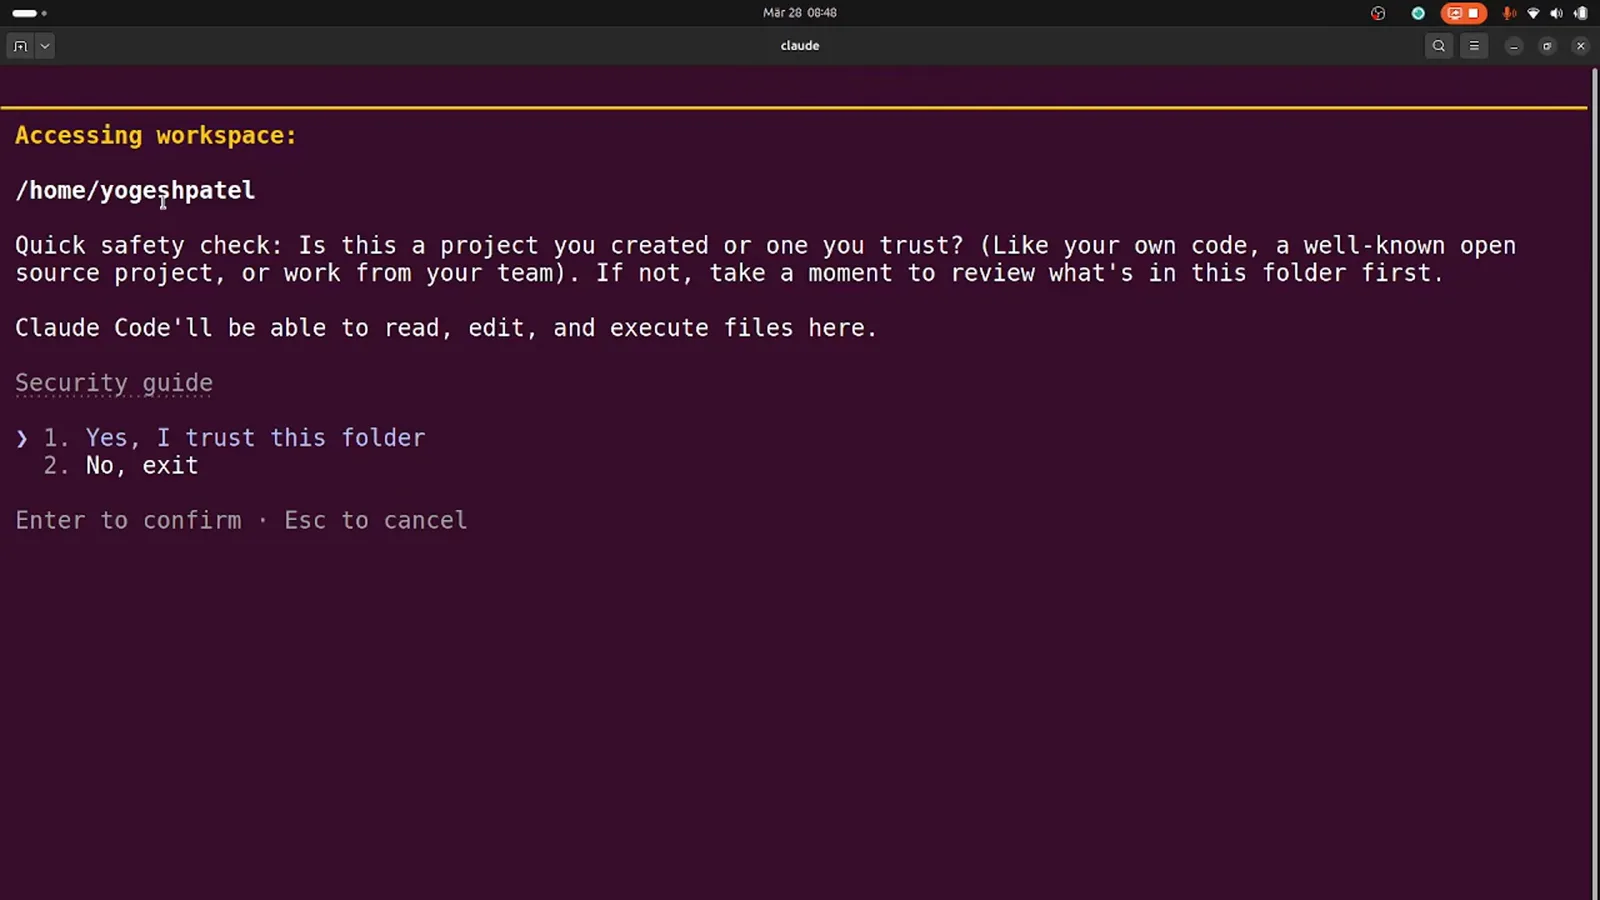
The prompt names the exact path it is trusting - here /home/yoogeshpatel.Watch at 2:38
Part 2 · Prove the install works
Before touching VS Code, one prompt and one slash command show how the CLI asks permission and where it keeps things.
- 5
Approve the first shell command
Ask "what are the specs of this computer?" and Claude proposes the commands it wants to run - lscpu, free -h, nproc, lspci. The dialog offers 1. Yes once, 2. Yes and don't ask again for that exact command, or 3. No.
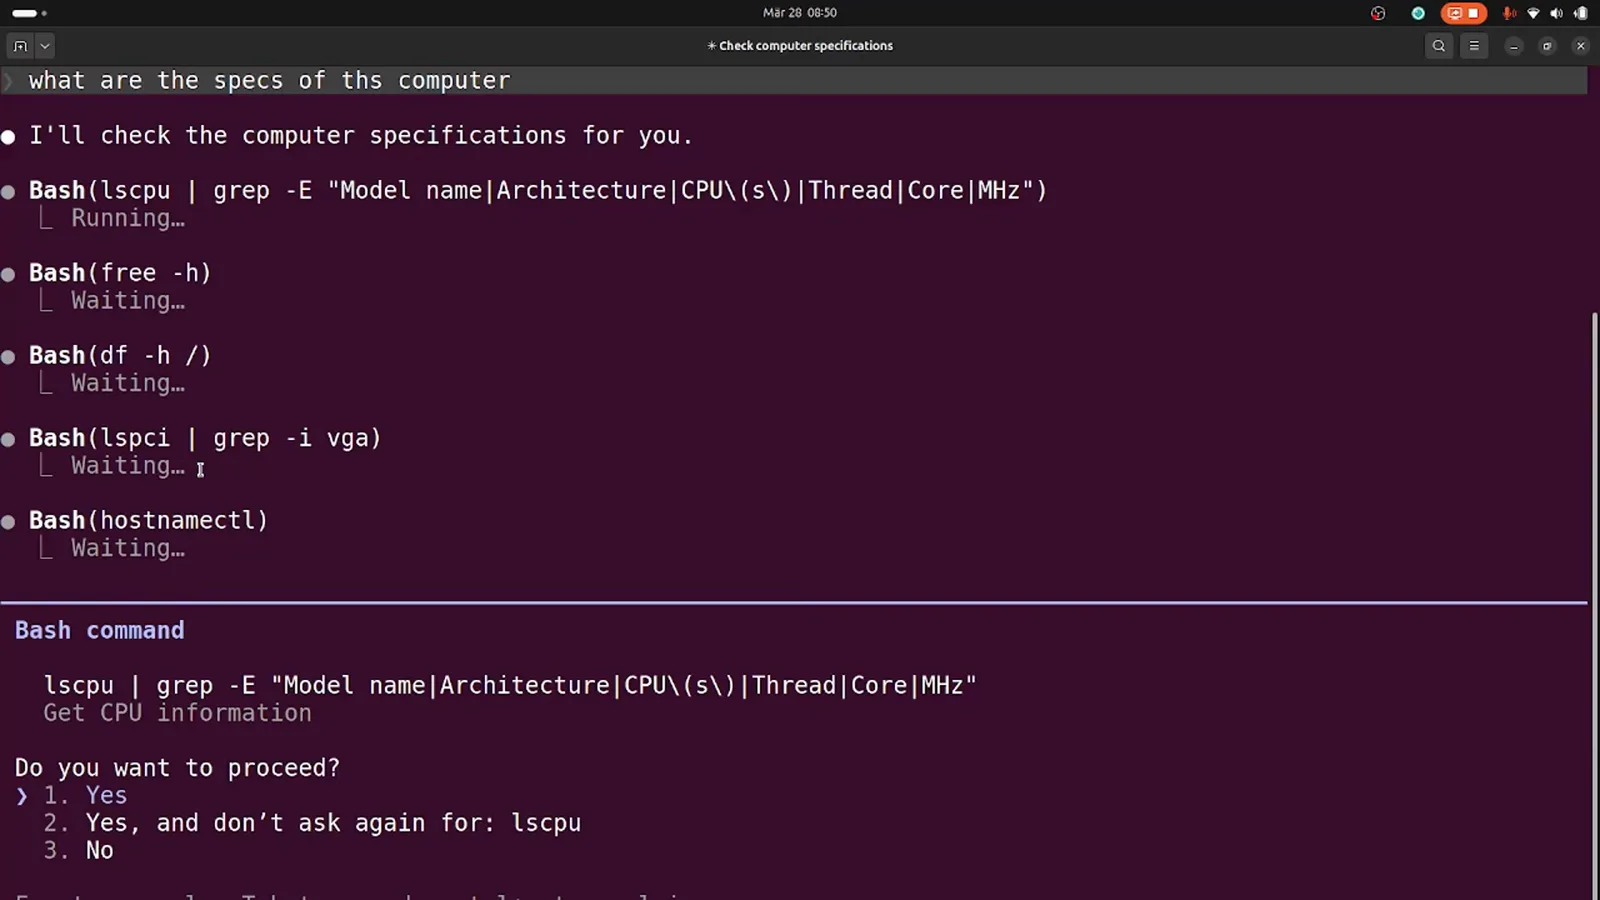
Permission prompts list the full command line before anything executes.Watch at 3:40 - 6
Read the verification report
Seconds later the answer arrives as a structured report: CPU (Intel Core Ultra 7 155H, 16 cores), memory (62 GB total), storage (914 GB), graphics, and the OS line - Ubuntu 24.04.2 LTS. If you get an answer this specific, the CLI is wired up correctly.
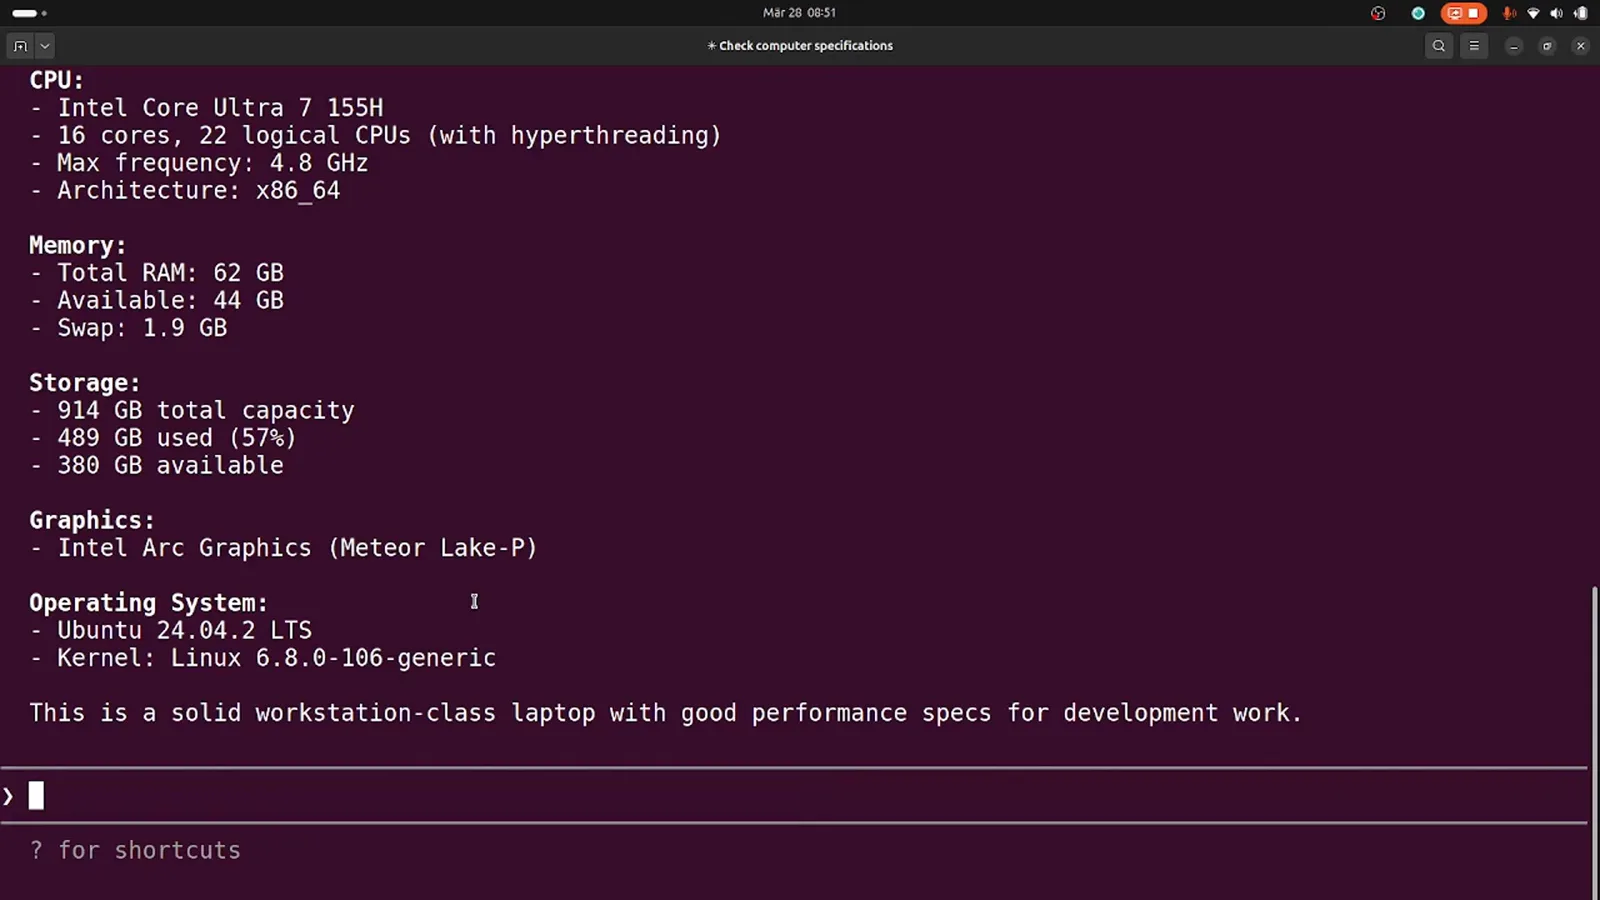
A concrete, correct answer is the fastest smoke test for the install.Watch at 4:00 - 7
Tour the slash commands
Typing / opens the command menu; the recording stops at /skills, which answers No skills found and names the two folders skills live in: .claude/skills/ or ~/.claude/skills/. Everything you see in this menu works the same once the extension is installed.
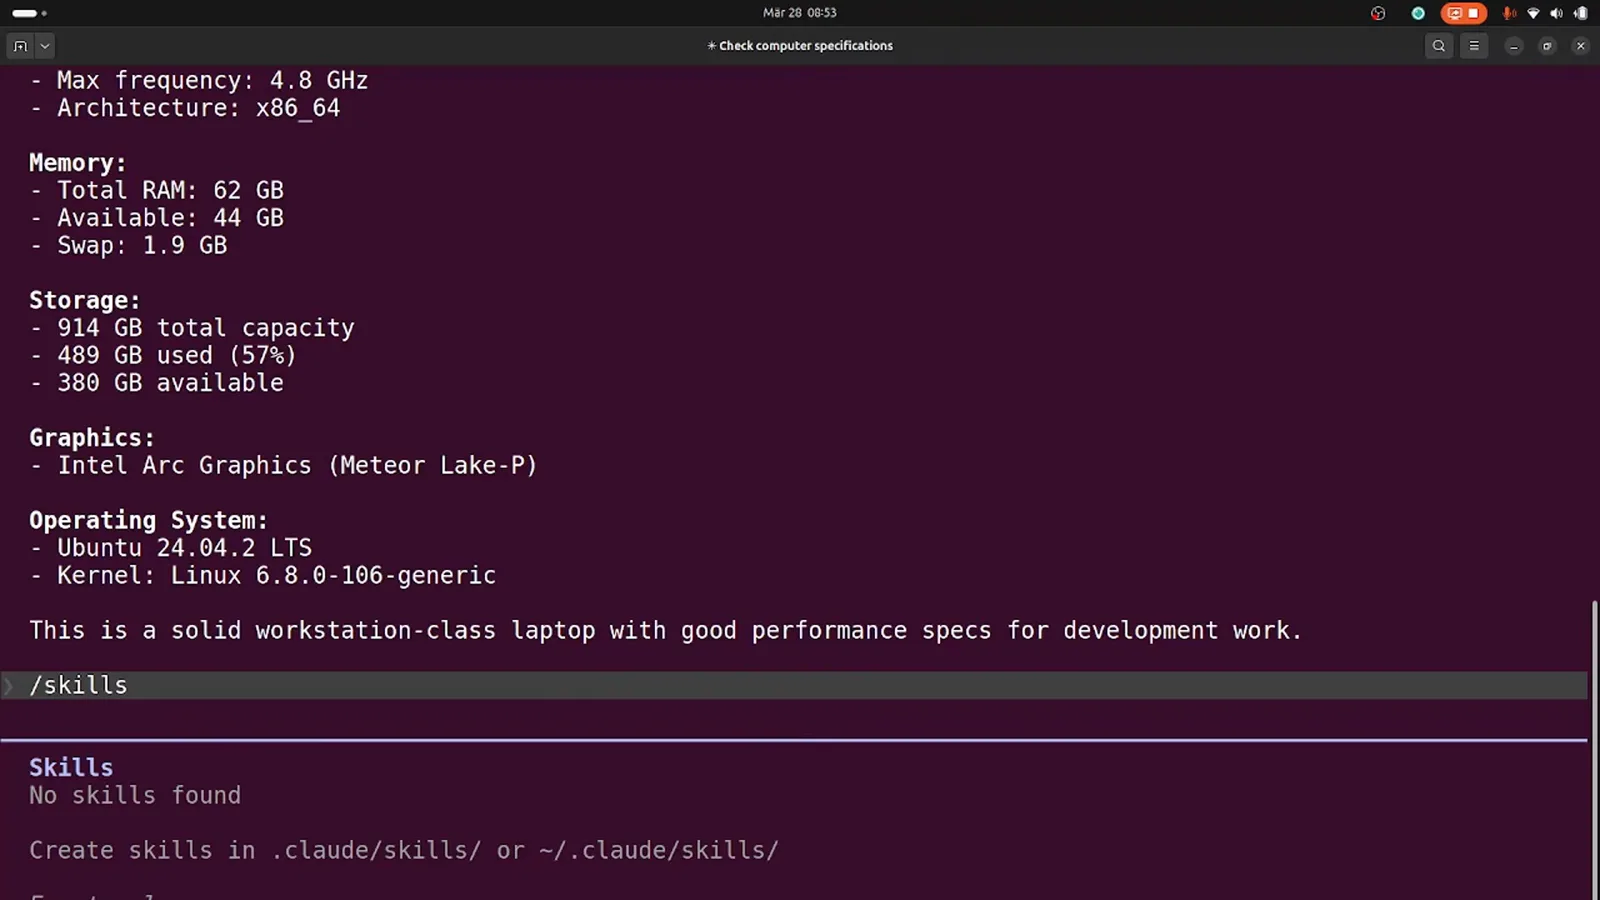
/skills doubles as documentation for where custom skills belong.Watch at 5:00
Part 3 · Add the VS Code extension
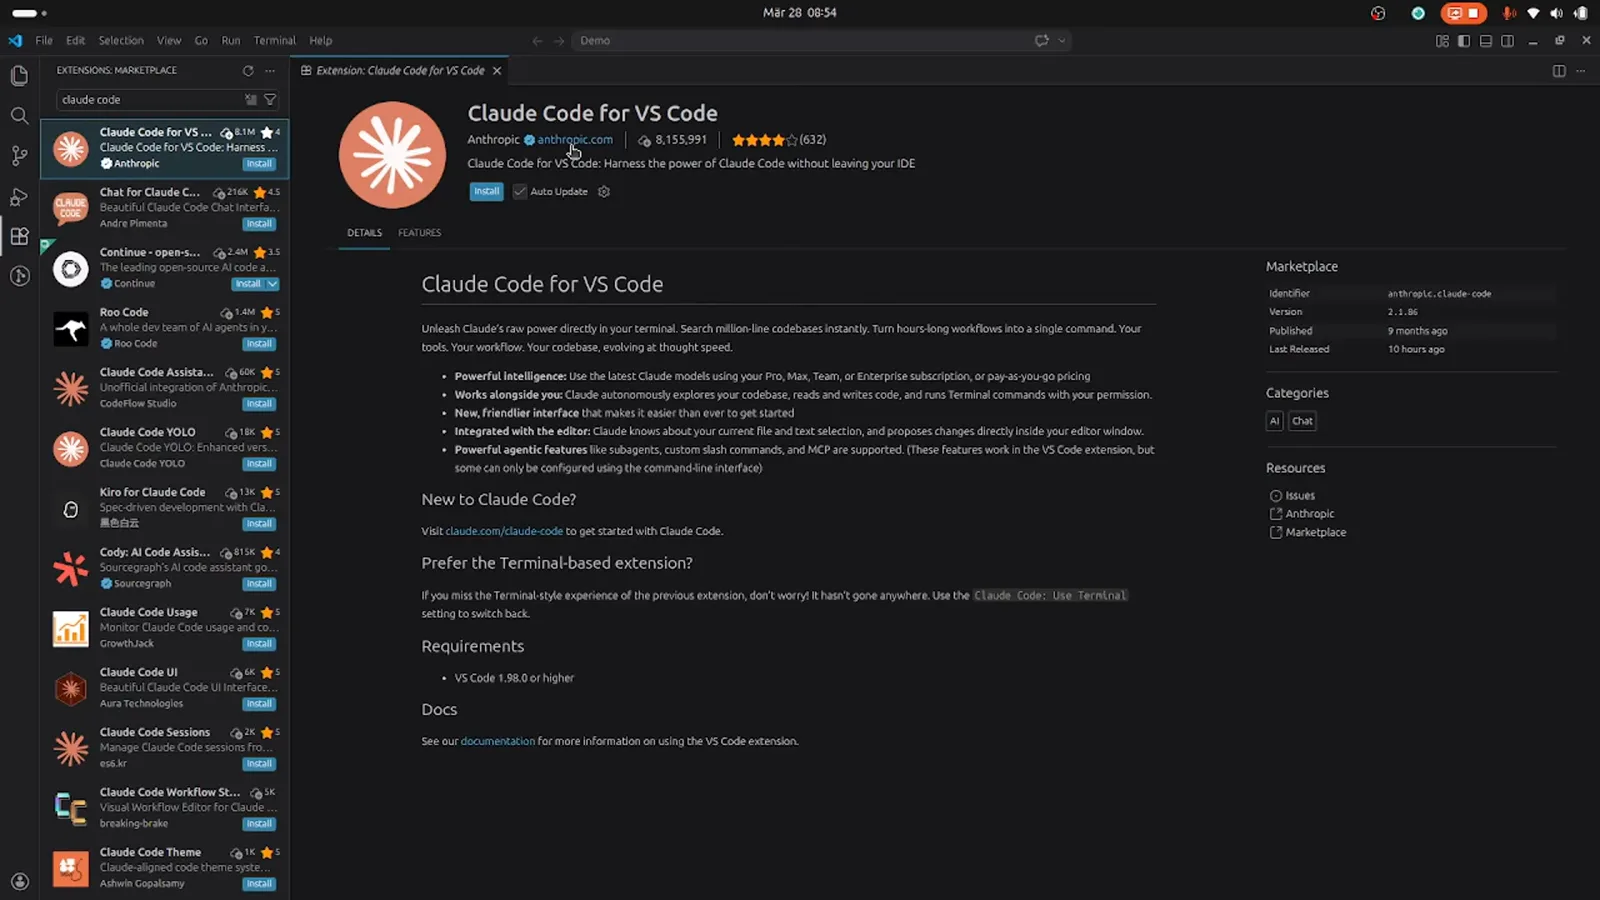
The official extension is published by Anthropic in the VS Code marketplace - no third-party account or extra install step.
- 8
Install the extension from the marketplace
In VS Code open the Extensions view, search "claude code", and open the entry published by Anthropic - identifier anthropic.claude-code, 8.1 million installs at recording time. It requires VS Code 1.98.0 or higher; click Install.
The marketplace page shows the publisher, install count and version before you commit.Watch at 5:30 - 9
Walk through the getting-started tab
After install a Welcome tab opens: Get started with Claude Code, a Your AI coding partner card, and three checklist rows - Open Claude Code, Chat with Claude, Past conversations. It also mentions the terminal fallback: Claude Code: Open in Terminal from the Command Palette.
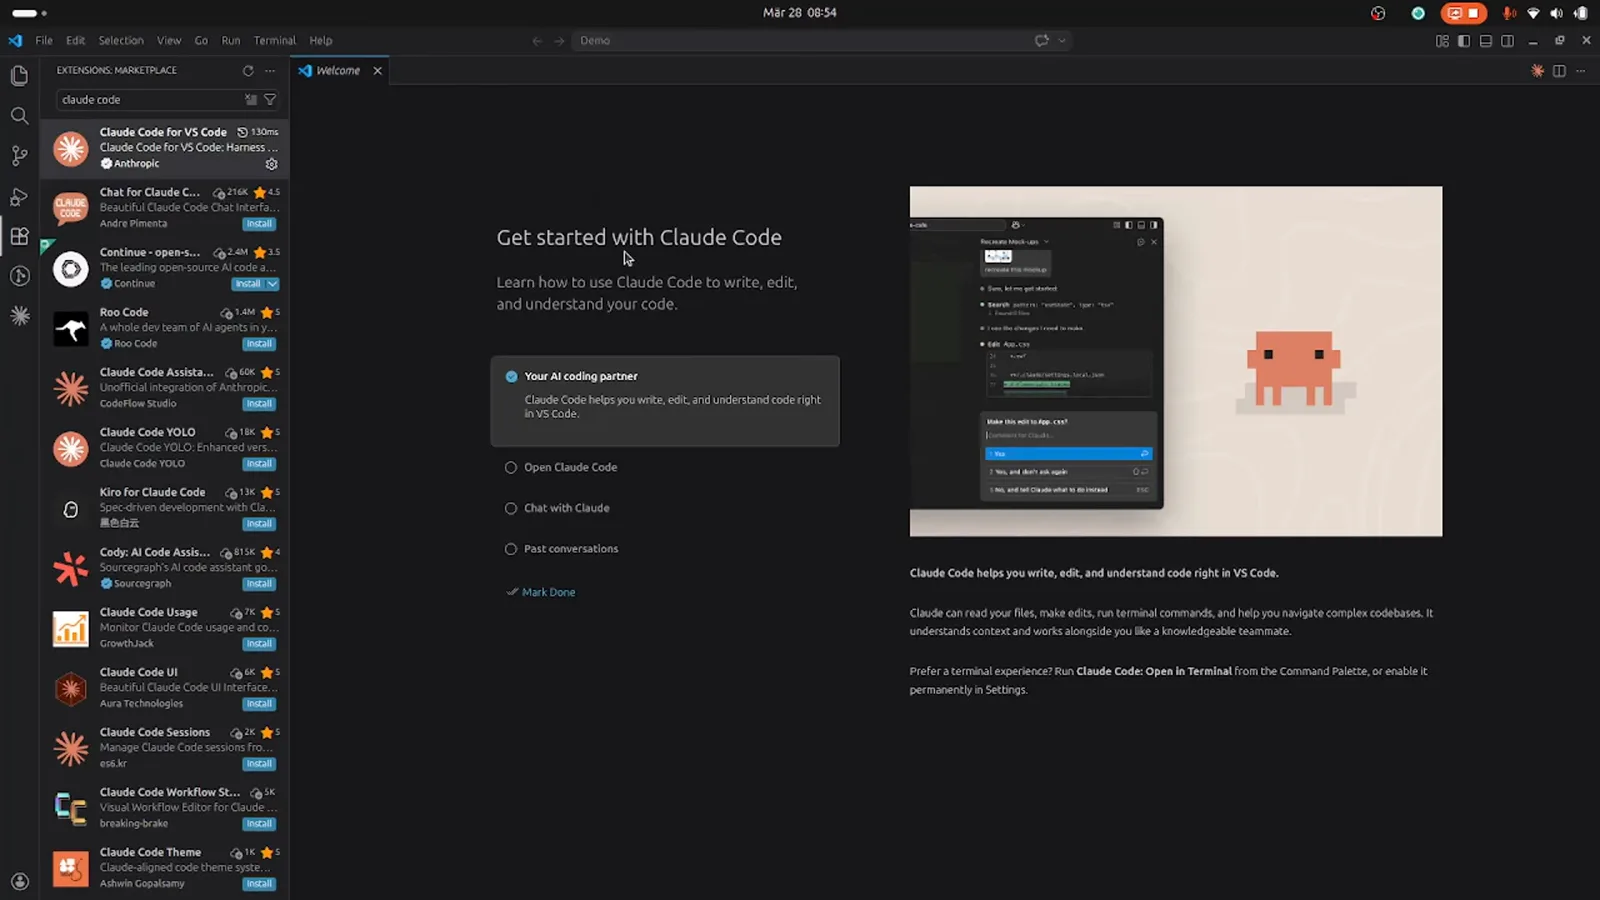
The walkthrough tab appears once; Mark Done clears it.Watch at 5:48 - 10
Open the Claude panel
The Claude Code icon in the activity bar opens a side panel docked next to your editor. The empty state says it plainly: What to do first? Ask about this codebase or we can start writing code. A hint at the bottom notes you can switch back to a terminal experience in Settings.
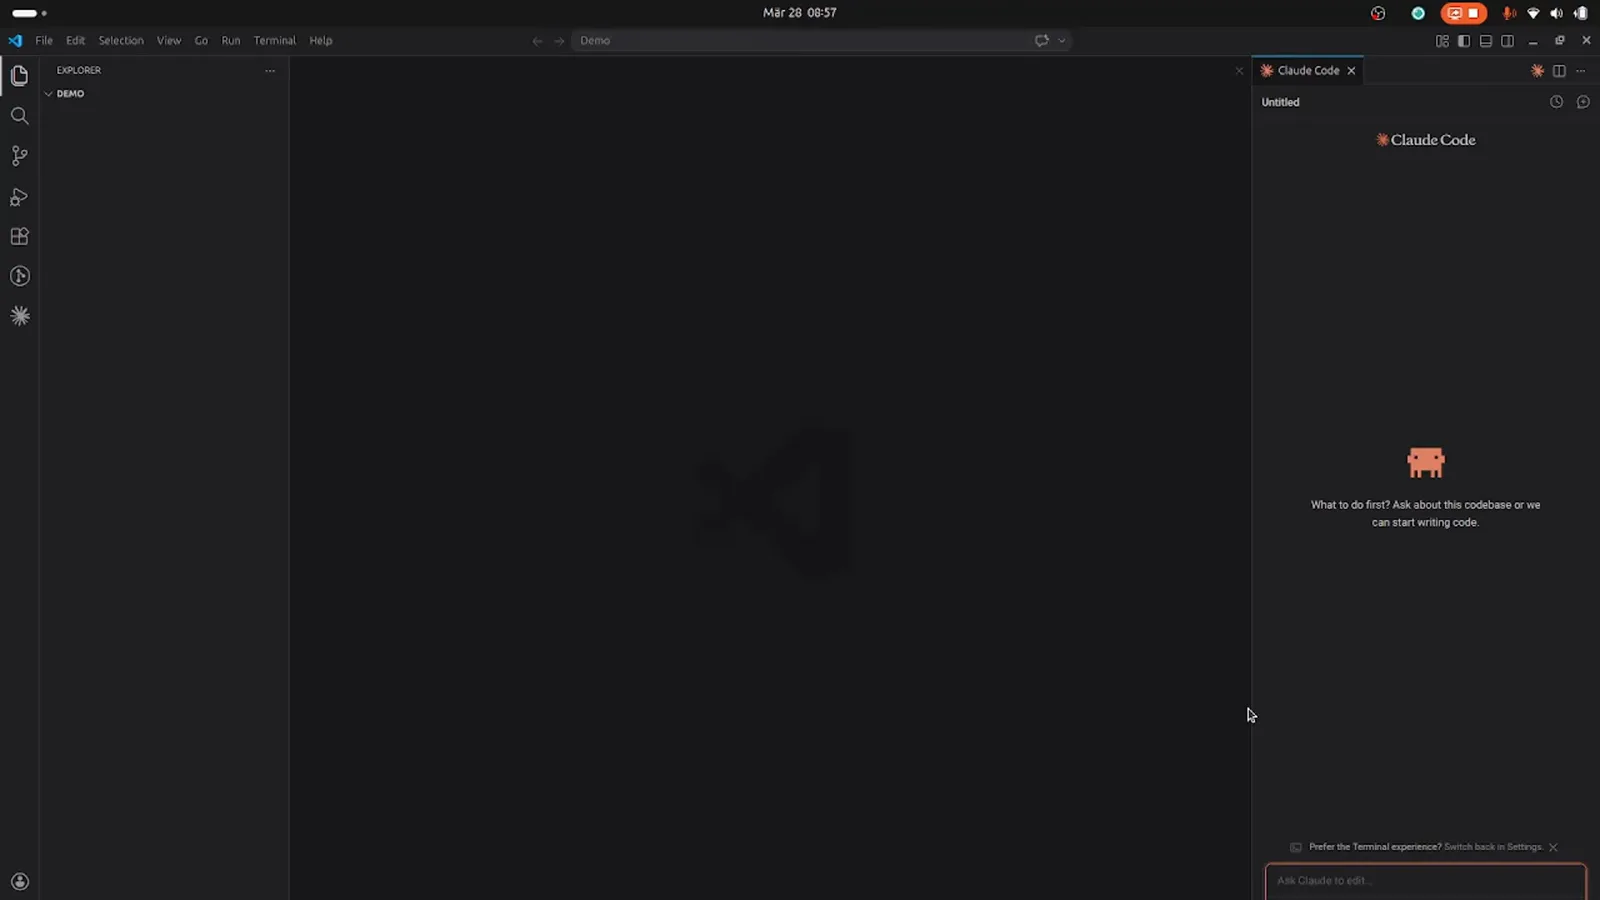
The panel lives beside the editor and shares the workspace context.Watch at 6:46
Part 4 · Build and run an app from the panel
One prompt in the Claude panel scaffolds an Express CRUD API. Each write shows a diff and asks before touching disk.
- 11
Give it a real build prompt
The recording types a full spec in one message: act as a senior backend developer, create a simple Node.js CRUD application using Express, no database - an in-memory array - with named endpoints and validation. Specific prompts like this get working scaffolding on the first try.
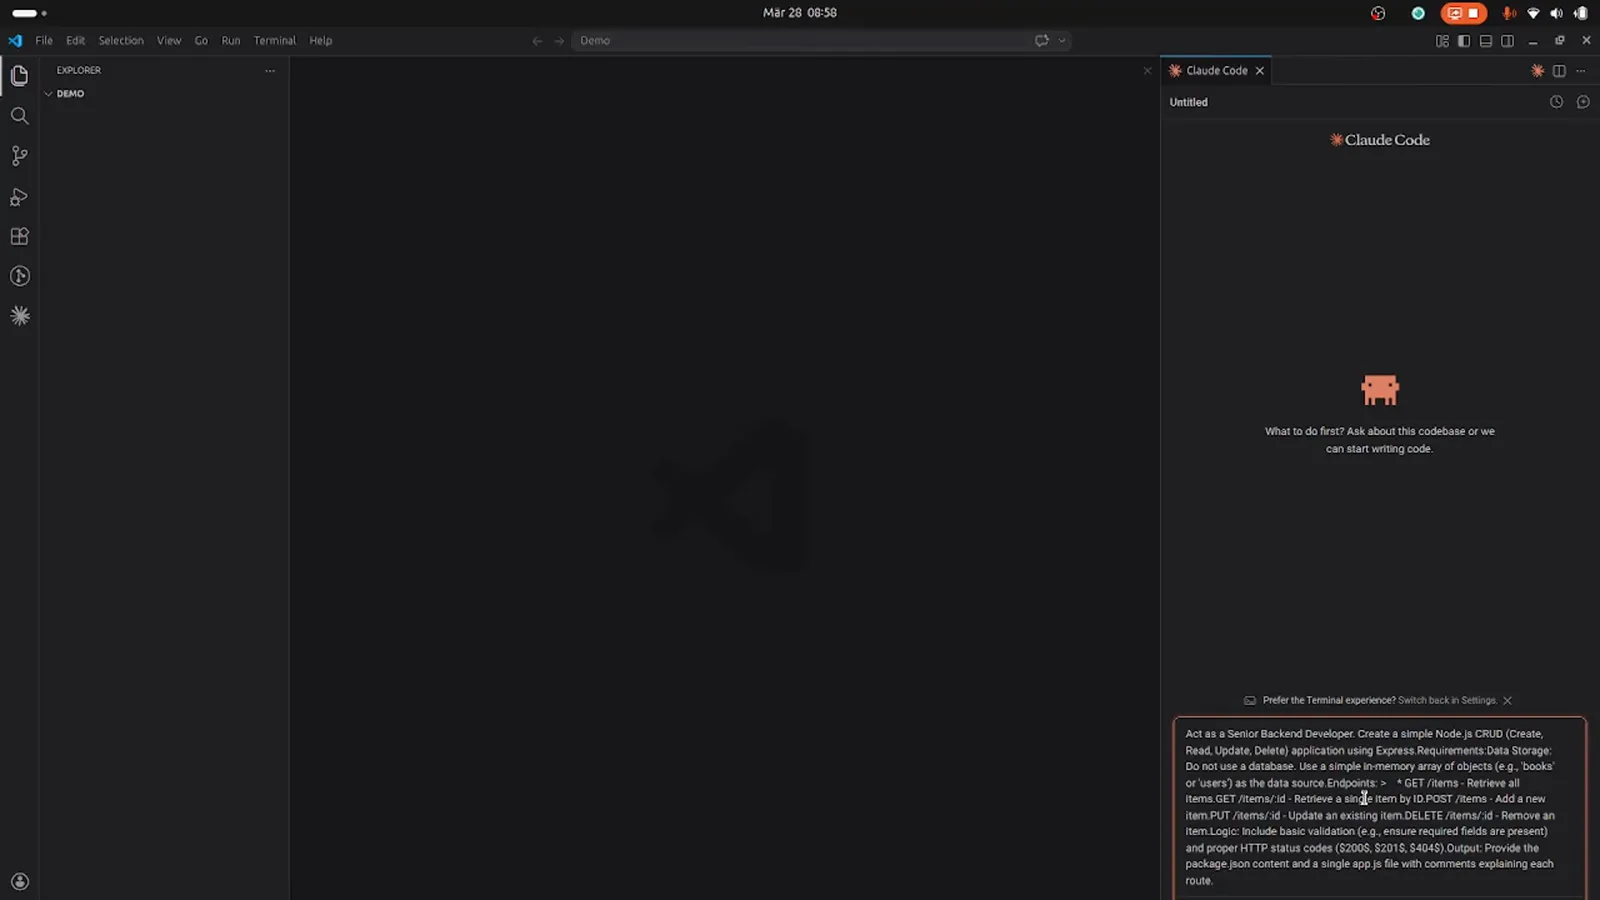
One message carries the role, the stack and the acceptance criteria.Watch at 7:02 - 12
Read the diff before accepting
Claude answers with a plan, then writes files. Each Write step opens a green diff - here app.js with an Express server on port 3000, an in-memory books array, and the GET /items routes - so you can read exactly what lands on disk before allowing it.
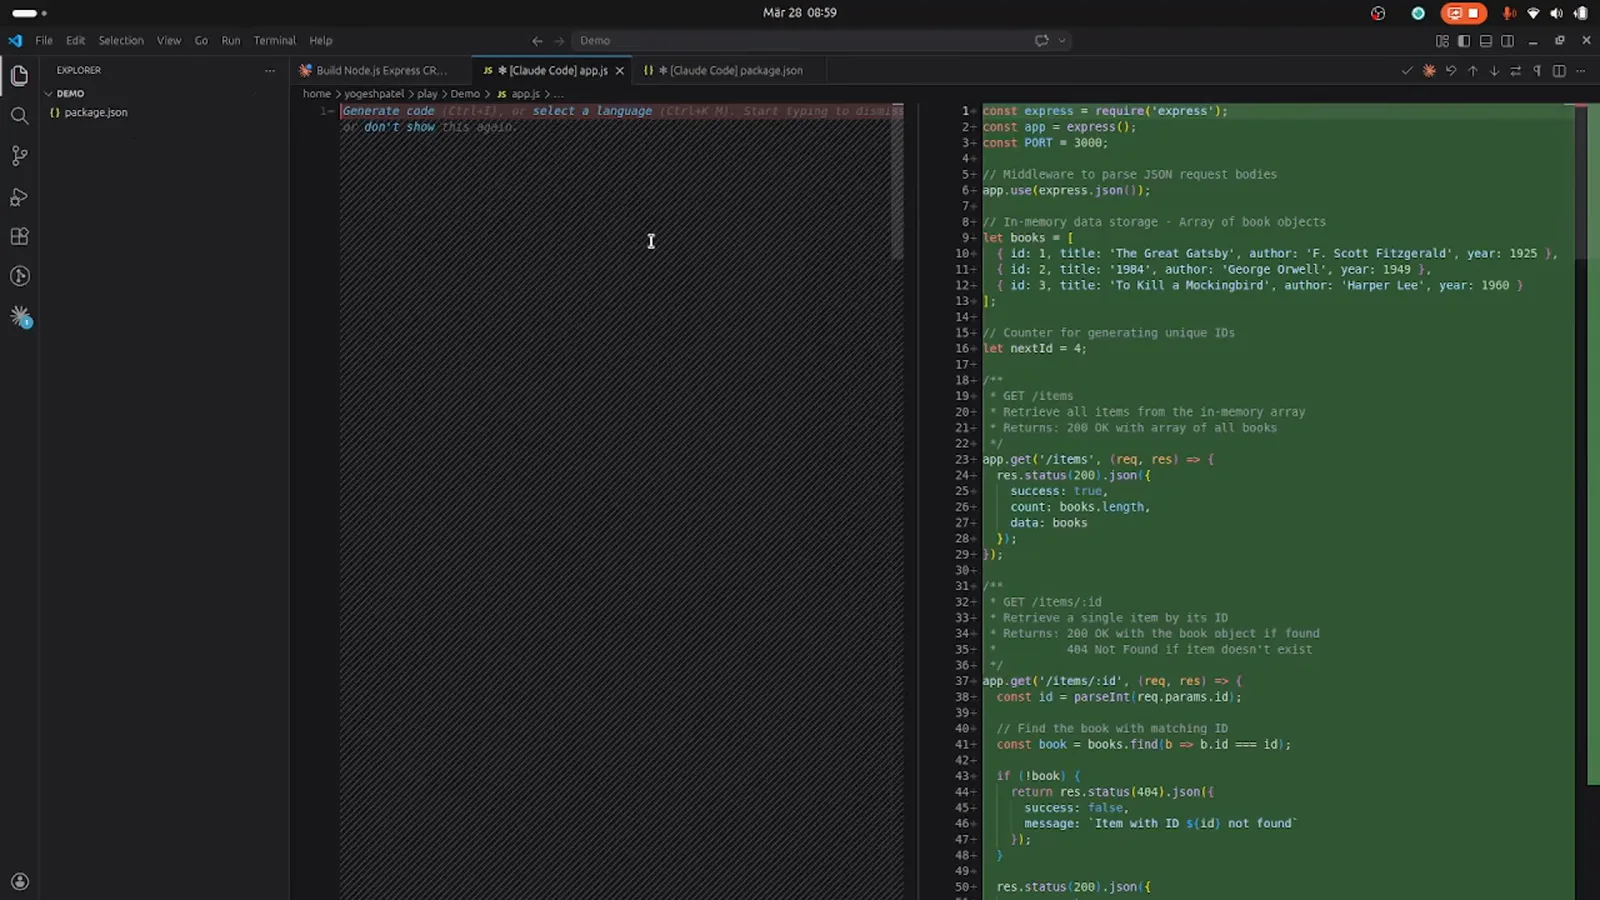
Green lines are what Claude proposes; nothing is written until you approve.Watch at 7:22 - 13
Approve one write, or the whole session
Every write gets a dialog - this one asks Allow write to app.js? - with three options: 1. Yes once, 2. Yes, allow all edits this session, 3. No. For scaffold-style work the second option stops the interruptions; review the diffs you already saw first.
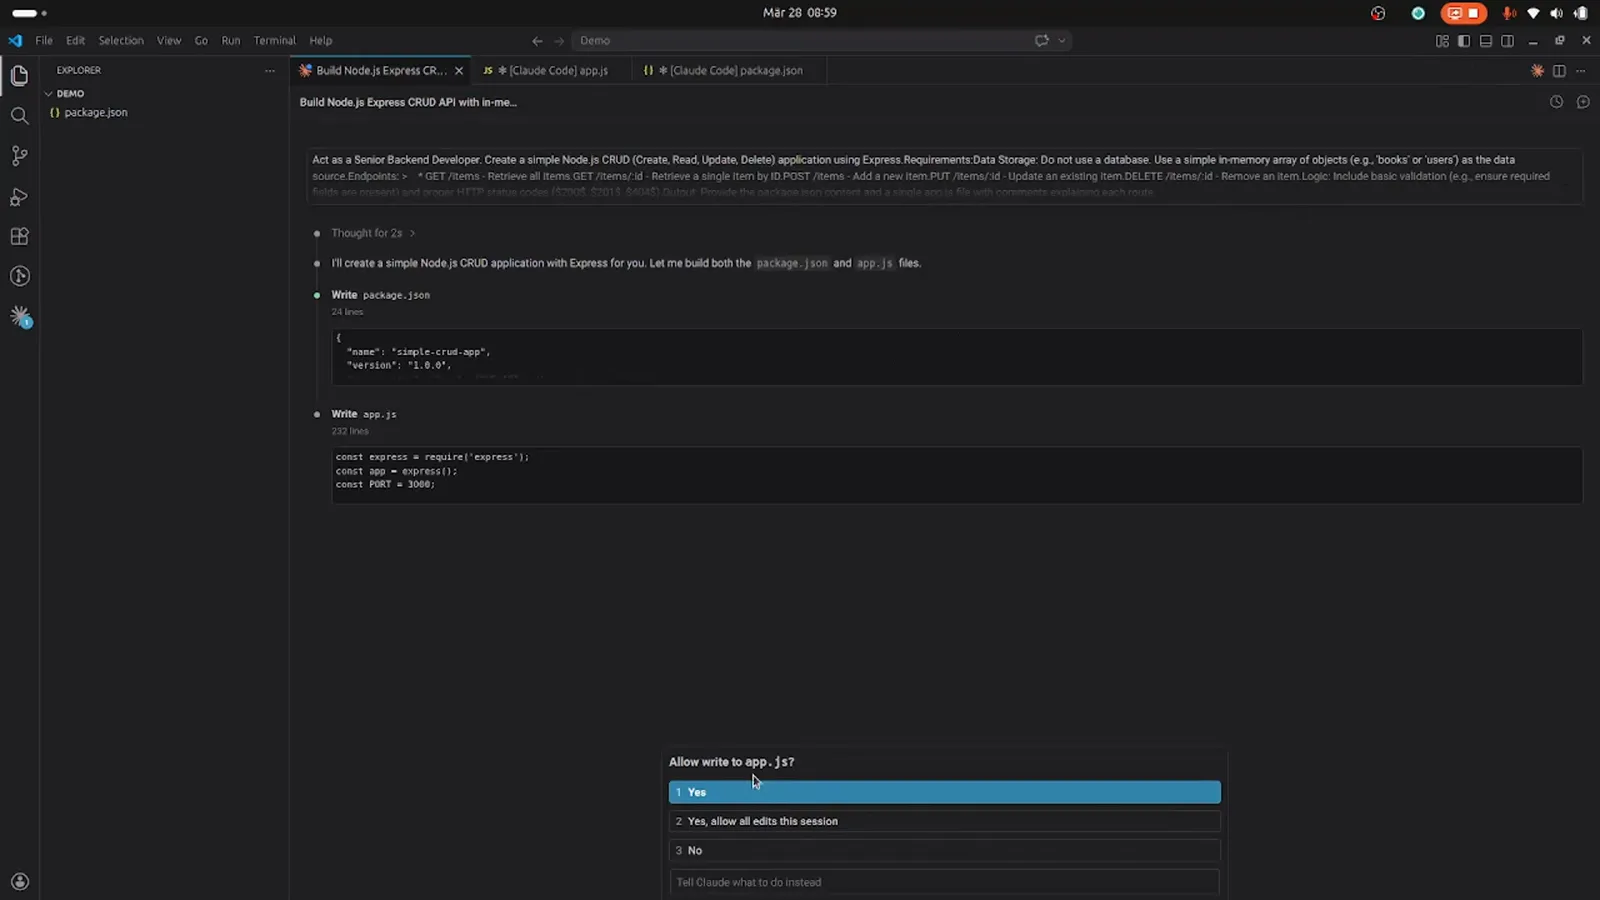
The dialog names the file it wants to write - app.js is 232 lines here.Watch at 7:29 - 14
Run and test what Claude built
The final reply checks off validation and error handling, then prints the run sheet: npm install, npm start, npm run dev for auto-restart, plus curl commands for every endpoint - GET /items, GET /items/:id, POST, PUT and DELETE - against localhost:3000.
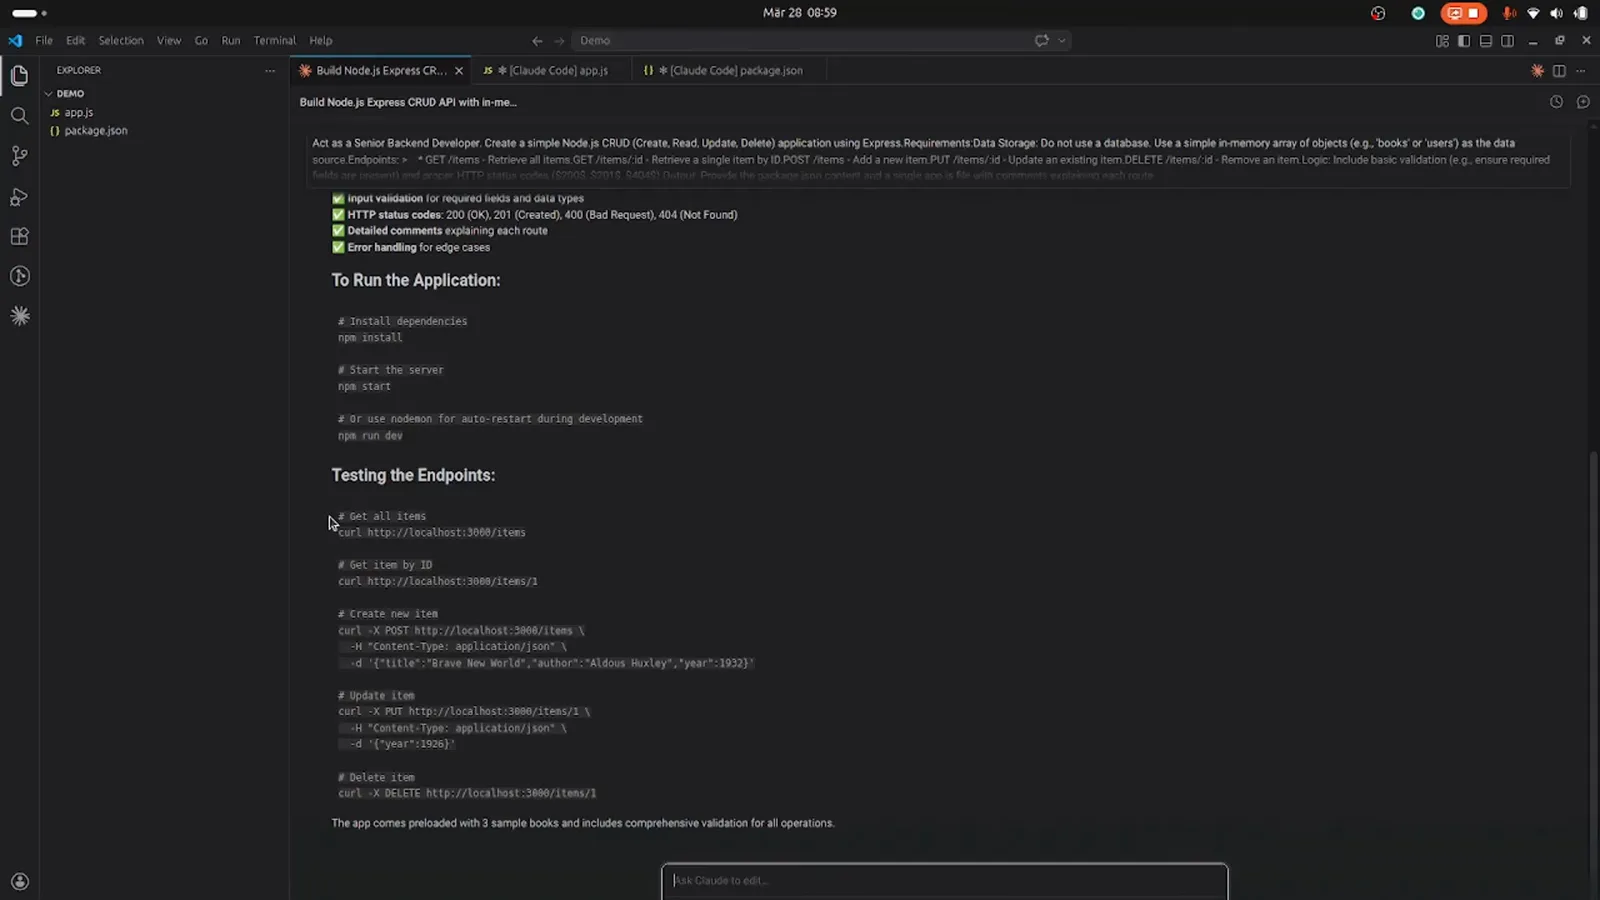
The reply ends with ready-to-paste curl commands for each route.Watch at 7:48