
Hands-on tutorial
Claude Code Custom Slash Commands
Turn your most repeated prompt into a one-word command: write a markdown file once, and Claude Code follows your conventions, tests and file layout every time.
An illustrated walkthrough of 14 steps - about 5 minutes to read. Every step links back to the exact moment in the source video.
TL;DR
A custom slash command is a markdown file in .claude/commands whose contents Claude Code treats as one big prompt. Name the file after the command, write the instructions once - output location, naming conventions, variants, tests - restart the session, and /your-command appears in the menu. Add front matter with description and argument-hint, parse $ARGUMENTS into named values, and the same command can generate a different component every time you call it.
About the source video
This page follows the slash-commands lesson of Net Ninja's Claude Code course and rebuilds its custom /ui-component command step by step.
Screenshots are frames from the video, credited to the creator; the write-up is our own. Steps verified against the video in September 2026.
Where custom commands live
One markdown file inside .claude/commands becomes a new entry in the slash menu.
- 1
Start from the built-in commands
Typing a slash on its own opens the command menu that ships with Claude Code: /add-dir for extra working directories, /agents, /clear, /compact, /model, /permissions and more. Every one of them is a shortcut to a pre-written action - and the list is extensible, which is what the rest of this guide does.
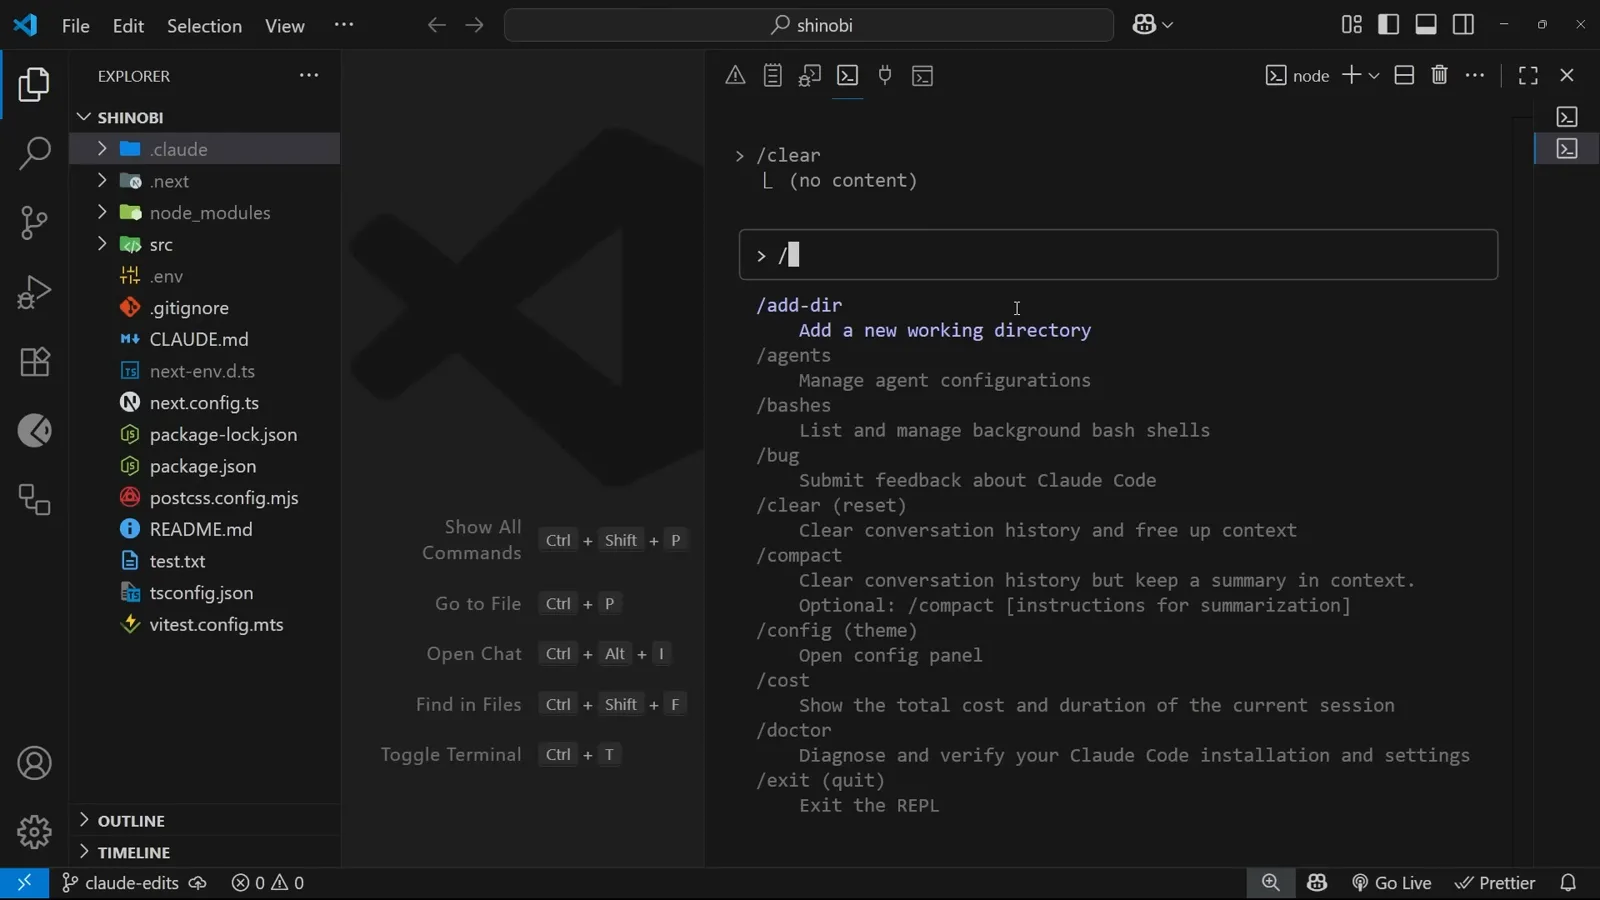
The built-in slash menu, before any custom commands exist.Watch at 0:34 - 2
Create a commands folder in .claude
Custom slash commands live in a commands folder inside the project's .claude directory - create both if they are not there yet. Each markdown file you drop in this folder becomes one command, named after the file.
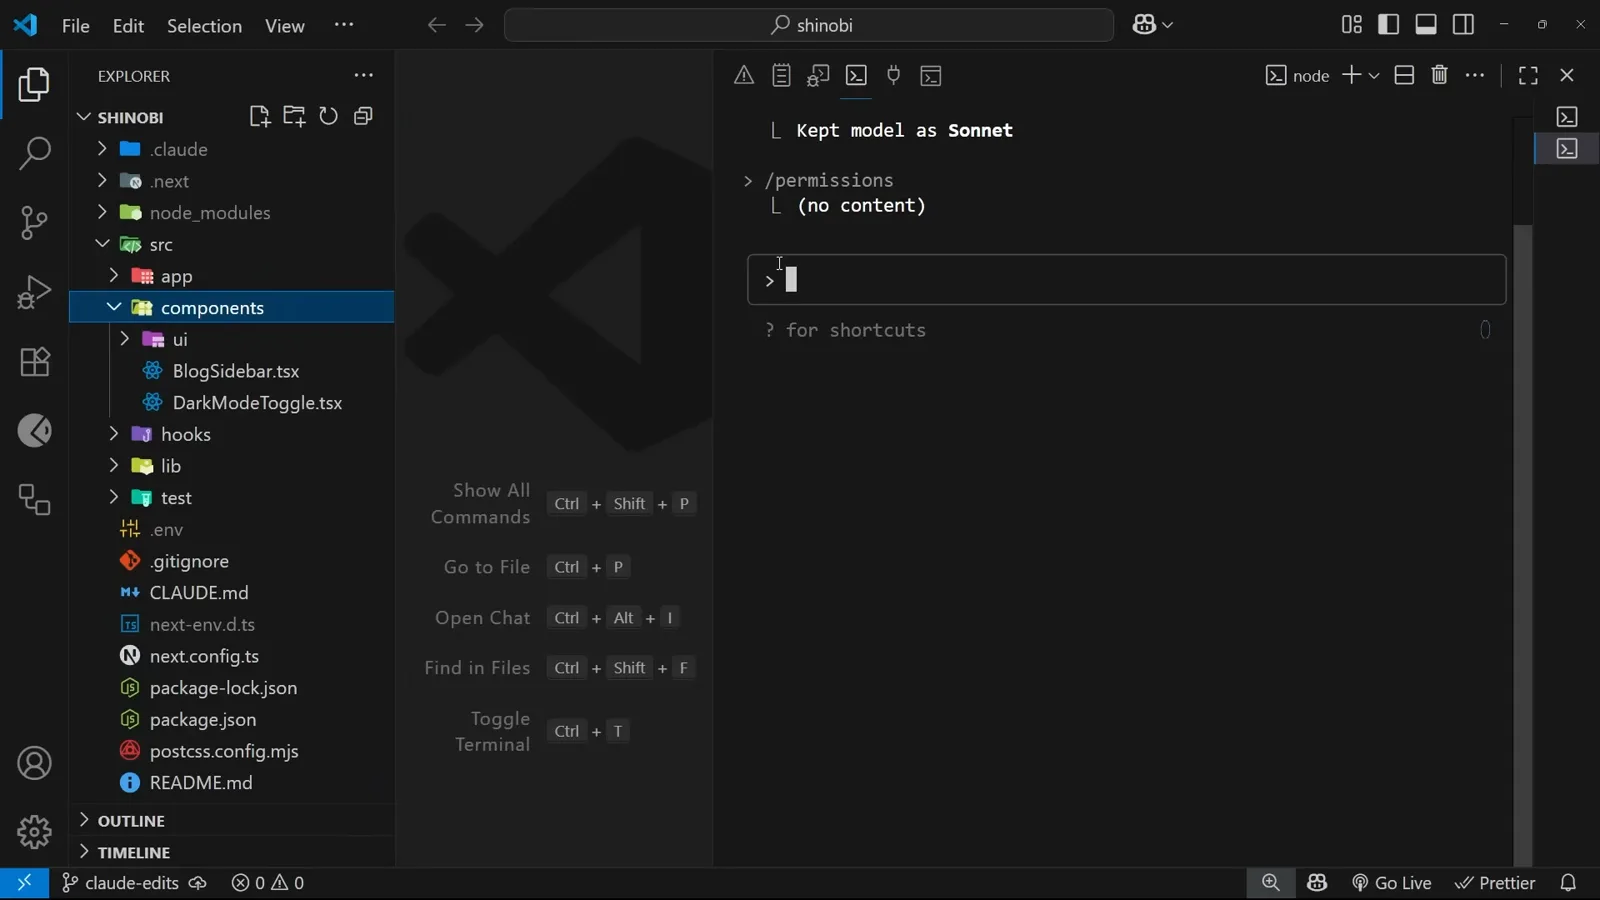
.claude/commands holds one markdown file per custom command.Watch at 2:03 - 3
Write the command as a markdown file
Here the file ui-component.md tells Claude Code where new components go, the PascalCase naming rule, which theme-color variants to define, and to write a test file and run it until everything passes. The @path syntax pulls another file in as context. To Claude Code this file is simply one big, carefully crafted prompt.
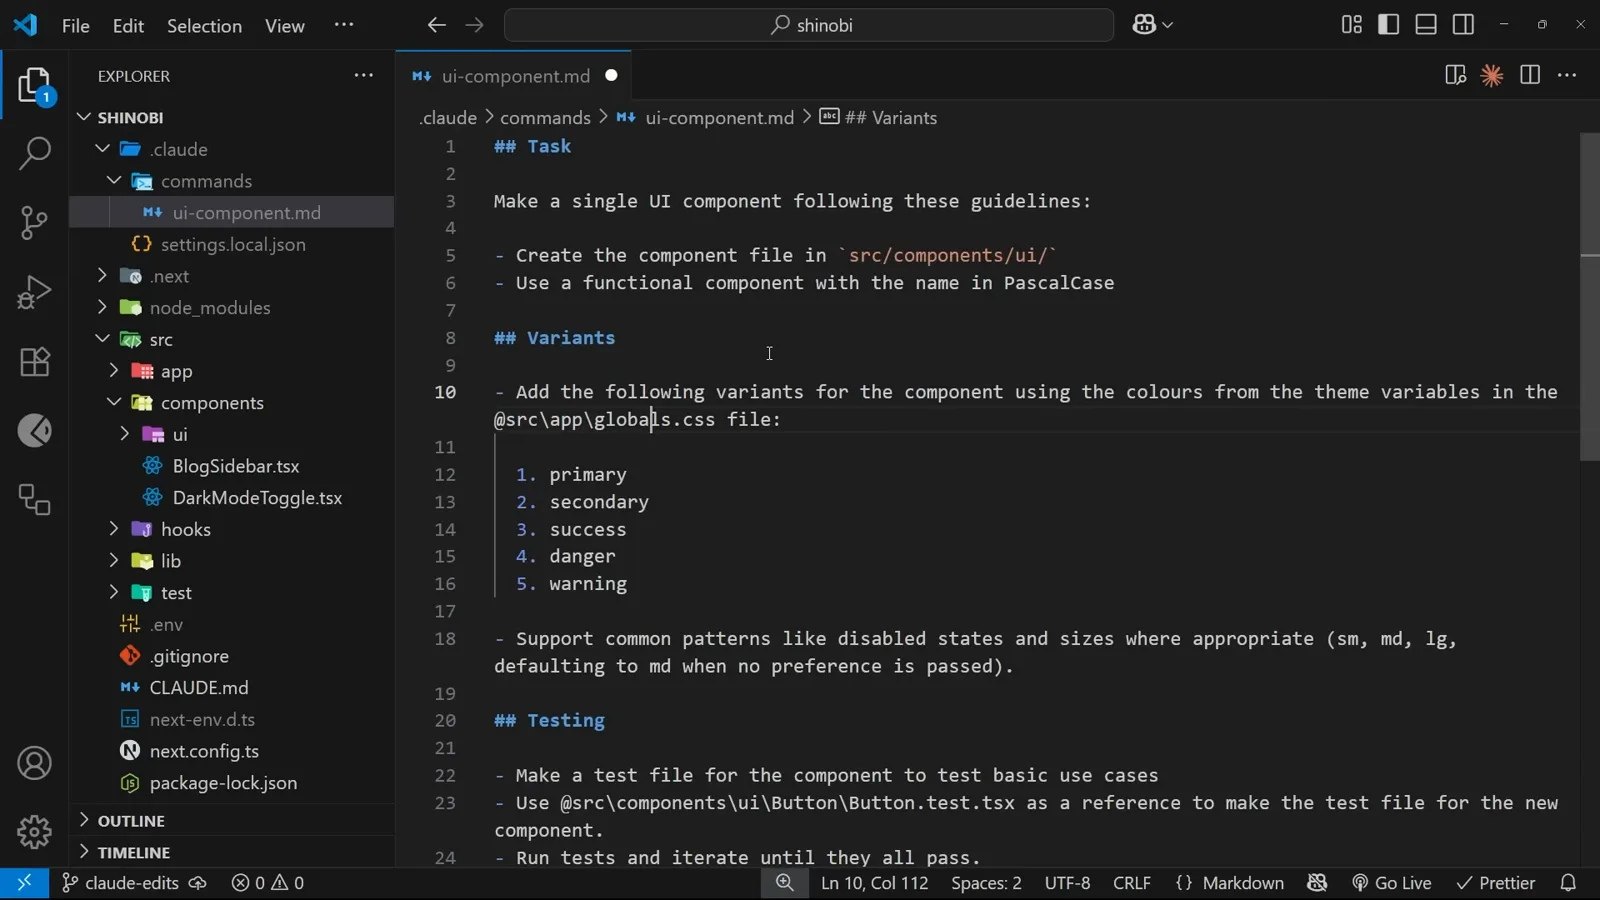
The full prompt lives in a single markdown file.Watch at 3:06
Run the command end to end
Restart, pick /ui-component from the menu, and let it build a component your way.
- 4
Restart and find the command in the menu
Claude Code only picks up new command files when a session starts, so exit and relaunch. Now typing a slash lists ui-component at the very top, marked as a project command - select it and press Enter to run.
A fresh session: /ui-component sits above the built-ins.Watch at 4:05 - 5
Approve what the command wants to run
The command file never said which component to build, so Claude Code chooses one - a card - and asks before running mkdir to create its directory. Option 2 approves every mkdir in this project for future runs, which keeps repeat invocations friction-free.
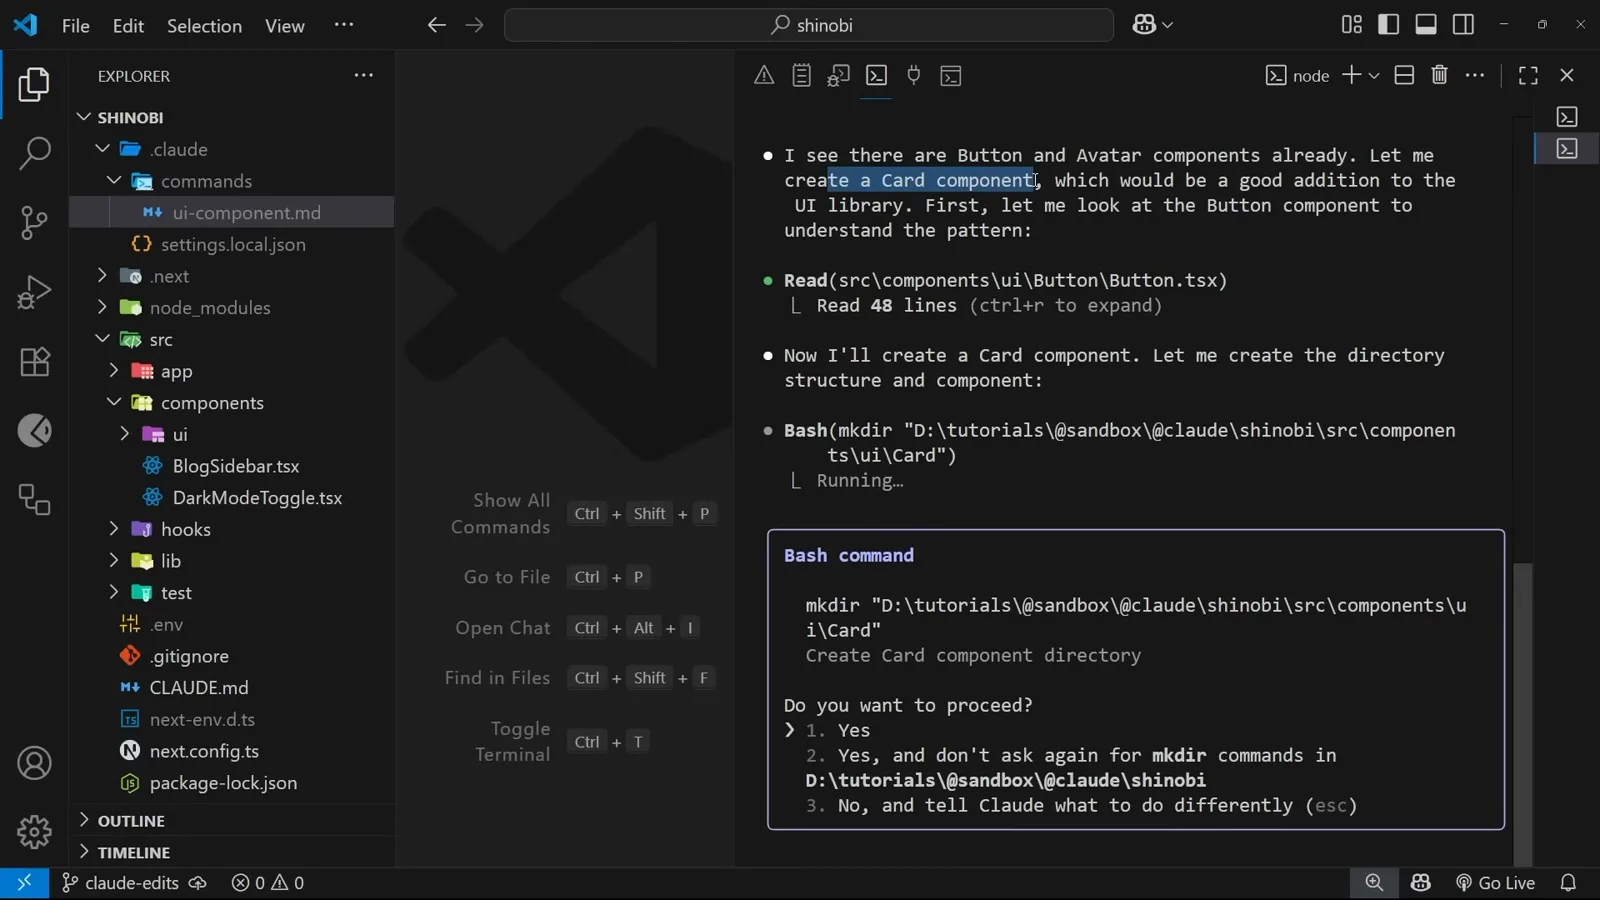
The first approval of the run: creating the Card directory.Watch at 4:32 - 6
Read the run summary before trusting it
A moment later the terminal reports what happened: five variants using theme colors, three sizes, interactive states, nine passing tests and a preview page update. This summary is the fast path for reviewing a command run - the details of every file are still worth a skim.
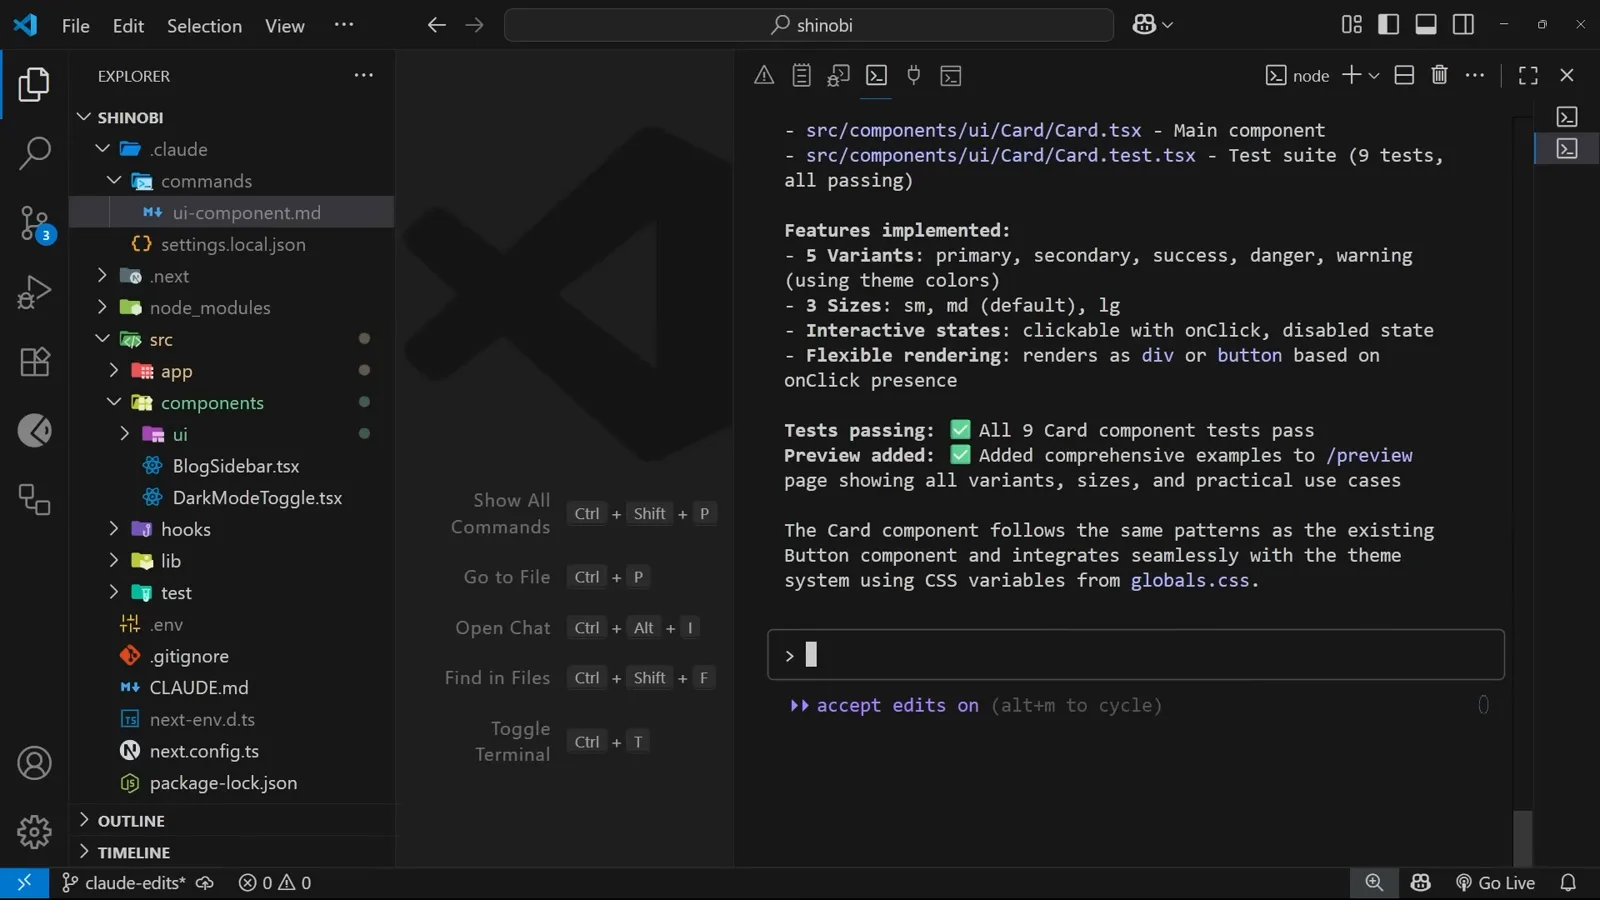
Features, tests and preview additions in one summary block.Watch at 5:01 - 7
Preview the result in the browser
The command added the new cards to the project's preview page, so scrolling down reveals primary, secondary, success, warning and danger variants in several sizes, each with hover states - all from a single slash command.
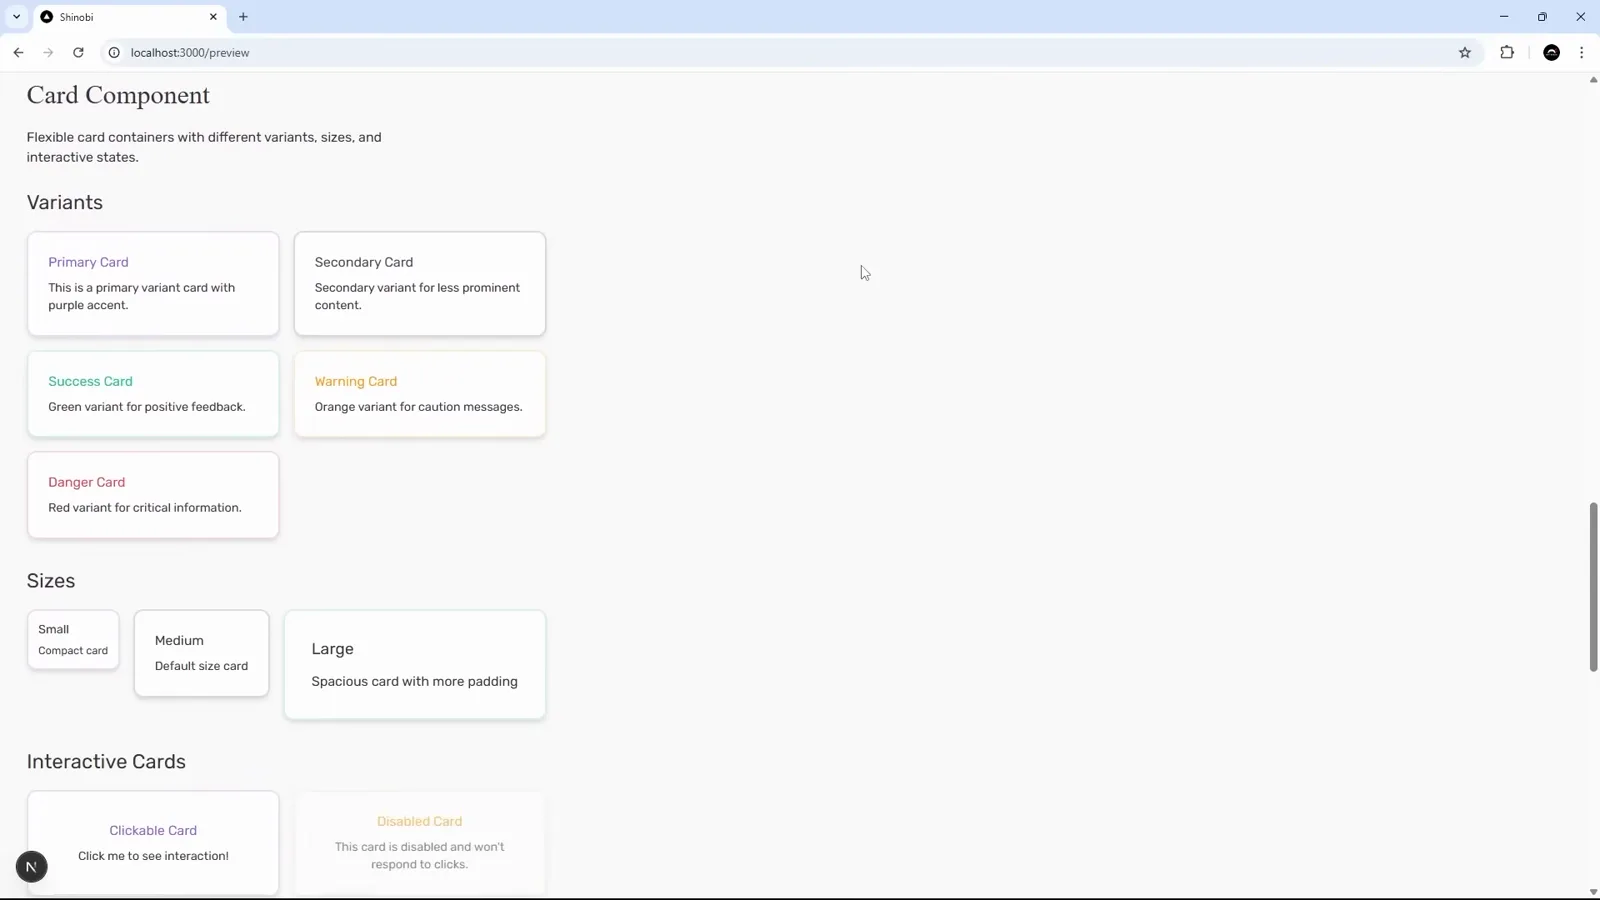
Generated card variants rendered in light mode.Watch at 6:03 - 8
Check the theme you did not think about
The preview page ships with a dark mode toggle, and the generated components hold up there too - the same markup recolored through the theme variables the command file pointed at. Getting this for free is what writing 'use the colors from the theme variables' into the command buys you.
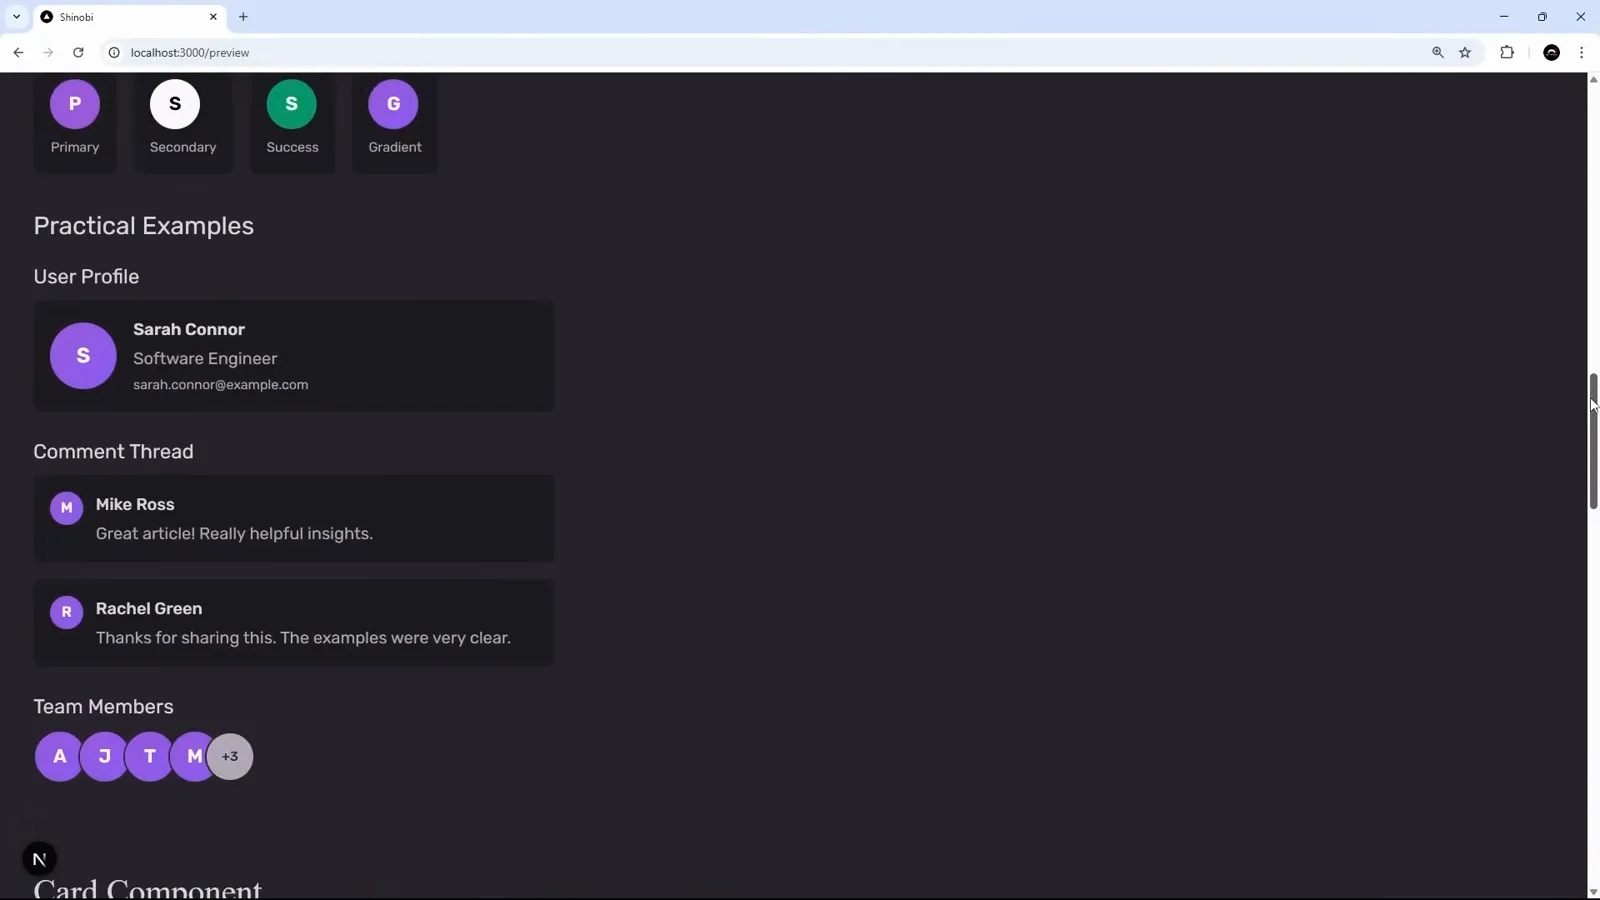
The same components, re-themed through CSS variables in dark mode.Watch at 6:34
Make the command accept arguments
Front matter plus $ARGUMENTS turns one command into a reusable generator.
- 9
Describe the command in front matter
Editing the command file starts with front matter - the metadata block between the --- lines. description explains what the command does and argument-hint shows the expected arguments; both surface in the menu and at the prompt later, so future-you never has to open the file to remember the syntax.
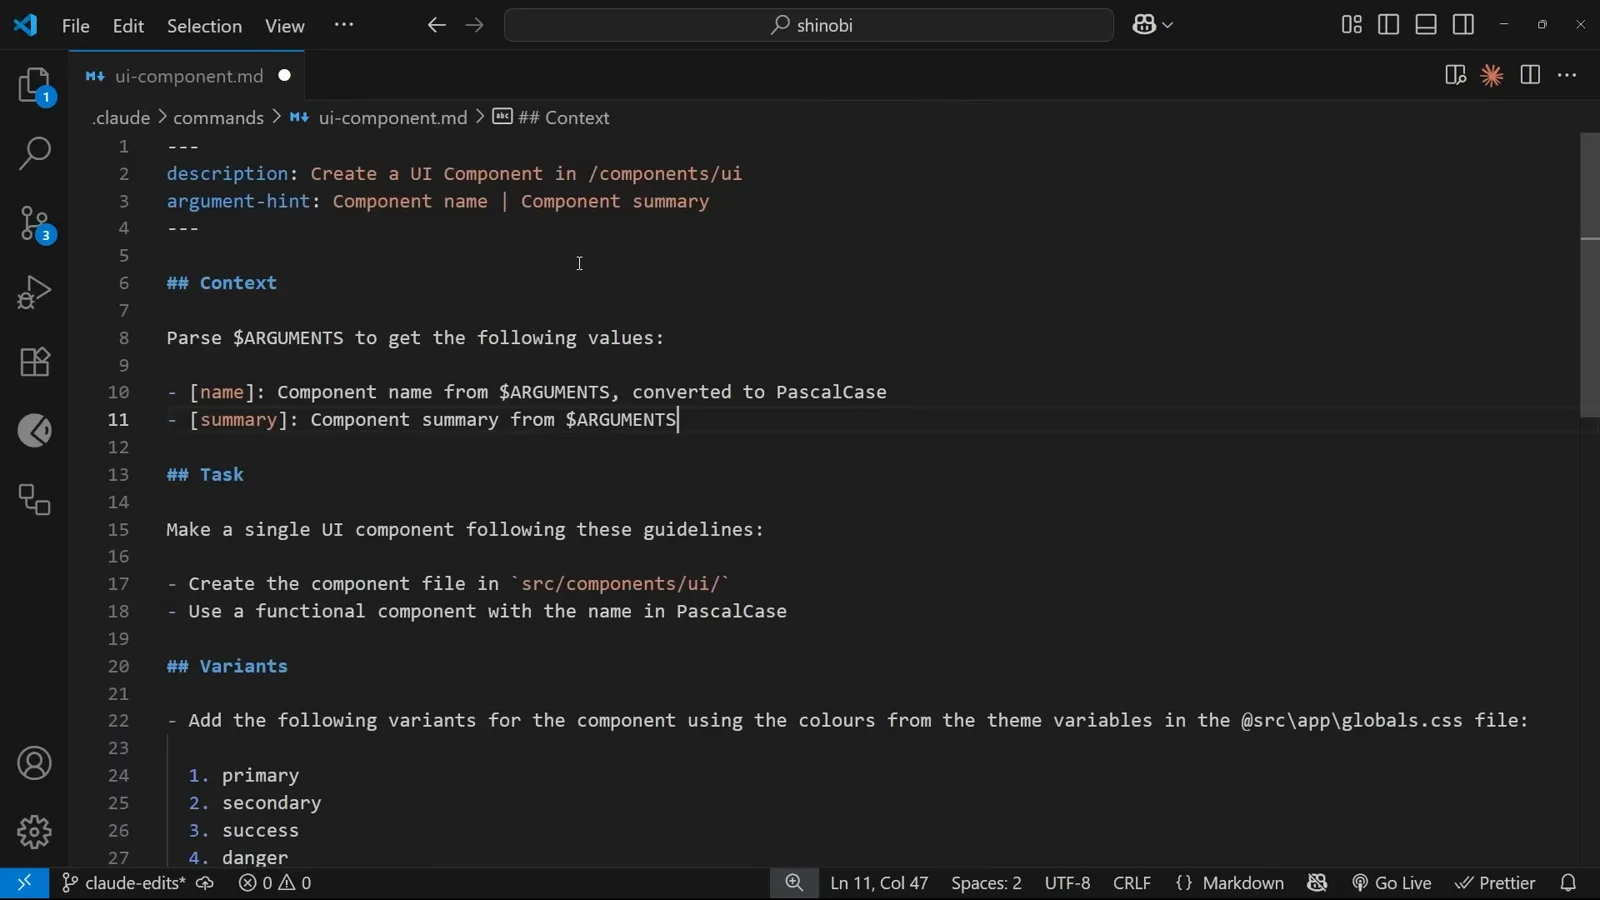
description and argument-hint, defined once at the top of the file.Watch at 7:13 - 10
Split $ARGUMENTS into named values
Everything typed after the command name lands in one $ARGUMENTS variable. The trick shown here parses it into named values using markdown reference-style lines - [name] for the component name and [summary] for its description - which the task instructions below can then use as placeholders.
![Task section of a custom slash command file referencing the [name] and [summary] values parsed from the command arguments](/images/guides/claude-code-slash-commands/claude-code-slash-commands-task-arguments.webp "Task section using parsed arguments")
Reference-style lines turn one $ARGUMENTS string into named values.Watch at 9:01 - 11
Get the hint while you type
After another restart, accepting the command from the menu shows both pieces of front matter in action: the description confirms what it does, and the ghost text spells out the argument format - component name, a pipe, then the summary.
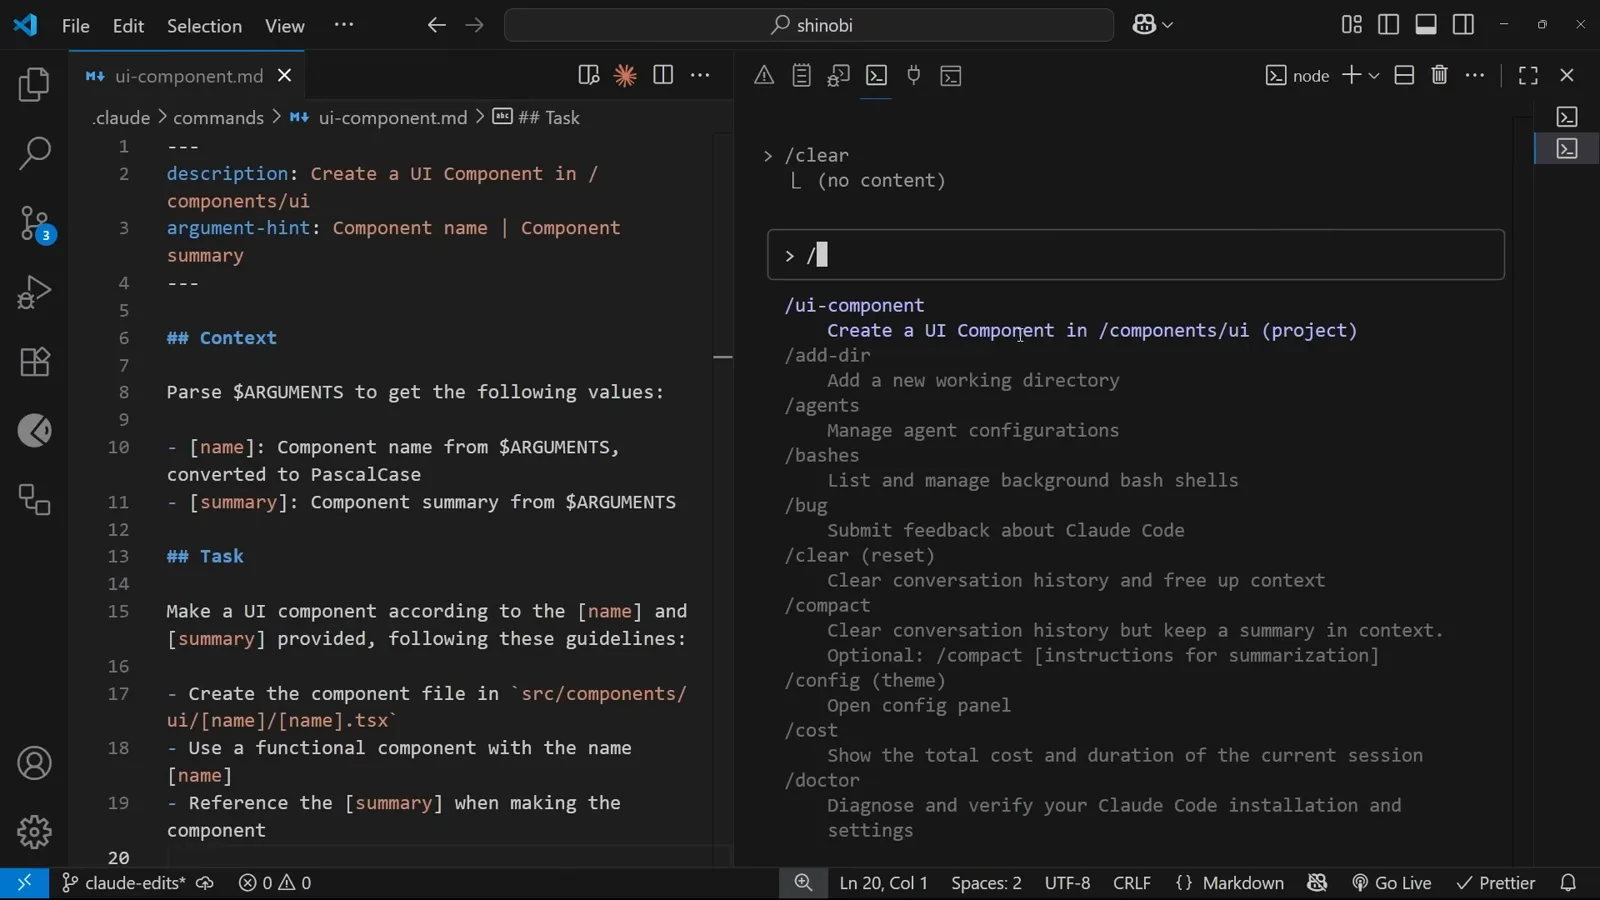
Front matter pays off: description plus inline argument hint.Watch at 9:29 - 12
Call the command with arguments
This invocation passes icon as the name and 'an icon component for showing icons with a circular background' as the summary, separated by a pipe. The same command file now produces exactly the component asked for instead of leaving the choice to the model.
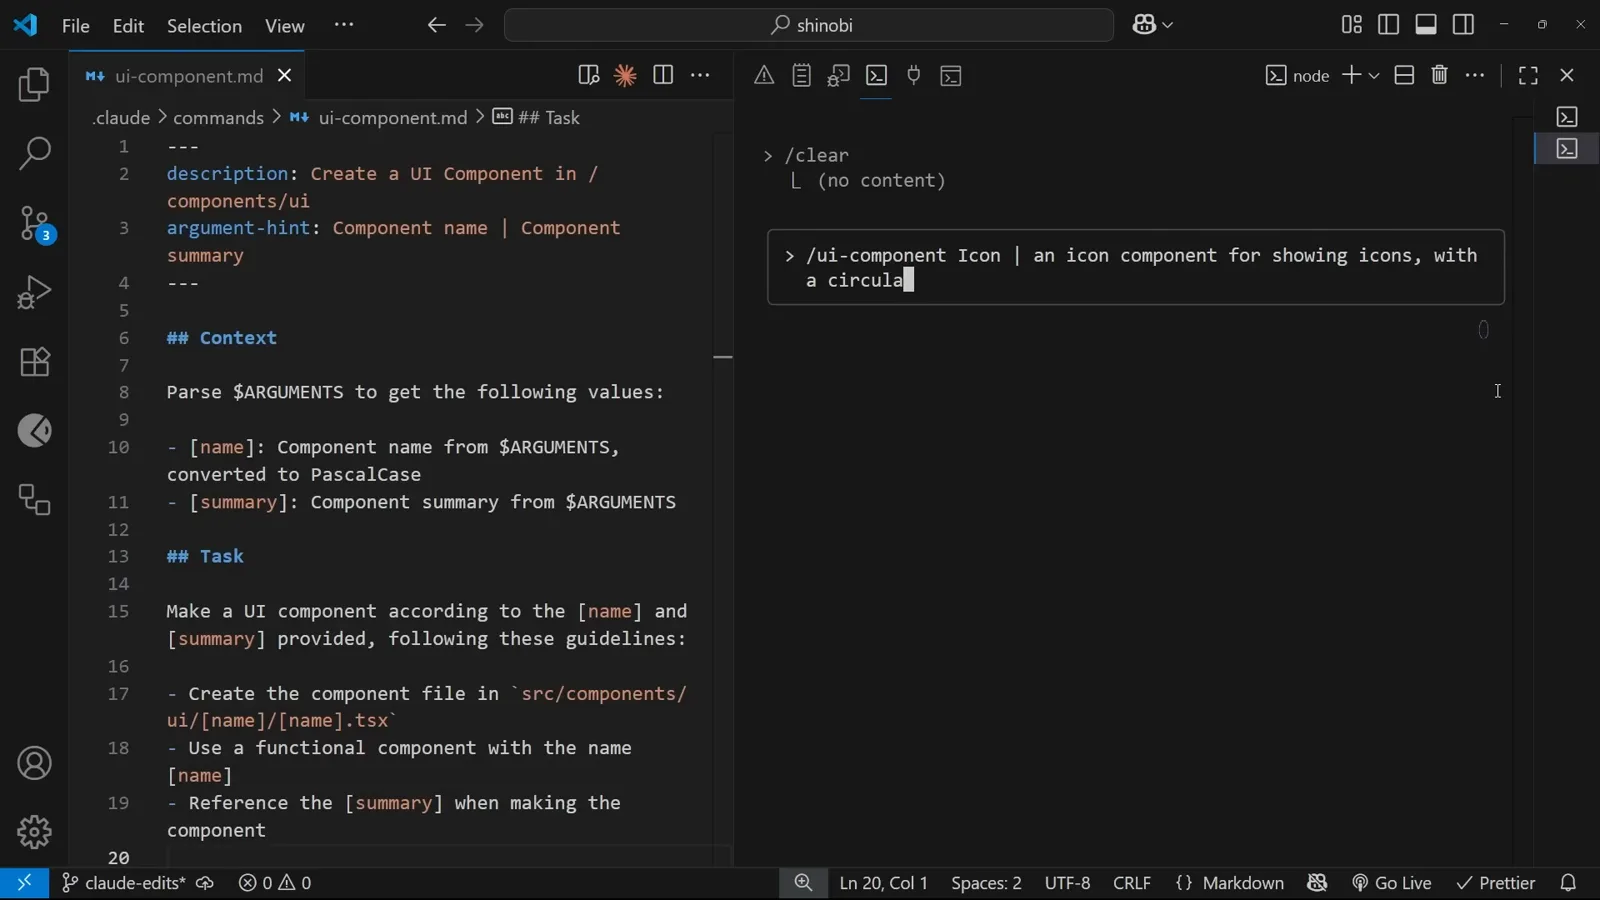
Name first, pipe, then the one-line summary.Watch at 9:54 - 13
Inspect the files it created
The explorer shows the payoff of the named arguments: a new Icon folder under components/ui containing Icon.tsx and its test file, following the same layout the earlier card used. Same command, different input, consistent structure.
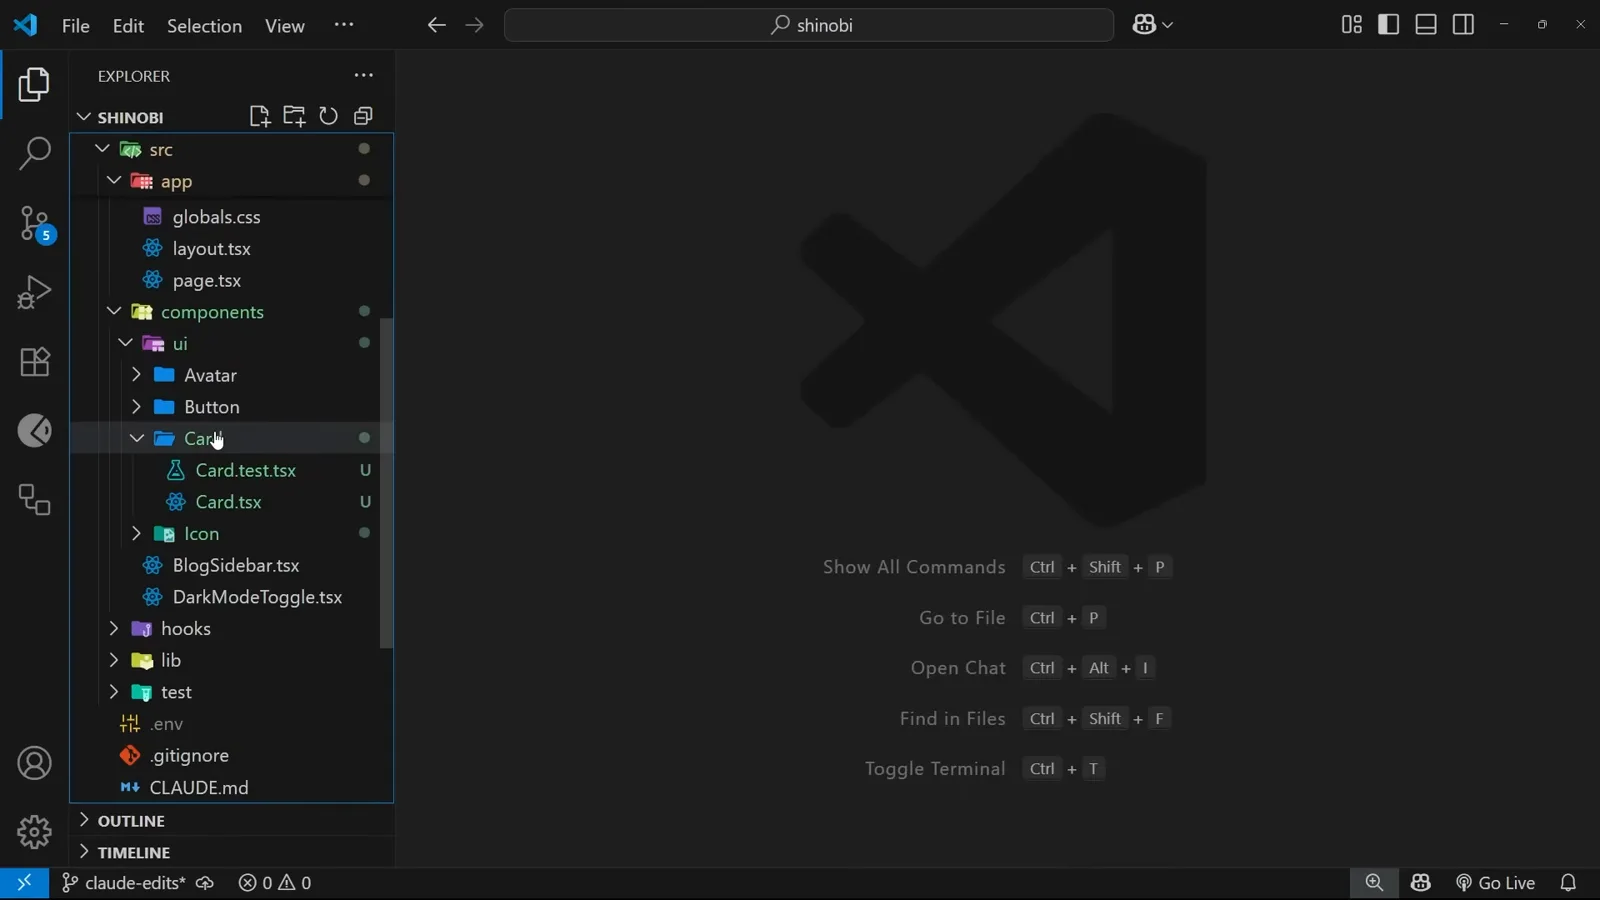
Icon.tsx and its test file land in the expected folder.Watch at 10:27 - 14
Iterate on output you can see
The first draft used raw emojis, which the author pushed back on - Claude Code swapped them for a proper icon library on request, and the preview now shows action bars, status indicators and five variants. A custom command sets the floor for quality; your review still sets the ceiling.
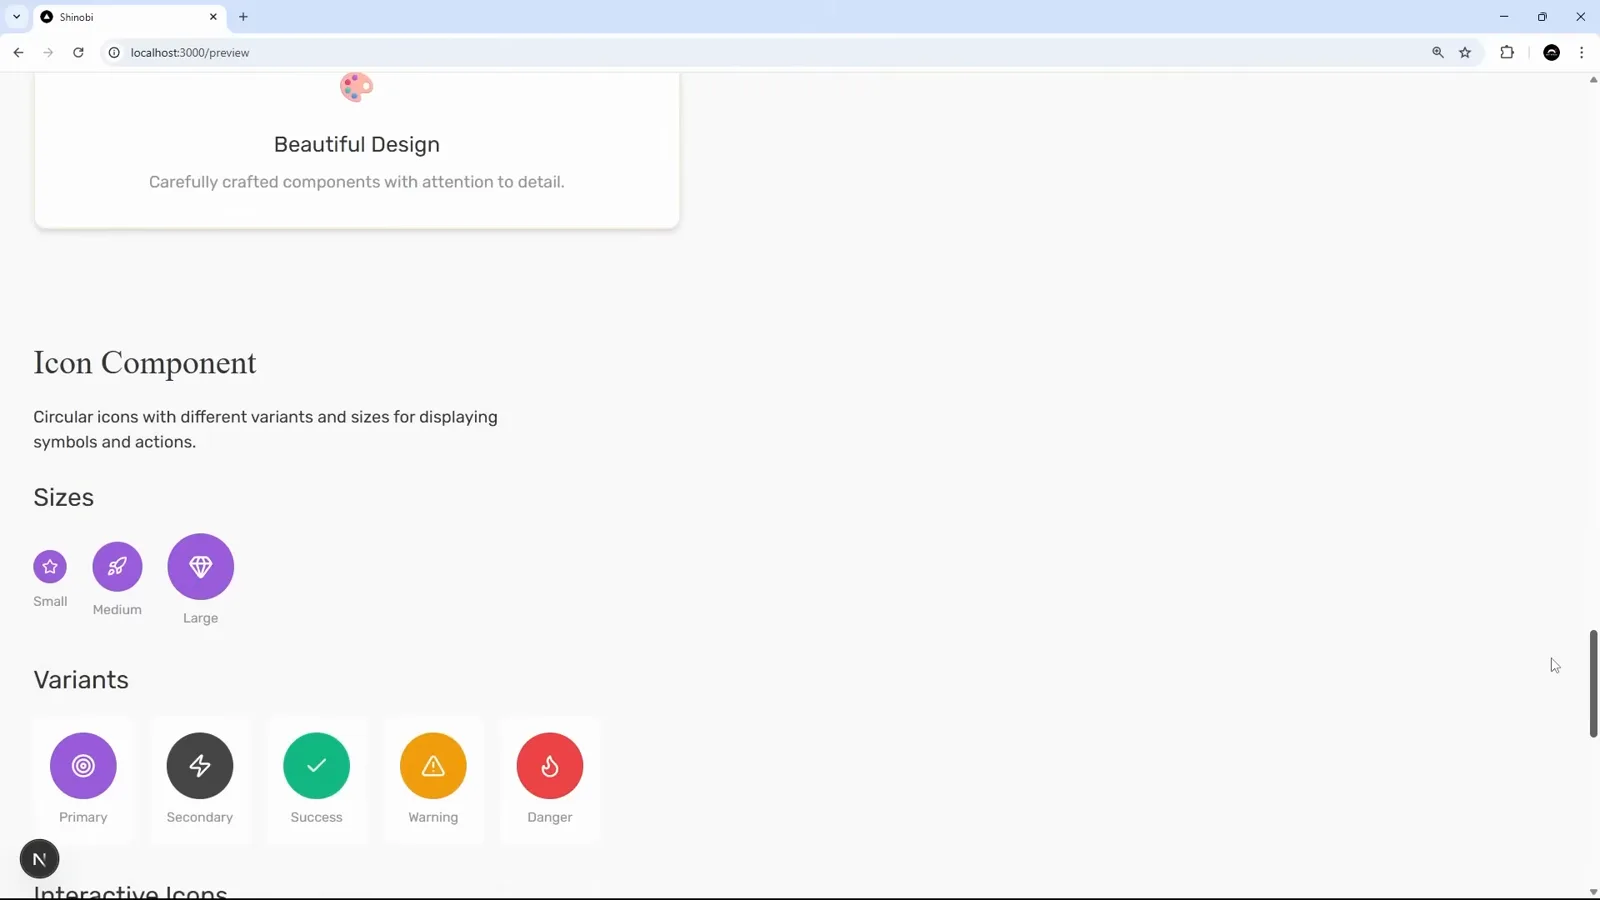
After one round of feedback: real icons, five variants, action bars.Watch at 11:52