
Screenshot walkthrough · 16 steps
Claude Code in JetBrains IDEs: the Illustrated Setup Guide
From the JetBrains Marketplace plugin to a working Claude Code panel in IntelliJ IDEA — plugin install, native CLI install, the Path fix, sign-in and your first prompt, every step with screenshots from a real session.
![JetBrains Marketplace search for claude code inside IntelliJ IDEA returning 220 results, with third-party lookalike plugins above the official Claude Code [Beta] entry published by Anthropic PBC](/images/guides/claude-code-jetbrains/claude-code-jetbrains-claude-code-beta-anthropic.webp "Finding Anthropic's plugin in the JetBrains Marketplace")
6 min read · 16 annotated steps
The short version
Install the Claude Code [Beta] plugin by Anthropic PBC from IntelliJ's Marketplace — but know that the plugin is only a terminal wrapper: the claude CLI itself must be installed separately (irm https://claude.ai/install.ps1 | iex on Windows), its install location added to Path, and IntelliJ restarted. The plugin's terminal then walks you through theme, login method and folder trust before you can type prompts or slash commands like /model.
Source video
All 16 frames in this guide come from a screen recording by United Top Tech — a four-minute Windows session that installs the plugin, repairs the CLI and runs a first prompt. Each step below deep-links to the exact second it was taken from.
Frames are used with attribution and link back to the source video. The write-up is ours; the clicks are theirs.
Part 1 — Install the plugin from the Marketplace
Settings → Plugins → Marketplace, and pick the one publisher that matters.
- 1
Open Settings and go to Plugins
In IntelliJ IDEA, open the settings icon at the top of the window and choose Plugins. The video also stresses updating IntelliJ IDEA to the latest version first. Switch to the Marketplace tab and start typing claude in the search box.
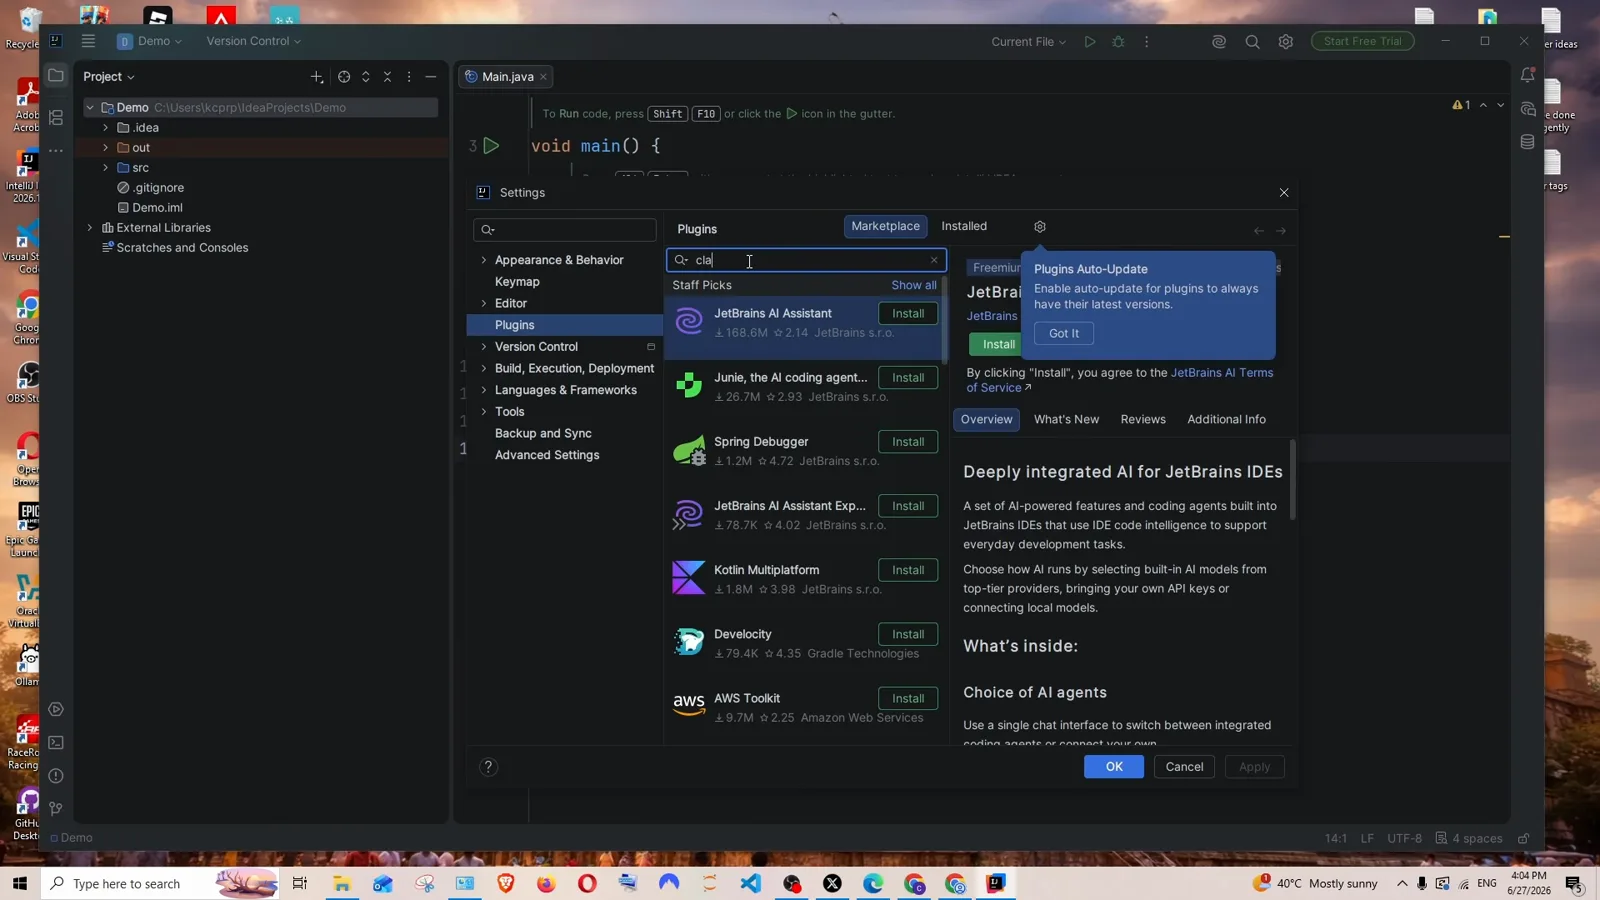
The Settings dialog with the Plugins section selected and the Marketplace search box active.Watch at 0:28 - 2
Pick the Anthropic PBC entry
The search returns 220 results, and many are lookalikes from third-party publishers — Claude Code with GUI, CC GUI, Claude Codex AiGo123 and more. The video's rule: only trust what comes from Anthropic PBC. The official entry is called Claude Code [Beta], with 4.2M downloads.
Search results full of lookalike plugins; the real one is Claude Code [Beta] by Anthropic PBC.Watch at 0:32 - 3
Check the detail page, then Install
The detail page lists the publisher (Anthropic PBC), the version (0.1.14-beta in the recording) and an IMPORTANT note that is easy to skip: this plugin requires Claude Code to be installed separately. Click Install, Accept, then Apply and OK.
![Claude Code [Beta] plugin detail page in IntelliJ IDEA showing publisher Anthropic PBC, version 0.1.14-beta, a green Install button and an IMPORTANT note that the plugin requires Claude Code to be installed separately](/images/guides/claude-code-jetbrains/claude-code-jetbrains-plugin-detail-install.webp "Read the IMPORTANT note")
Detail page for Claude Code [Beta] — the IMPORTANT note foreshadows the whole next section.Watch at 0:46
Part 2 — The plugin is not enough: install the CLI
Until the claude CLI exists, the toolbar icon fails on first launch.
- 4
Find the new toolbar icon
Once the install finishes, a Claude Code starburst icon appears in IntelliJ's top toolbar (keyboard: Ctrl+Escape). Hovering it shows the tooltip. One click should open a Claude Code terminal inside the IDE.
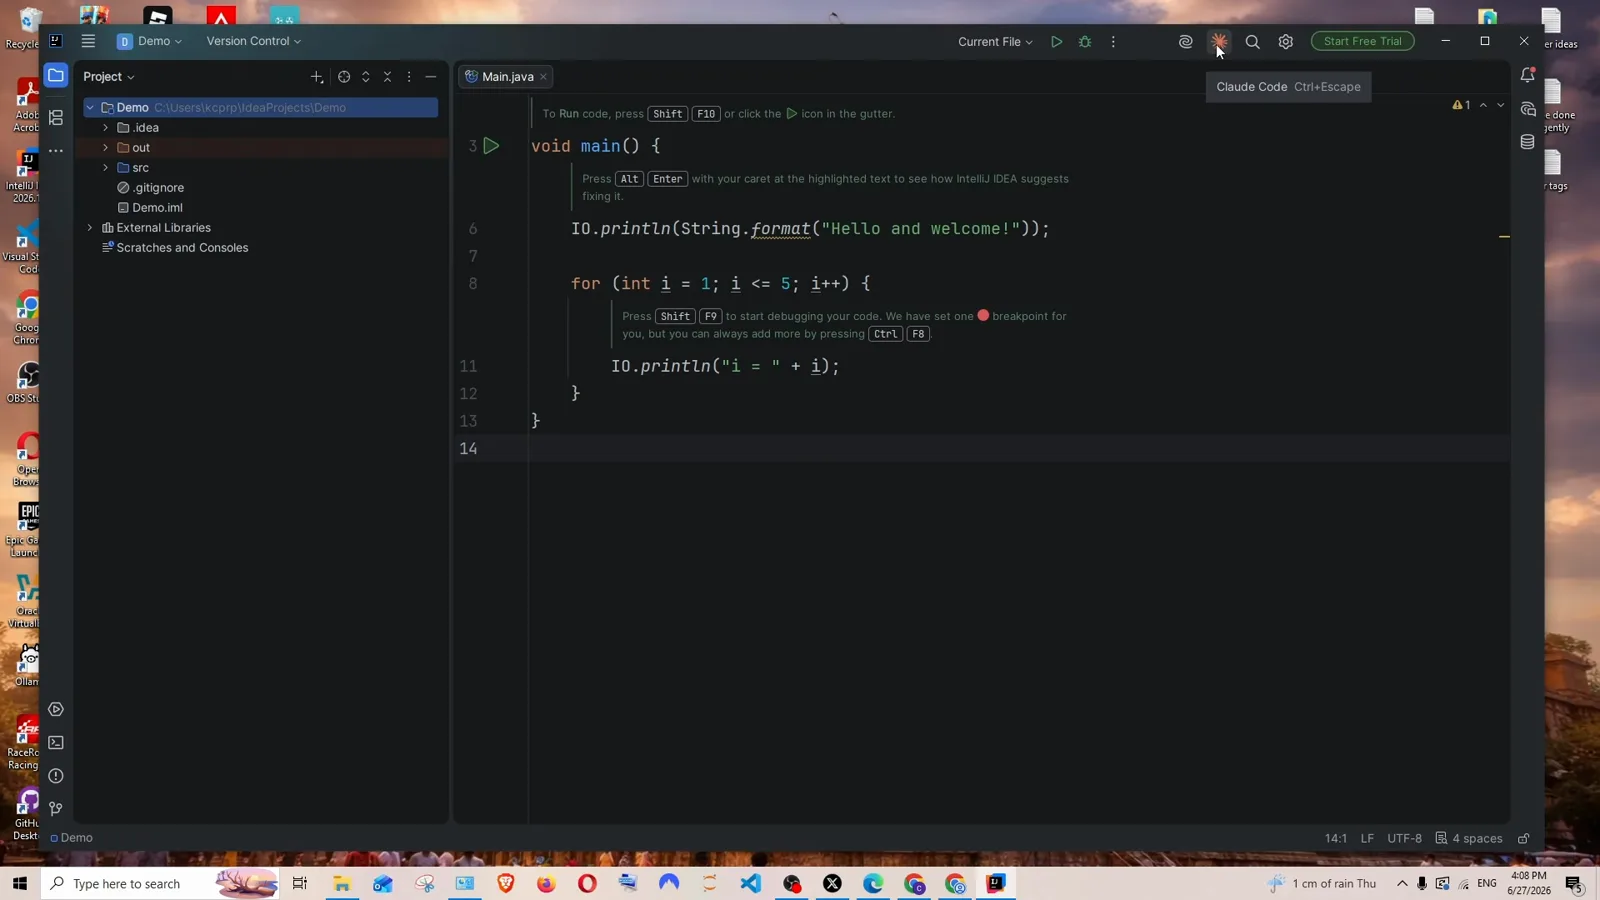
The Claude Code icon sits in the top toolbar with a Ctrl+Escape shortcut.Watch at 0:58 - 5
Expect an error on first launch
In the recording, clicking the icon opens a terminal where claude fails with: The term 'claude' is not recognized as the name of a cmdlet... That is because the plugin talks to the claude CLI, and the CLI is not installed yet. This is the moment the docs link is for.
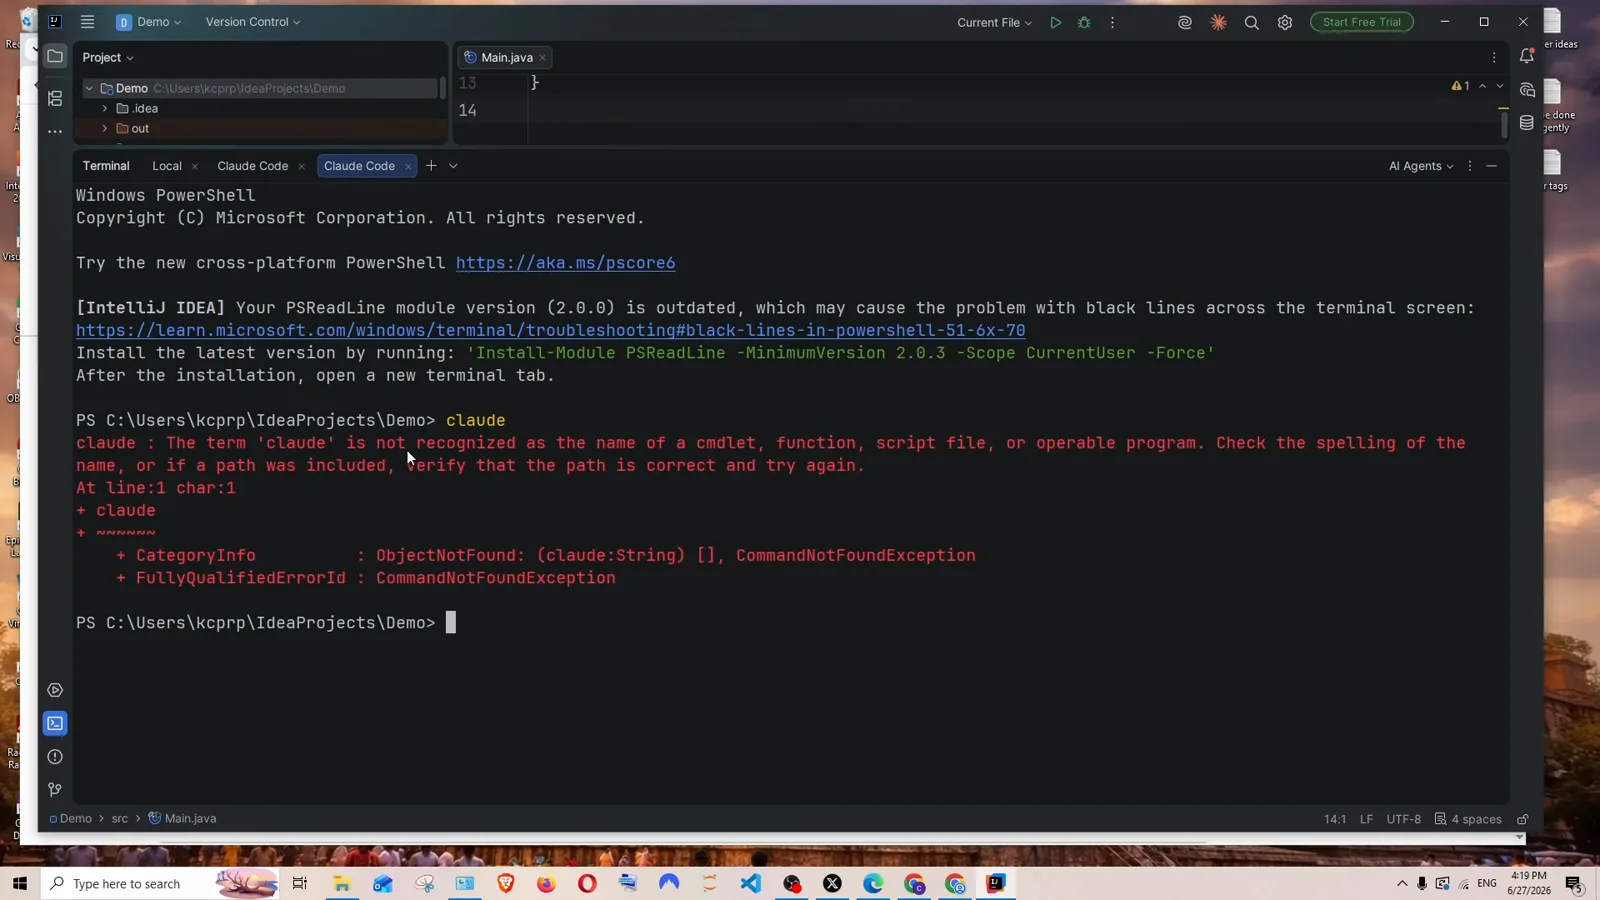
PowerShell in the Claude Code terminal tab: CommandNotFoundException, because the CLI is missing.Watch at 1:03 - 6
Get the native install command
Open the Claude Code docs (code.claude.com/docs) and find the install methods. The docs list a Native Install (Recommended) plus Homebrew and WinGet, with commands for macOS/Linux/WSL, Windows PowerShell and Windows CMD. For this Windows session, copy the PowerShell line: irm https://claude.ai/install.ps1 | iex.
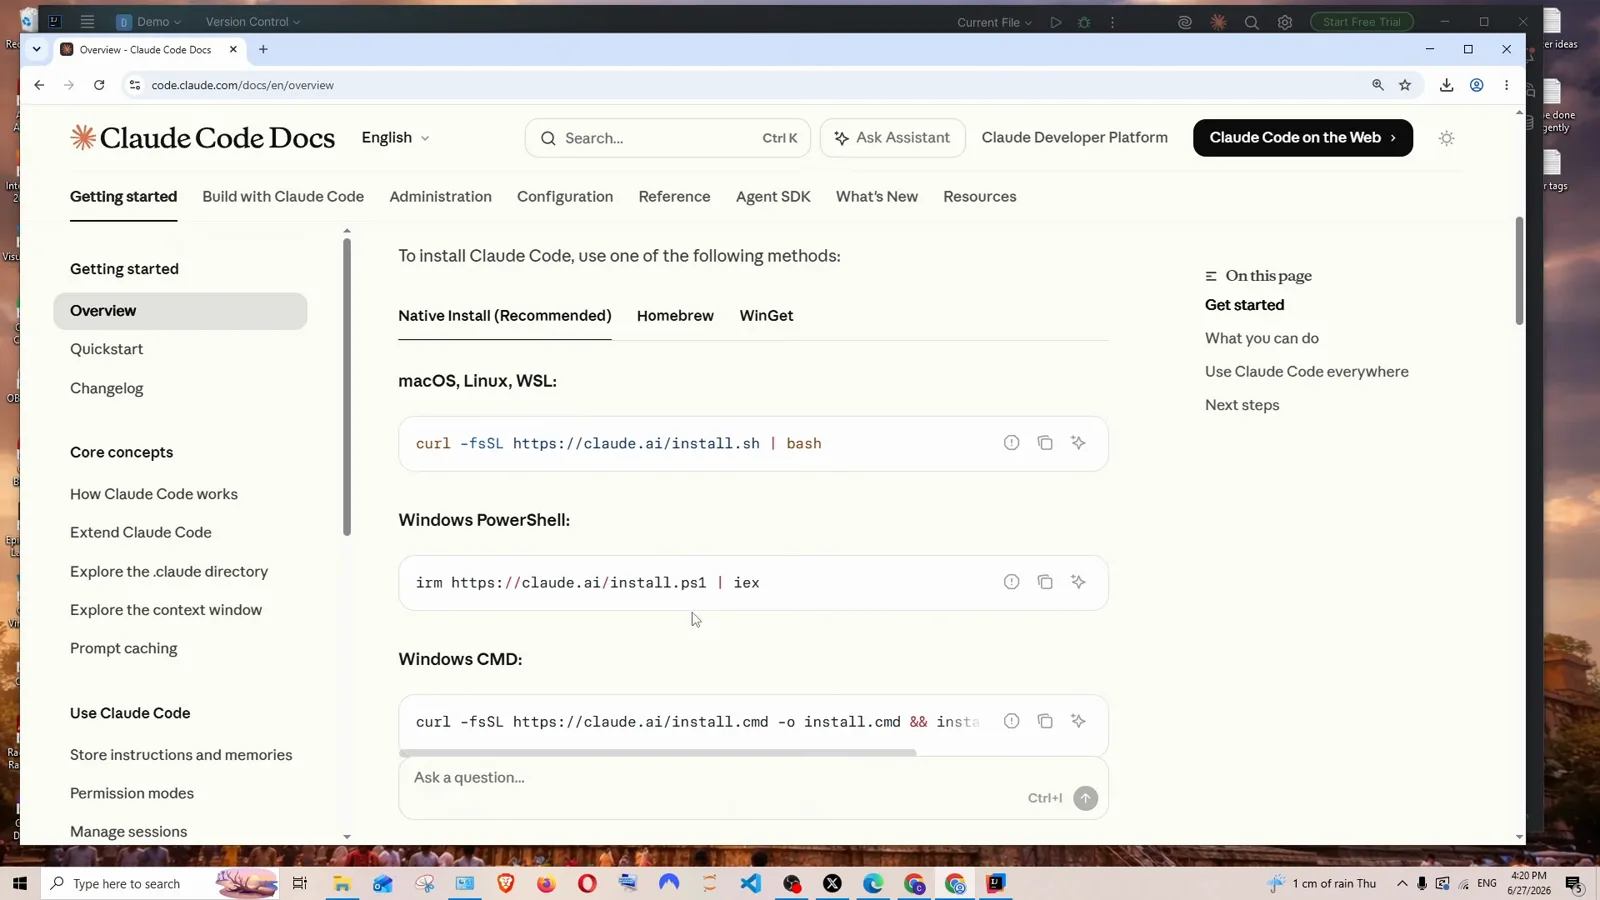
The docs page with all three Windows install commands; PowerShell's is the one used here.Watch at 1:16 - 7
Run the installer in PowerShell
Open PowerShell, paste the command and press Enter. The installer prints Setting up Claude Code..., then Installing Claude Code native build latest..., and finishes after a short wait. Be patient here — the recording cuts the download.
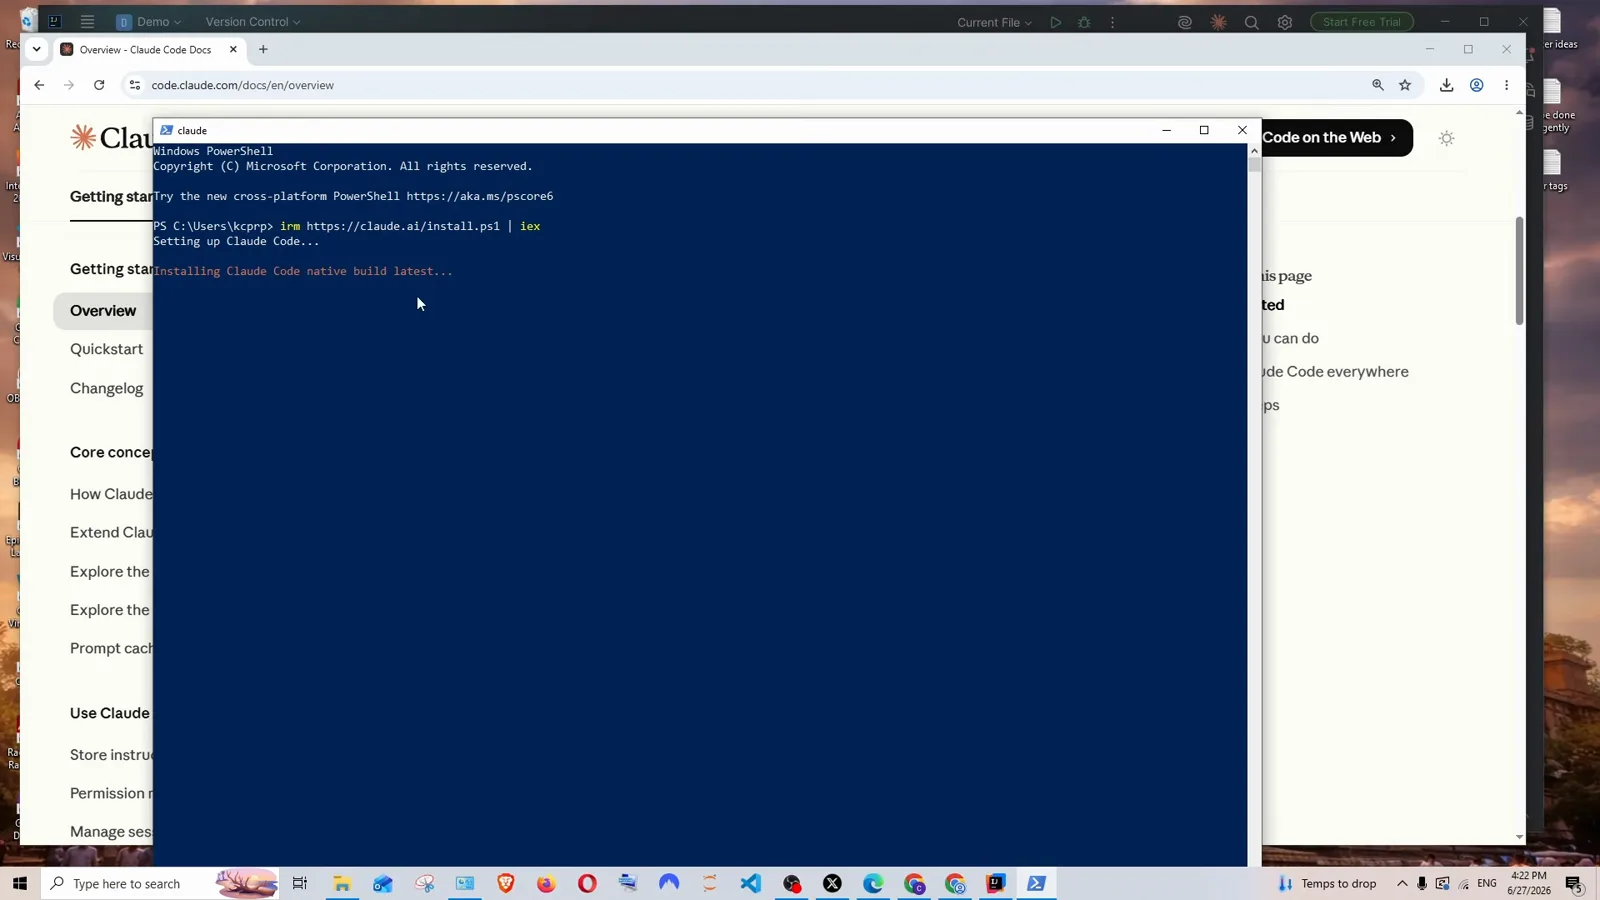
The native installer pulling the Claude Code build in a PowerShell window.Watch at 1:26
Part 3 — Put claude on Path
Add the install location to your environment variables and verify it works.
- 8
Add the install location to Path
The installer prints the location — in the recording C:\Users\kcprp\.local\bin\claude.exe — and the video copies it, then searches Windows for edit system environment variables. In Environment Variables, edit Path and add that location, then OK your way out of every dialog.
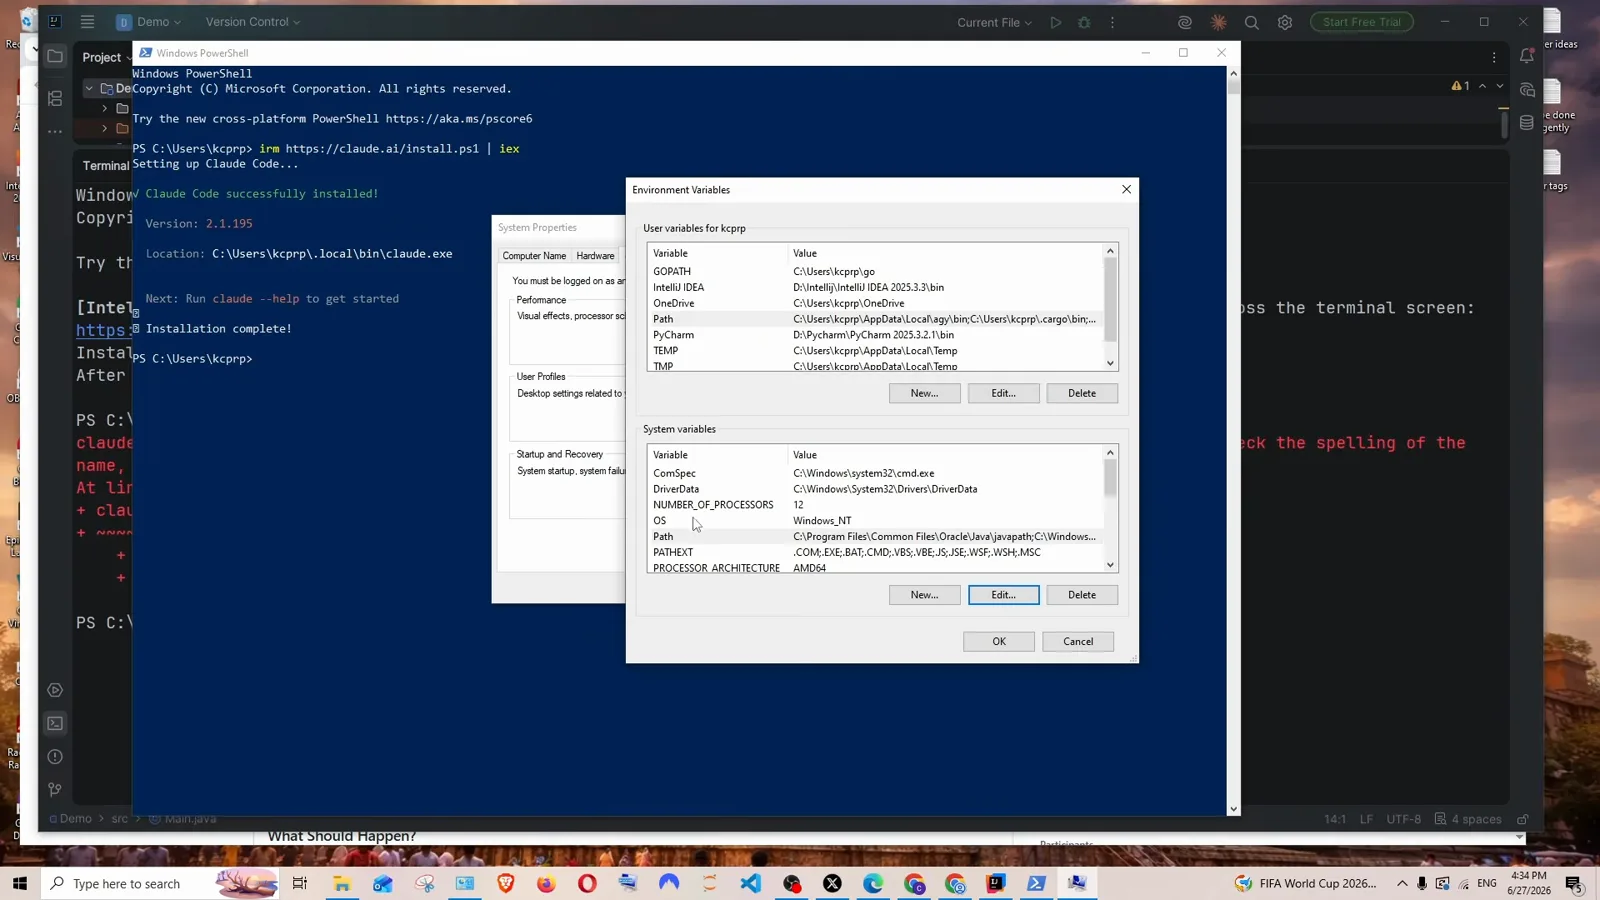
Environment Variables dialog over the successful install output showing version 2.1.195 and the .local\bin\claude.exe location.Watch at 1:44 - 9
Verify claude from a command prompt
Open a fresh Command Prompt and type claude. Instead of an error, the Claude Code mascot appears with Let's get started and the theme picker — proof the Path edit works. Close this window and restart IntelliJ IDEA so it picks up the new environment.
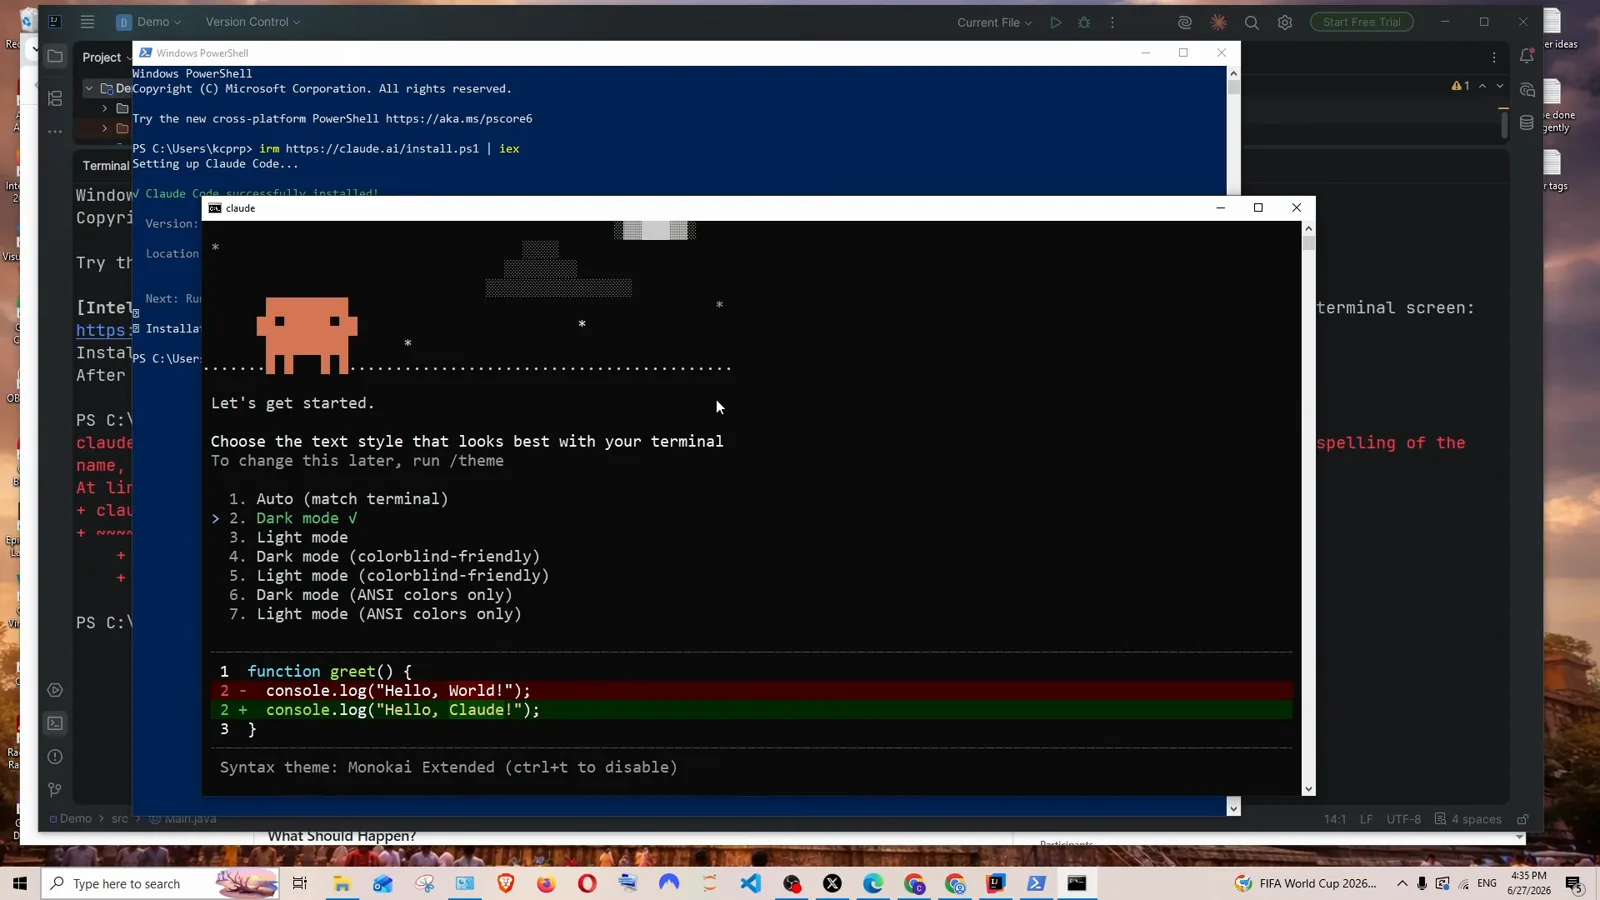
Command Prompt running claude: the mascot and theme list mean the CLI is reachable.Watch at 1:56
Part 4 — Sign in inside IntelliJ
Theme, login method and the folder-trust prompt.
- 10
Back in IntelliJ, the panel onboards you
After the IDE restart, clicking the Claude Code icon opens the same onboarding inside a docked terminal tool window: Welcome to Claude Code v2.1.195, then Choose the text style that looks best with your terminal. Use the arrow keys and Enter — you can change it later with /theme.
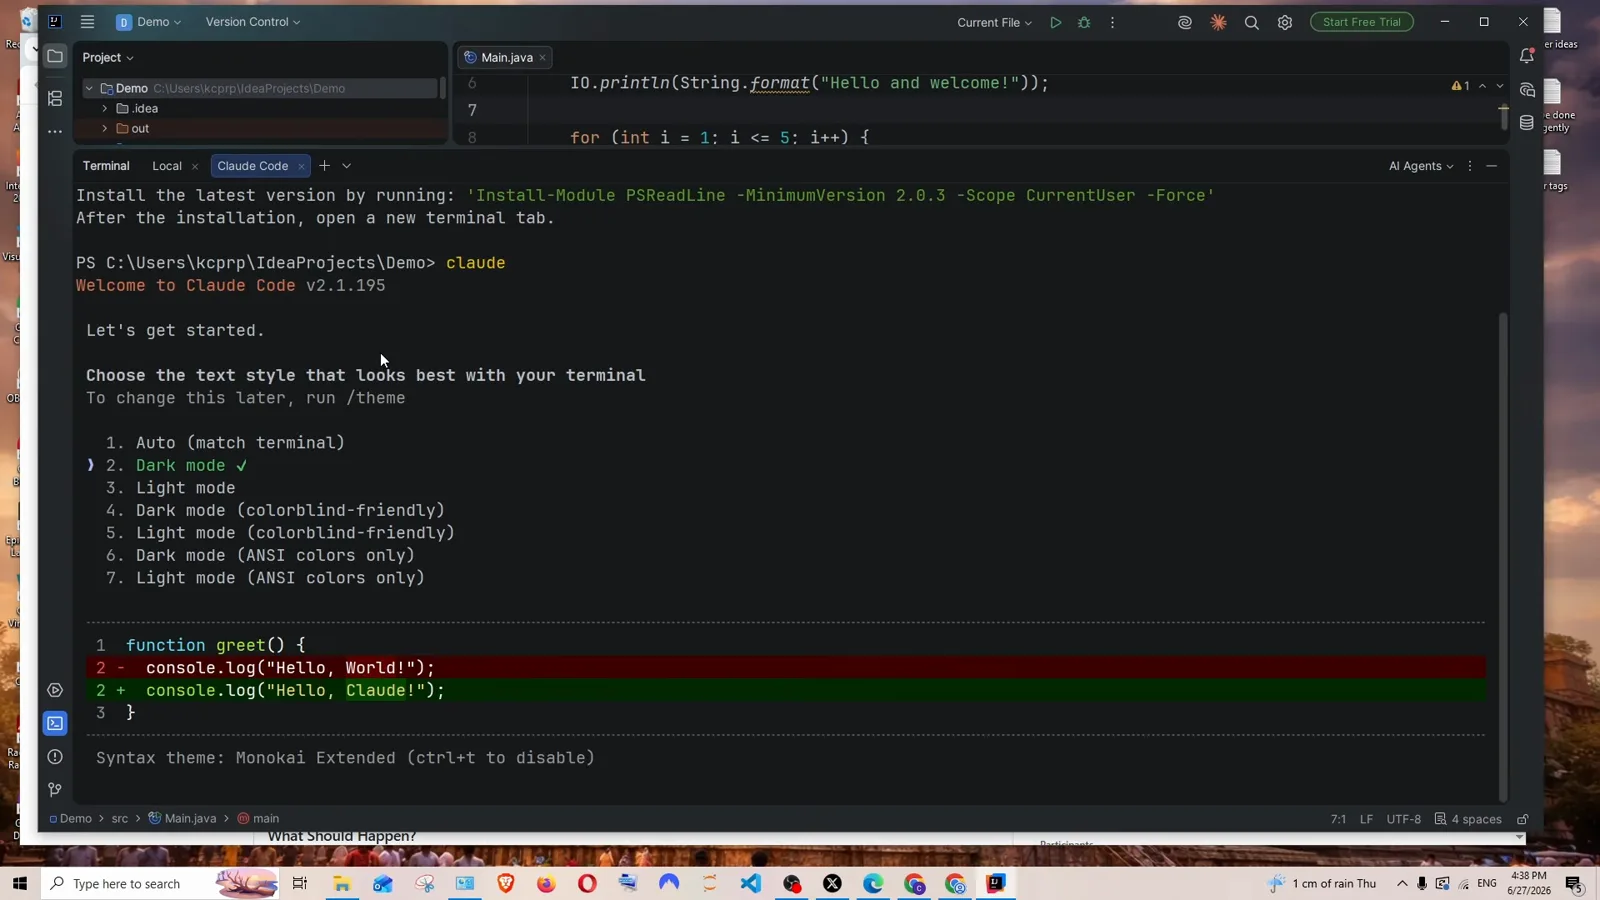
The Claude Code tool window in IntelliJ with the seven-option theme picker on Dark mode.Watch at 2:12 - 11
Choose how you log in
Next the panel asks to select a login method: 1) a Claude account with subscription (Pro, Max, Team or Enterprise), 2) an Anthropic Console account billed per API usage, or 3) a 3rd-party platform (Amazon Bedrock, Microsoft Foundry, Vertex AI). Press Enter and your browser opens to log in with the Claude account.
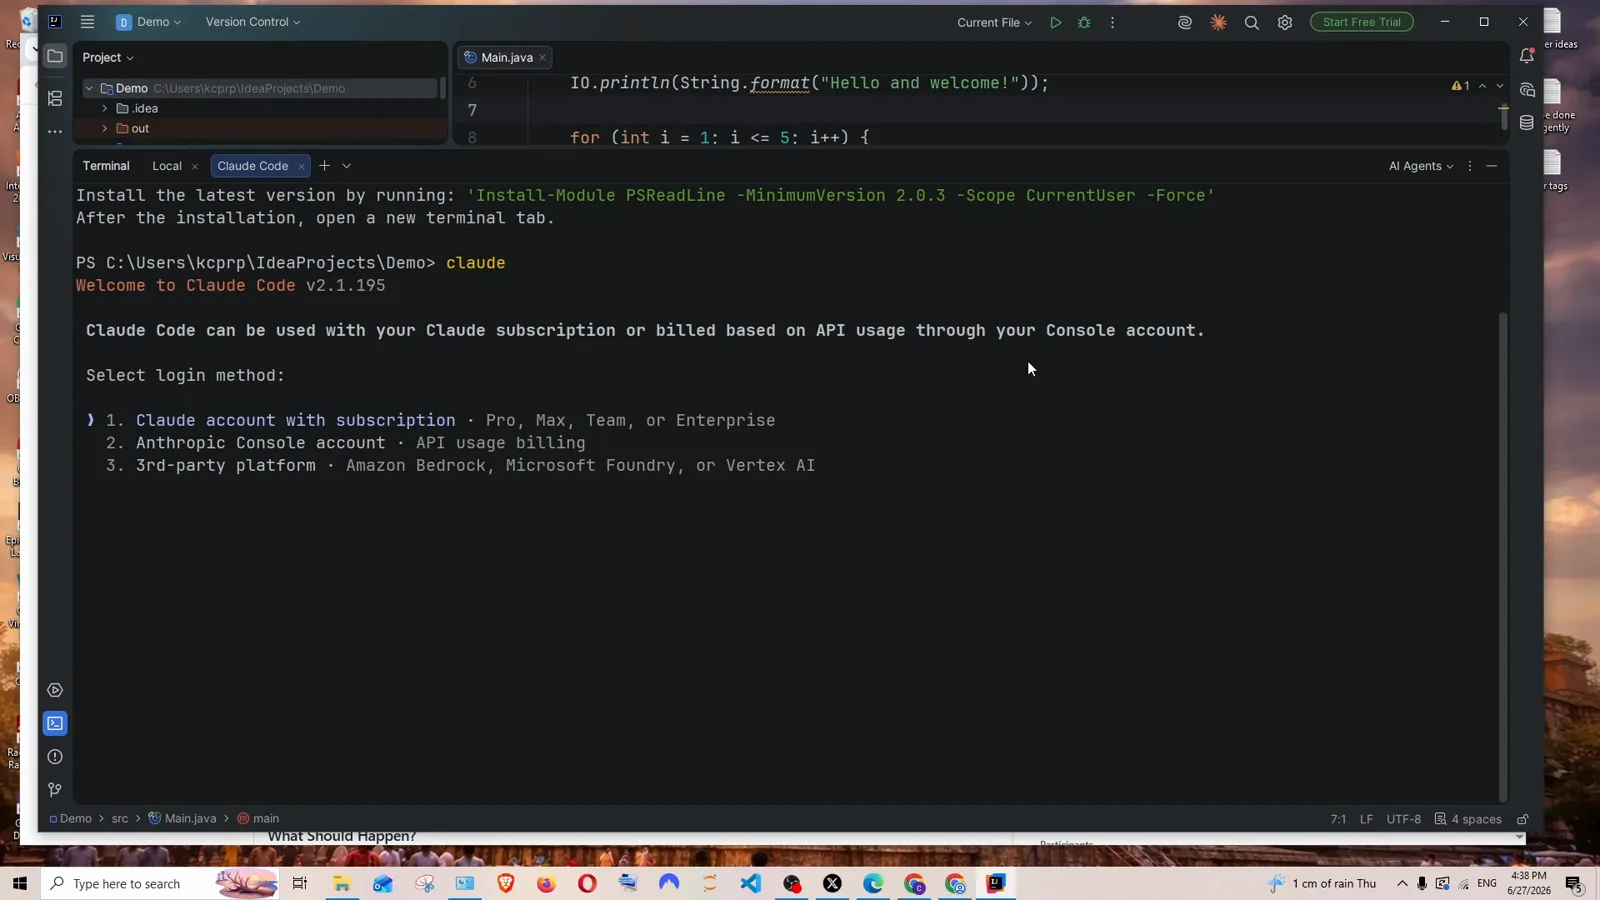
The three login methods: subscription, API billing, or a third-party platform.Watch at 2:24 - 12
Trust the project folder
After login, Claude Code shows an Accessing workspace check for the folder IntelliJ has open — in the recording C:\Users\kcprp\IdeaProjects\Demo. It warns that Claude will be able to read, edit and execute files here. Pick 1. Yes, I trust this folder for your own project.
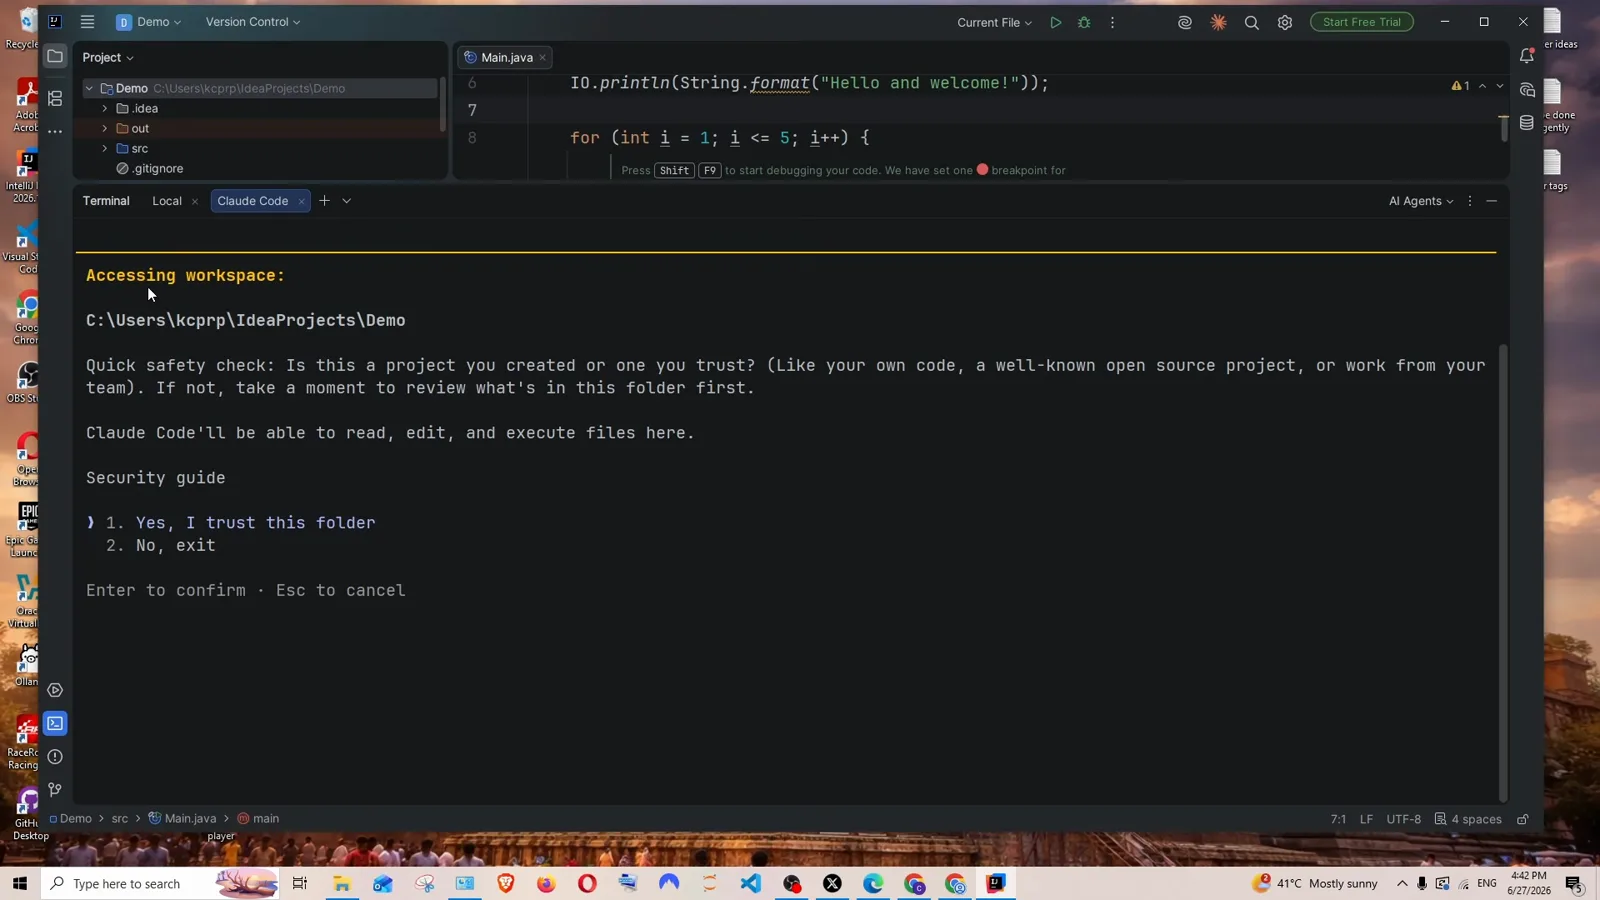
The workspace safety check for the Demo project before Claude gets access.Watch at 2:46
Part 5 — First commands and first prompt
The slash menu, /model, and asking Claude to explain code.
- 13
Type / to see every command
The panel greets you with Welcome back Coder! and tips (run /init to create a CLAUDE.md). Typing / in the input opens the command menu with descriptions — the same slash commands Claude Code has in any terminal, now one keystroke away in IntelliJ.
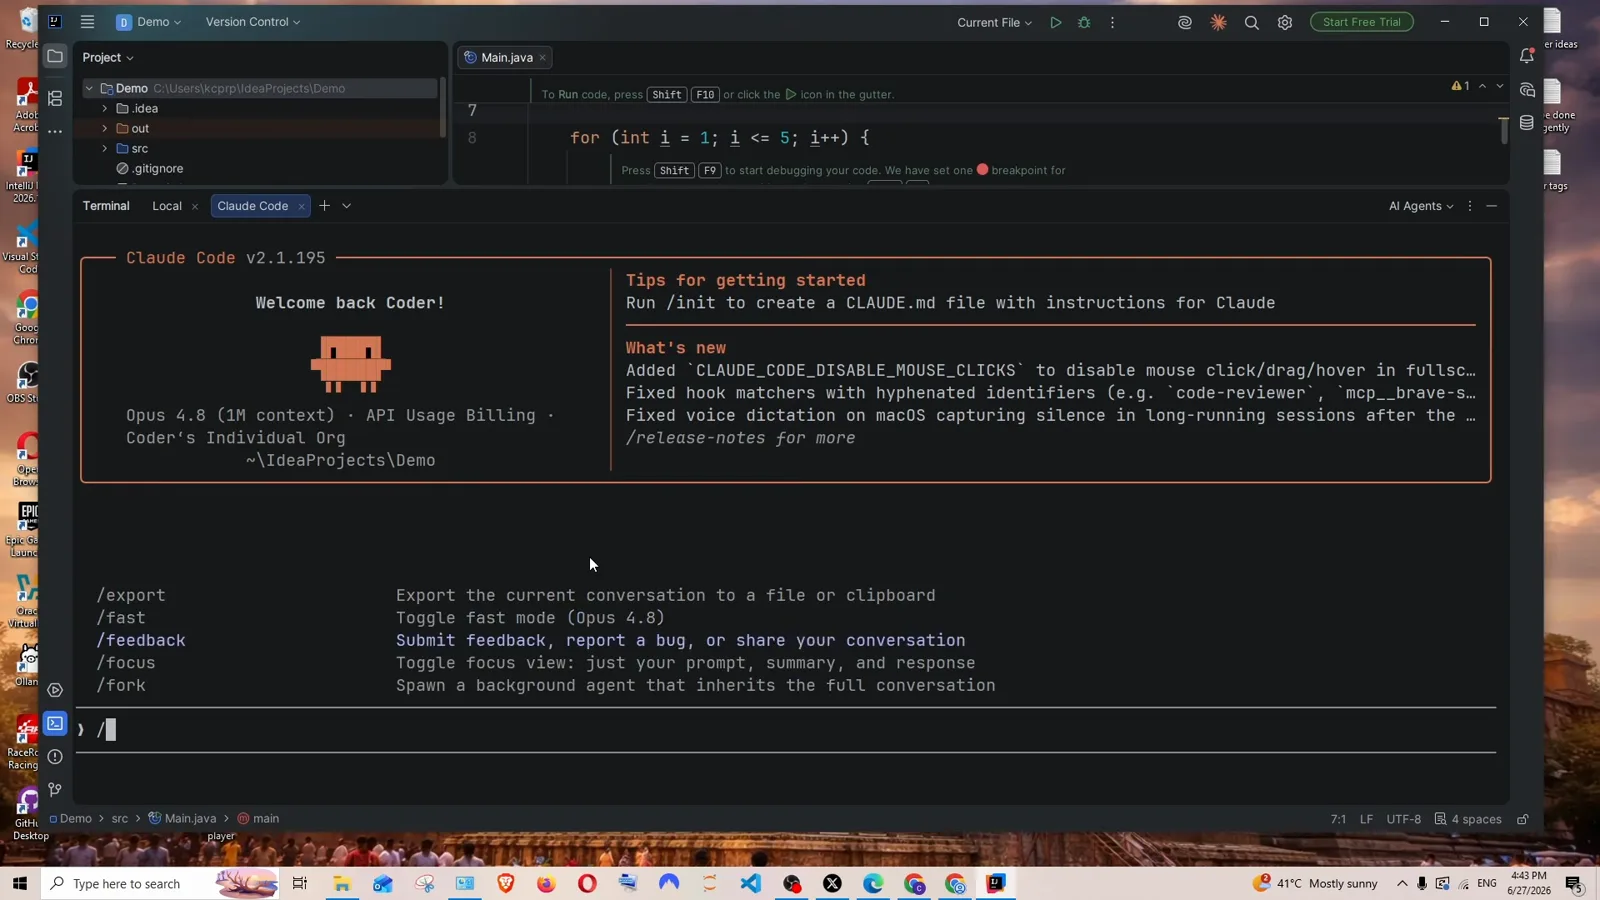
The welcome banner plus the slash menu showing /export, /fast, /feedback and friends.Watch at 3:20 - 14
Switch models with /model
Run /model to open the model picker. The recording lists Default (recommended) Opus 4.8 at $5/$25 per Mtok, Opus, Sonnet 4.6 at $3/$15, Sonnet (1M context) and Haiku 4.5 at $1/$5 — and picks Haiku for quick answers. Your pick becomes the default for new sessions.
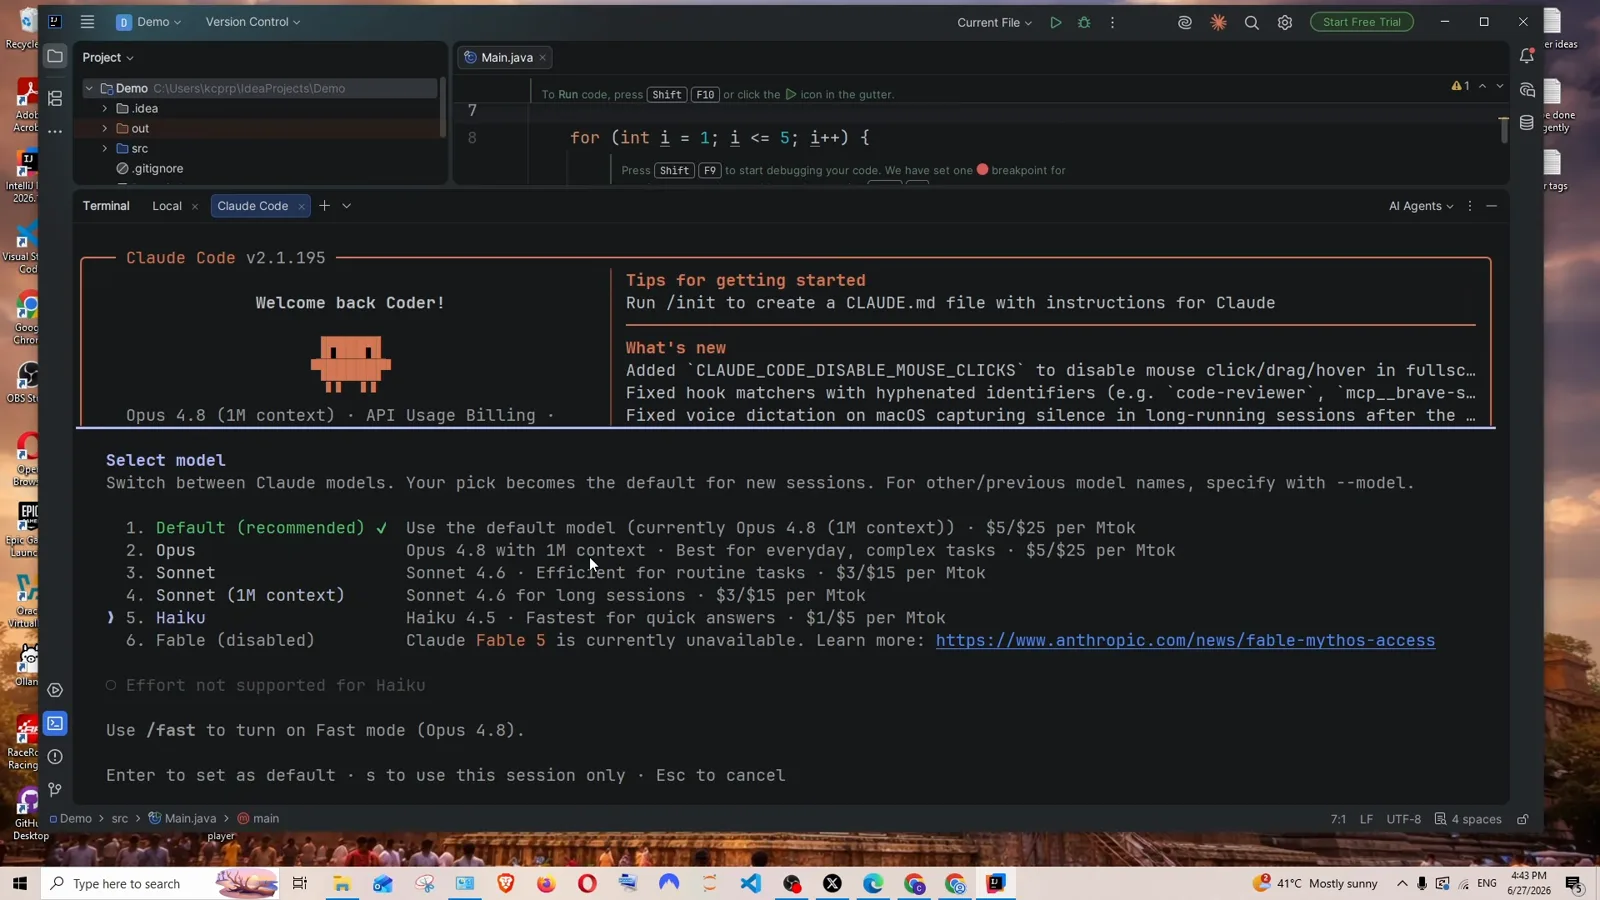
The /model picker with Haiku 4.5 highlighted at $1/$5 per Mtok.Watch at 3:30 - 15
Ask Claude to explain code
With the for loop visible in Main.java, the creator types explain the code. Claude replies that it needs to know which file to look at and offers options: give it a file path (like src/main.js) or paste a snippet. The answer here: main.java.
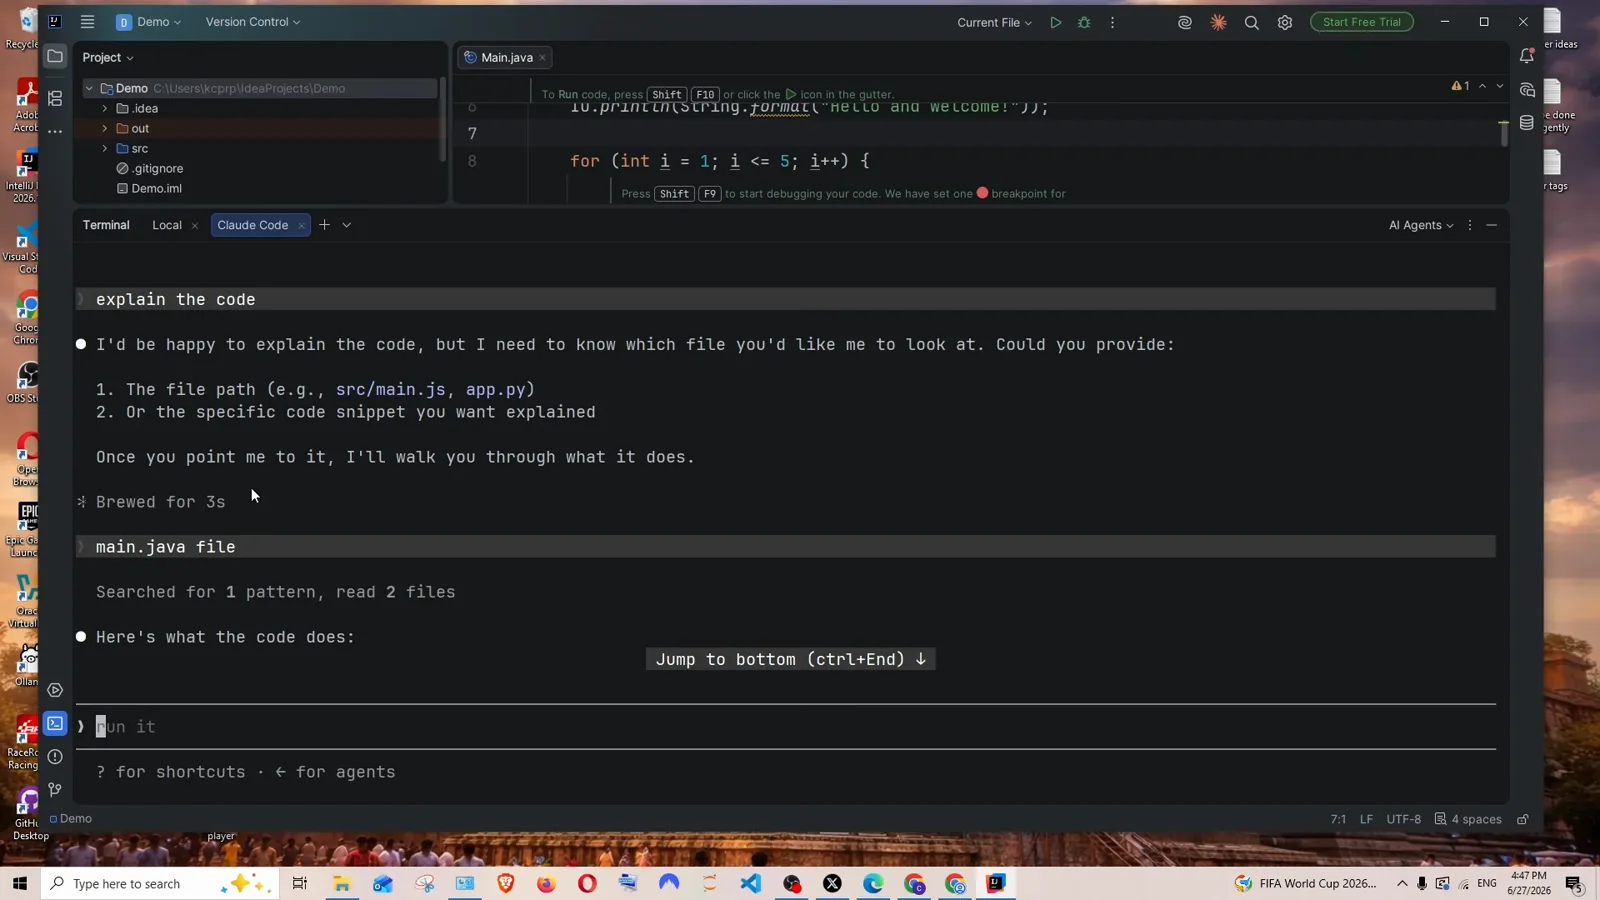
Claude asking which file to explain; main.java goes into the input.Watch at 3:52 - 16
Read the walkthrough
After a quick search (Searched for 1 pattern, read 2 files), Claude explains the code line by line: what line 6 prints, how the loop initializes a counter at 1, runs while i is less than or equal to 5, increments after each pass — and the output you'll see when you run it, i = 1 through i = 5. That's the full loop working inside IntelliJ.
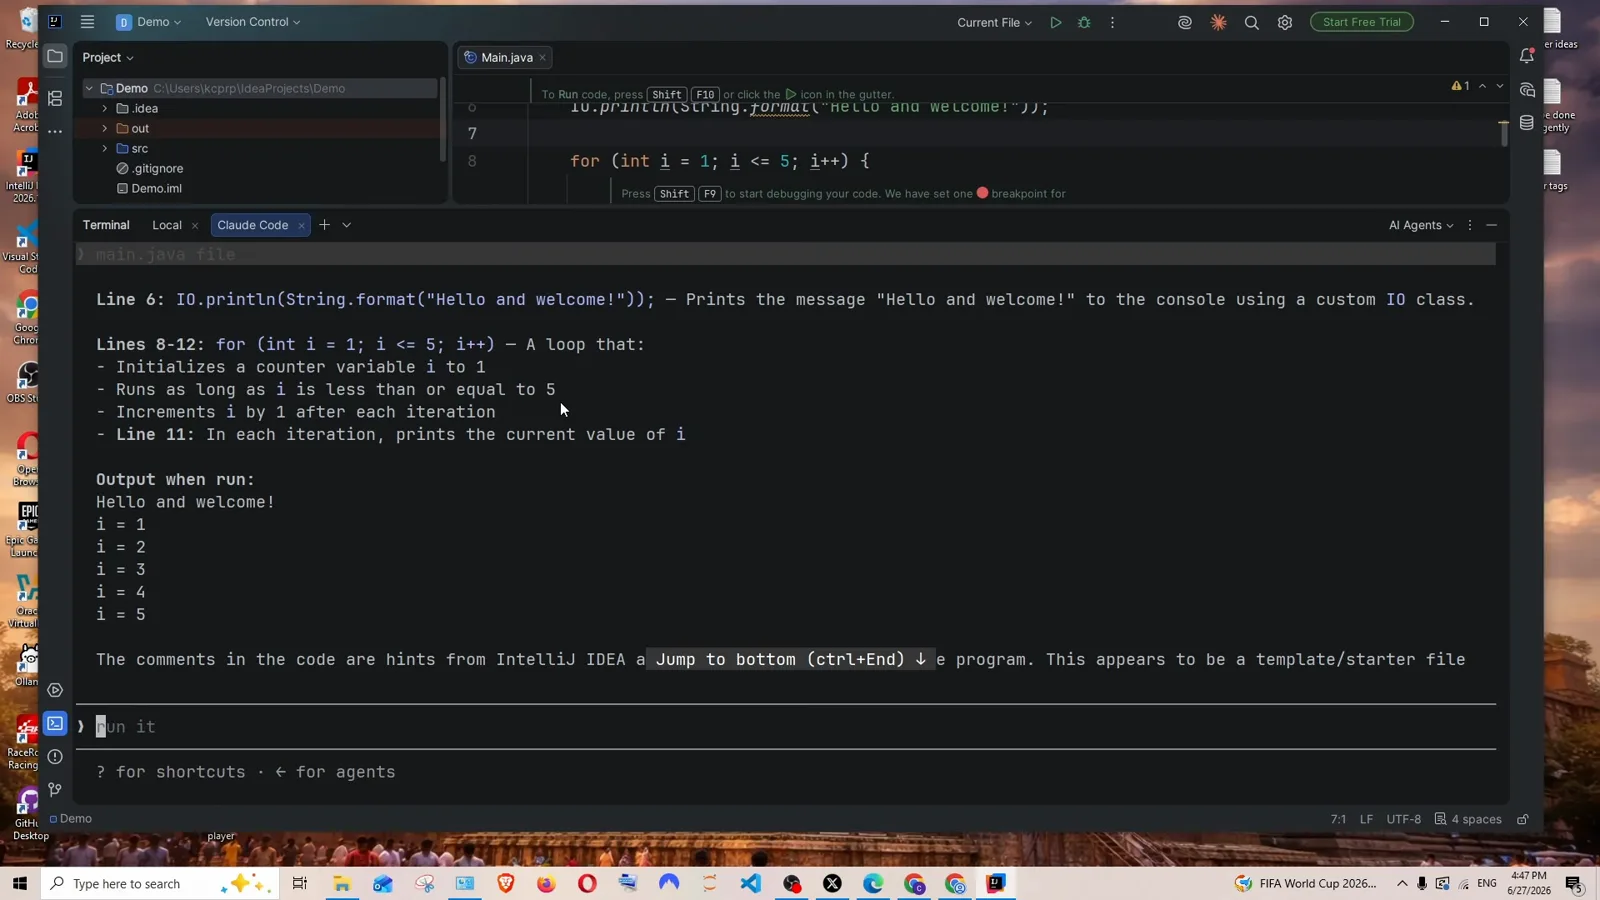
Line-by-line explanation with the loop breakdown and the program's output.Watch at 4:00