
Bash 沙箱
Claude Code 沙箱模式:一步步开启 Bash 沙箱
安装沙箱运行环境,在 .claude/settings.json 里写清文件与网络边界,然后亲眼看它拒绝读取项目目录之外的文件、并且每遇到一个新域名只问一次。
共 13 个图文步骤,约 5 分钟读完。每一步都能跳到视频里对应的那一秒。
沙箱到底改变了什么
沙箱把「要不要批准」这件事从你手里交给了操作系统。在 Linux(以及 WSL2 里的 Ubuntu)上,Claude Code 用 bubblewrap 运行 Bash 命令,出站流量再走一层代理;在 macOS 上用的是系统自带的 Seatbelt,什么都不用装。你在 .claude/settings.json 里声明两条边界:shell 能读写哪些路径、能访问哪些域名。边界内的命令不再弹窗,ls、git status 这类操作不会再打断你。越界的命令要么直接失败,要么弹出一条很具体的提示:Network request outside of sandbox,并写明是哪个域名。还有一点常被忽略:沙箱只管 Bash 工具,Read、Edit、Write 仍然走 Claude Code 的权限系统。
这些截图来自哪里
本页跟随 Shelly Systems 的录屏:先装依赖,再在 settings.json 里写 sandbox 配置,最后在 bash 模式里实测文件边界和网络边界。
截图取自视频并署名原作者,文字为本站原创。录屏运行在 Windows 的 WSL2 Ubuntu 上,因此终端截图展示的是 Linux 路线(bubblewrap 加 socat);macOS 靠系统自带的 Seatbelt 也能得到同样的启动提示,且无需安装任何东西。内容与视频、Claude Code 官方沙箱文档于 2026 年 9 月核对。
先给沙箱一套能执行机制
在 Linux 上,边界是真正的操作系统机制:bubblewrap 把进程关进笼子,socat 负责把流量送到代理。macOS 自带等价物,这一节可以直接跳过。
- 1
安装 bubblewrap 和 socat
在你真正要运行 Claude Code 的那个 Linux 发行版里装上两个依赖:sudo apt-get install bubblewrap socat。apt 这里解析出三个包——bubblewrap、libwrap0 和 socat,共 472 kB。macOS 用户整段跳过:Seatbelt 是系统的一部分。
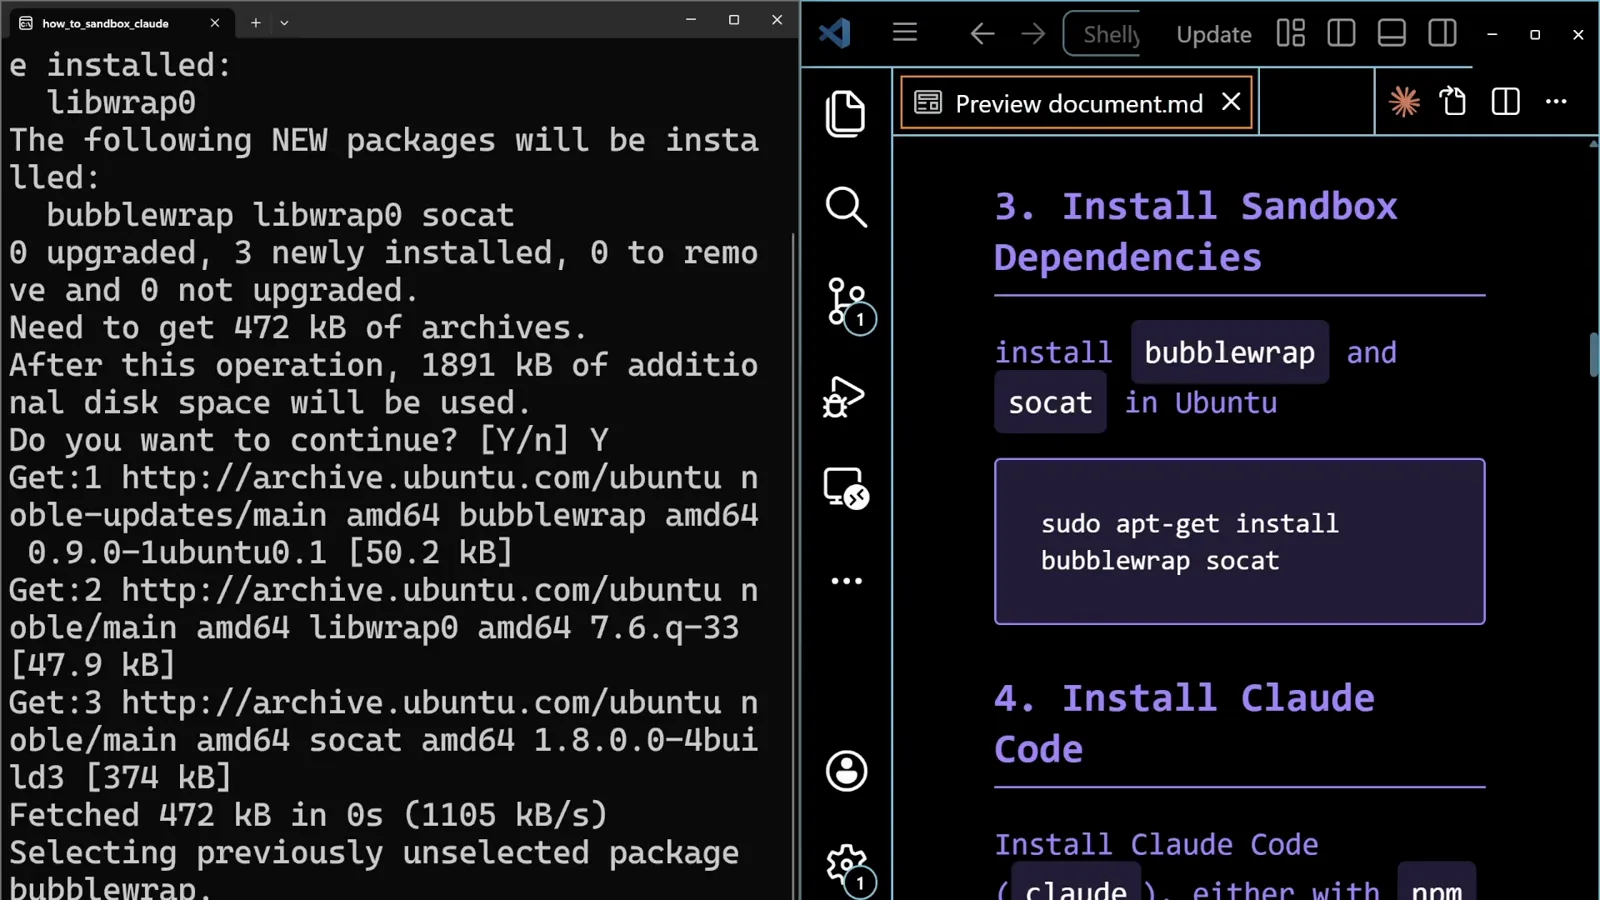
三个包、472 kB,没有一样是 Claude 专用的——bubblewrap 正是 Flatpak 应用用的那套技术。跳到 1:52 - 2
用原生安装脚本装 Claude Code
依赖就位后安装 CLI:curl -fsSL https://claude.ai/install.sh | bash。录屏用的是原生安装脚本而不是 npm;配套笔记提到两条路都可以,但沙箱要求 Claude Code 版本足够新、自带该功能。
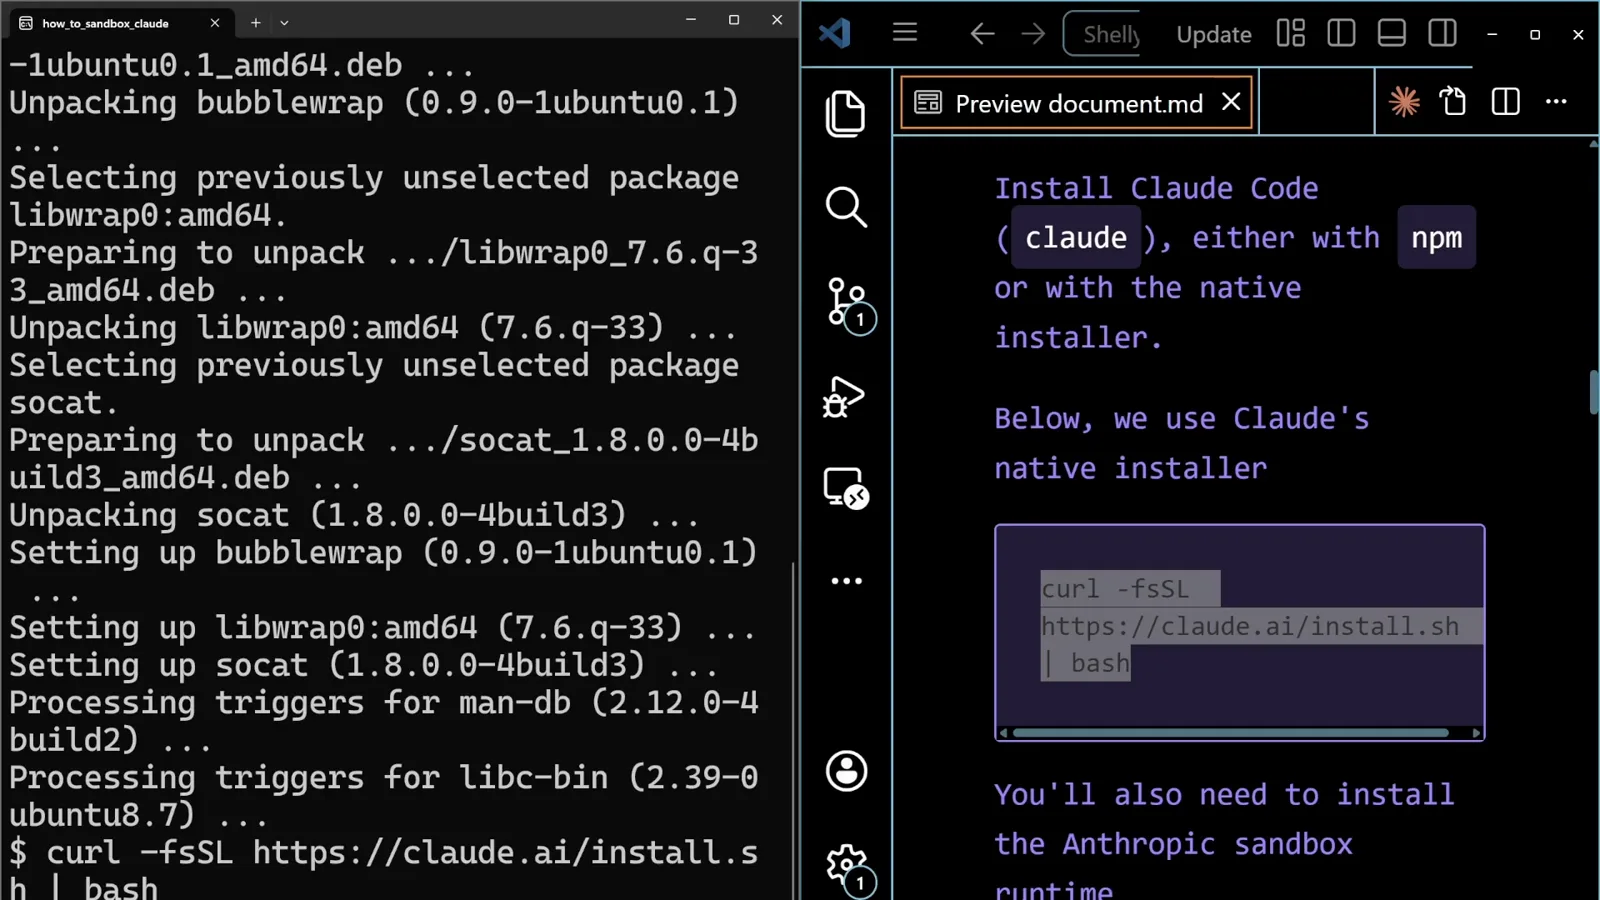
apt 以 Setting up bubblewrap、Setting up socat 收尾,下面已经敲好了安装命令。跳到 2:16 - 3
装上 Anthropic 的沙箱运行时
同一份笔记还会再装一个包:npm install -g @anthropic-ai/sandbox-runtime。它就是 Claude Code 包裹 Bash 工具所用的运行时,也能单独用在别的工具外面——比如把某个 MCP server 圈在一个目录里。这张截图停在项目配置还不存在的时刻:.claude/settings.json 打开着,里面是空的。
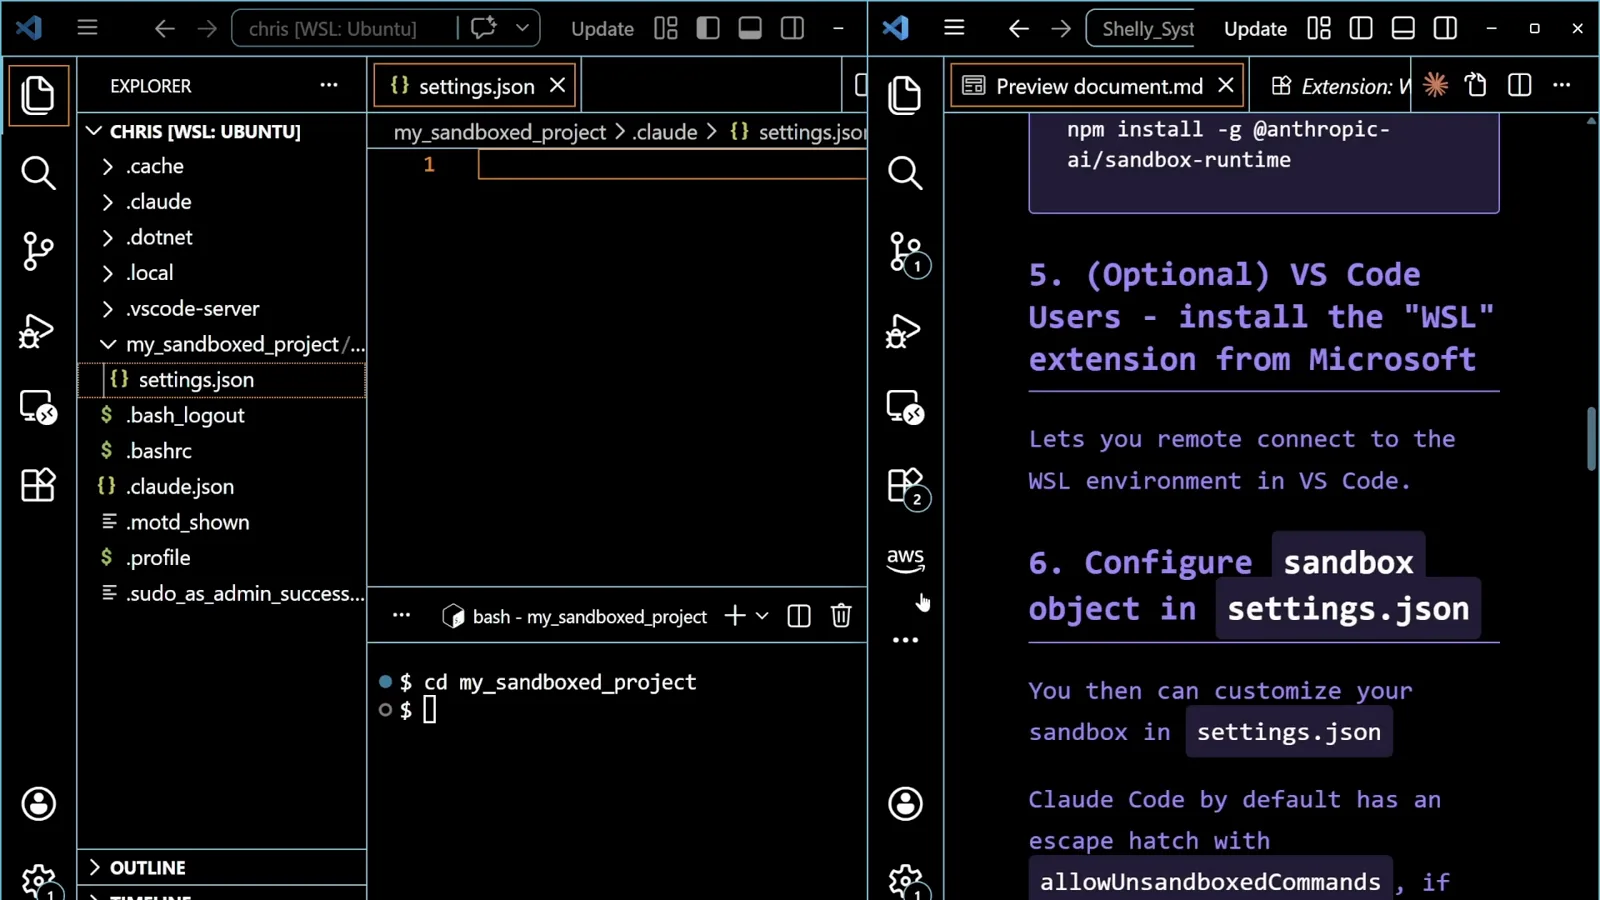
空白的 settings.json 才是最诚实的起点,下一节会把它填满。跳到 3:10
在 settings.json 里写下边界
一个 sandbox 对象,两个子对象:filesystem 和 network。后面会话里的所有行为,都来自这里写下的内容。
- 4
写下 sandbox 对象
在项目里创建 .claude/settings.json 并加上 sandbox 键。录屏里设了 enabled: true 和 failIfUnavailable: true,意思是拿不到沙箱就拒绝启动,而不是悄悄在沙箱外运行。filesystem 下写的是 denyRead: ["../"] 和 allowRead: ["."]——项目目录可读,上一级不行。上面两行的 allowUnsandboxedCommands、autoAllowBashIfSandboxed 的取值被编辑器的小地图挡住了,这一页就不替它填。
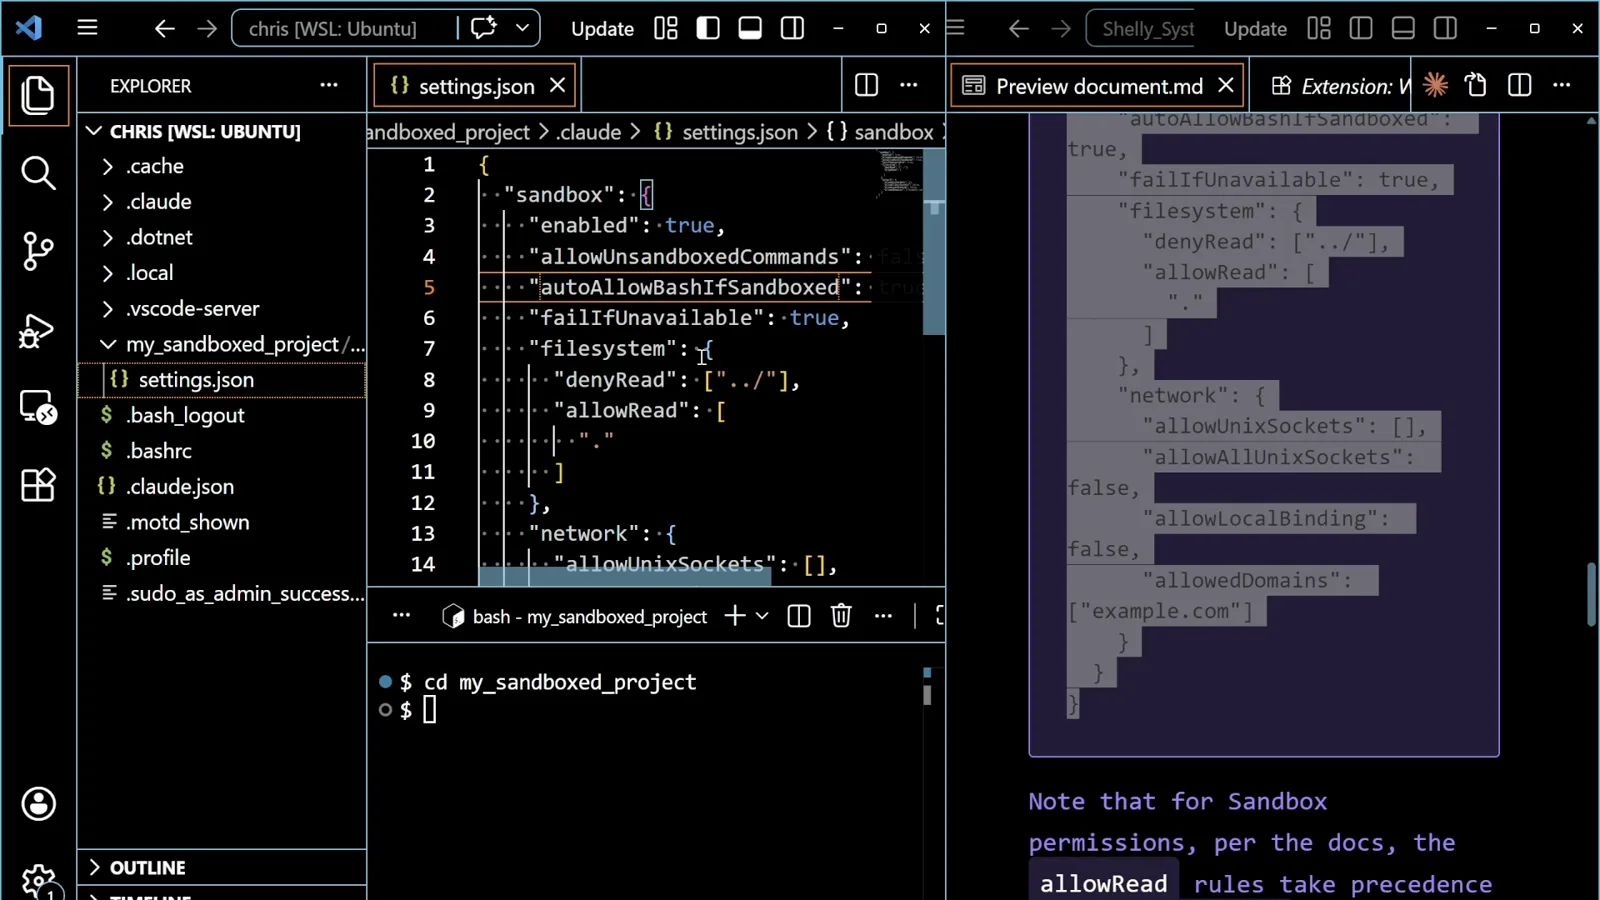
两个数组各一个元素:allowRead "." 和 denyRead "../",本次演示的文件边界全部来自这两行。跳到 4:12 - 5
只把你真正要用的域名写进白名单
审批行为来自 network 子对象。录屏里 allowUnixSockets 留空,allowAllUnixSockets: false、allowLocalBinding: false,allowedDomains 只写了一个条目:example.com。出站流量走沙箱外的代理,不在名单上的域名不会被悄悄丢掉——它会问你。
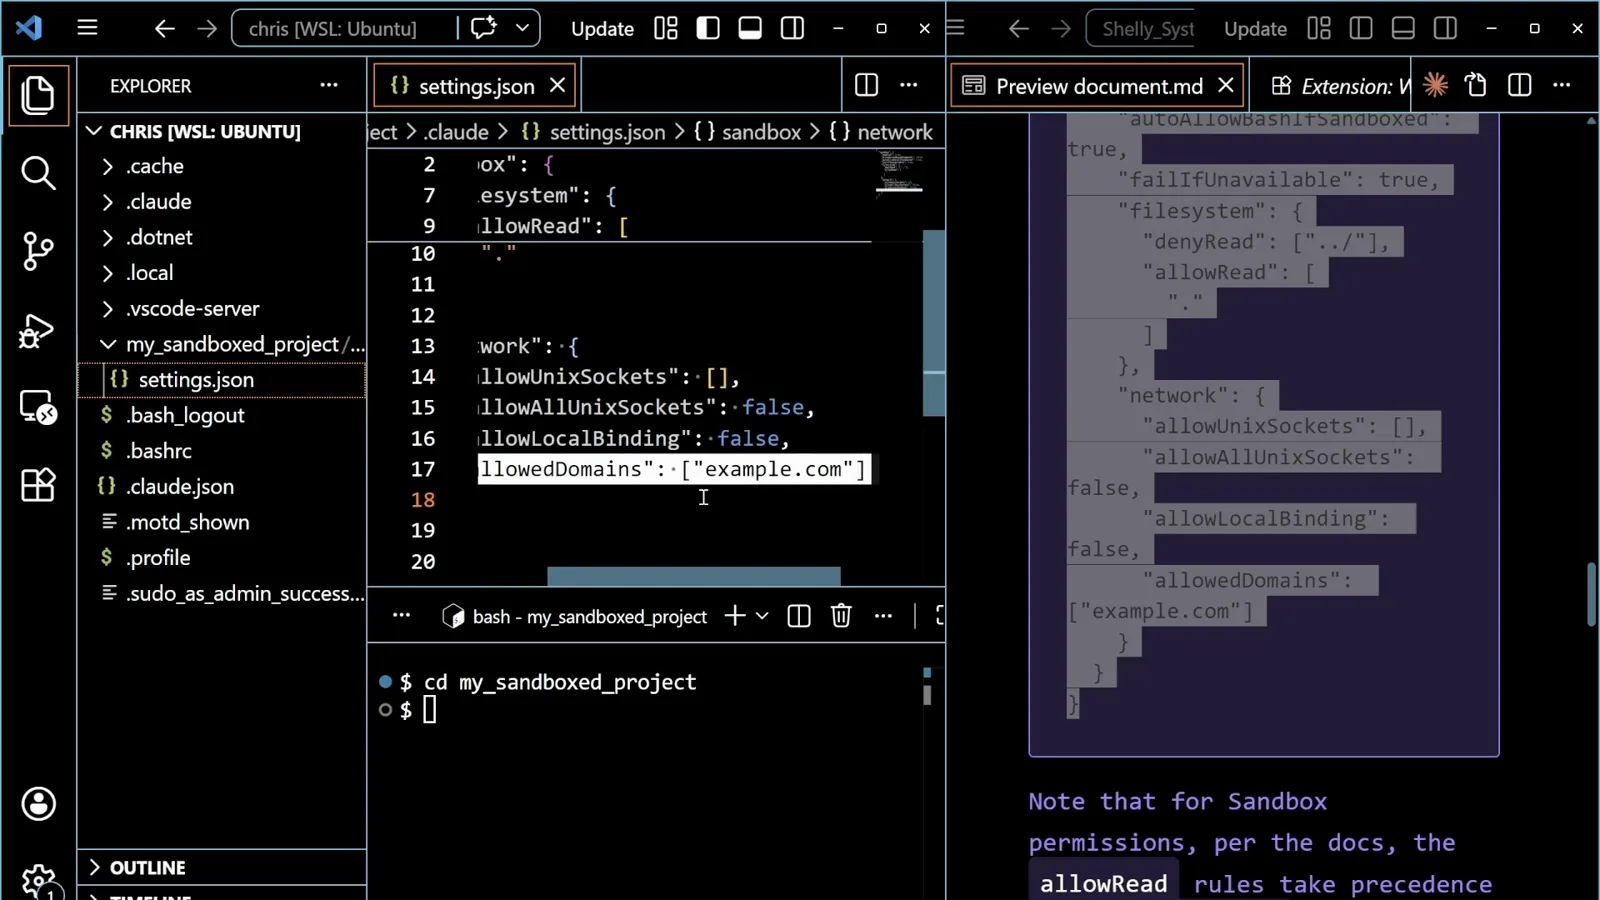
一个白名单域名就够演示两种结果:能通的那次请求,和停下来那次。跳到 4:20 - 6
先搞清楚默认的松紧
笔记把起点写得很明白:默认读取可以覆盖整台机器,写入只限项目目录,另外放行少数 Claude Code 运行必需的文件。denyRead 和 allowRead 主要就是用来收紧前半句,因为松的那一半才碰得到你的 SSH 私钥和 .env。同一份笔记建议:想把逃生门关上,就设 "allowUnsandboxedCommands": false。
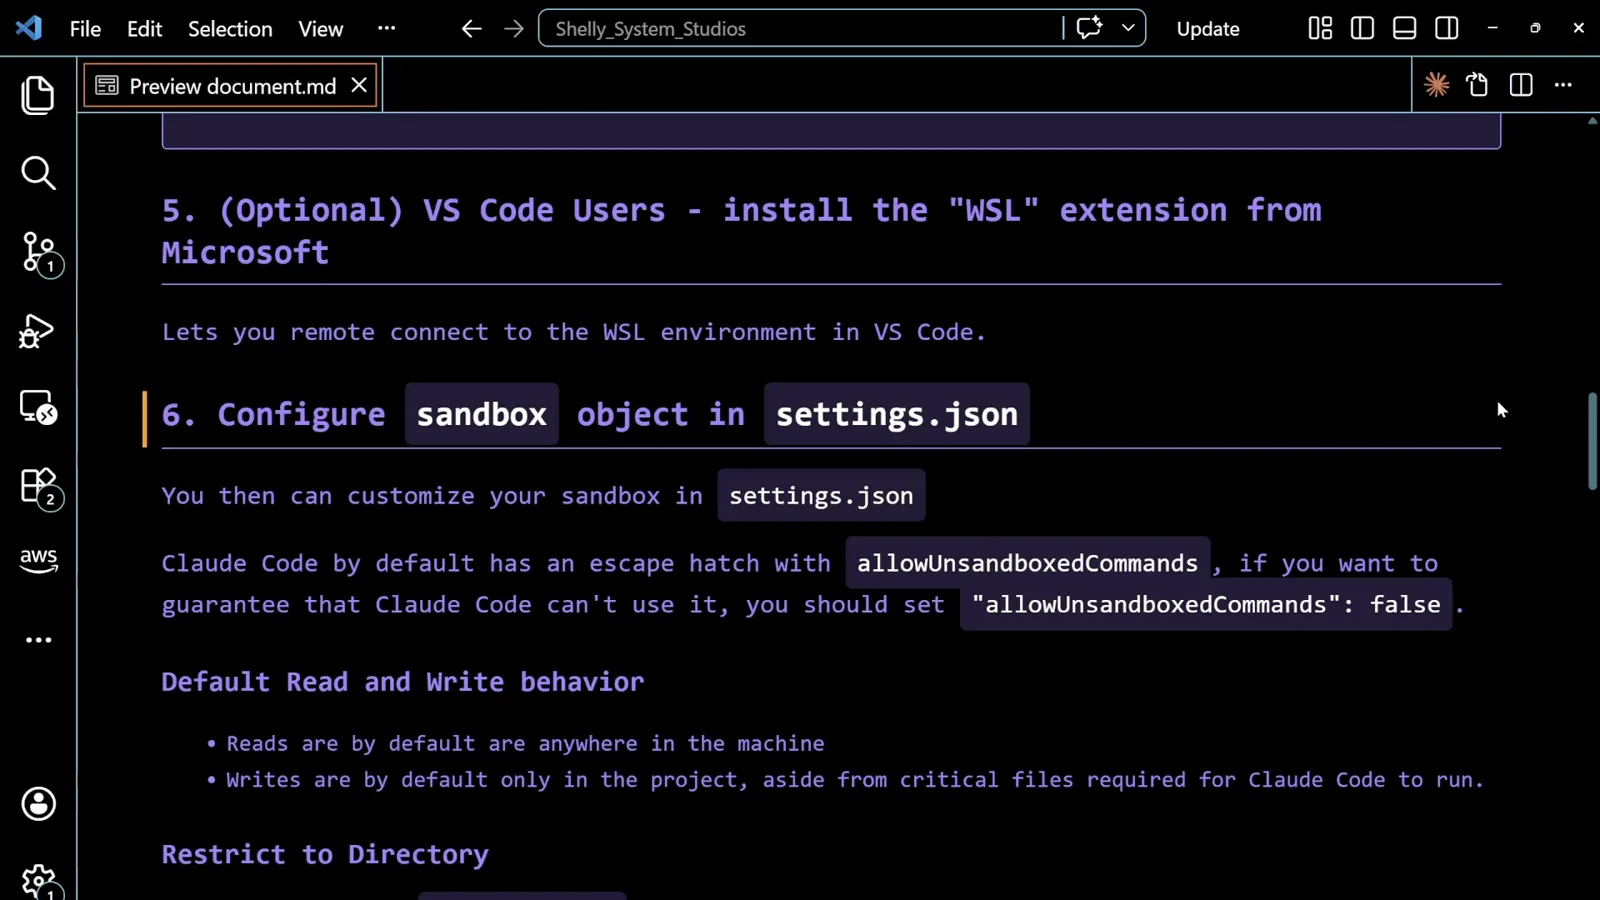
读取是默认里更松的那一半——所以示例选择 denyRead "../",而不是继续堆 allow 规则。跳到 6:56
开一个会话,确认它真的在沙箱里
Claude Code 会在第一屏告诉你,你随手试的第一条命令也能证明。
- 7
启动 claude,先看那行提示
在项目里启动 Claude Code。这里的版本行是 v2.1.118,欢迎框正下方会打印 Your bash commands will be sandboxed. Disable with /sandbox.。这行提示就是校验开关:没有它,就等于没有沙箱,先回头检查配置文件和运行时安装。
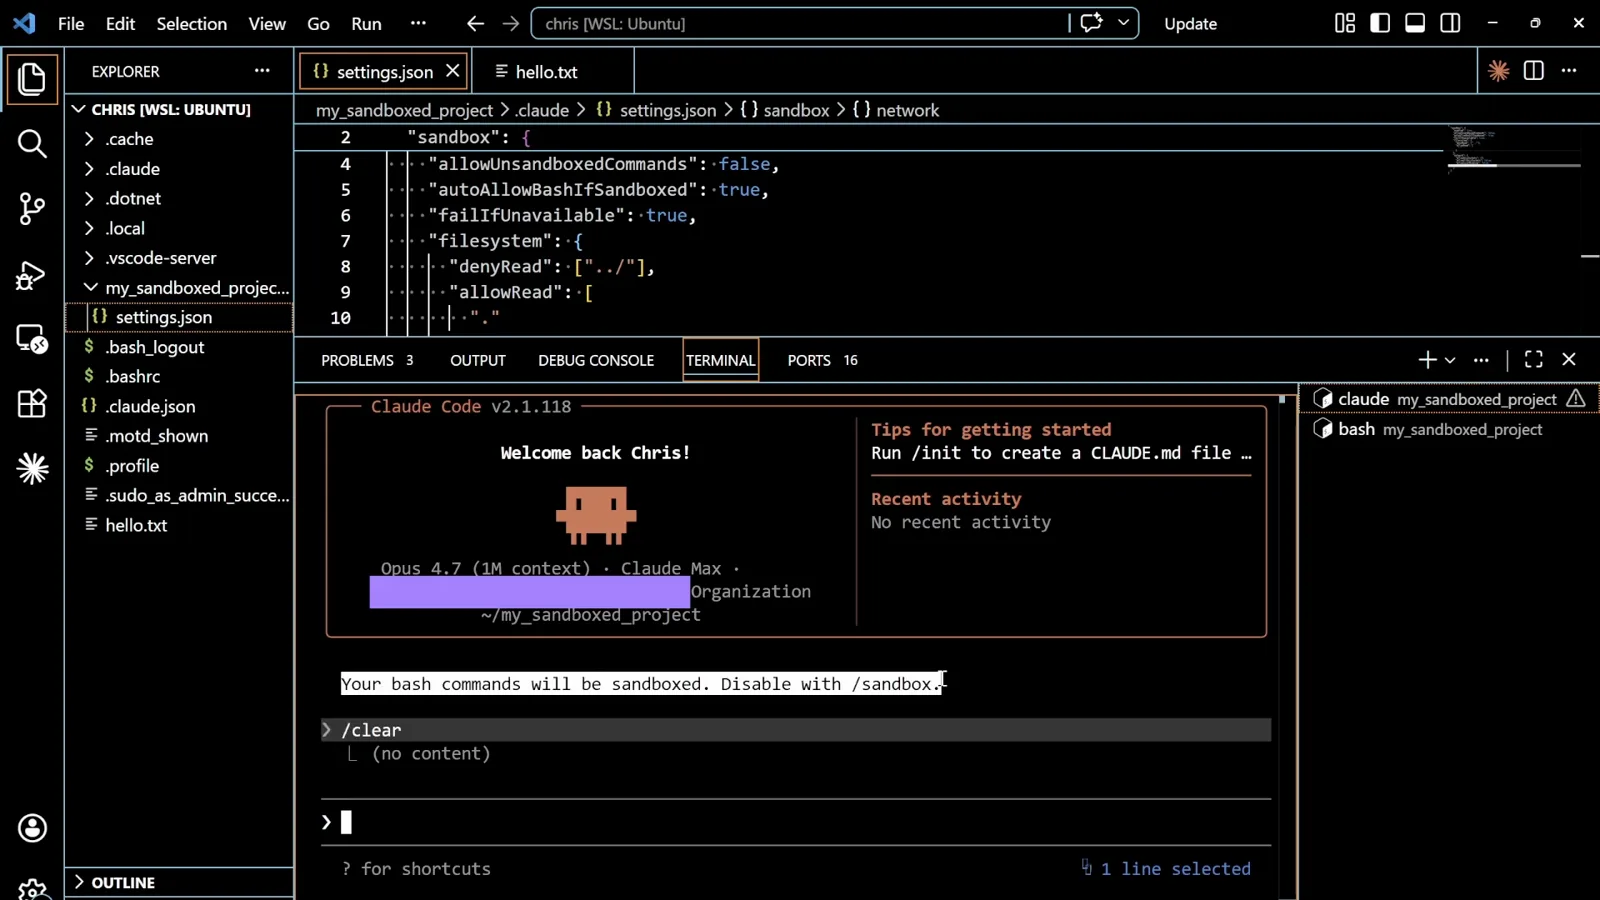
这行提示在告诉你身处沙箱的同时,也顺手写了退出的方法。跳到 4:44 - 8
在 bash 模式里验证文件边界
输入 ! cat ../hello.txt,直接从提示符执行命令。这个文件确实存在——它在上方编辑器里打开着,也在资源管理器的主目录层级列着——但沙箱里的 shell 回答 cat: ../hello.txt: No such file or directory。这就是 denyRead: ["../"] 生效的样子:路径不是被弹窗挡住,而是根本不存在。
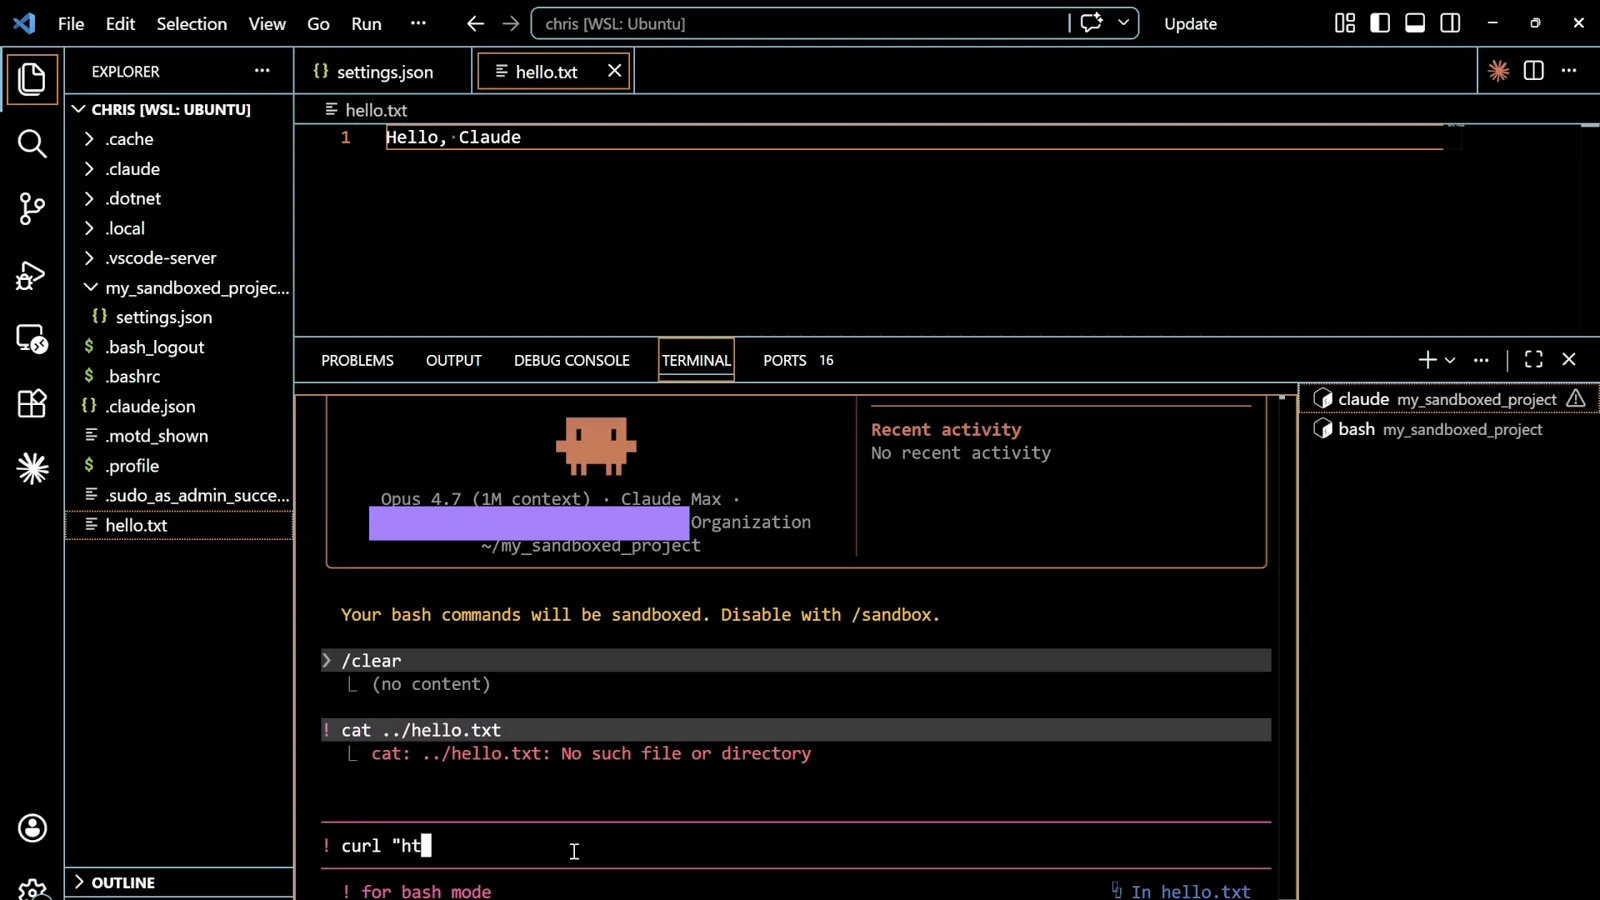
被拒绝的读取看起来像文件不存在,而不是像被拦截——这正是提示注入拿它没办法的原因。跳到 5:56 - 9
抓取一个在白名单里的域名
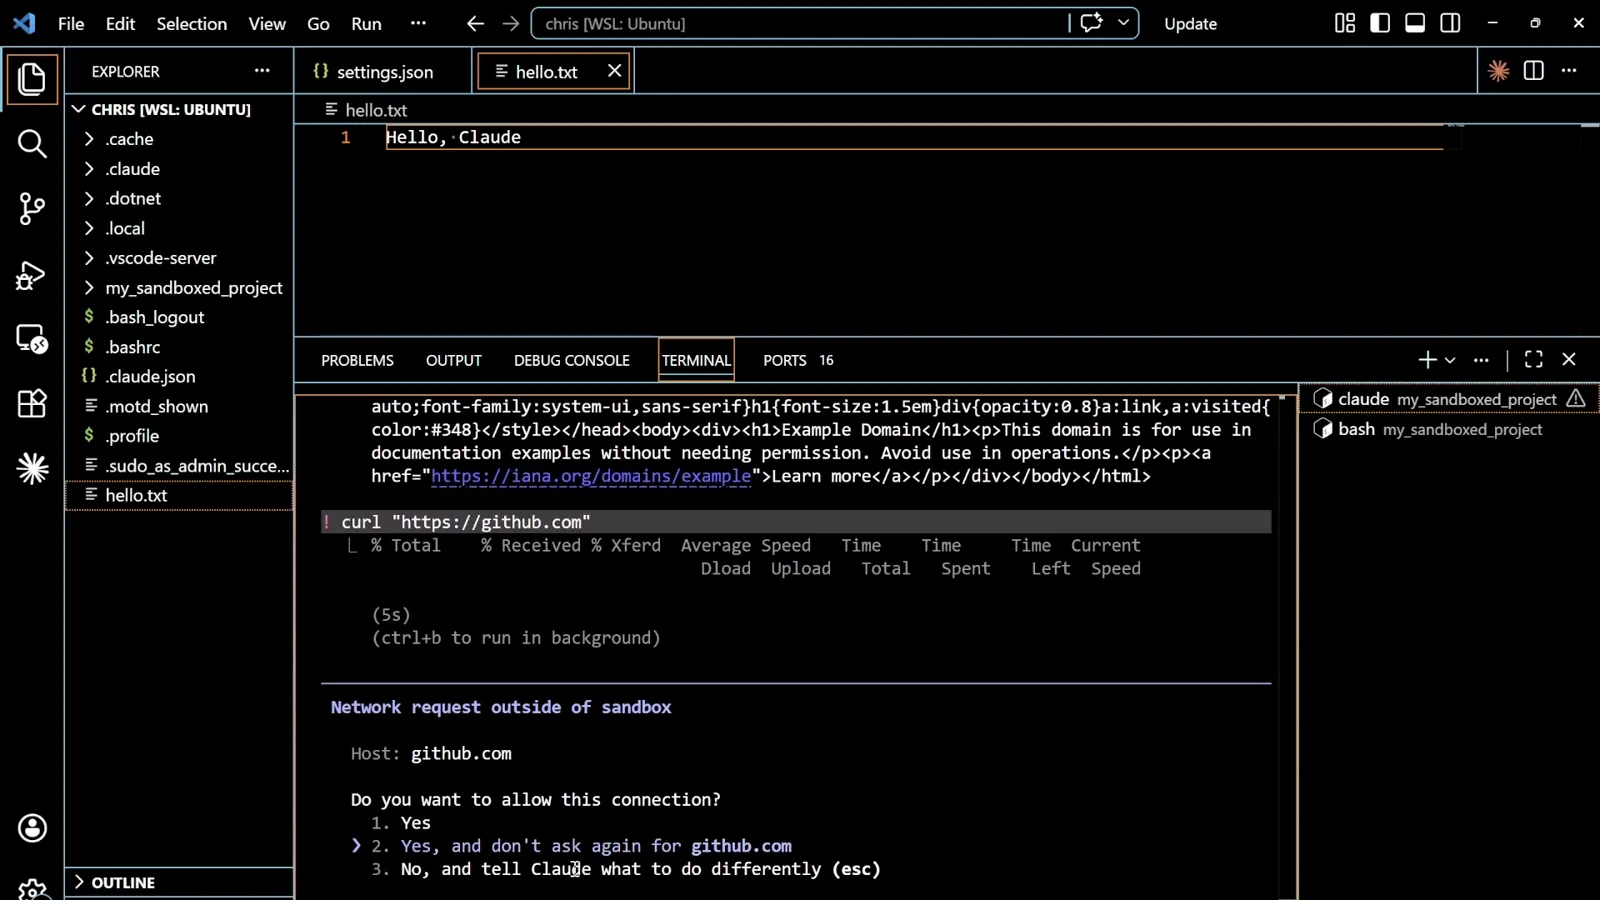
! curl "https://example.com" 返回 528 字节和 Example Domain 的 HTML,因为这个域名正是 allowedDomains 里唯一的条目。下一行 ! curl "https://github.com" 还停在 Running...——代理没有 github.com 的规则,所以请求在等待,而不是直接失败。
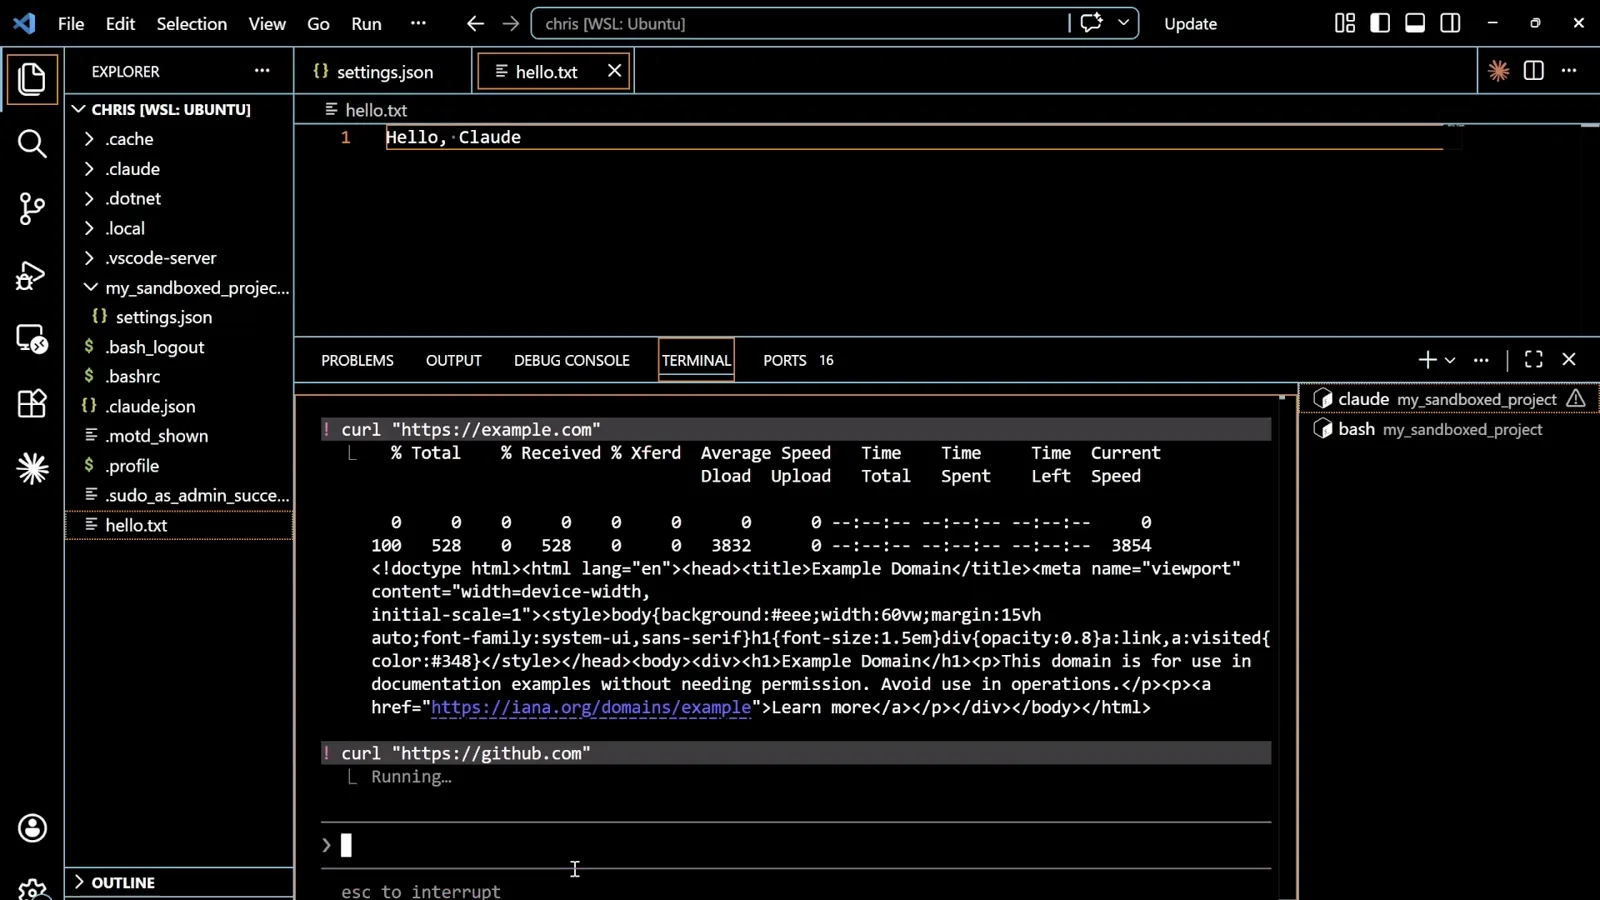
被允许的流量是安静的。真正值得看的是两边都没有规则时会发生什么。跳到 6:12 - 10
重启会话,确认配置真的生效
笔记第 8 步就是改完配置后该做的检查:关掉 claude 再启动一次,看有没有那行「已在沙箱中」的提示。配置只在启动时读取,所以没出现提示,就等于没读到。
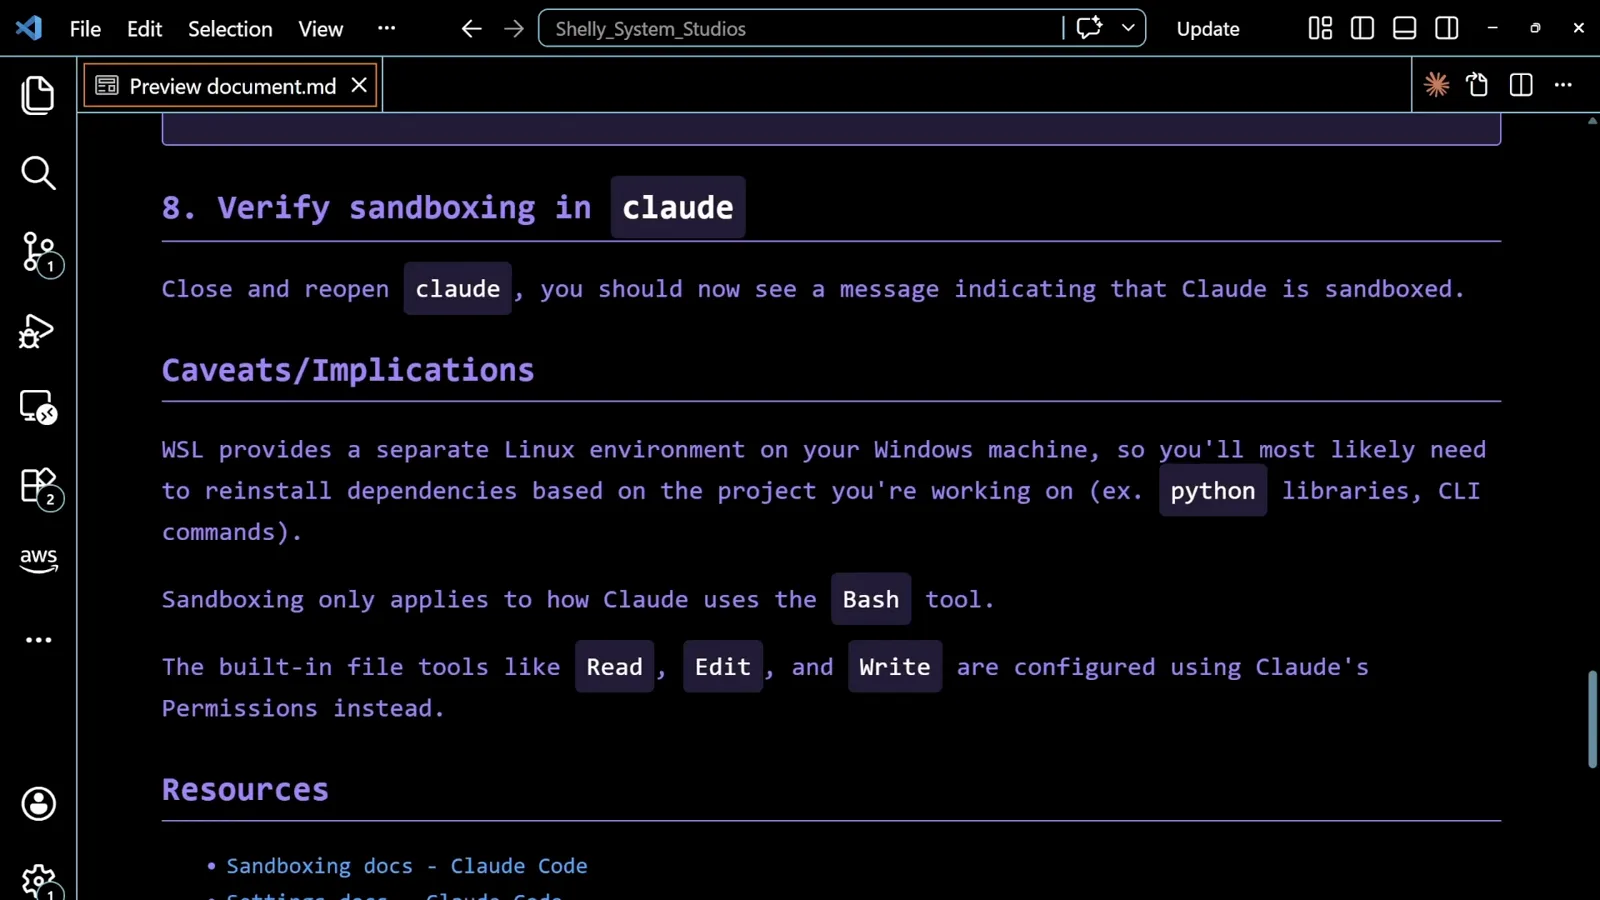
这一步很不酷,但正该写成一步:配置文件出错时一声不吭,启动提示却不会。跳到 7:26
网络审批提示,以及点完之后会发生什么
这就是取代「每条命令都问一遍」的那次询问:一个问题对应一个域名,由代理提出,而不是靠你手速。
- 11
回答这次网络审批
等待以一条性质完全不同的提示结束:标题 Network request outside of sandbox,目标单独占一行 Host:,然后问 Do you want to allow this connection?。三个选项依次是 Yes、Yes, and don’t ask again for github.com、No, and tell Claude what to do differently (esc)。中间那条才是让日常变清爽的关键:一个主机名批准一次,之后对它的所有请求都不再打扰你。
注意这里的粒度:承诺是按主机名,而不是按命令,所以它不会又退化成你想躲开的那种弹窗。跳到 6:18 - 12
看看拒绝一次请求的代价
提示之后的画面里,传输表格全是 0 字节,最后写着 curl: (56) CONNECT tunnel failed, response 403:代理没有开隧道,命令照常执行、什么也没拿到。视频没有拍到按了哪个选项,所以这里只描述被拒后的结果,不替它还原那一次点击。
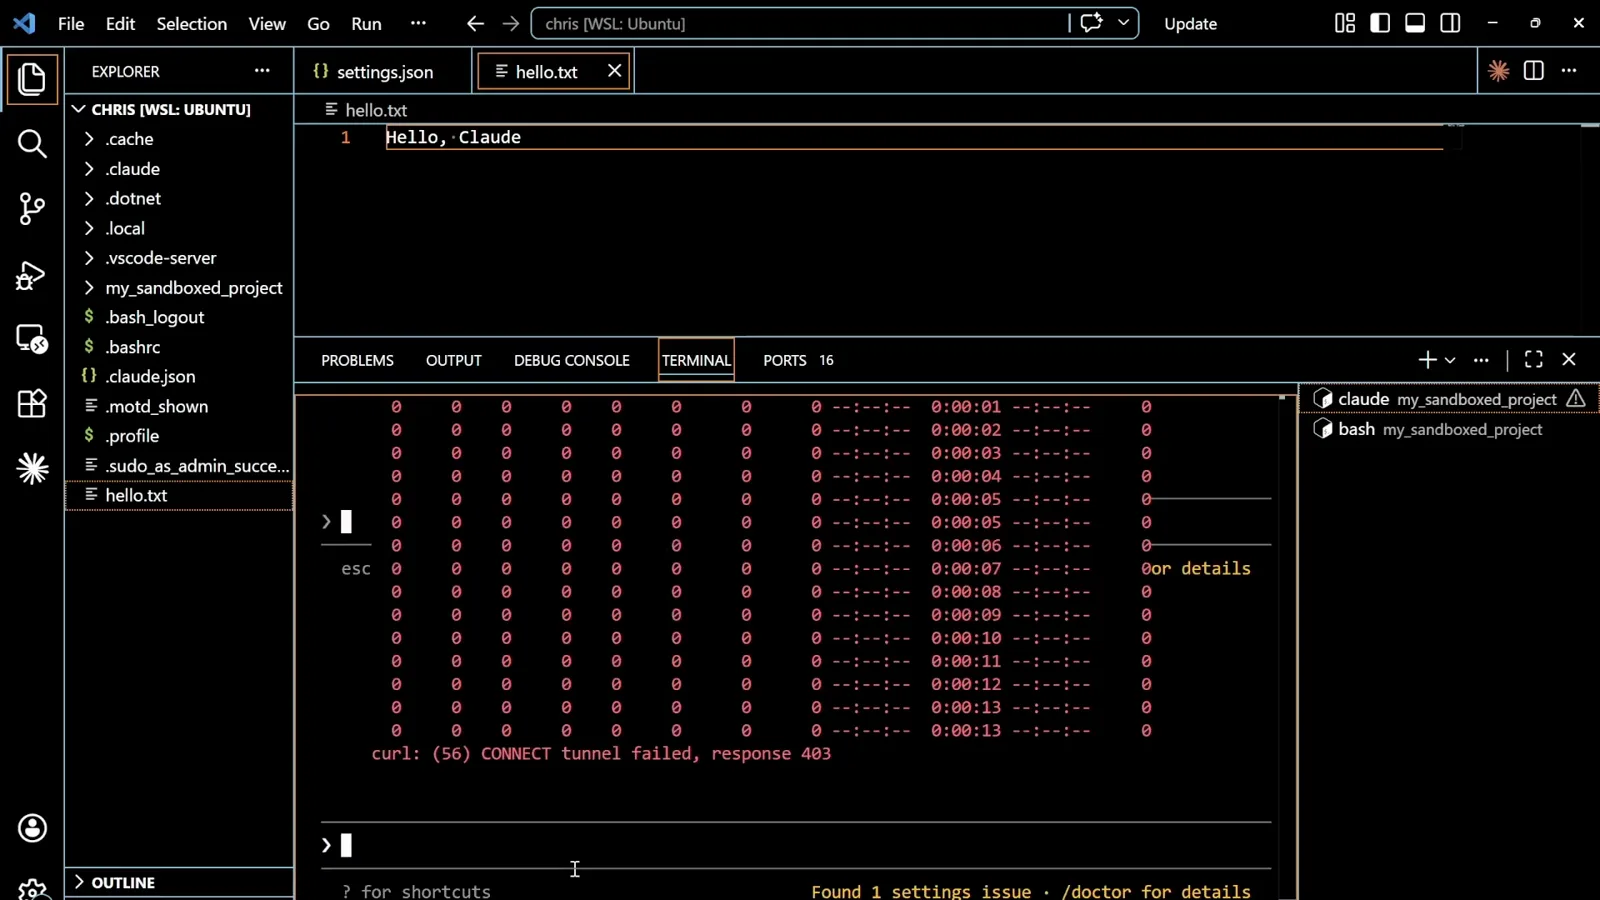
拒绝不会终止会话。命令带着错误退出,Claude 继续干活。跳到 6:26 - 13
记住沙箱管不到什么
注意事项那段值得原文引用,因为它对应的正是最常见的误解:Sandboxing only applies to how Claude uses the Bash tool。内置的 Read、Edit、Write 三个工具改由 Claude Code 的 Permissions 配置。沙箱不是把整个会话装进盒子,它是垫在 shell 命令下面的一层地板;文件工具仍然需要自己的规则。
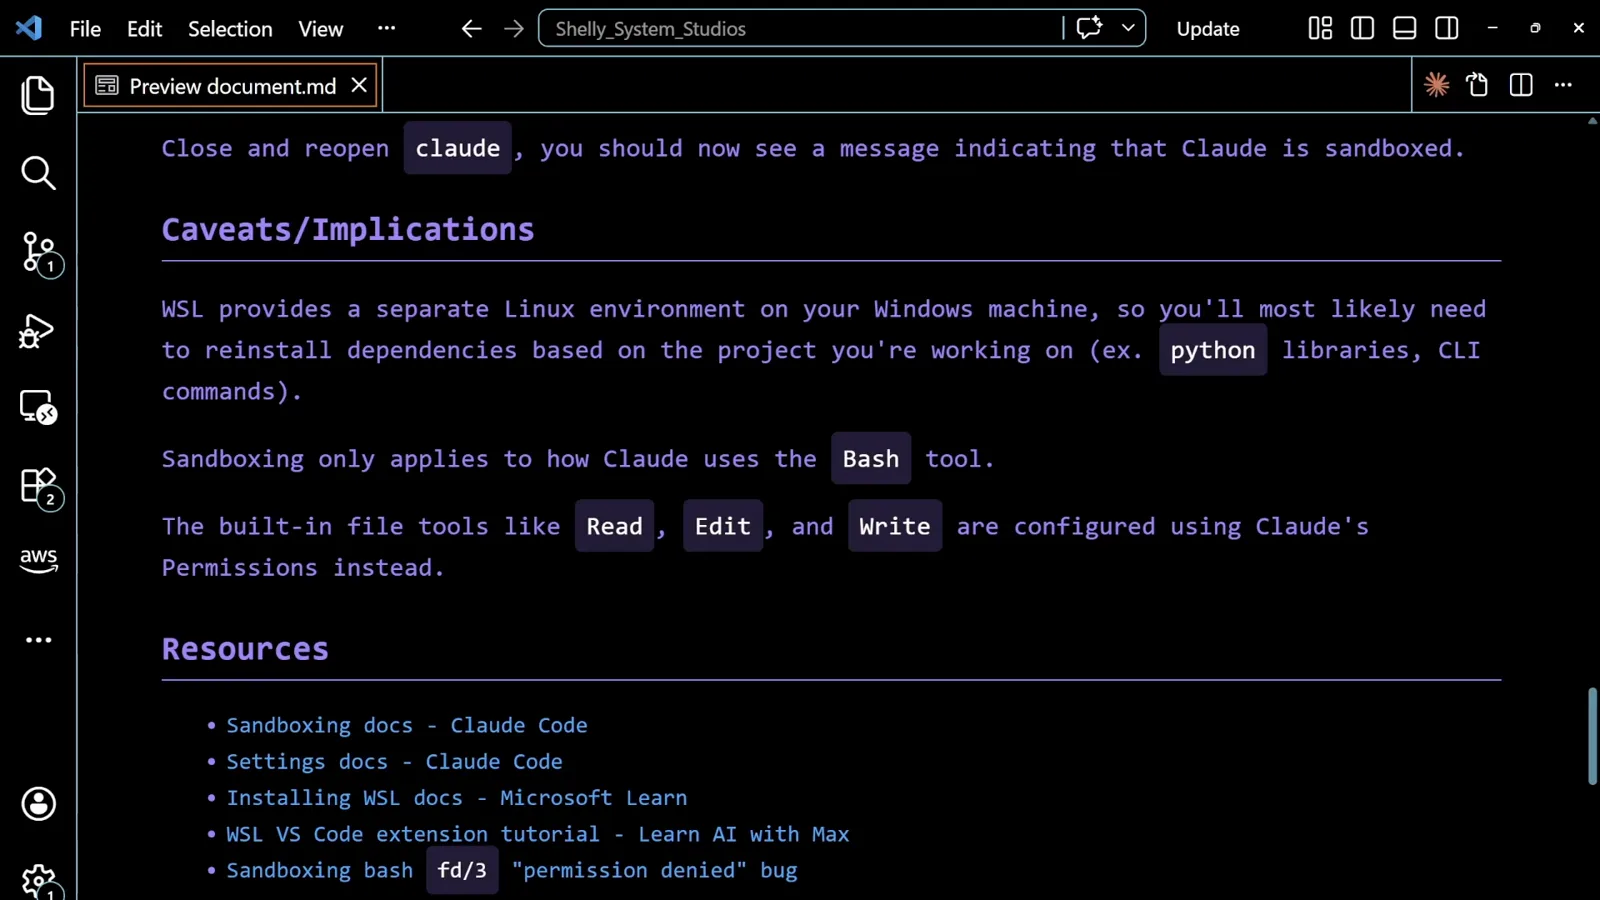
两套执行层、两个配置文件。第二套的写法在权限那篇逐图教程里。跳到 7:32