
Illustrated walkthrough · 16 screenshots
Claude Code Plan Mode: The Illustrated Guide
How Claude Code researches your codebase, proposes an implementation plan and waits for your approval — shown on a real task, one screenshot per step.
About 6 min · 16 steps, each linked to the exact moment in the source video
The short version
Plan mode makes Claude Code research first and code later. Cycle the mode indicator until it reads “plan mode on”, describe the task, and Claude searches your files, then returns a numbered implementation plan that names exact files and line ranges. You choose between auto-accepting edits, approving each edit manually, or replying “No, keep planning” with feedback. During execution the plan becomes a strikethrough todo list, and one-off Bash permissions can be granted “don’t ask again” per directory. Plan mode shines when changes span many files but each change is simple; for narrow tasks with hard logic, add “think hard” (or “ultrathink”) to the prompt instead.
About the source video
Every screenshot on this page comes from “Net Ninja”’s Claude Code course lesson on planning and thinking, recorded in VS Code on a real Next.js blog project called shinobi.
Frames are used with attribution and each step deep-links back to the exact second in the video. The written guide is our own work — the video was never transcribed into it.
What plan mode is
One indicator at the bottom of the input box tells you which behavior you get.
- 1
Cycle into plan mode
Plan mode is one stop on the mode indicator under the Claude Code input box. Cycle it (alt+m in this setup — the indicator itself says “plan mode on (alt+m to cycle)”) past “accept edits on” and it turns green: from now on Claude will research and plan instead of editing files. It’s the right default for tasks that touch many files at once, where each individual change is not that complex but the overall scope is wide.
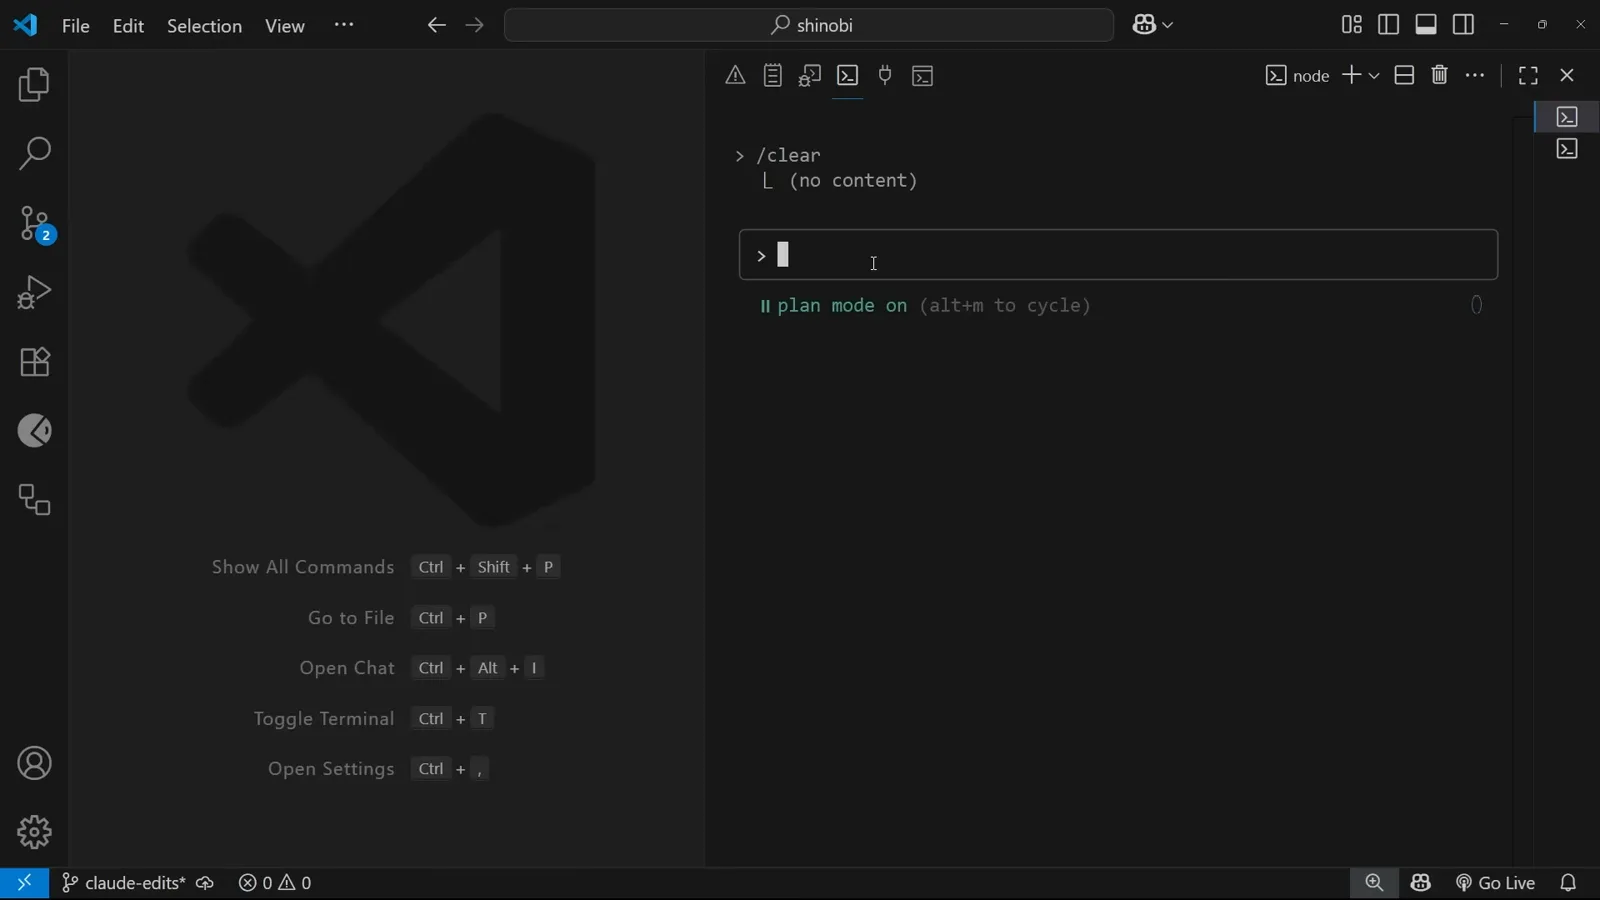
The input footer now reads “plan mode on (alt+m to cycle)” — Claude will not edit anything until a plan is approved.Watch at 0:38
Run a task under plan mode
An avatar component request, from prompt to research to a six-step plan.
- 2
Describe the task, keep plan mode on
The demo task: “Can you make a custom component for an Avatar (no pic, only initial) and find any places in the project where it can replace Avatar-like templates.” Two things make this prompt work well under plan mode: the constraint (initials only, no images) and the instruction to hunt down every existing lookalike. Nothing gets edited yet — Enter just starts the research.
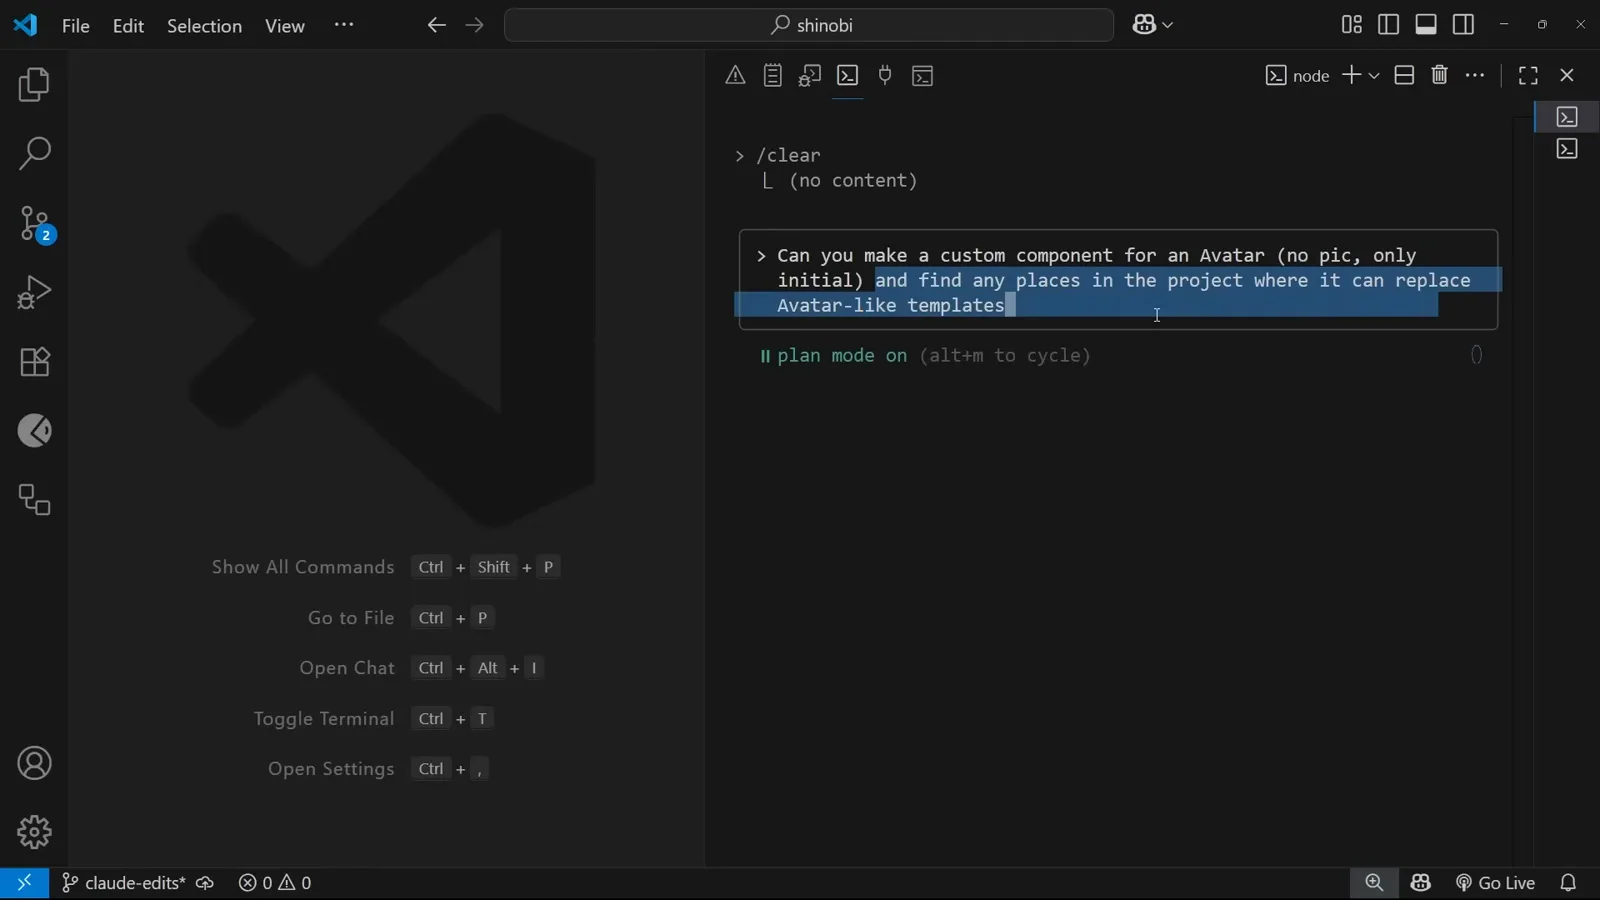
The avatar task typed into the prompt box while the footer still shows plan mode on.Watch at 1:10 - 3
Claude researches before it plans
Before proposing anything, Claude Code runs read-only searches: one pattern-matching sweep for “avatar|Avatar|initial|profile|user” that finds 4 candidate files, and a repo-wide scan of all .tsx/.ts/.jsx/.js files that finds 100. It announces what it is doing (“I’ll analyze the codebase to understand where an Avatar component could be useful and plan its implementation”) — plan mode makes these searches safe because nothing can be edited.
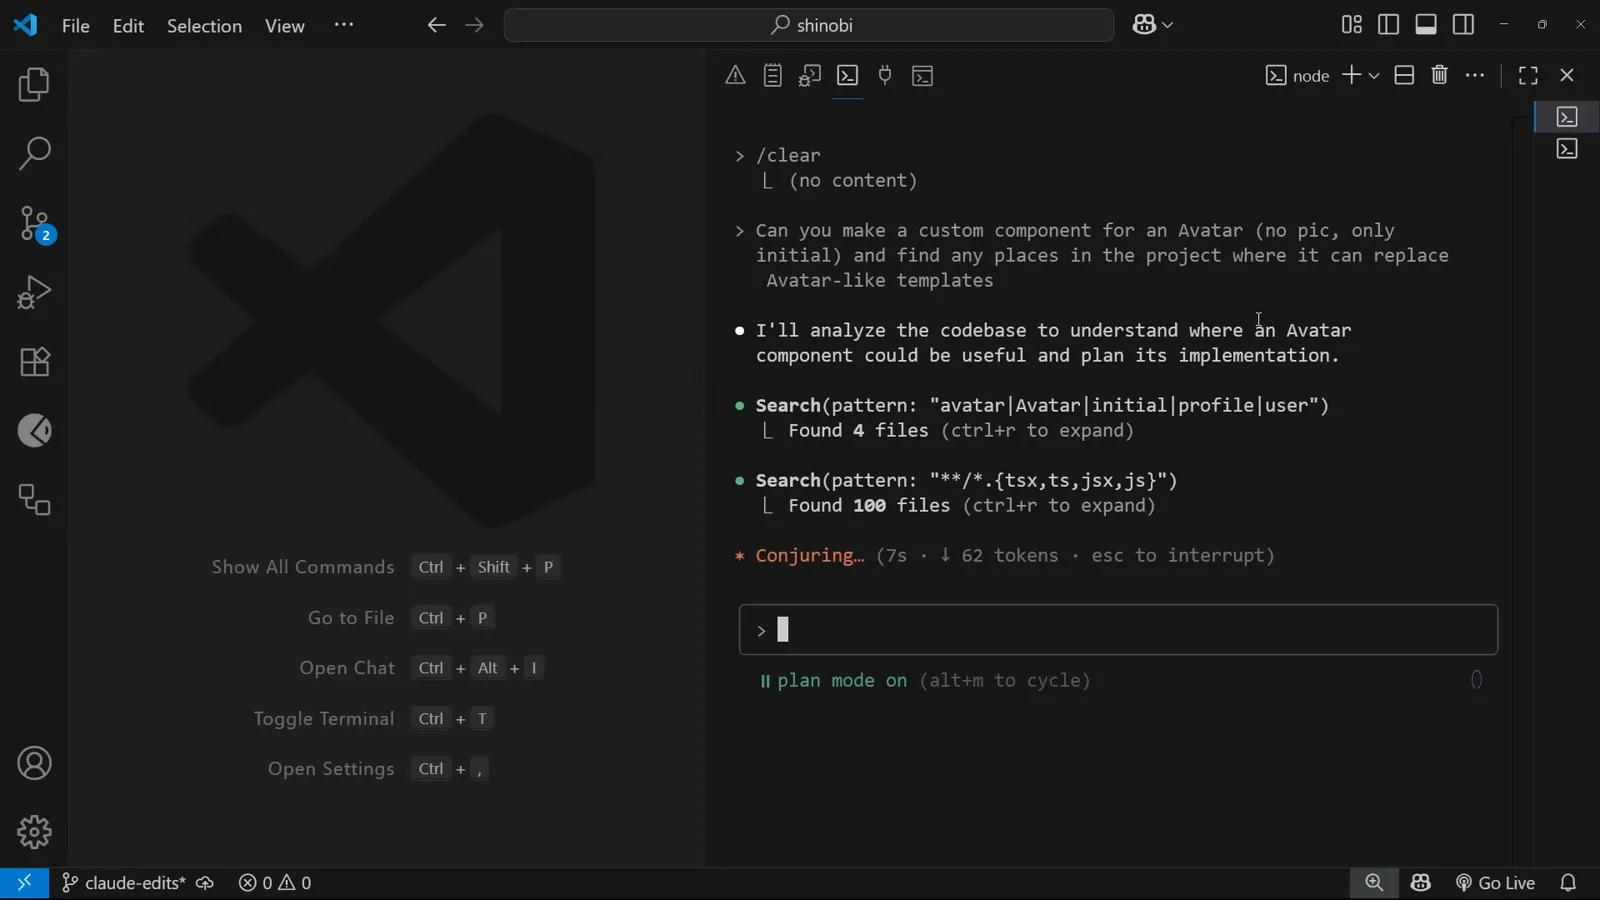
Two Search calls and a status line — the only things Claude touches in plan mode are read-only.Watch at 1:18 - 4
The plan opens with what it found
The plan arrives under a “Ready to code?” heading. First comes “Current Avatar Usage Found”: Blog Post Cards at src/app/blog/page.tsx:56-58, which use an inline div with a gradient background for author initials, and Recent Activity at src/components/BlogSidebar.tsx:43, which uses a colored dot. Naming the exact files and lines is what makes a Claude Code plan reviewable — you can open both spots and check the claim.
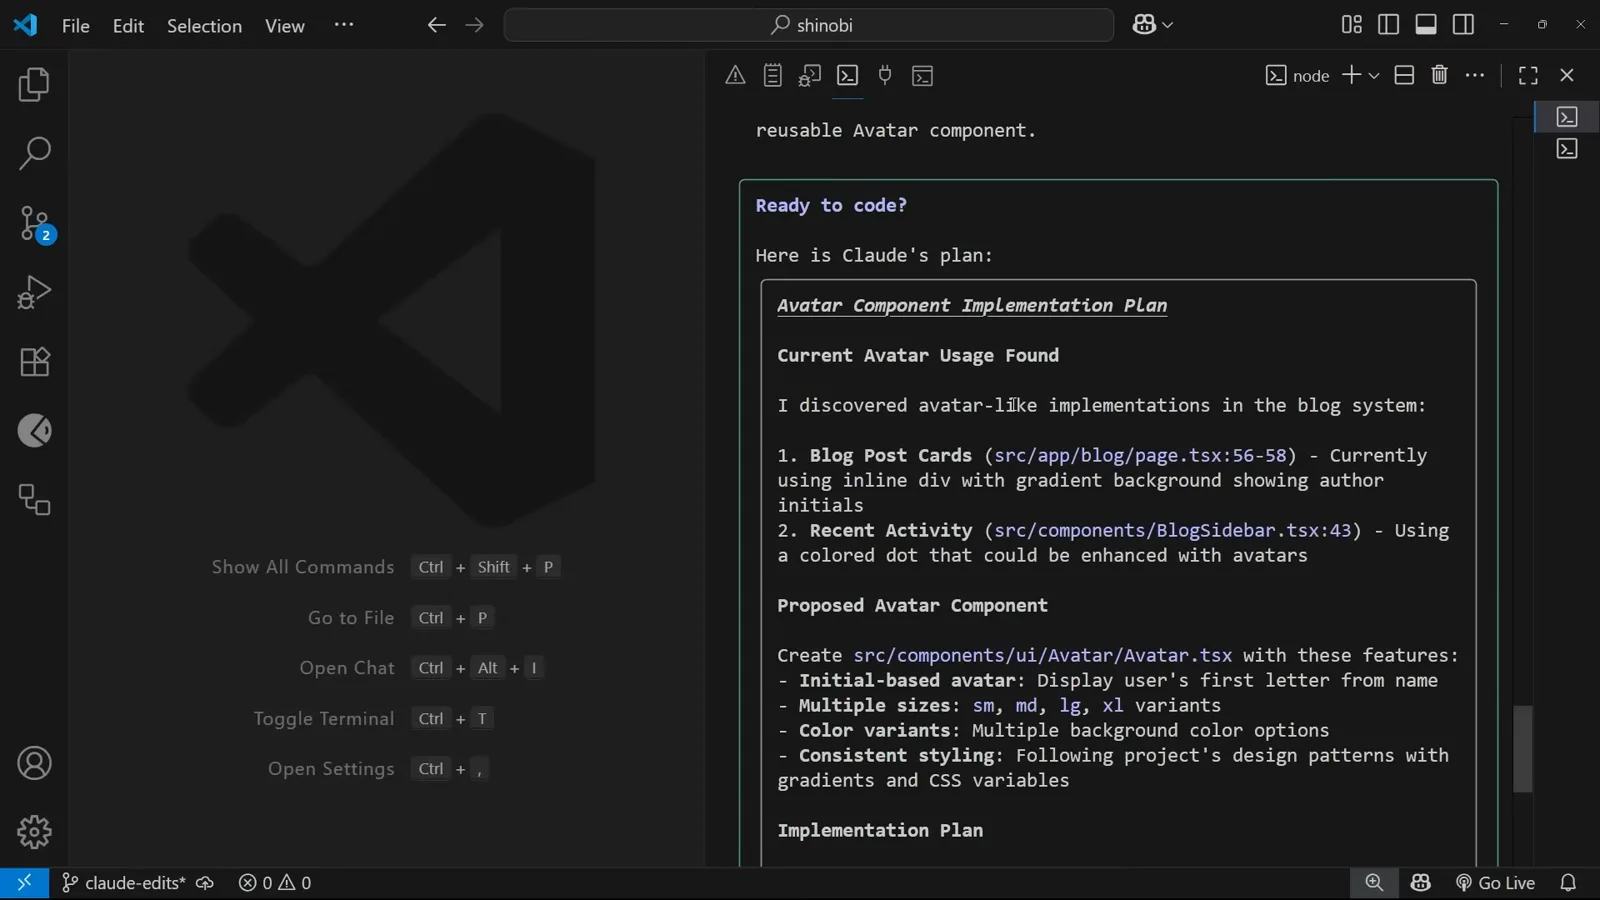
“Ready to code? Here is Claude’s plan” — starting with the two avatar-like spots it discovered.Watch at 1:34 - 5
Six ordered steps across five files
The Proposed Avatar Component section promises src/components/ui/Avatar/Avatar.tsx with initial-based display, sm/md/lg/xl sizes and six color variants, following the project’s existing Button component patterns. Then the Implementation Plan lists six ordered steps: create the component, replace the avatar code in blog post cards (line 56-58), enhance BlogSidebar, add the Avatar to individual blog post headers, create a test file following the Button test patterns, and add a preview link to the header navigation “as per project instructions”.
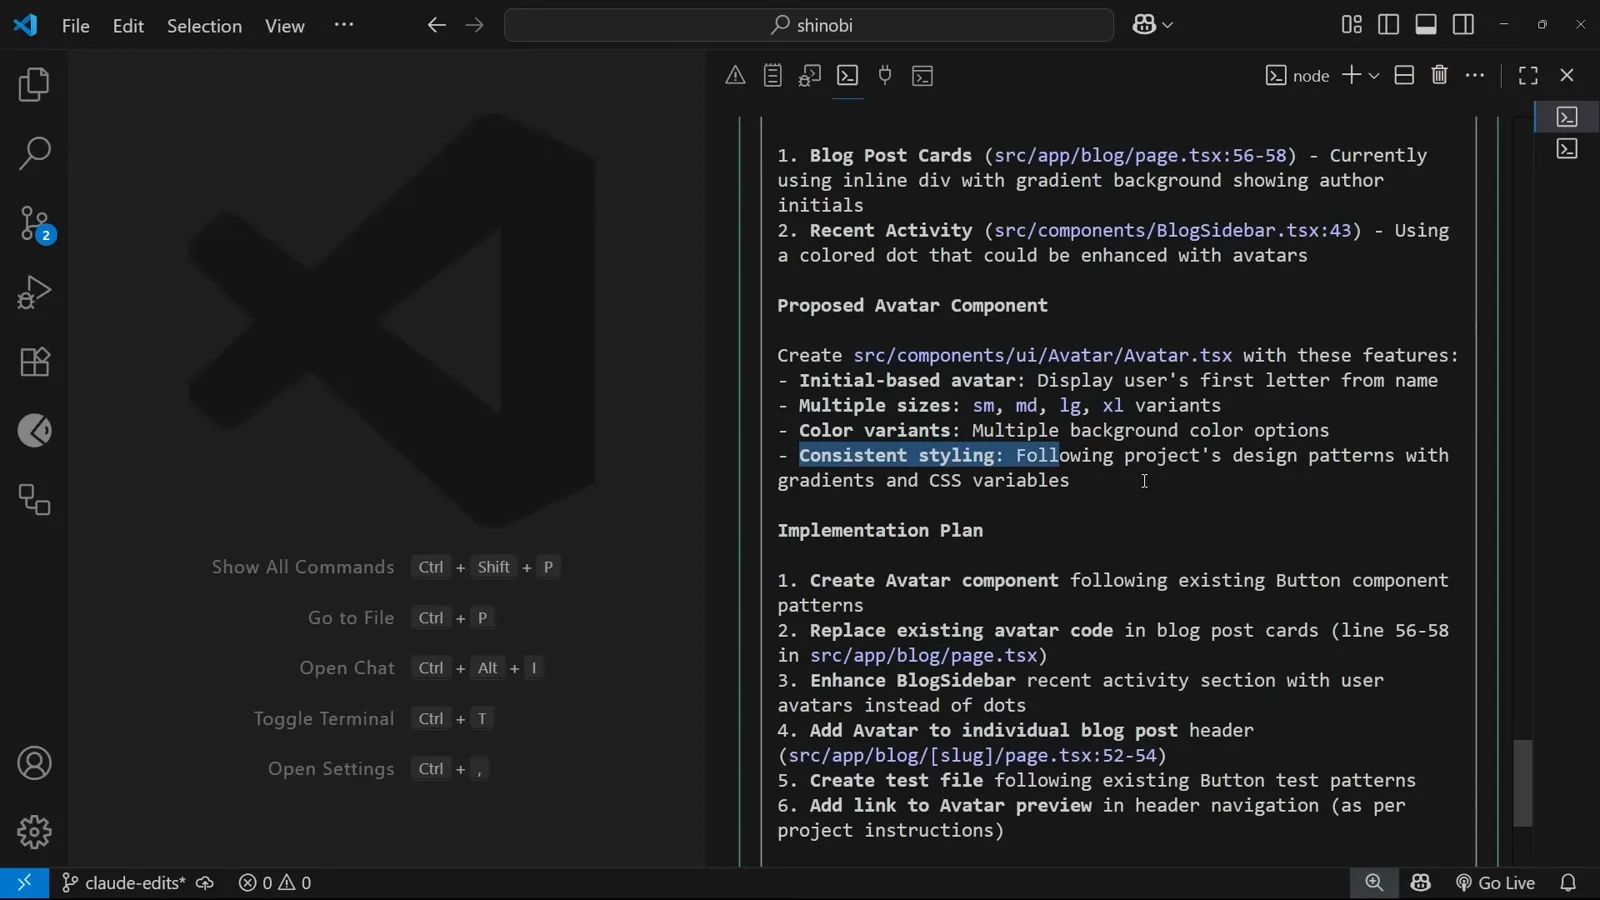
The full implementation plan — each step names its file, so you can sanity-check scope before approving.Watch at 2:02
Review and approve the plan
The approval prompt is the whole point of plan mode — read the plan before answering it.
- 6
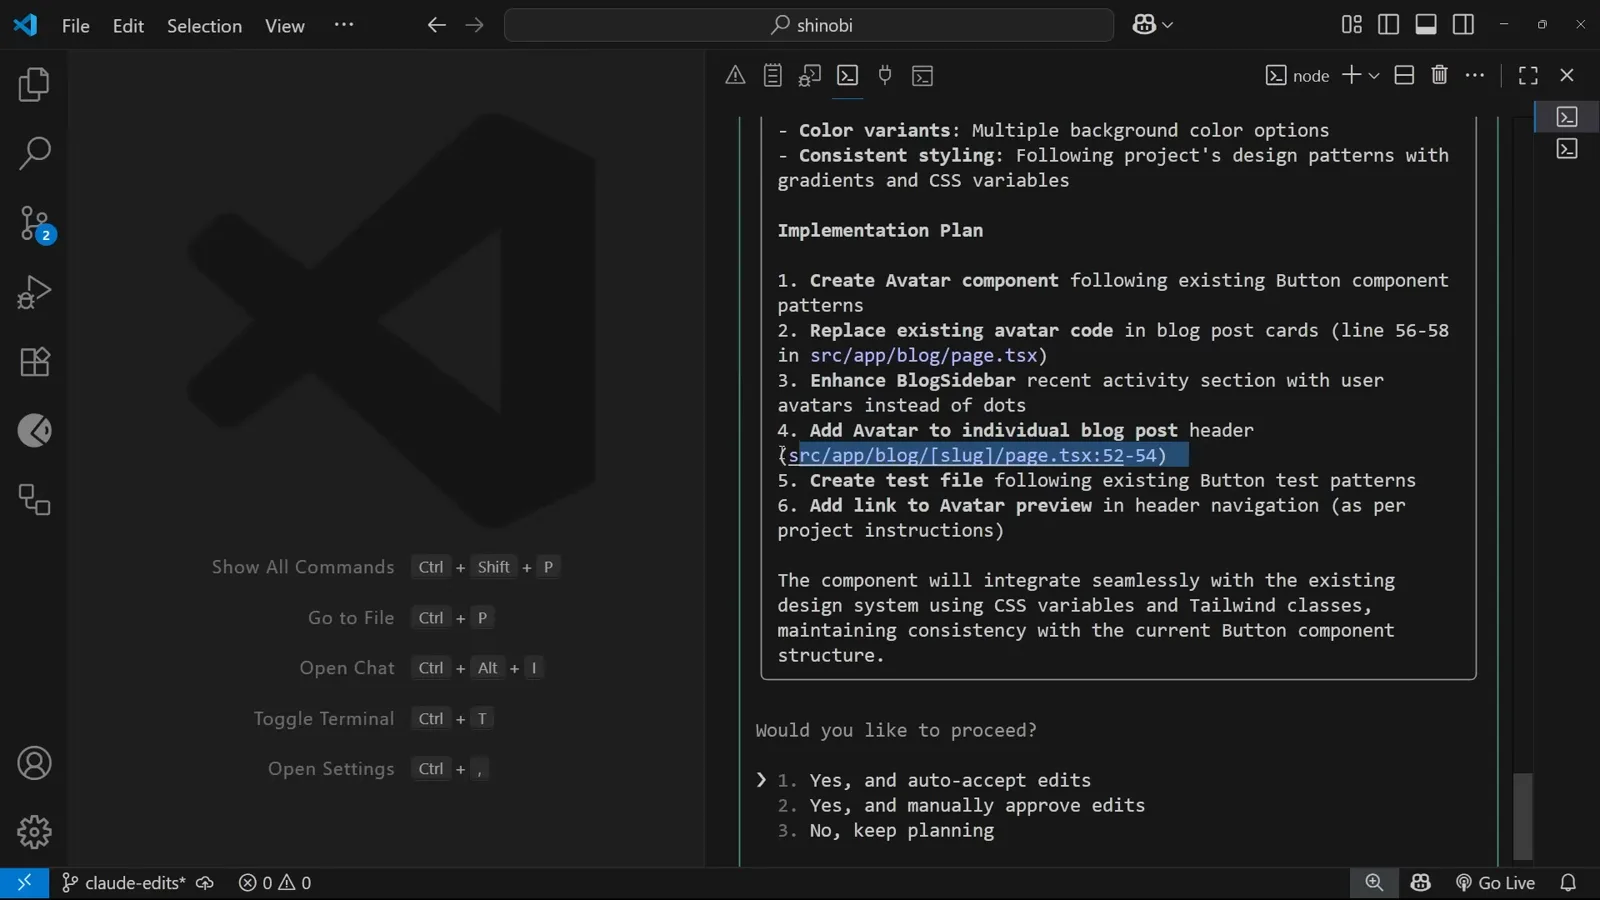
Three ways to answer the plan
Every plan mode session ends at the same fork: “Would you like to proceed?” with three options. “Yes, and auto-accept edits” hands Claude the keys for the whole plan. “Yes, and manually approve edits” approves the plan but keeps you in the loop per edit. “No, keep planning” sends the plan back with your feedback. For a plan you’ve actually read, the first option is the fast path — that’s what the video picks.
Would you like to proceed? Auto-accept, manual approval, or keep planning — the three-way fork of plan mode.Watch at 2:26 - 7
The plan becomes a checklist
Once approved, the plan turns into an Update Todos list that gets struck through item by item — all six avatar tasks are already crossed out here. Plan mode does not pre-approve shell commands: running the test suite pops a Bash command dialog for “npm run test — Run tests to verify Avatar component works correctly”, and option 2 grants it permanently for this project directory so later test runs go through unattended.
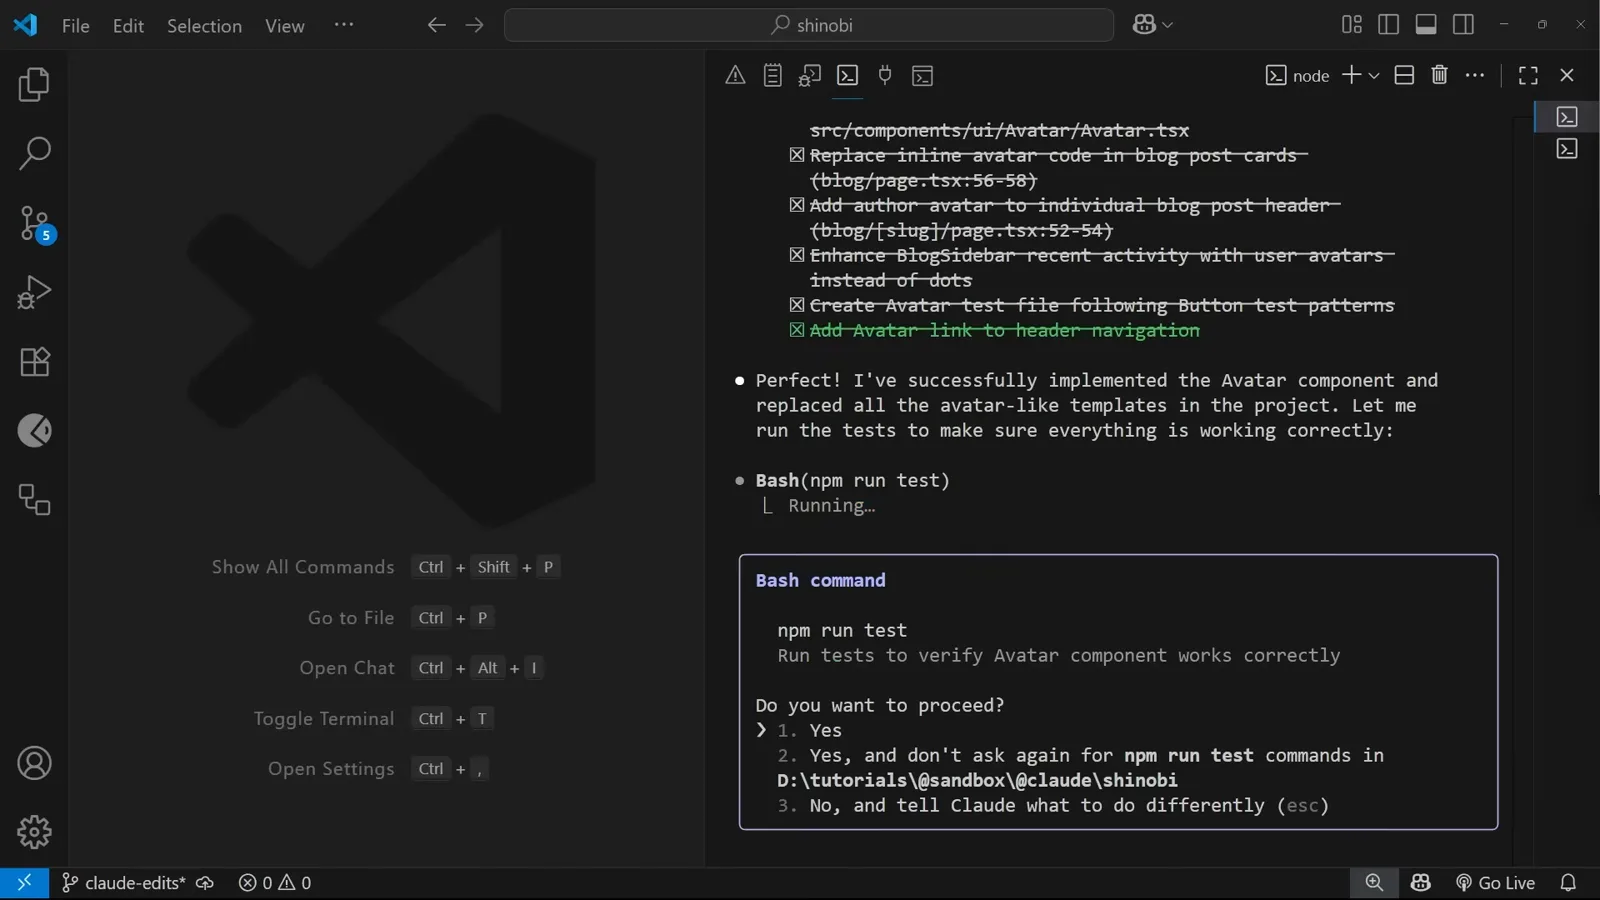
Every todo struck through, and a Bash permission dialog for npm run test — approving once covers the rest of the run.Watch at 3:10
Verify what plan mode delivered
Checklist, code, navigation, preview page and the live blog.
- 8
Every plan item checked off
The run ends with a green-check summary: Avatar Component Created at src/components/ui/Avatar/Avatar.tsx, Blog Post Cards Updated (inline avatar div replaced in src/app/blog/page.tsx:57), Individual Blog Posts Enhanced, Sidebar Enhanced, Tests Created, Navigation Updated and Preview Page Created at /avatar. Matching this list against the six plan steps is the fastest review: same items, same files, no surprises.
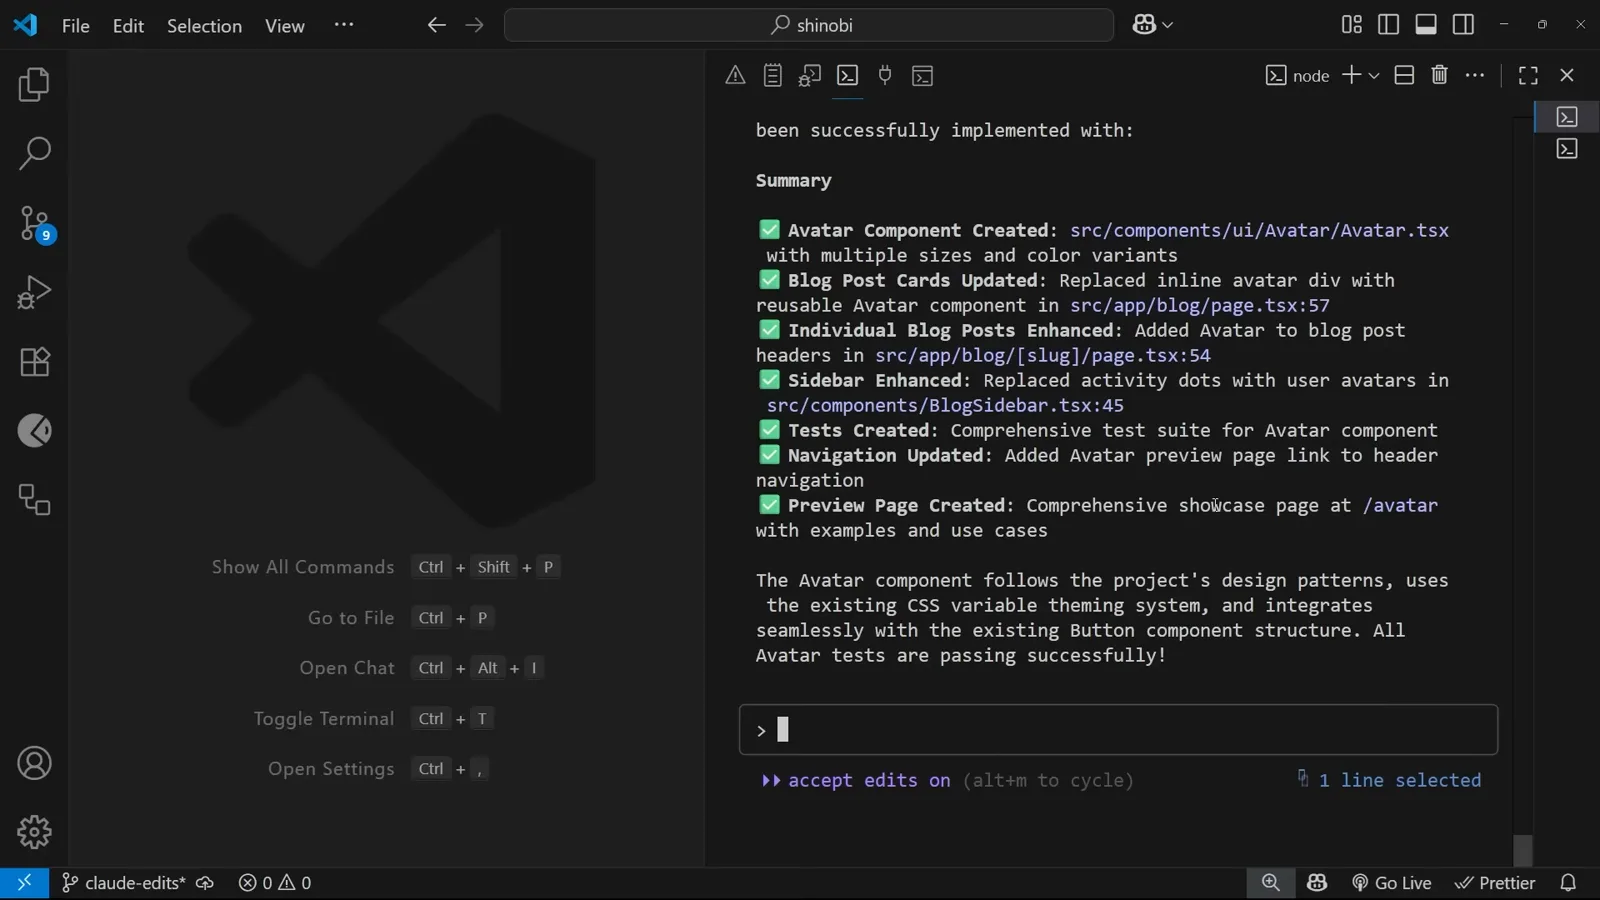
The completion summary mirrors the plan step for step — all Avatar tests passing.Watch at 3:58 - 9
The component matches the plan
Opening the generated Avatar.tsx confirms the promises in the plan: an AvatarProps interface with name, size ('sm' | 'md' | 'lg' | 'xl') and variant ('primary' | 'secondary' | 'success' | 'warning' | 'danger' | 'gradient'), initials derived via name.charAt(0).toUpperCase(), and size/variant class maps following the same structure as the project’s Button component.
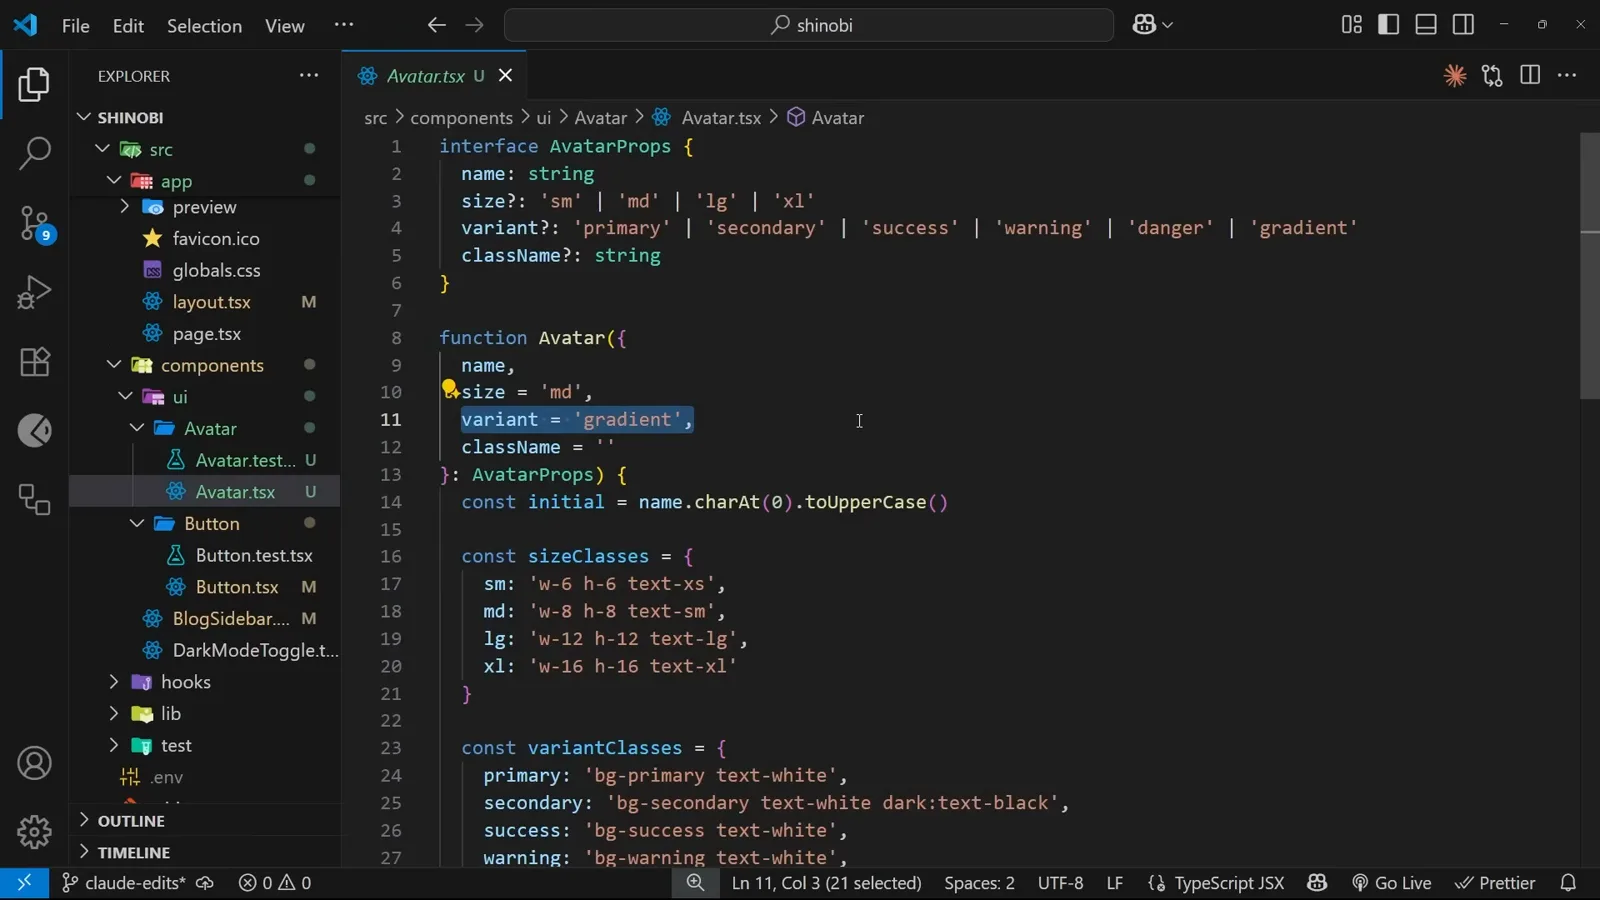
Avatar.tsx in VS Code — props, sizes and variants exactly as the plan proposed.Watch at 4:42 - 10
Even the nav link was in the plan
Step 6 of the plan said “Add link to Avatar preview in header navigation”, and here it is: the Shinobi homepage header now carries an Avatar item between Preview and About. Small touch, but it shows plan mode keeps its promises — everything in the plan happened, including the navigation edit that is easy to forget.
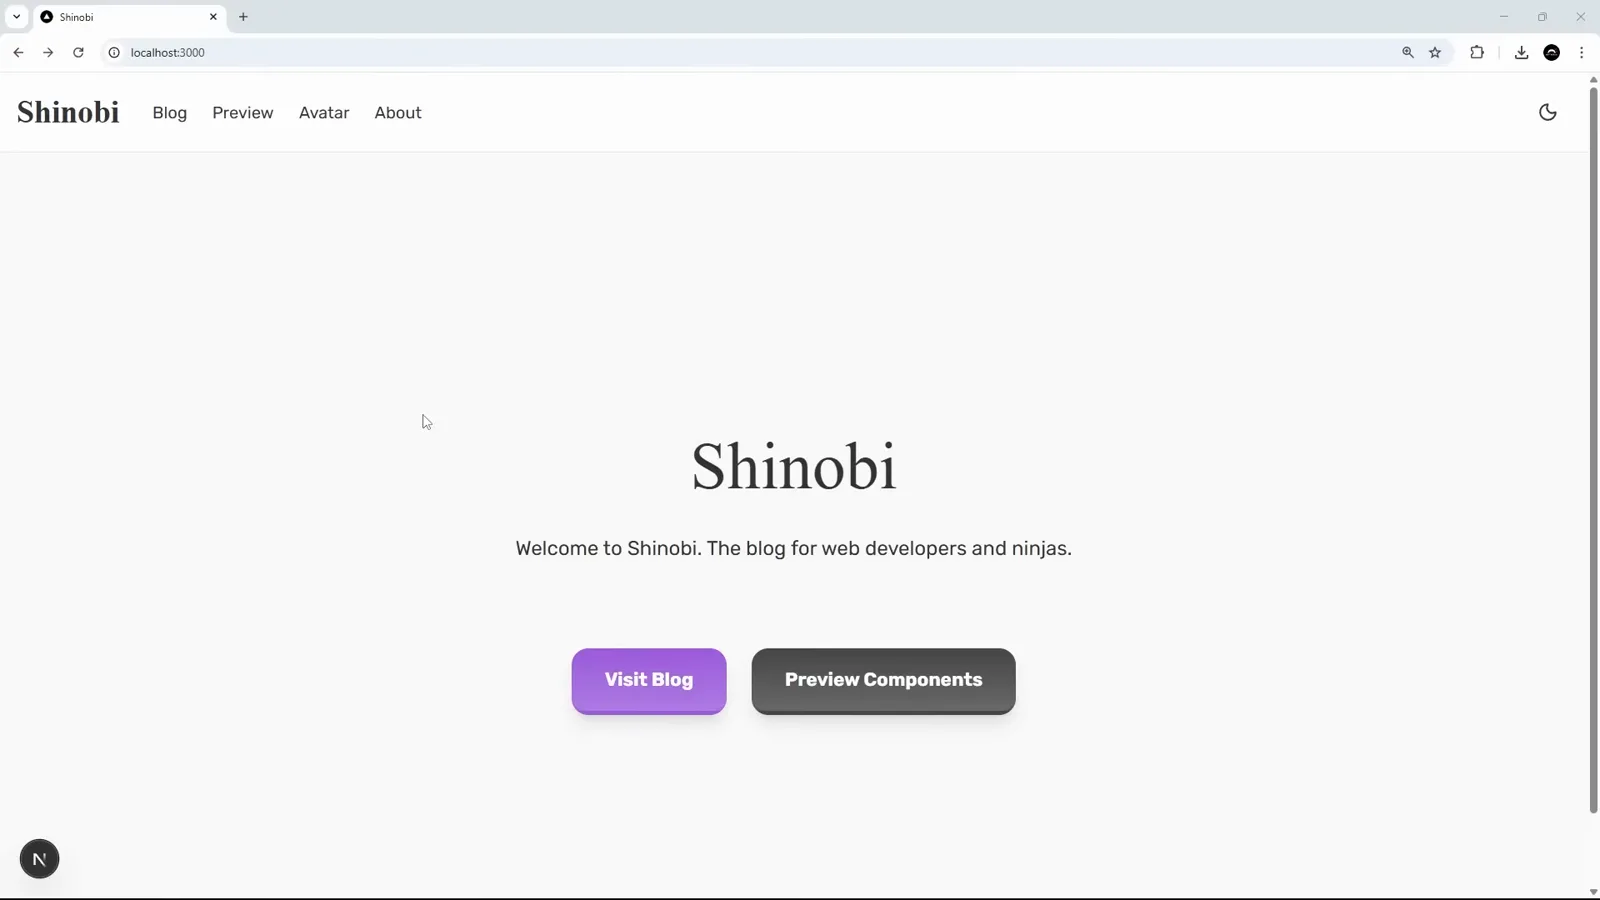
The homepage header gained an Avatar link — the sixth plan step, delivered verbatim.Watch at 4:58 - 11
A showcase page for every variant
At localhost:3000/avatar the new preview page renders the component matrix: a Sizes row from Small to X-Large, then a Variants grid with Primary, Secondary, Success, Warning, Danger and Gradient circles. One glance tells you the component works across its whole prop space — which is exactly what a preview page is for.
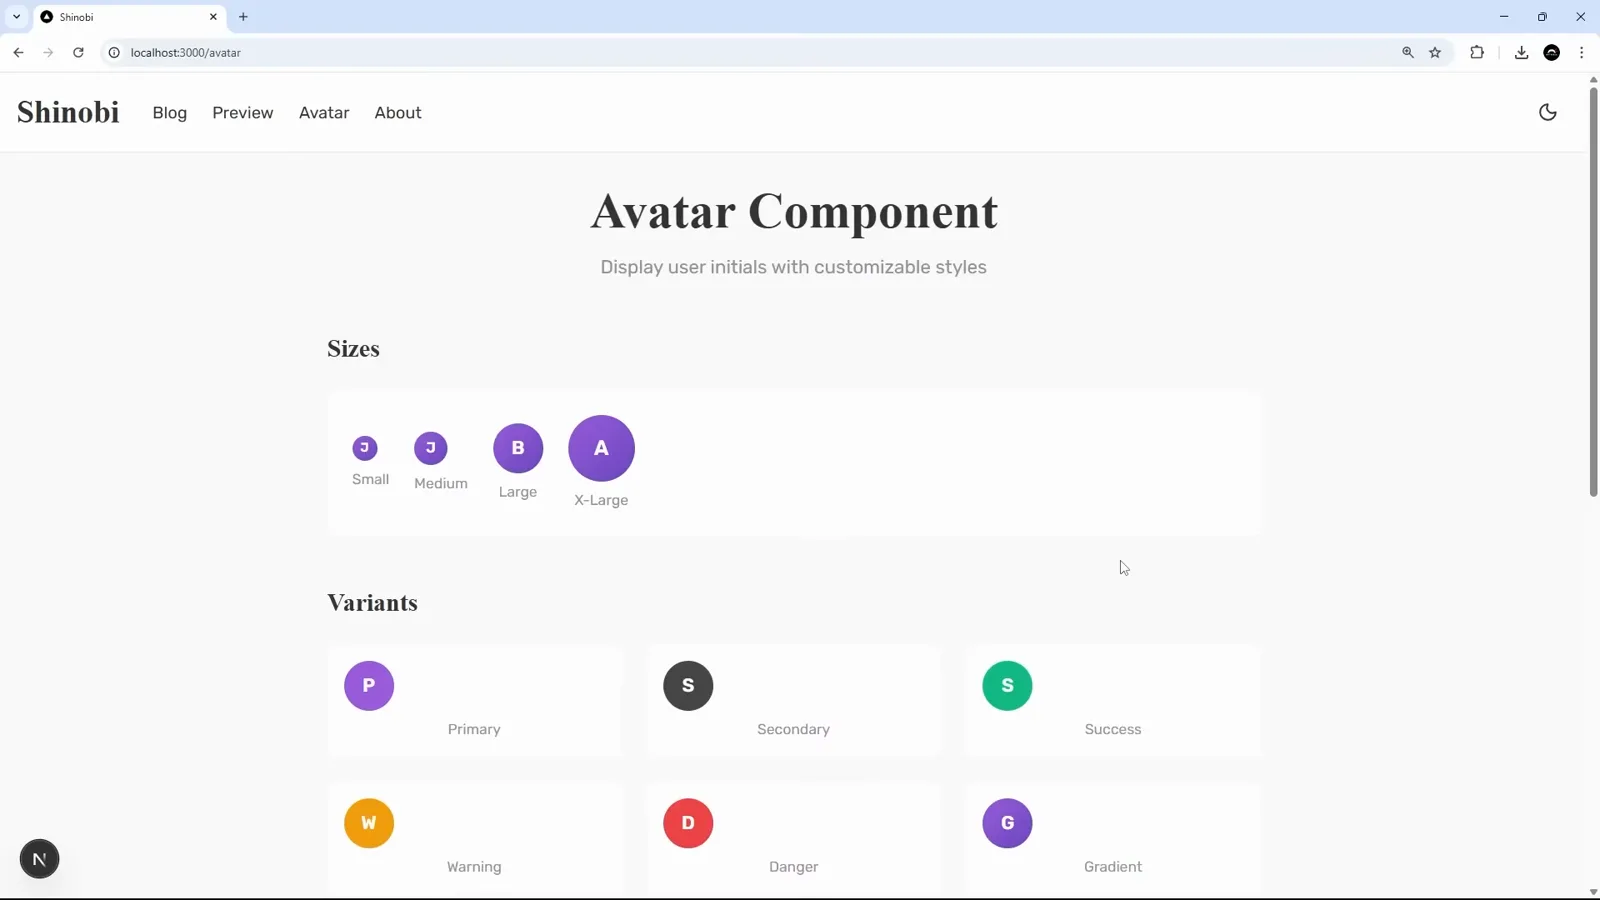
The /avatar preview page: four sizes, six color variants, all live.Watch at 5:14 - 12
Real pages use the new component
The payoff shot: the blog list at localhost:3000/blog now shows a purple “N” avatar beside “By Net Ninja” on every post card, and the Recent Activity sidebar in the same view renders avatars where colored dots used to be. The plan’s first two steps — blog post cards and BlogSidebar — are visible on one screen.
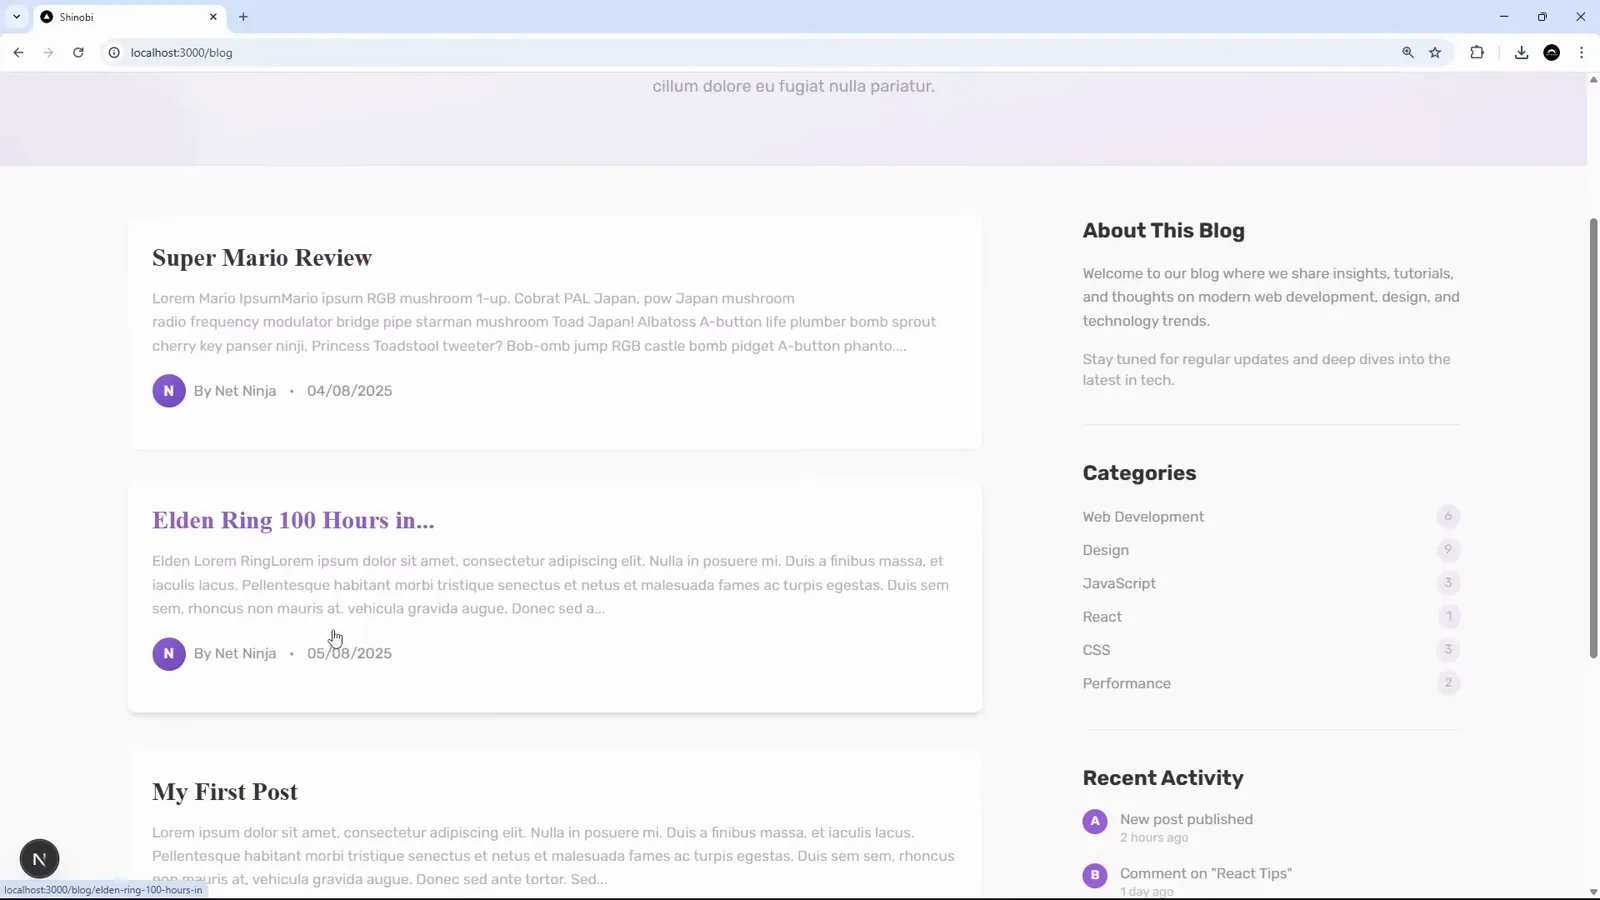
Blog post cards and the Recent Activity sidebar now render the Avatar component.Watch at 5:22
When the plan drifts, write a rule
Claude followed the plan perfectly — the plan itself outran the project conventions, so the fix goes into CLAUDE.md.
- 13
Turn the drift into a rule
Plan mode executed faithfully — but the plan added a standalone /avatar page and a header link, while the project’s CLAUDE.md said component samples belong on the preview page. The fix takes two prompts (“remove the avatar page, put the samples in the preview page”), then a durable rule goes into CLAUDE.md: “when making new page components, always add a link to that page in the header. Only do this for page components, not UI or other drop-in components.” The lesson: read the plan, and codify whatever you had to correct.
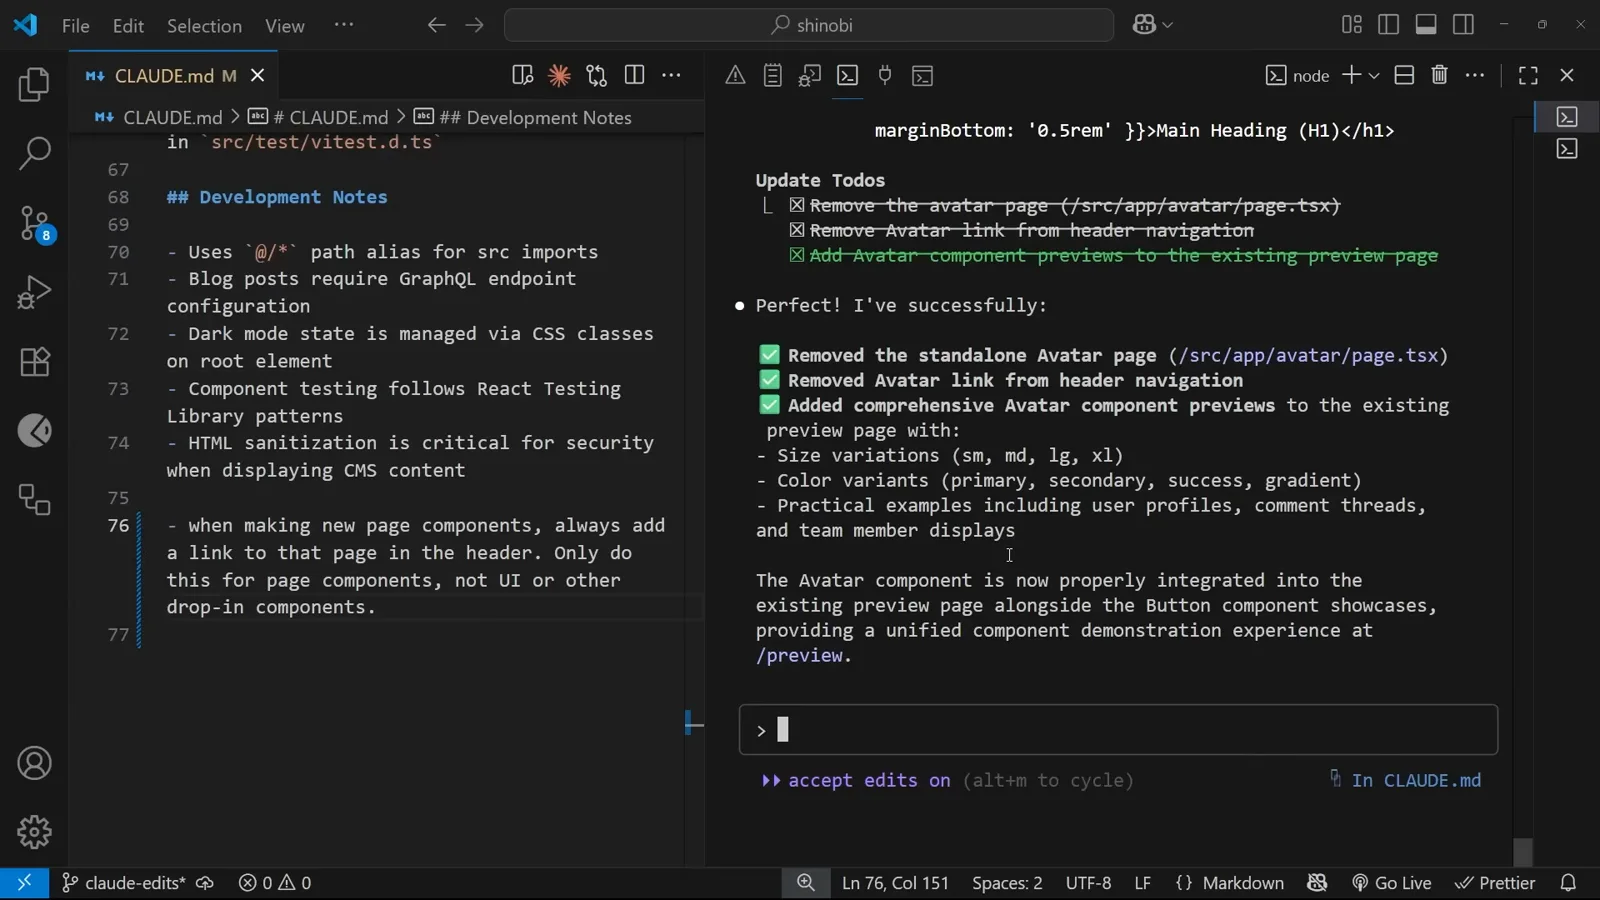
CLAUDE.md gains the page-components rule while Claude’s cleanup summary confirms the stray page is gone.Watch at 6:02
Plan mode’s sibling: extended thinking
Wide scope → plan mode. Narrow scope, hard logic → think keywords.
- 14
Say “think hard” for complex logic
Thinking mode solves the opposite problem: not wide scope but hard logic. The demo prompt asks Claude to implement a comment system with authentication, moderation and real-time updates, and contains the phrase “Think hard about this implementation”. Seeing “think” (or a stronger variant) in a prompt switches Claude Code into extended thinking, which burns more tokens in exchange for more reasoning before the plan is written.
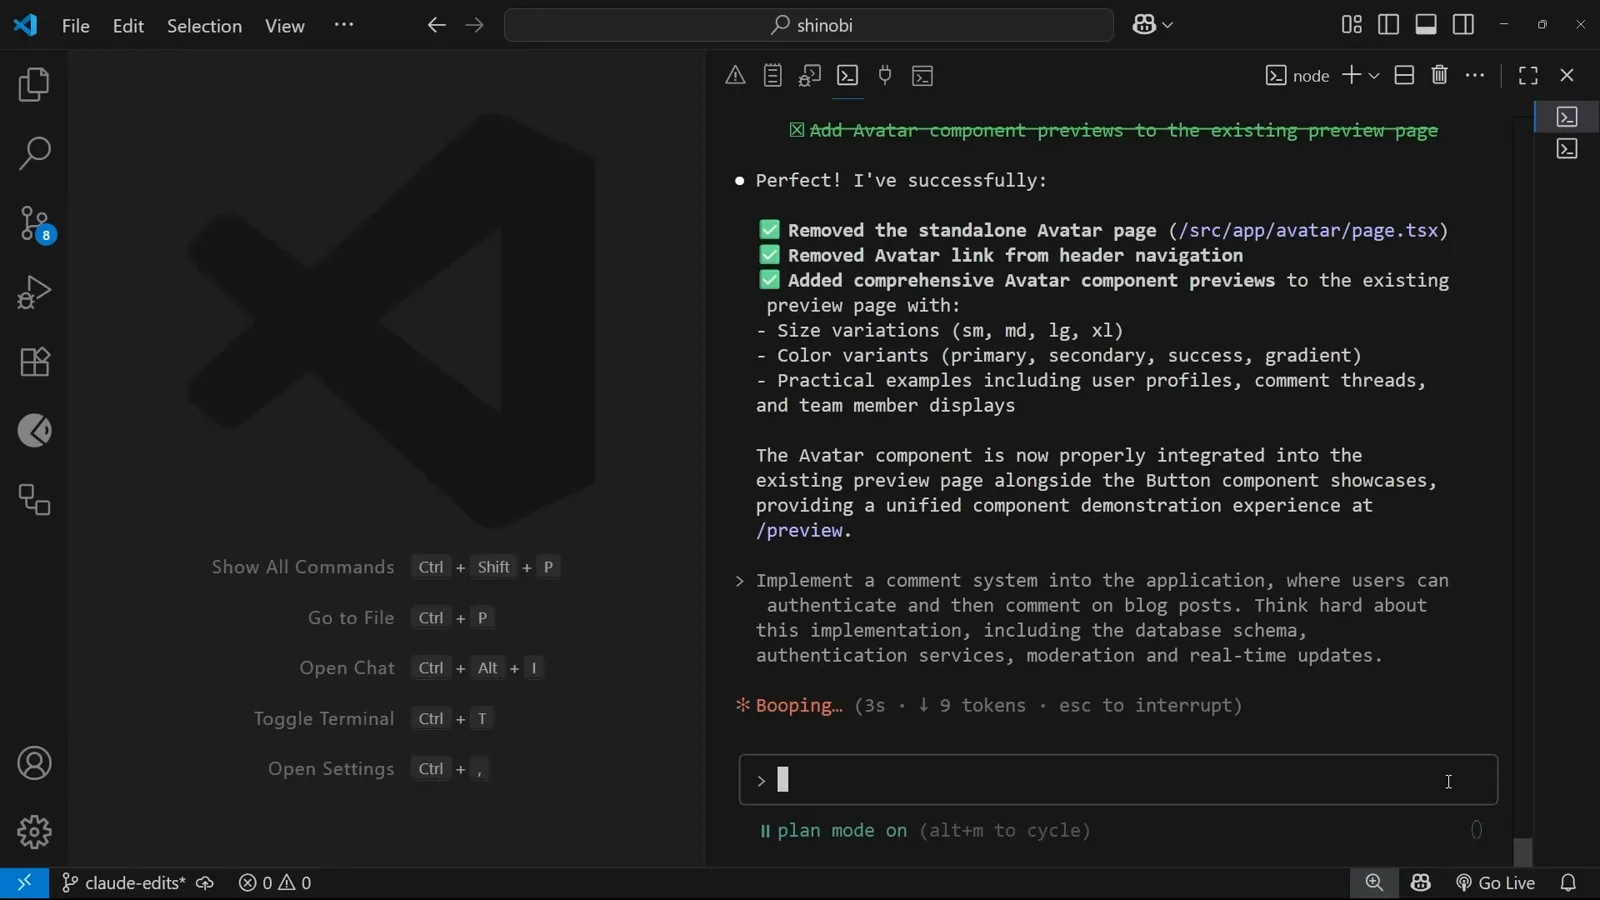
The comment-system prompt with “Think hard” in it, still under plan mode so the result is a plan, not code.Watch at 8:52 - 15
Watch the reasoning stream
With extended thinking on, Claude Code streams its reasoning in faded gray italics under a “Thinking…” marker before any plan appears: “This is a comprehensive feature request that requires careful planning. Let me think through all the components needed for a comment system: 1. Database Schema… 2. Authentication… 3. Database… 4. API Routes…”. Reading this stream is the cheapest way to catch a wrong assumption early.
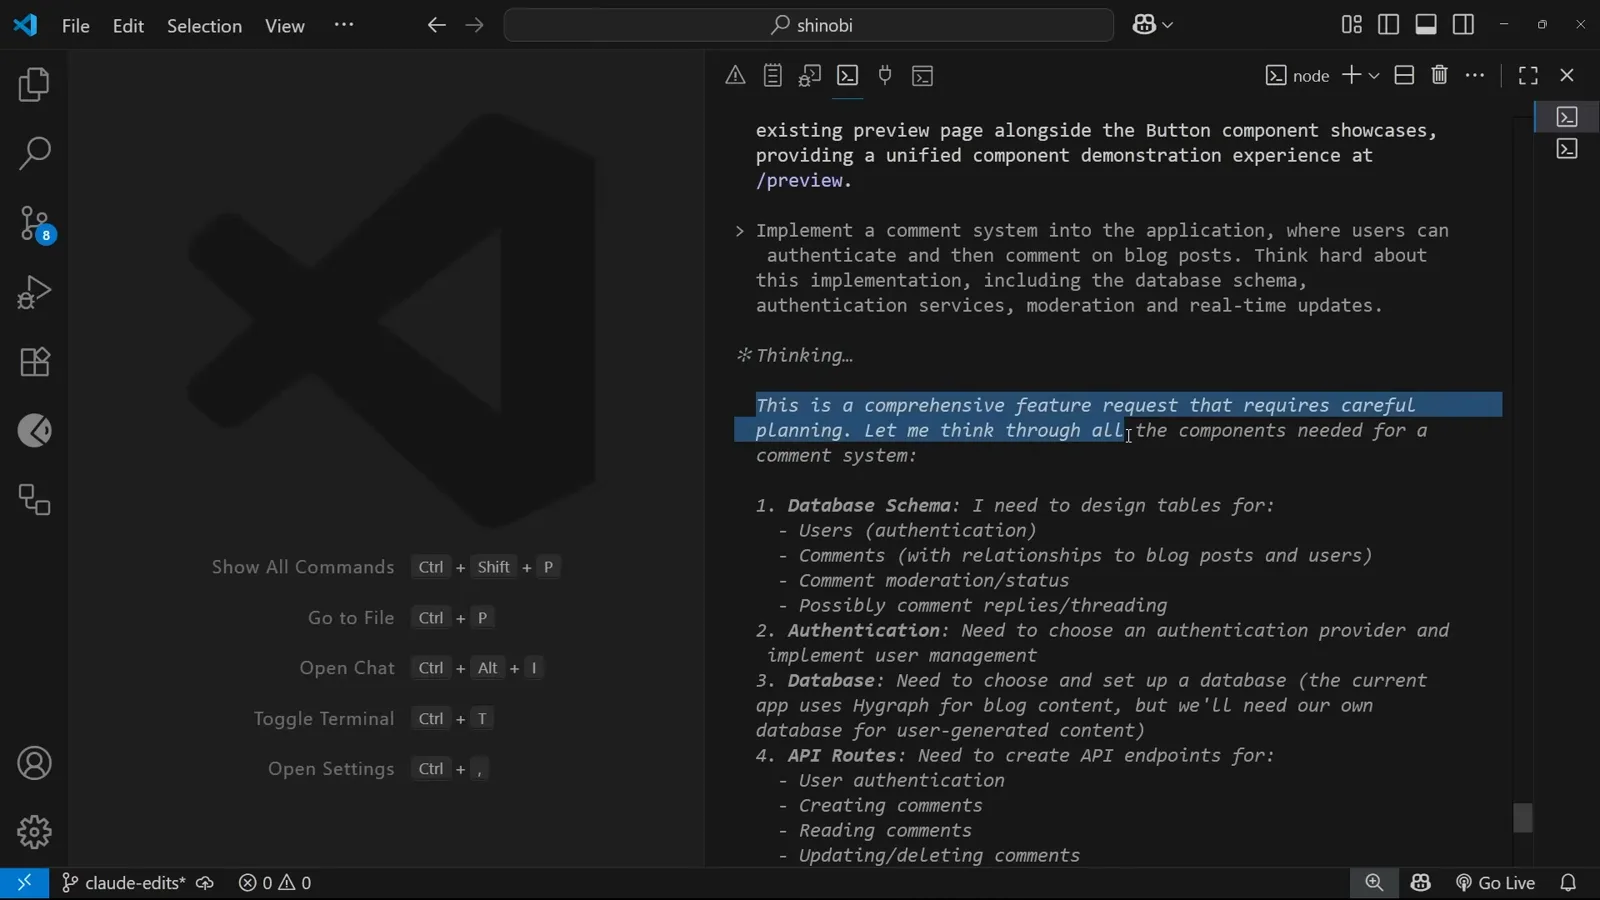
The gray italic block is Claude’s actual reasoning, streamed before the plan.Watch at 9:00 - 16
Four levels, ultrathink is the max
Thinking comes in four intensities triggered by the words themselves: “think” for a small nudge, “think hard”, “think harder”, and “ultrathink” for the deepest budget — the word typed here into the input box. The tradeoff is always tokens: the harder Claude thinks, the more each turn costs, so spend the big budgets on architecture-level questions, not on renaming a variable.
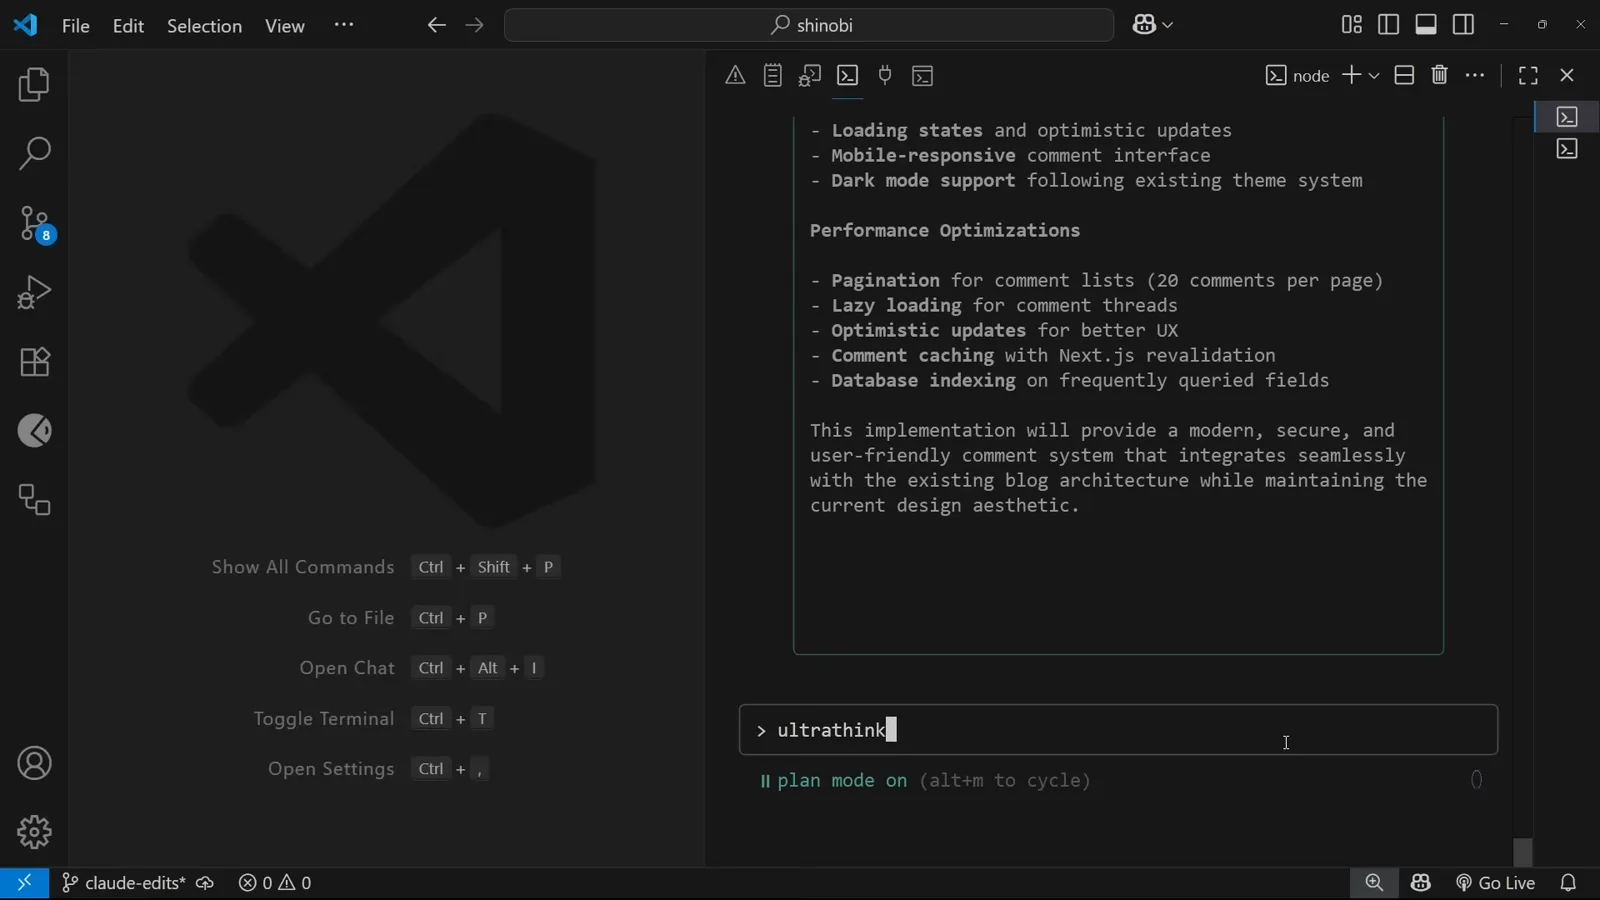
Typing “ultrathink” — the strongest thinking trigger Claude Code recognizes.Watch at 10:54