
Integration walkthrough
Claude Code MCP Servers: Add Context7 & Playwright
Install, verify, and actually use MCP servers in Claude Code - Context7 for current docs, Playwright for browser control, every step illustrated.
An illustrated walkthrough of 16 steps - about 6 minutes to read. Every step links back to the exact moment in the source video.
TL;DR
MCP servers lend Claude Code tools it does not ship with - database clients, browsers, documentation libraries. Run claude mcp add <name> -- <command> with --scope project so the config lands in .mcp.json and travels with the repo; if a local stdio server will not connect, switch to its hosted HTTP variant. Restart, check /mcp for a green tick, then name the server in your prompt - 'use context7' - and let it fetch current docs or drive a real browser.
About the source video
This page follows the MCP servers lesson of Net Ninja's Claude Code course and rebuilds its Context7 and Playwright setup step by step.
Screenshots are frames from the video, credited to the creator; the write-up is our own. Steps verified against the video in September 2026.
What an MCP server actually is
A small adapter that lends Claude Code new tools.
- 1
An MCP server is a plug-in adapter
MCP (Model Context Protocol) is an open protocol from Anthropic that lets a model call tools living outside the codebase - databases, browsers, documentation libraries. The server, not Claude Code, talks to the external source and hands the result back as tools the model can invoke.
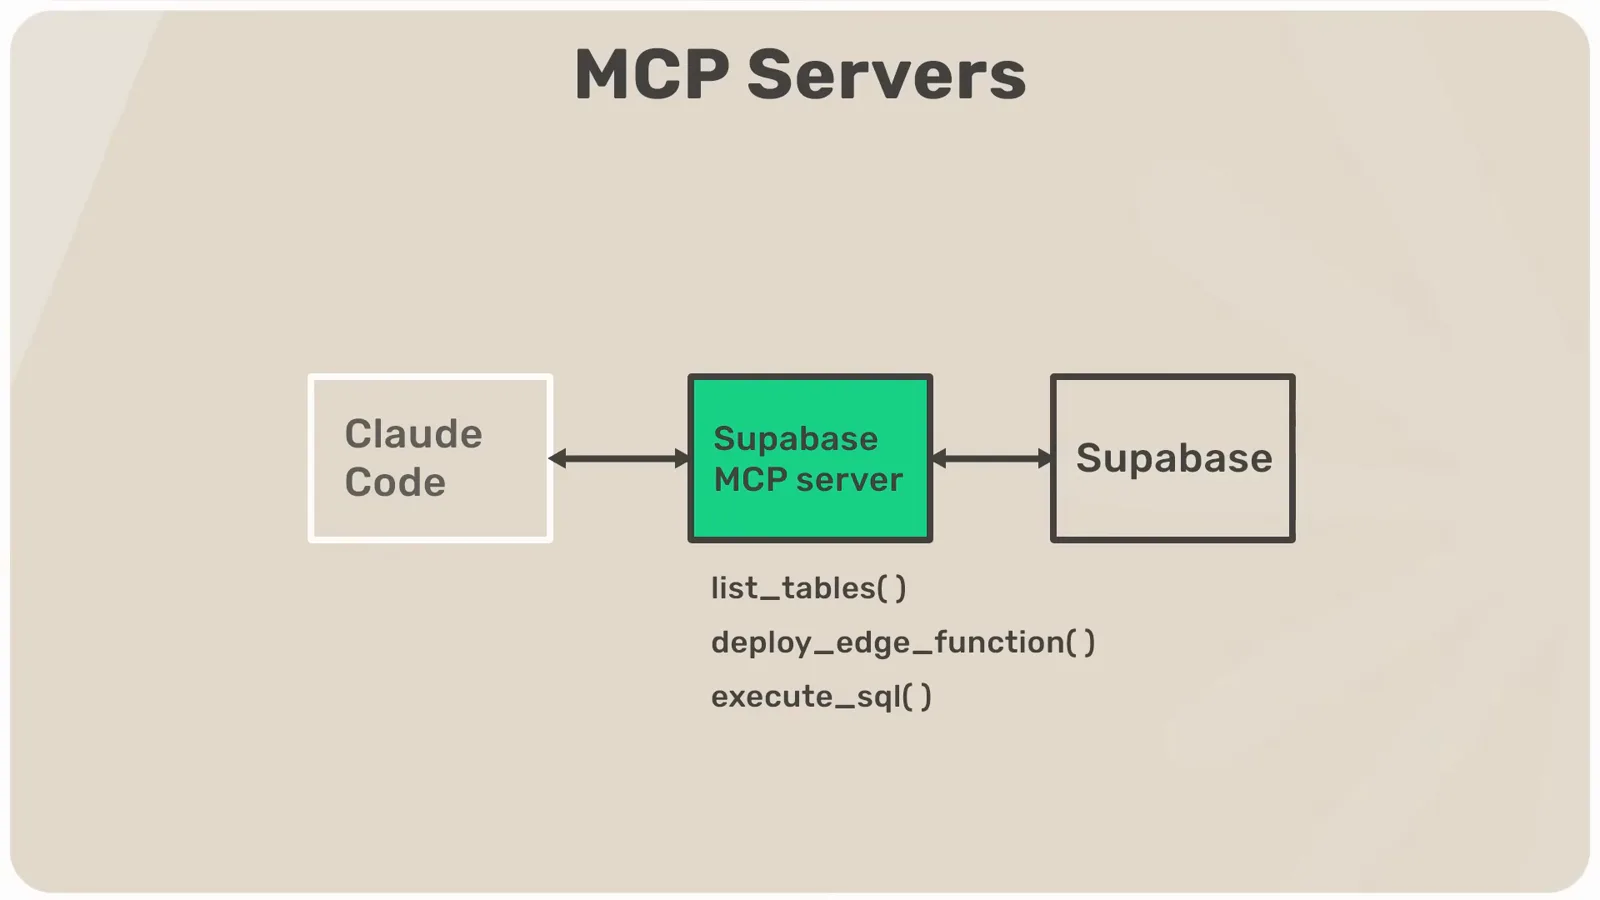
Claude Code asks the server; the server asks Supabase.Watch at 2:04 - 2
Pick servers from a directory
Hundreds of ready-made servers are indexed in directories such as pulsemcp.com, and each project's own site shows what it covers - Context7's homepage lists the frameworks and libraries it can pull current docs for. The two installed on this page are Context7, for up-to-date documentation, and Playwright, for browser automation.
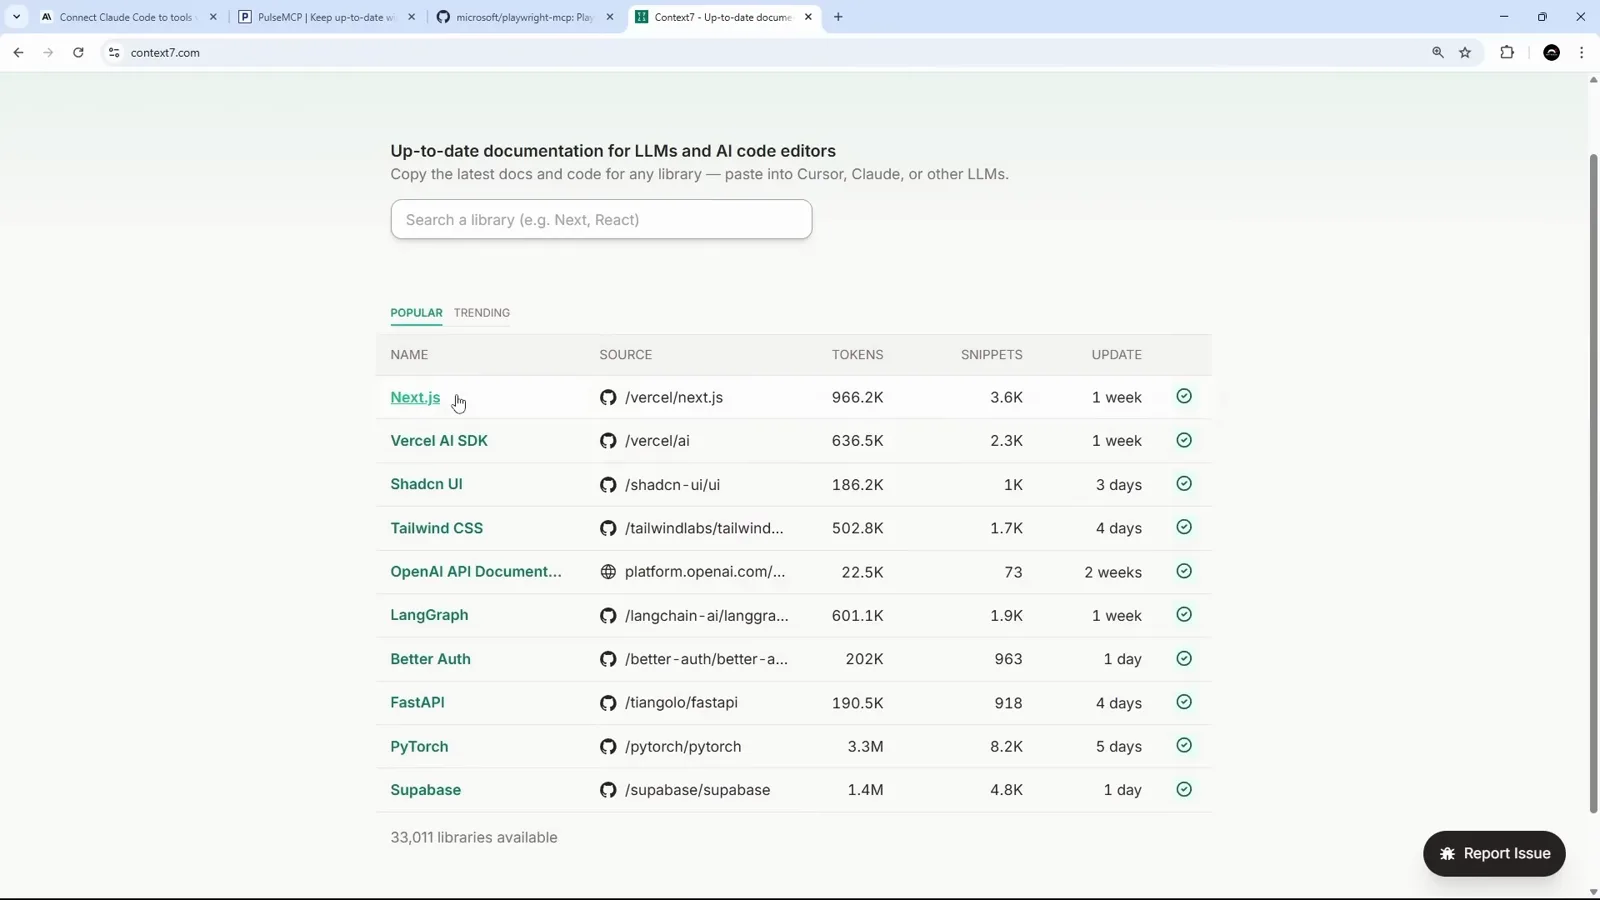
Directories list the servers; project sites list the coverage.Watch at 2:32
Add the Context7 server
One command in the terminal, one JSON file in the repo.
- 3
Two transport options, one command
Anthropic's MCP docs describe three ways to add a server; the two that matter are a local stdio process on your machine and a remote HTTP connection. Both share the same CLI shape: claude mcp add, the server name, then the launch command after a double dash.
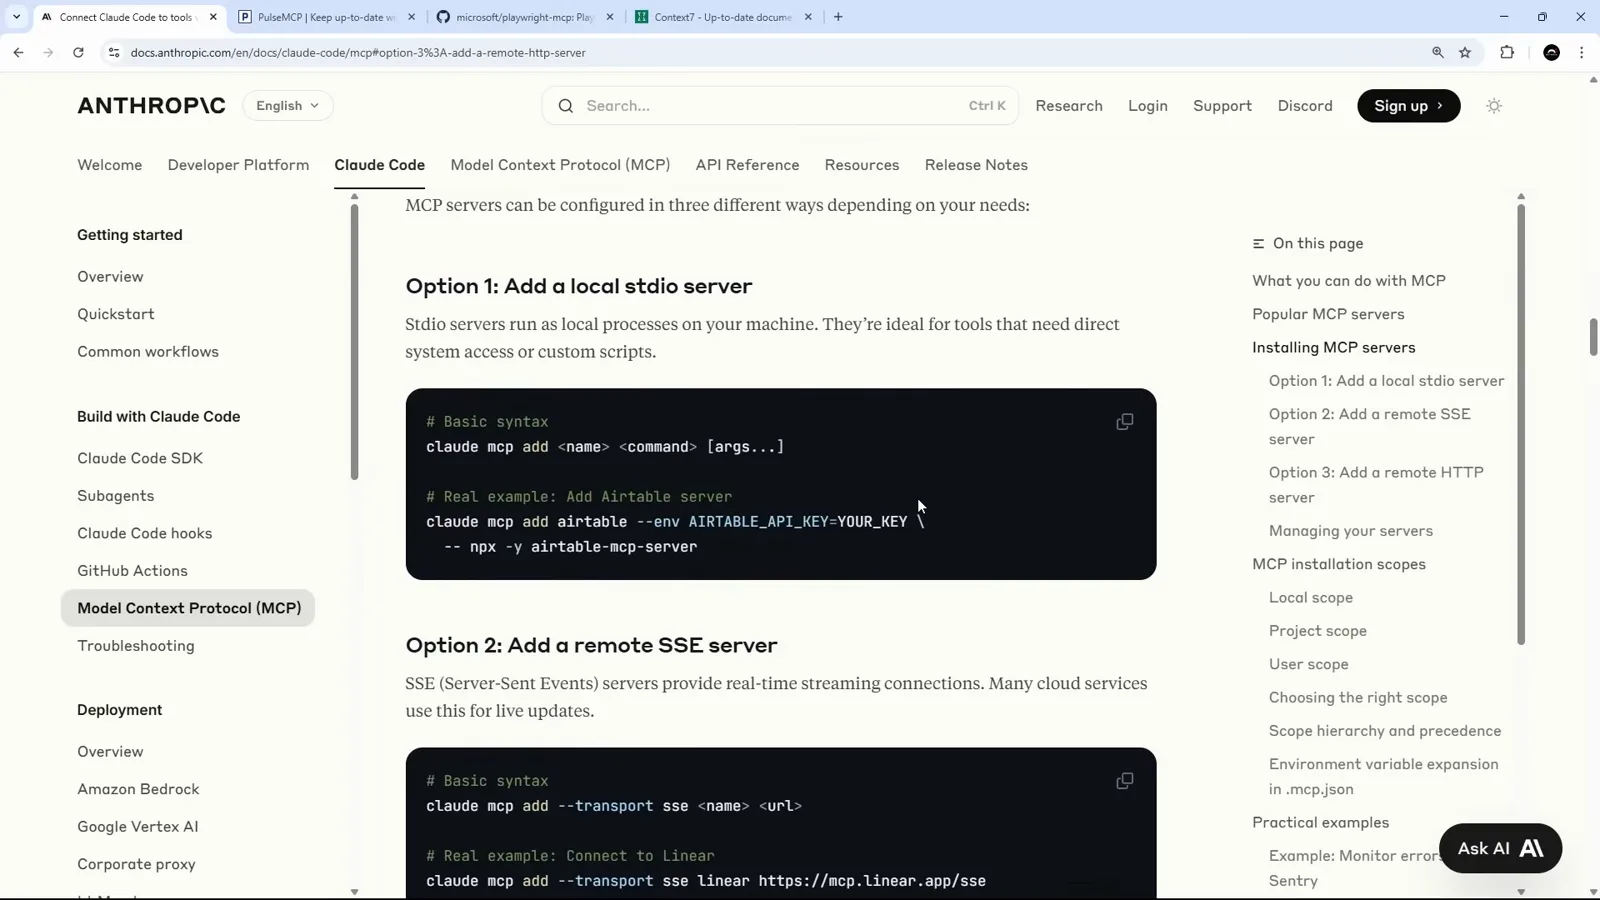
Local stdio or remote HTTP - same command shape.Watch at 3:10 - 4
Copy the command from the project's README
Well-maintained MCP projects ship a ready-made install line. In Context7's GitHub repo, the Claude Code section shows the local command with the remote variants above it - copy the one that matches your setup.
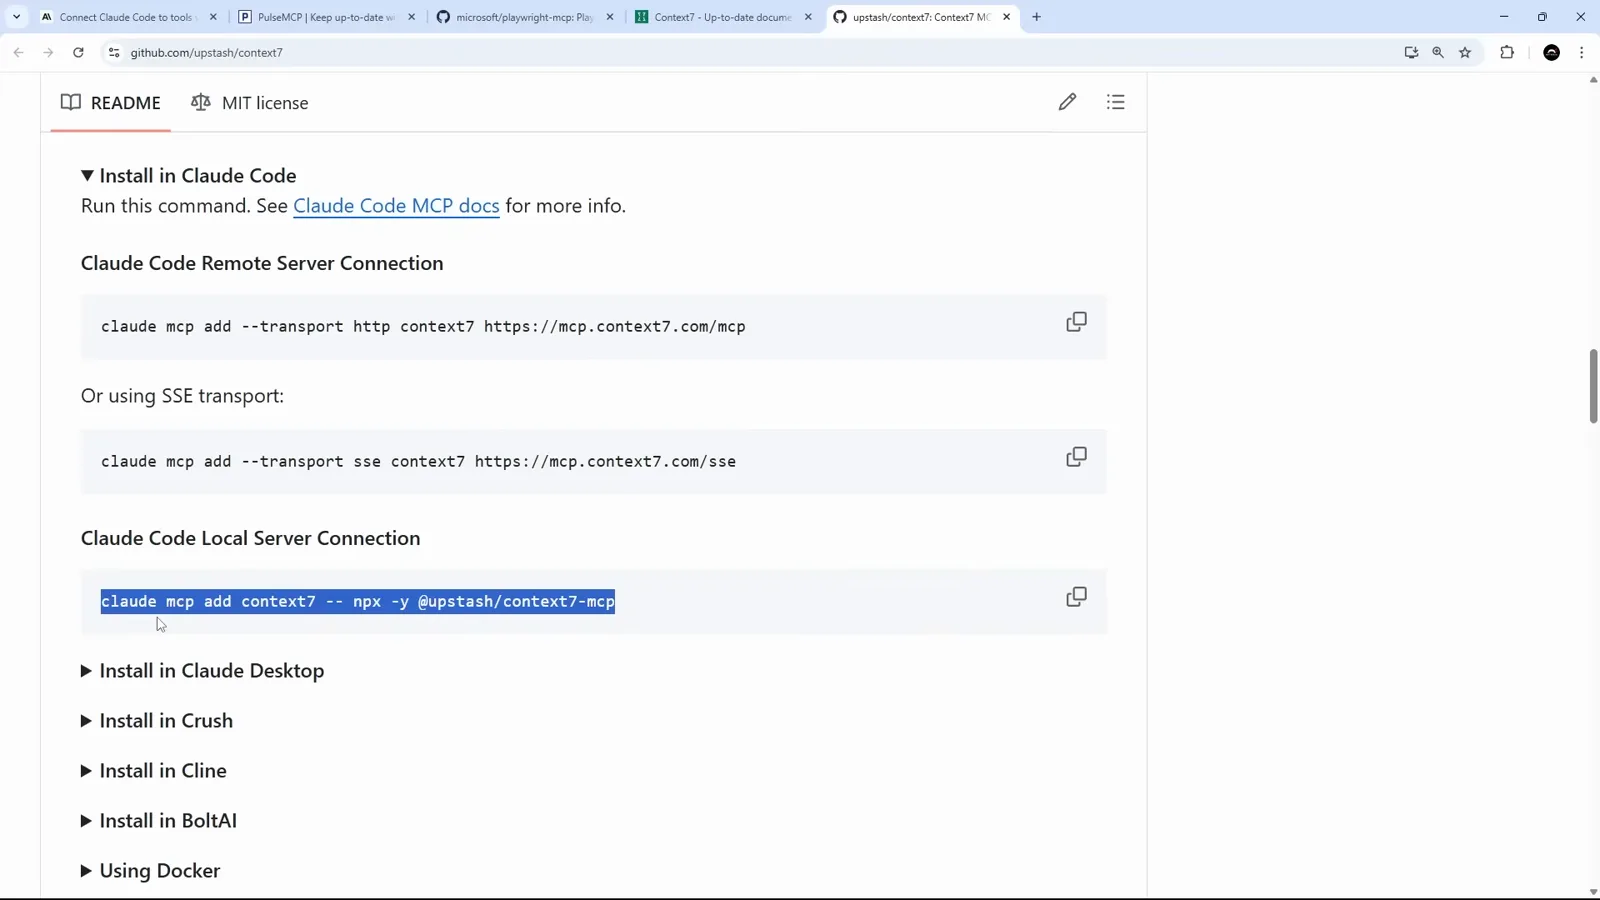
The README hands you the exact line to paste.Watch at 4:30 - 5
Pin the scope with --scope project
Before running the command, add --scope project so the config lands in the project's .mcp.json and travels with the repo - teammates get the same servers on clone. The alternatives are local (only you, only this project) and global (every project on the machine). On Windows, prefix npx commands with cmd /c so the shell closes after the run.
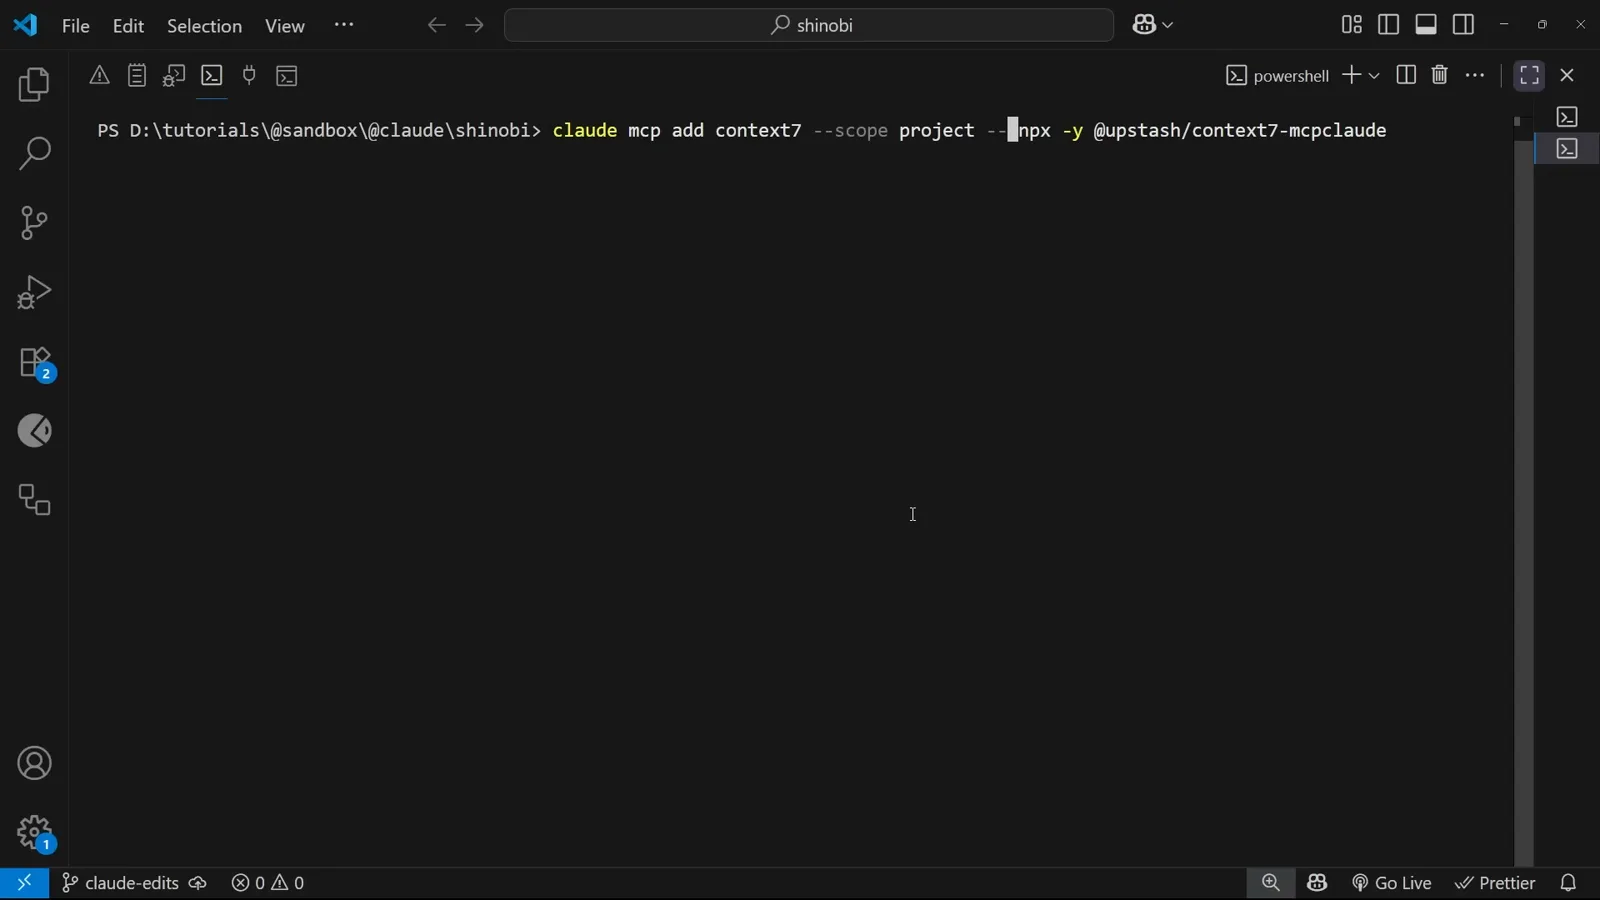
Project scope commits the server to the repo.Watch at 5:28 - 6
Claude Code writes .mcp.json for you
A successful add creates .mcp.json in the project root with an mcpServers object. Each entry stores the transport type plus whatever the server needs to start - here a stdio process with its command and arguments array.
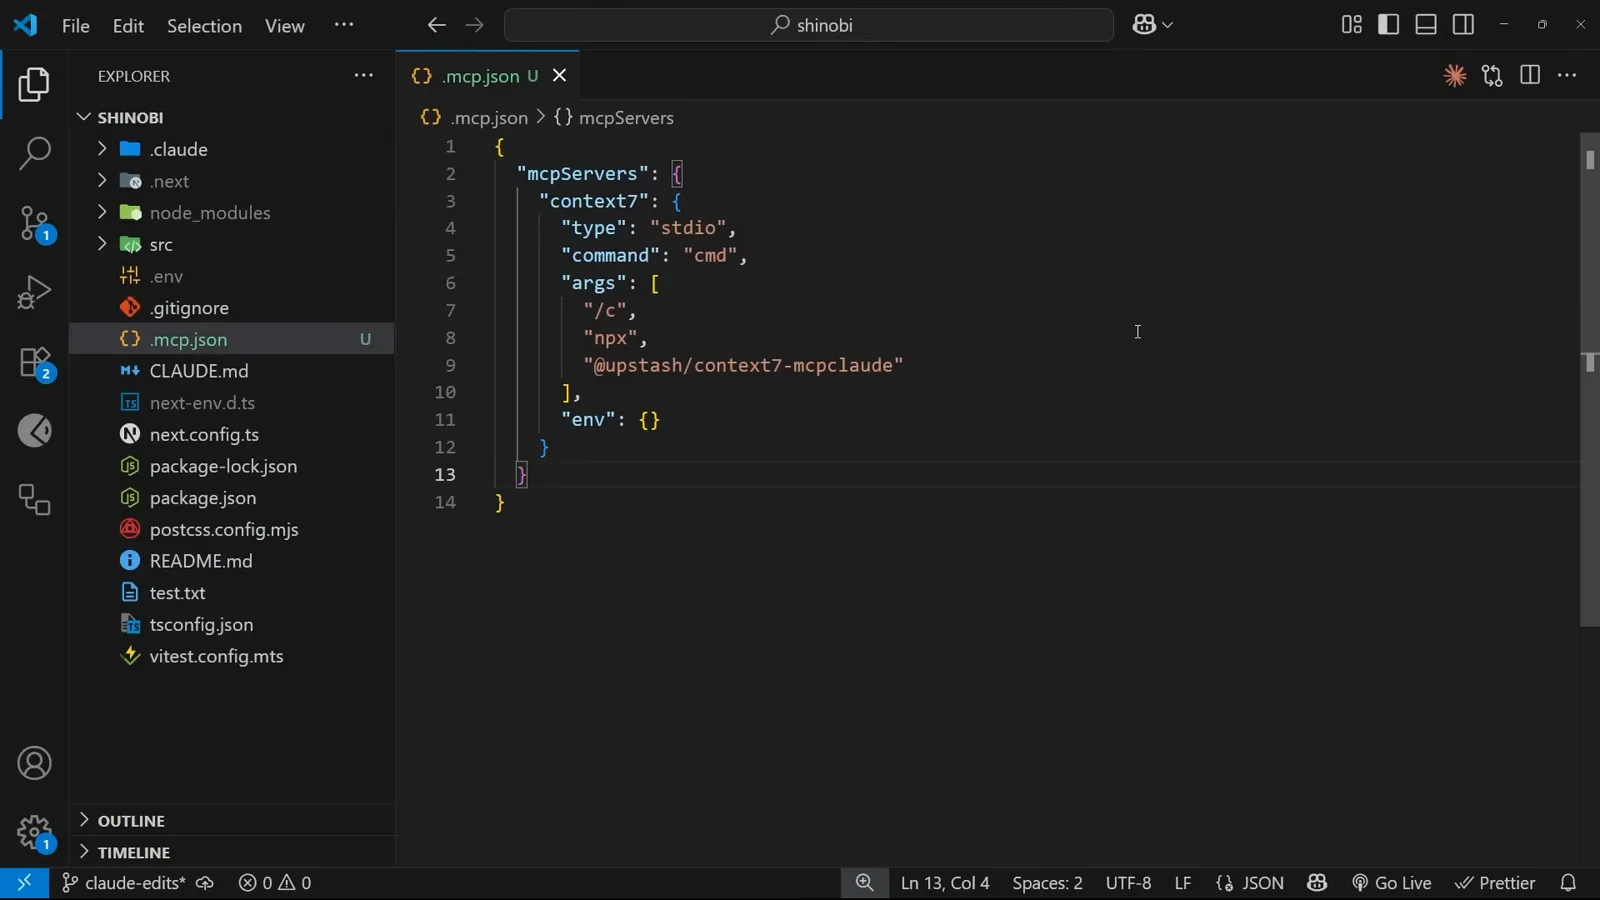
One JSON object, one entry per server.Watch at 6:42 - 7
When local fails, switch to remote
Local stdio connections can be flaky while these packages churn. The fallback is the hosted variant: Context7's README documents an HTTP transport line, and adding --scope project keeps it in the same file. The terminal confirms the add and the file it modified.
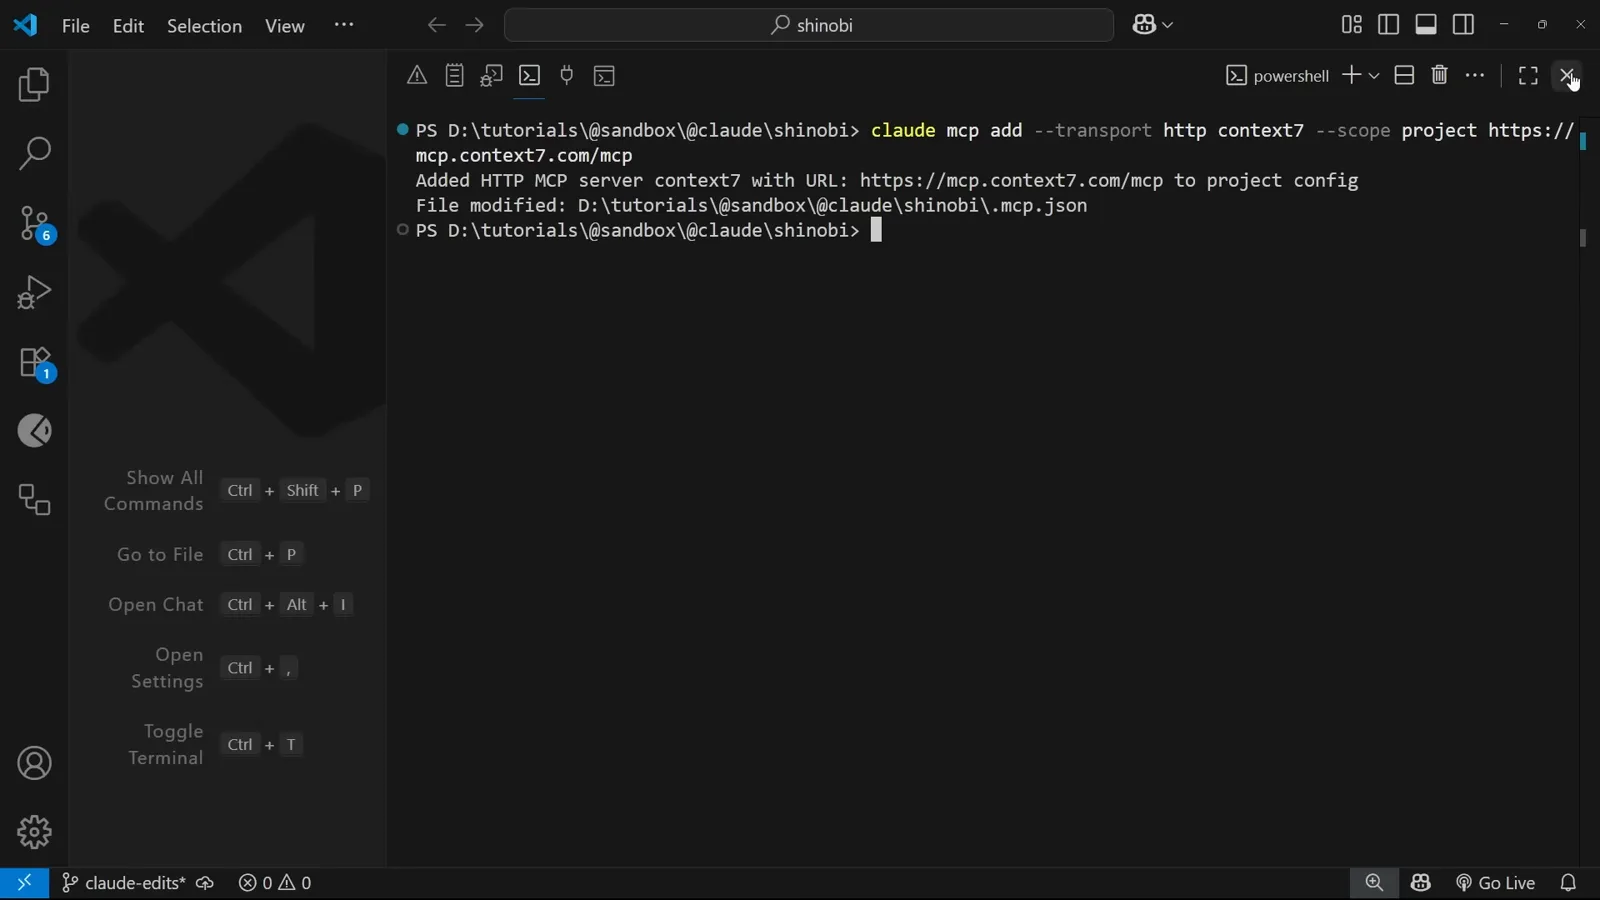
Remote HTTP is the reliable fallback.Watch at 8:40 - 8
An HTTP entry is three lines
Remote servers need no local process, so their config is minimal: type http plus the server URL. Restart Claude Code after editing the file so the new connection is picked up.
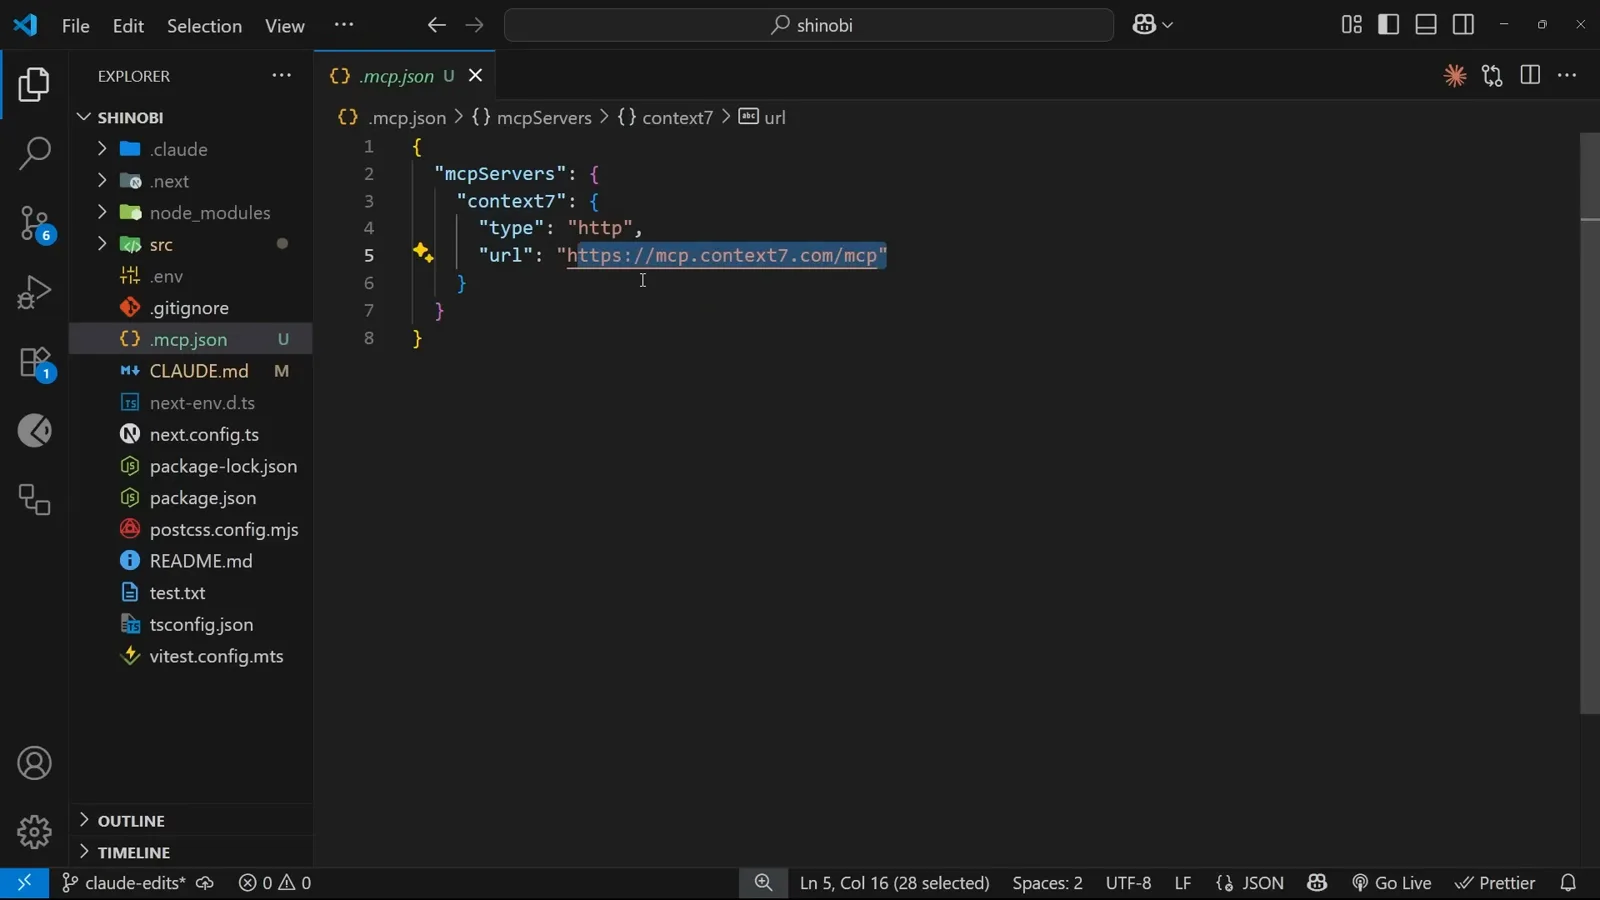
Type and URL - nothing to install.Watch at 8:52
Verify, then put it to work
Green tick first, then a real task.
- 9
Check the connection with /mcp
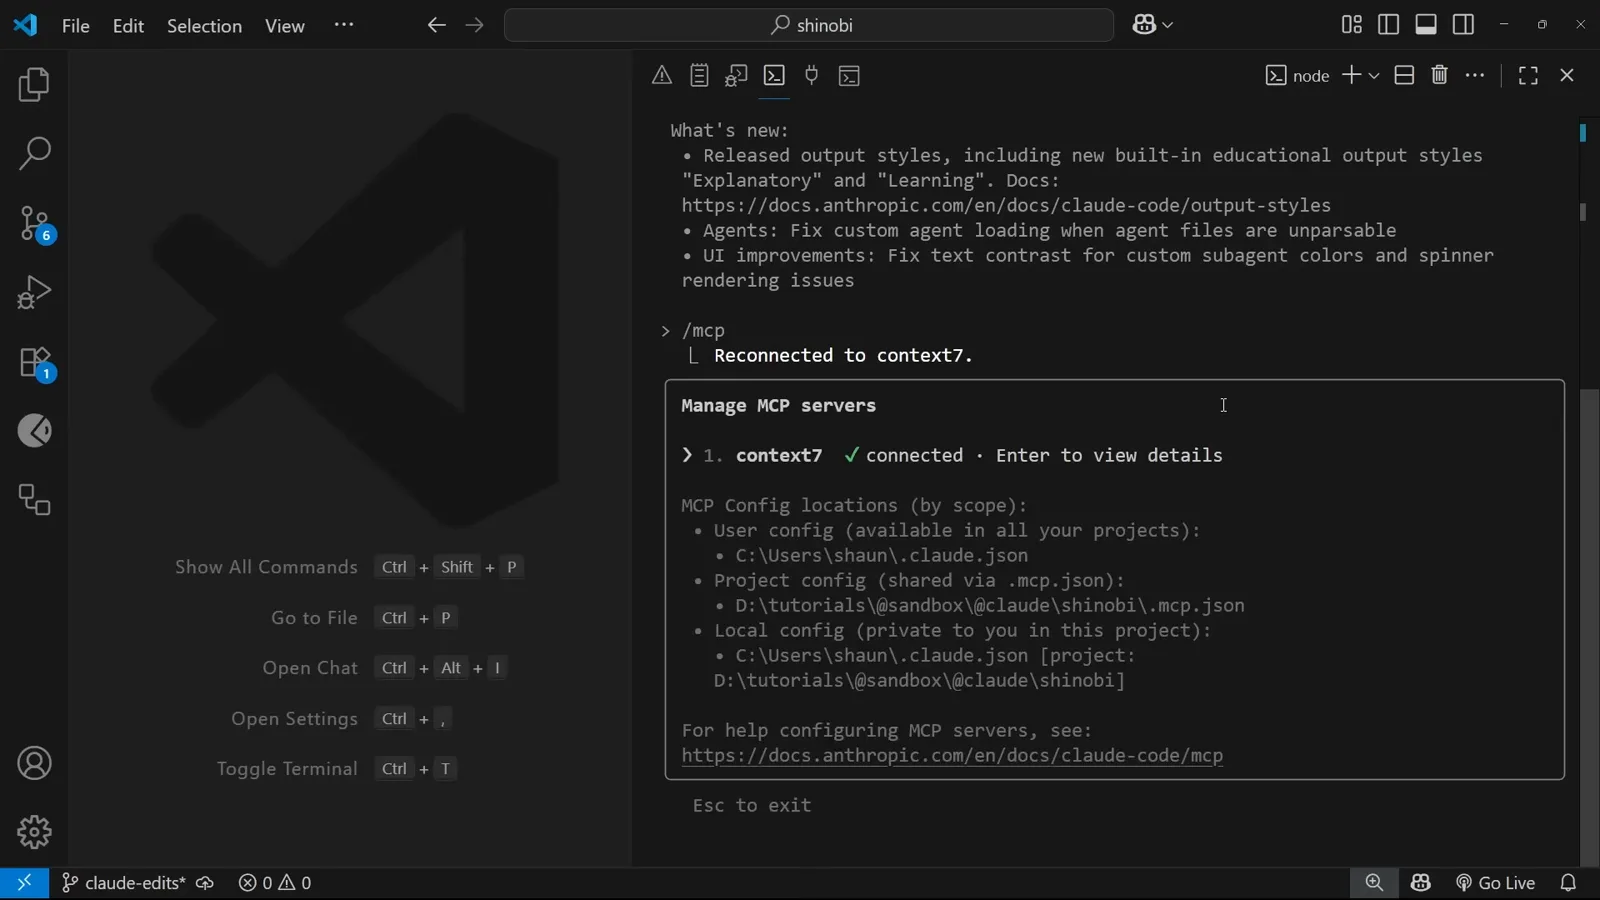
Inside a session, /mcp opens the Manage MCP servers panel. A green tick next to the server means connected; a failed entry can be retried by pressing Enter. The panel also lists exactly which file each scope reads from - handy when a config edit does not seem to take.
A green tick means the tools are live.Watch at 9:21 - 10
Name the server in your prompt
Explicitly saying 'use context7' routes the request to that server's tools. Here the task is checking a Tailwind config against the latest docs, with @src/app/globals.css attached so Claude reads the right file before asking the server anything.
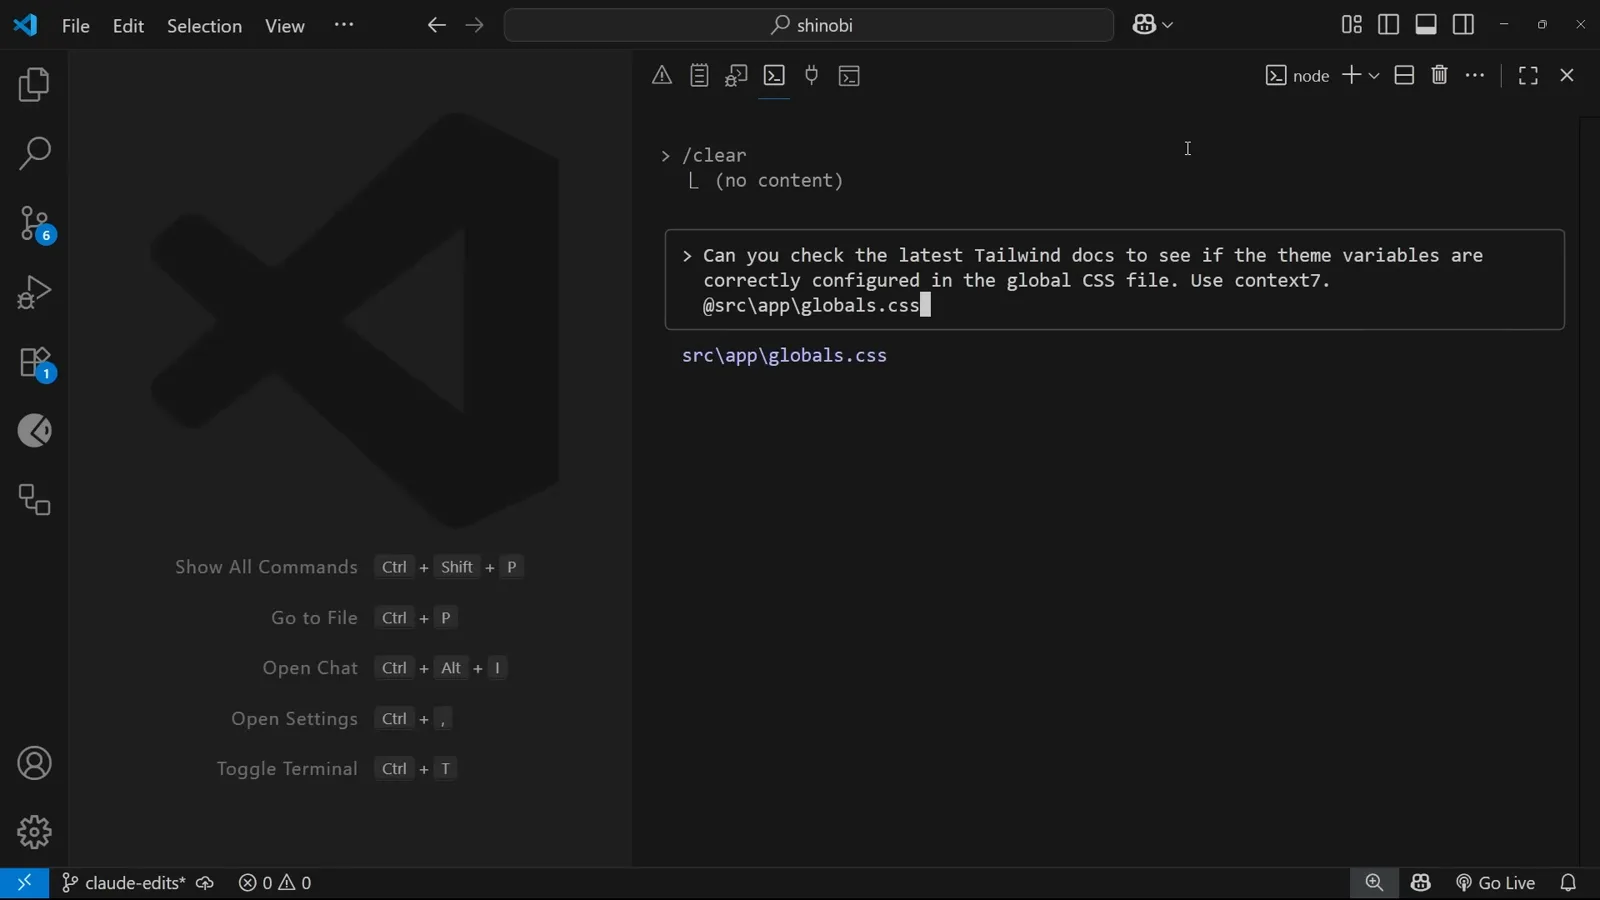
A named server plus an attached file.Watch at 9:48 - 11
Context7 resolves the library first
Before fetching anything, Context7 runs resolve-library-id to match 'Tailwind CSS' to the correct library ID and topic. Approve the tool call and it moves straight on to the docs fetch - two short calls instead of a stale guess.
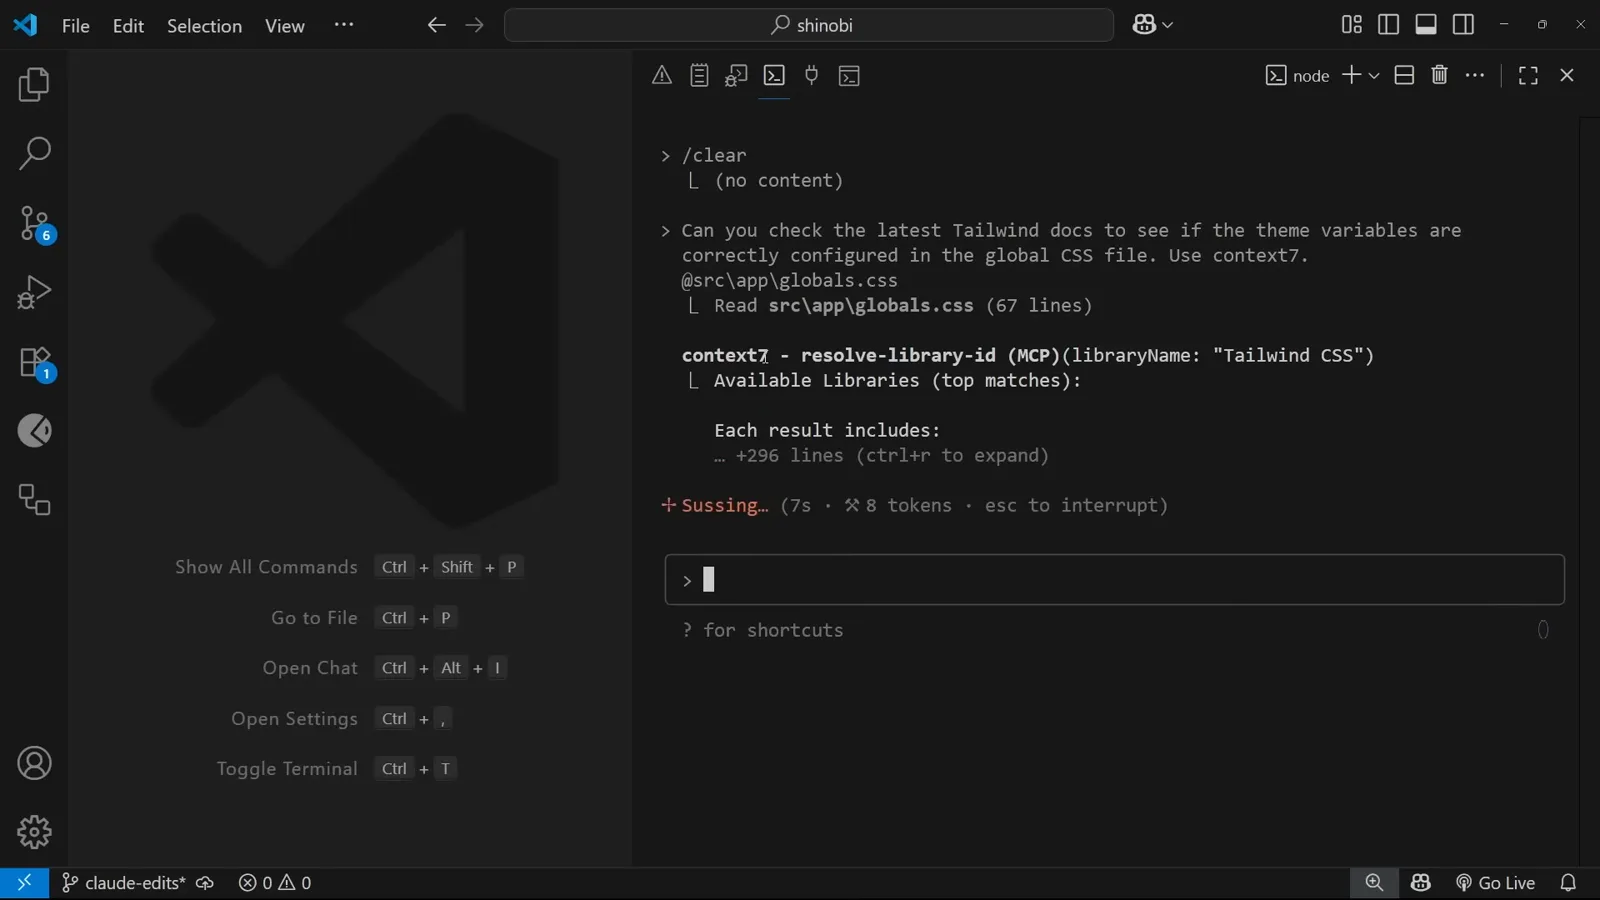
Library ID resolution before the docs fetch.Watch at 10:02 - 12
The answer cites current docs
The reply - theme variables correctly configured for Tailwind CSS v4, with the reasoning itemized - is grounded in freshly fetched documentation rather than training data. That is the whole point of the server: answers that match the library as it exists now.
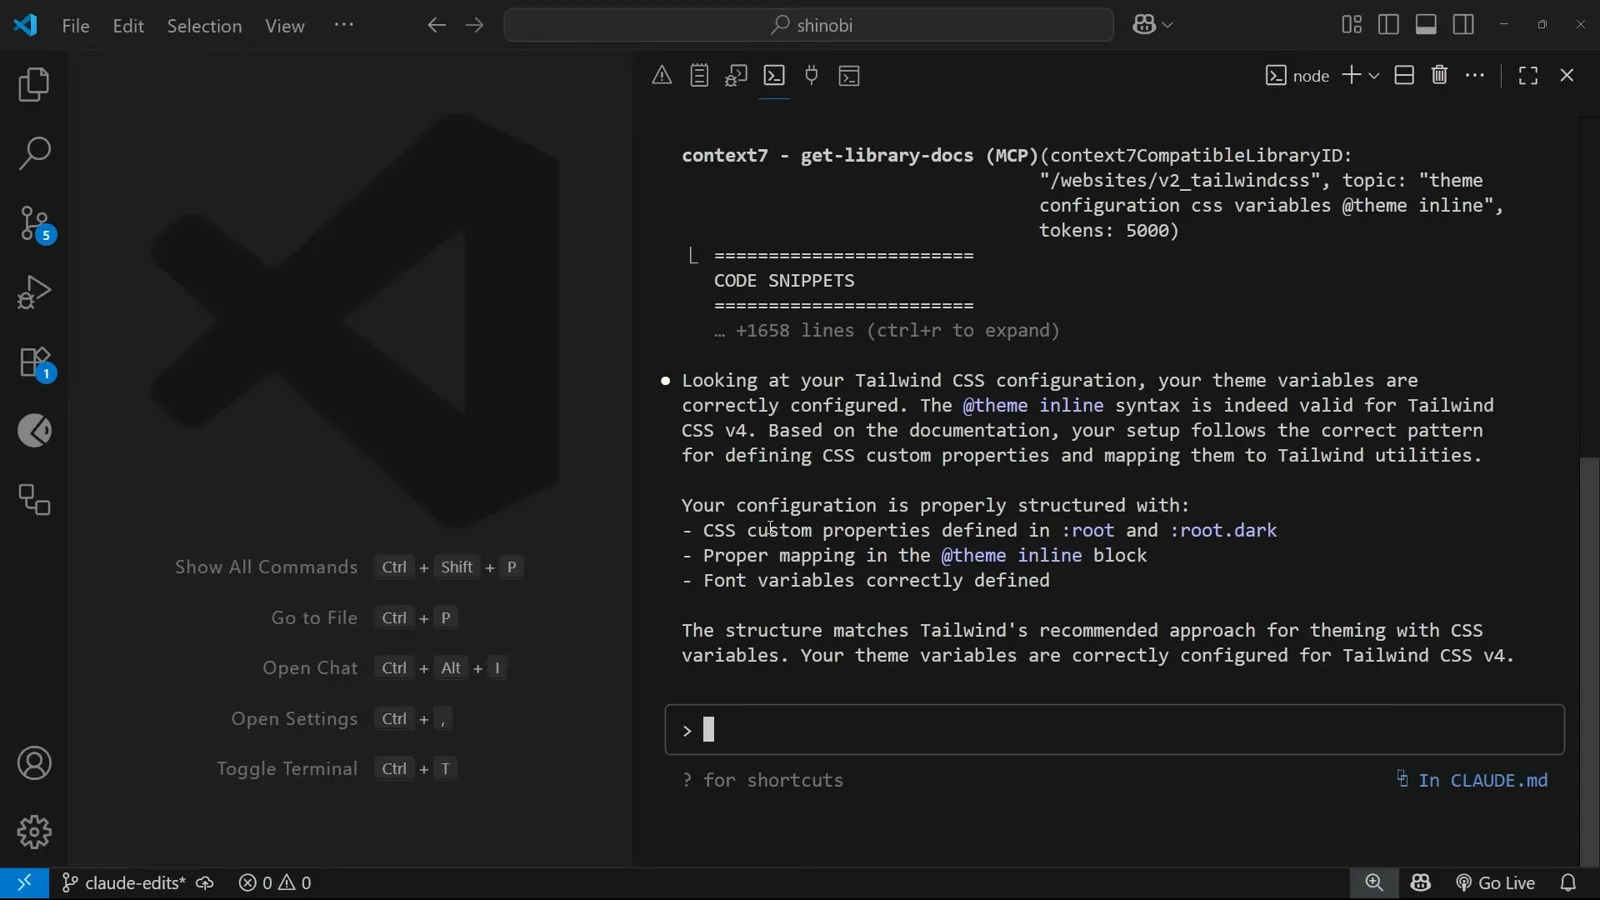
A v4-correct verdict, itemized.Watch at 10:45 - 13
Make it a habit with CLAUDE.md
Typing # in the prompt saves a project memory: 'Use Context7 to check up-to-date docs when needed for implementing new libraries or frameworks.' It lands in CLAUDE.md, so every future session in this project applies the rule without being reminded.
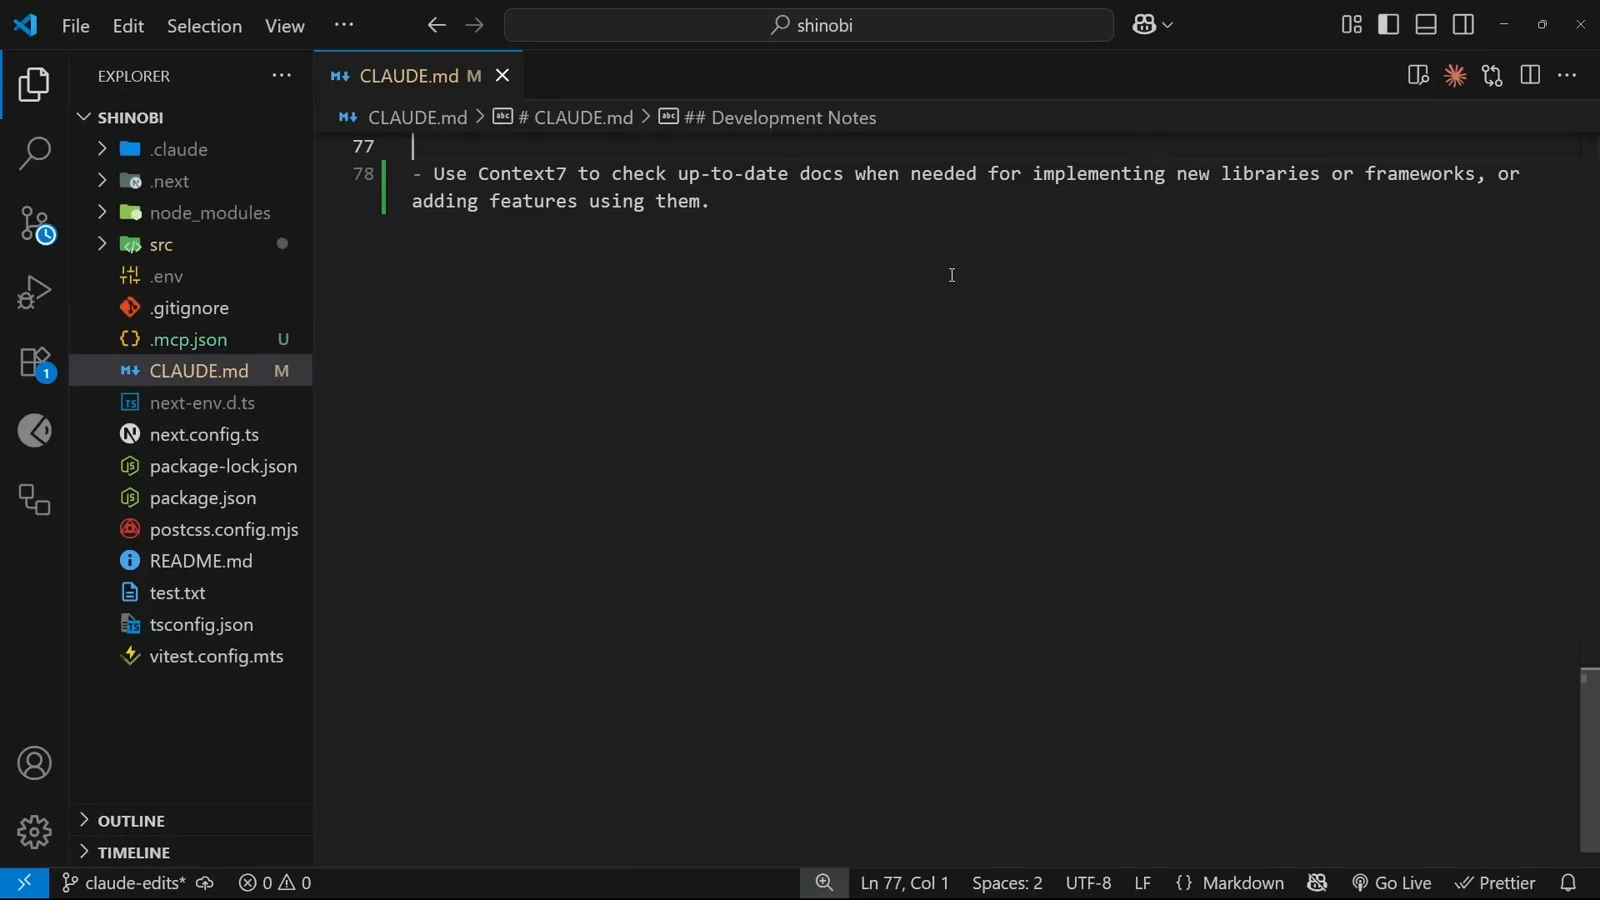
Project memory turns a one-off into policy.Watch at 11:10
Add Playwright for browser control
Same pattern, a second superpower.
- 14
Install Playwright the same way
The Playwright MCP README's Claude Code section carries the same install pattern - one claude mcp add line pointing at the npx package. Add --scope project, run it from the project root, then restart the session so the new server connects.
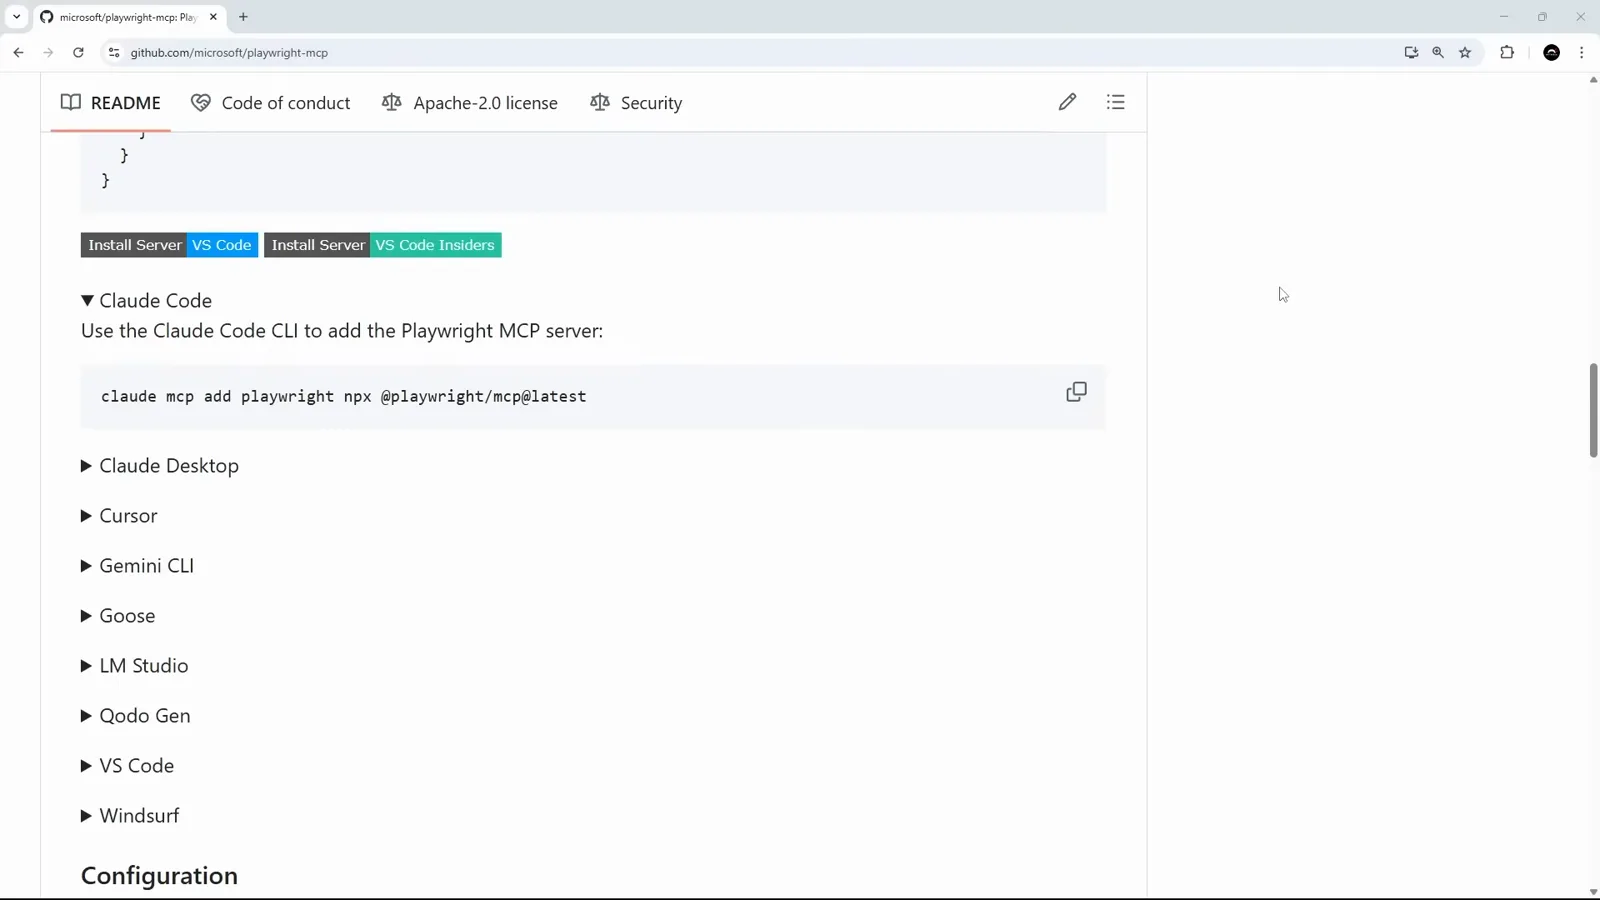
Same pattern, second server.Watch at 11:14 - 15
Both servers share one file
The project's .mcp.json now holds two entries side by side: Context7 over HTTP, Playwright as a local stdio process. Either can be edited by hand when a server changes its launch flags - the file is the single source of truth.
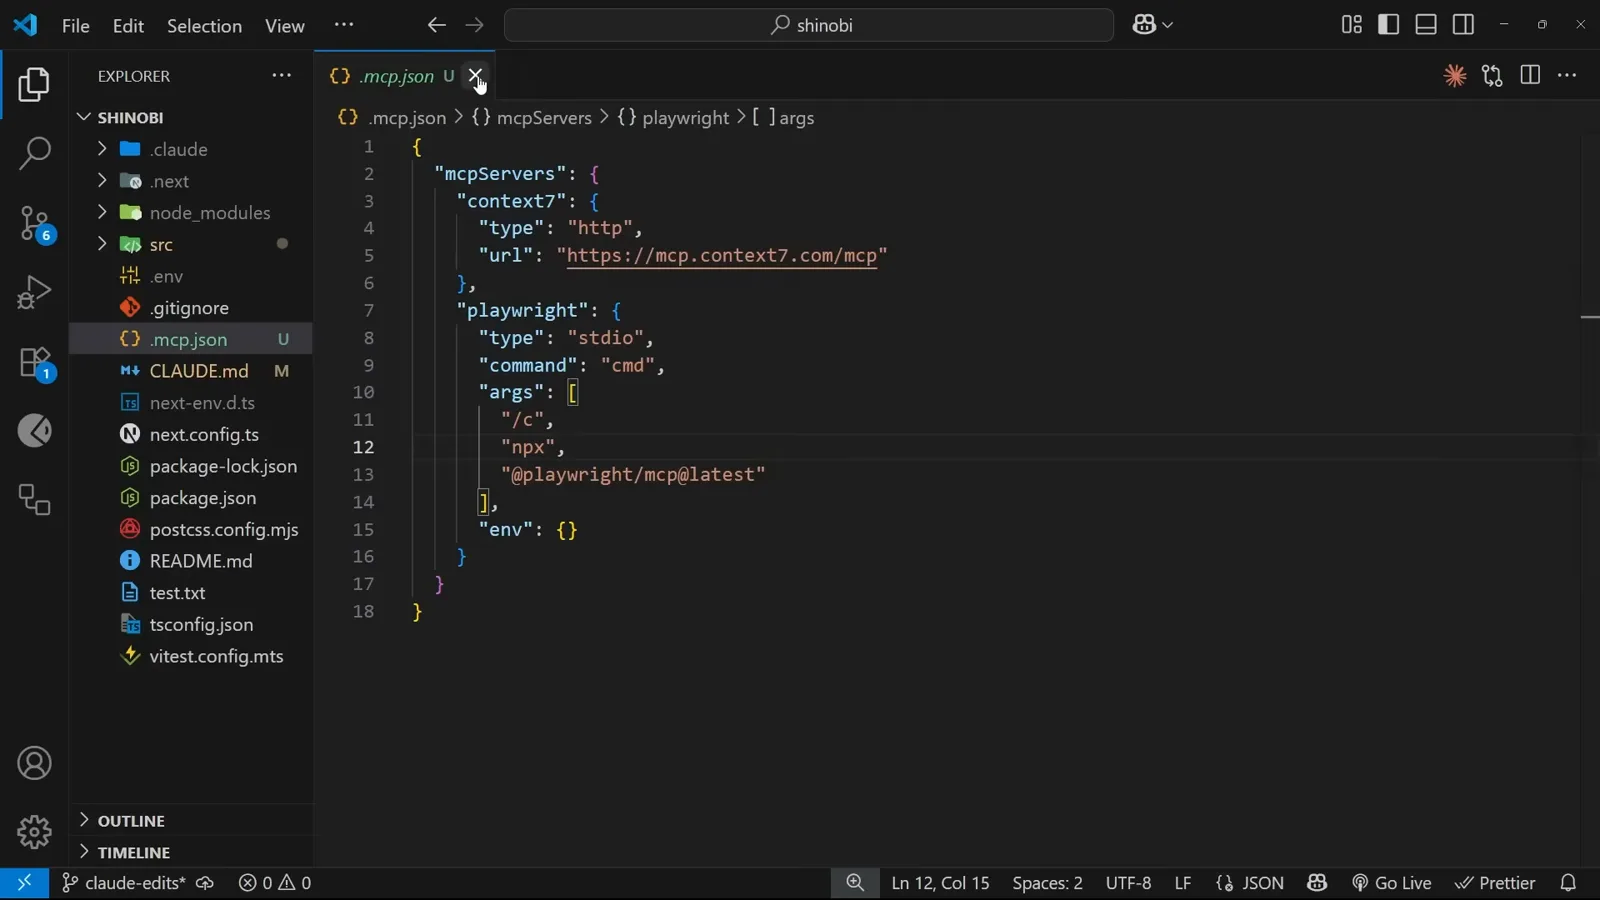
Two entries, two transports, one file.Watch at 12:17 - 16
Let Claude drive a real browser
With Playwright connected, asking Claude to open a page and summarize it triggers the Navigate to a URL tool - a real browser window opens on your machine and the model reads the rendered page. Useful for smoke-testing your own sites or checking how a component looks in the wild.
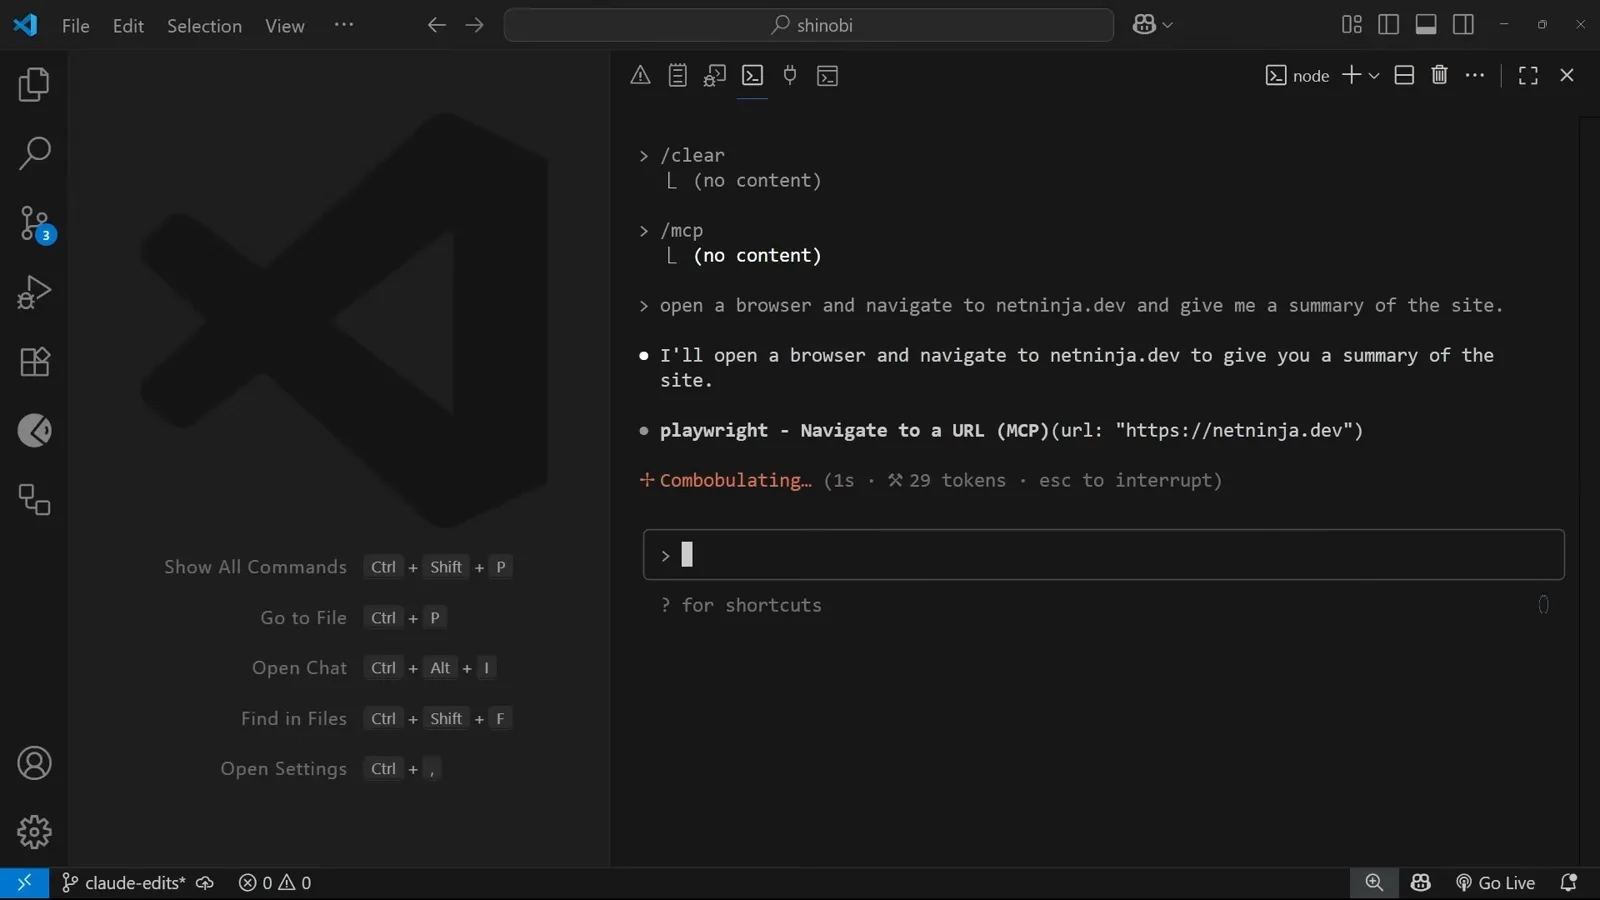
A live browser, driven by the model.Watch at 12:58